Use and efficiency of morpholinos in Neotropical tadpole brains
Sarah C. Ludington, Lauren A O'Connell, Julie M Butler, Chloe Golde
Abstract
Antisense morpholinos are a common tool used to knockdown protein abundance in target tissues in fish and amphibians. However, protocols are largely limited to common aquatic research organisms, such as zebrafish or Xenopus frogs. The goal of this protocol is to enable in vivo morpholino delivery, visualization, and knockdown evaluation in the Neotropical tadpoles. We tested the efficiency of standard and Vivo-morpholinos in the knockdown of tyrosine hydroxylase protein, the rate limiting enzyme in dopamine synthesis, in the Mimetic poison frog (Ramitomeya imitator). We compared the knockdown efficacy of each morpholino at two different time points and the effect of knockdown on tadpole behavior. To quantify tyrosine hydroxylase knockdown efficiency, we developed a quick and inexpensive dot blotting method to evaluate protein levels within a single tadpole brain. We compared this method to chemiluminescent imaging and found both methods are sufficient to assess protein levels and discuss important differences in blot visualization techniques. Finally, we found morpholino knockdown reduced tadpole swimming, consistent with other studies implicanting dopamine as important in motor behaviors. We complement this protocol with a discussion of common challenges, suggestions for troubleshooting, and ideas for future improvement. Extending morpholino delivery and protein knockdown assessment to diverse amphibian species and labs with low budgets will enable the field to move forward more rapidly in the study of tadpole physiology and behavior.
Before start
Consult with your local animal ethics board prior to experimentation.
Steps
Anesthesia Preparation
Mix 0.02g ethyl 3-aminobenzoate methanesulfonate (MS-222) and 0.08g sodium bicarbonate with 60 mL of tadpole water
Store at 4C for up to one week
Electroporation Set-Up
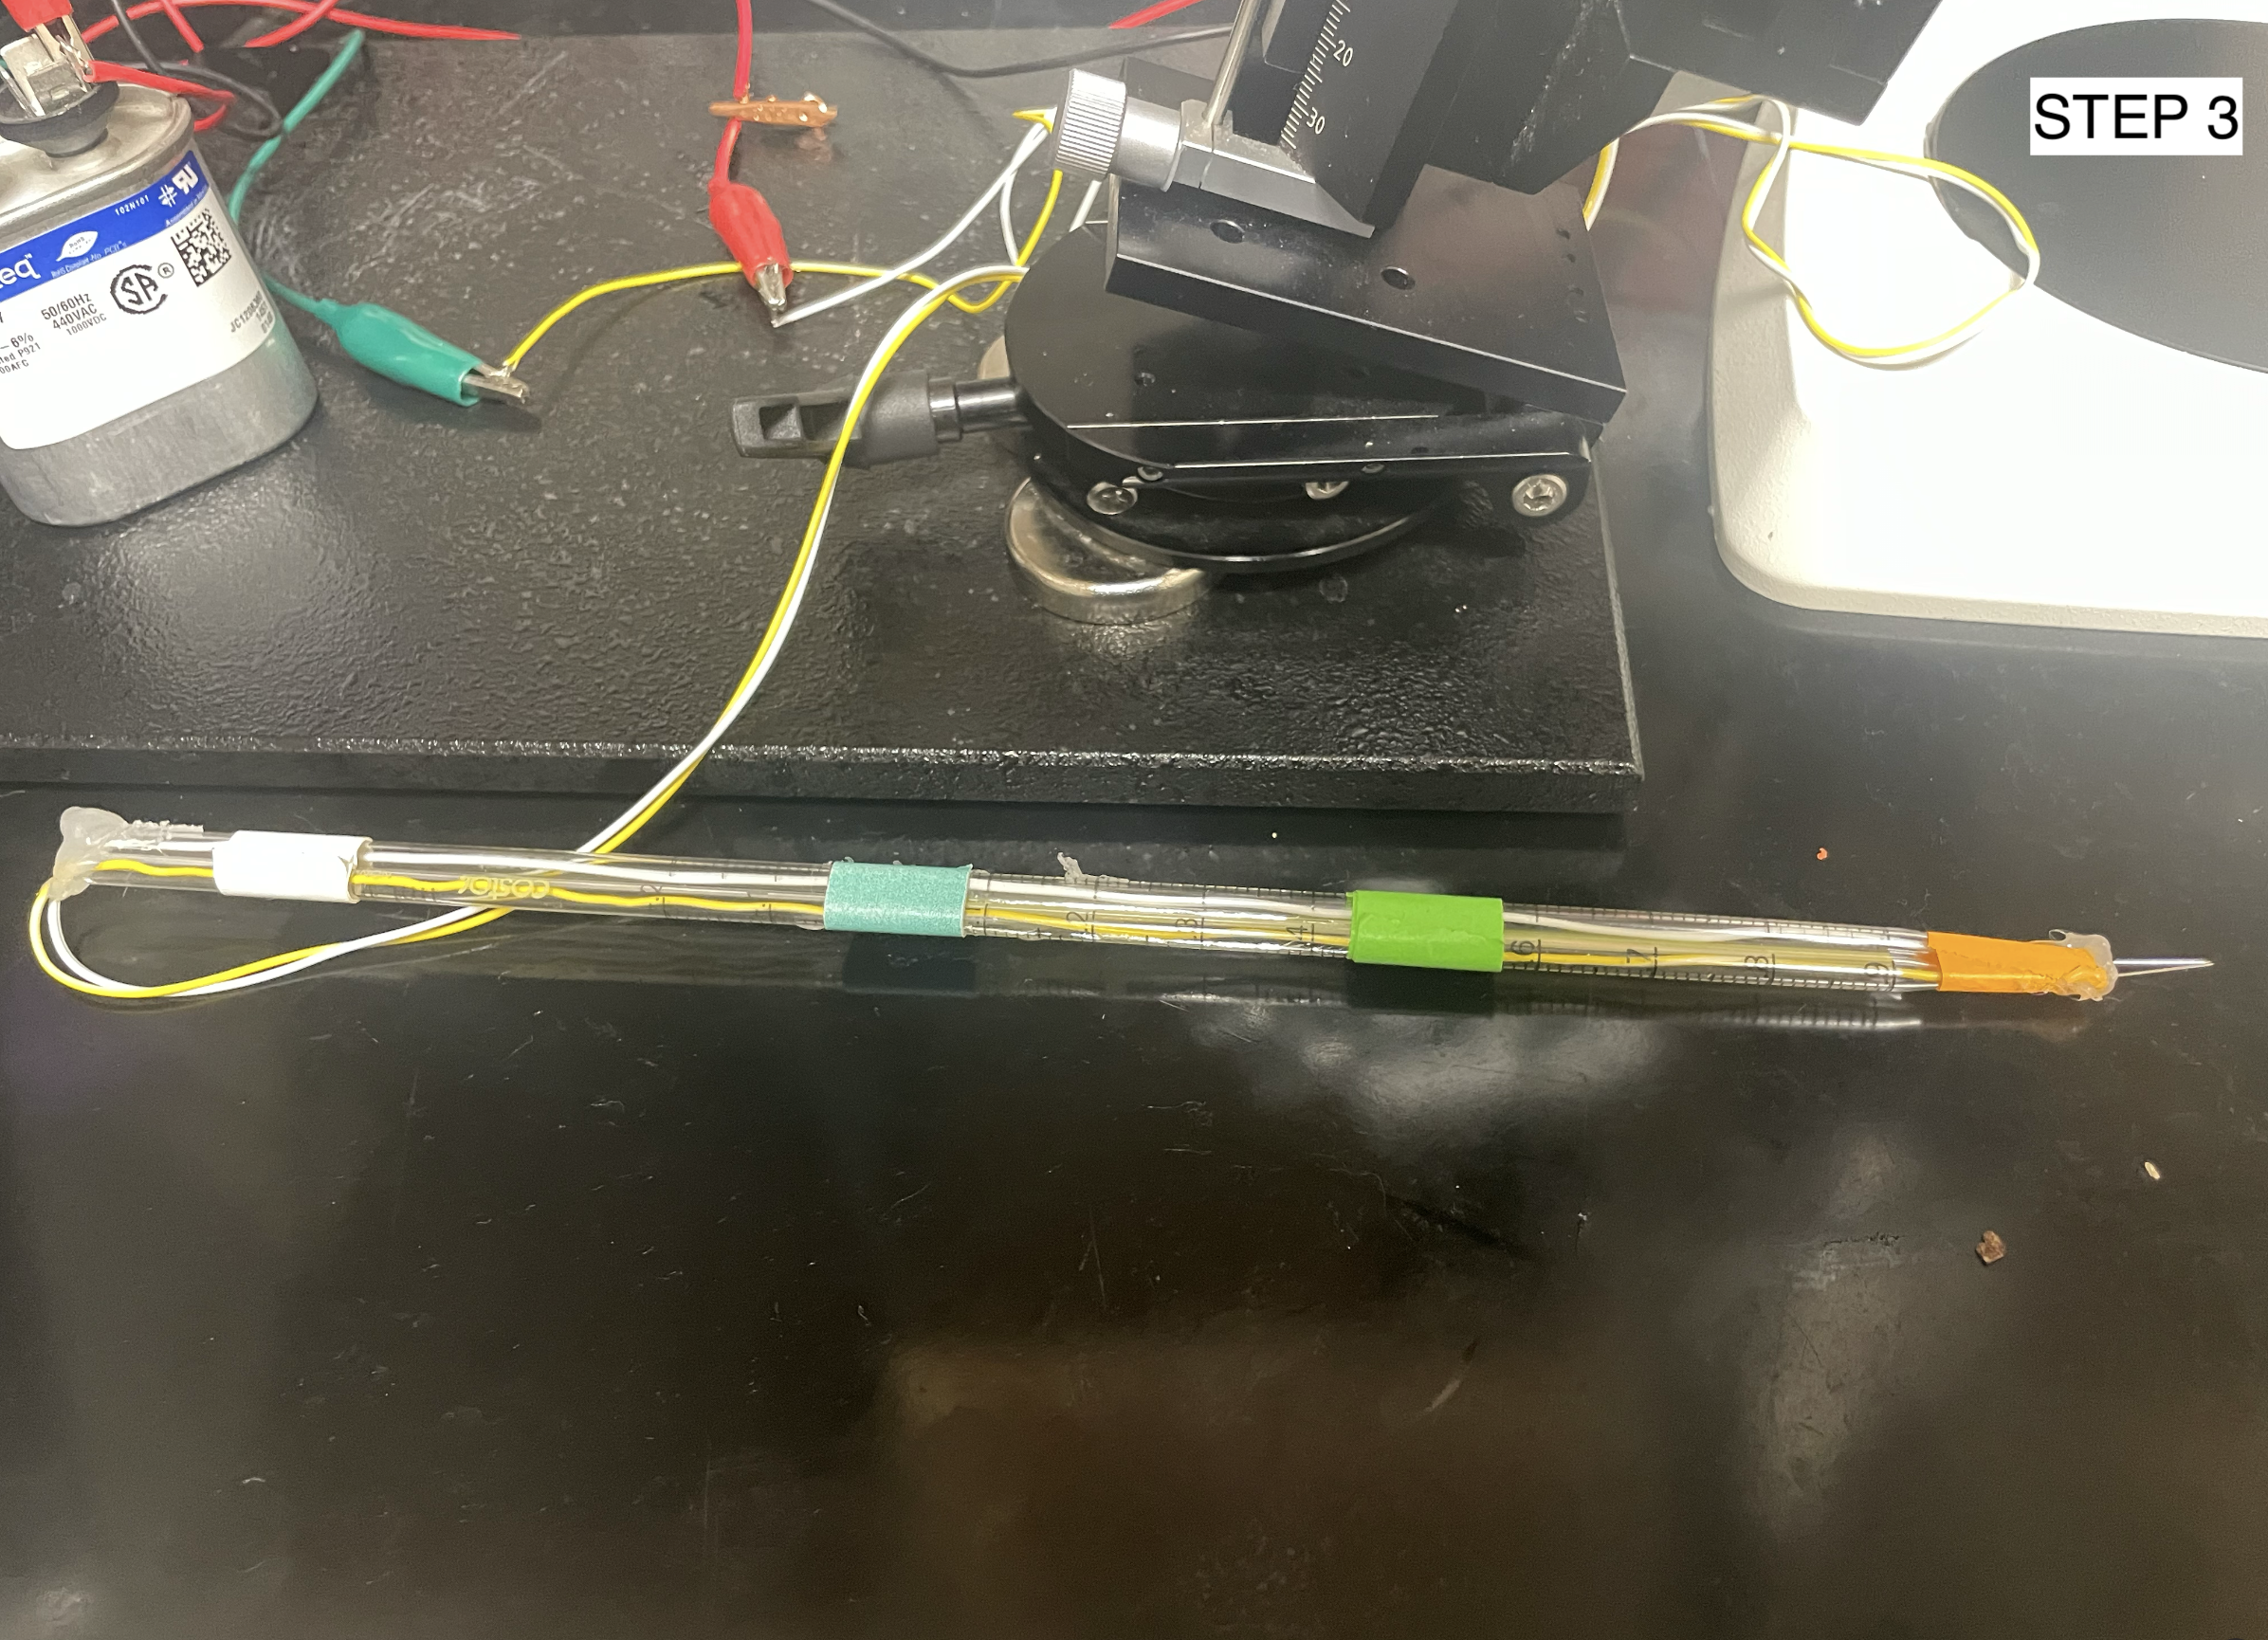
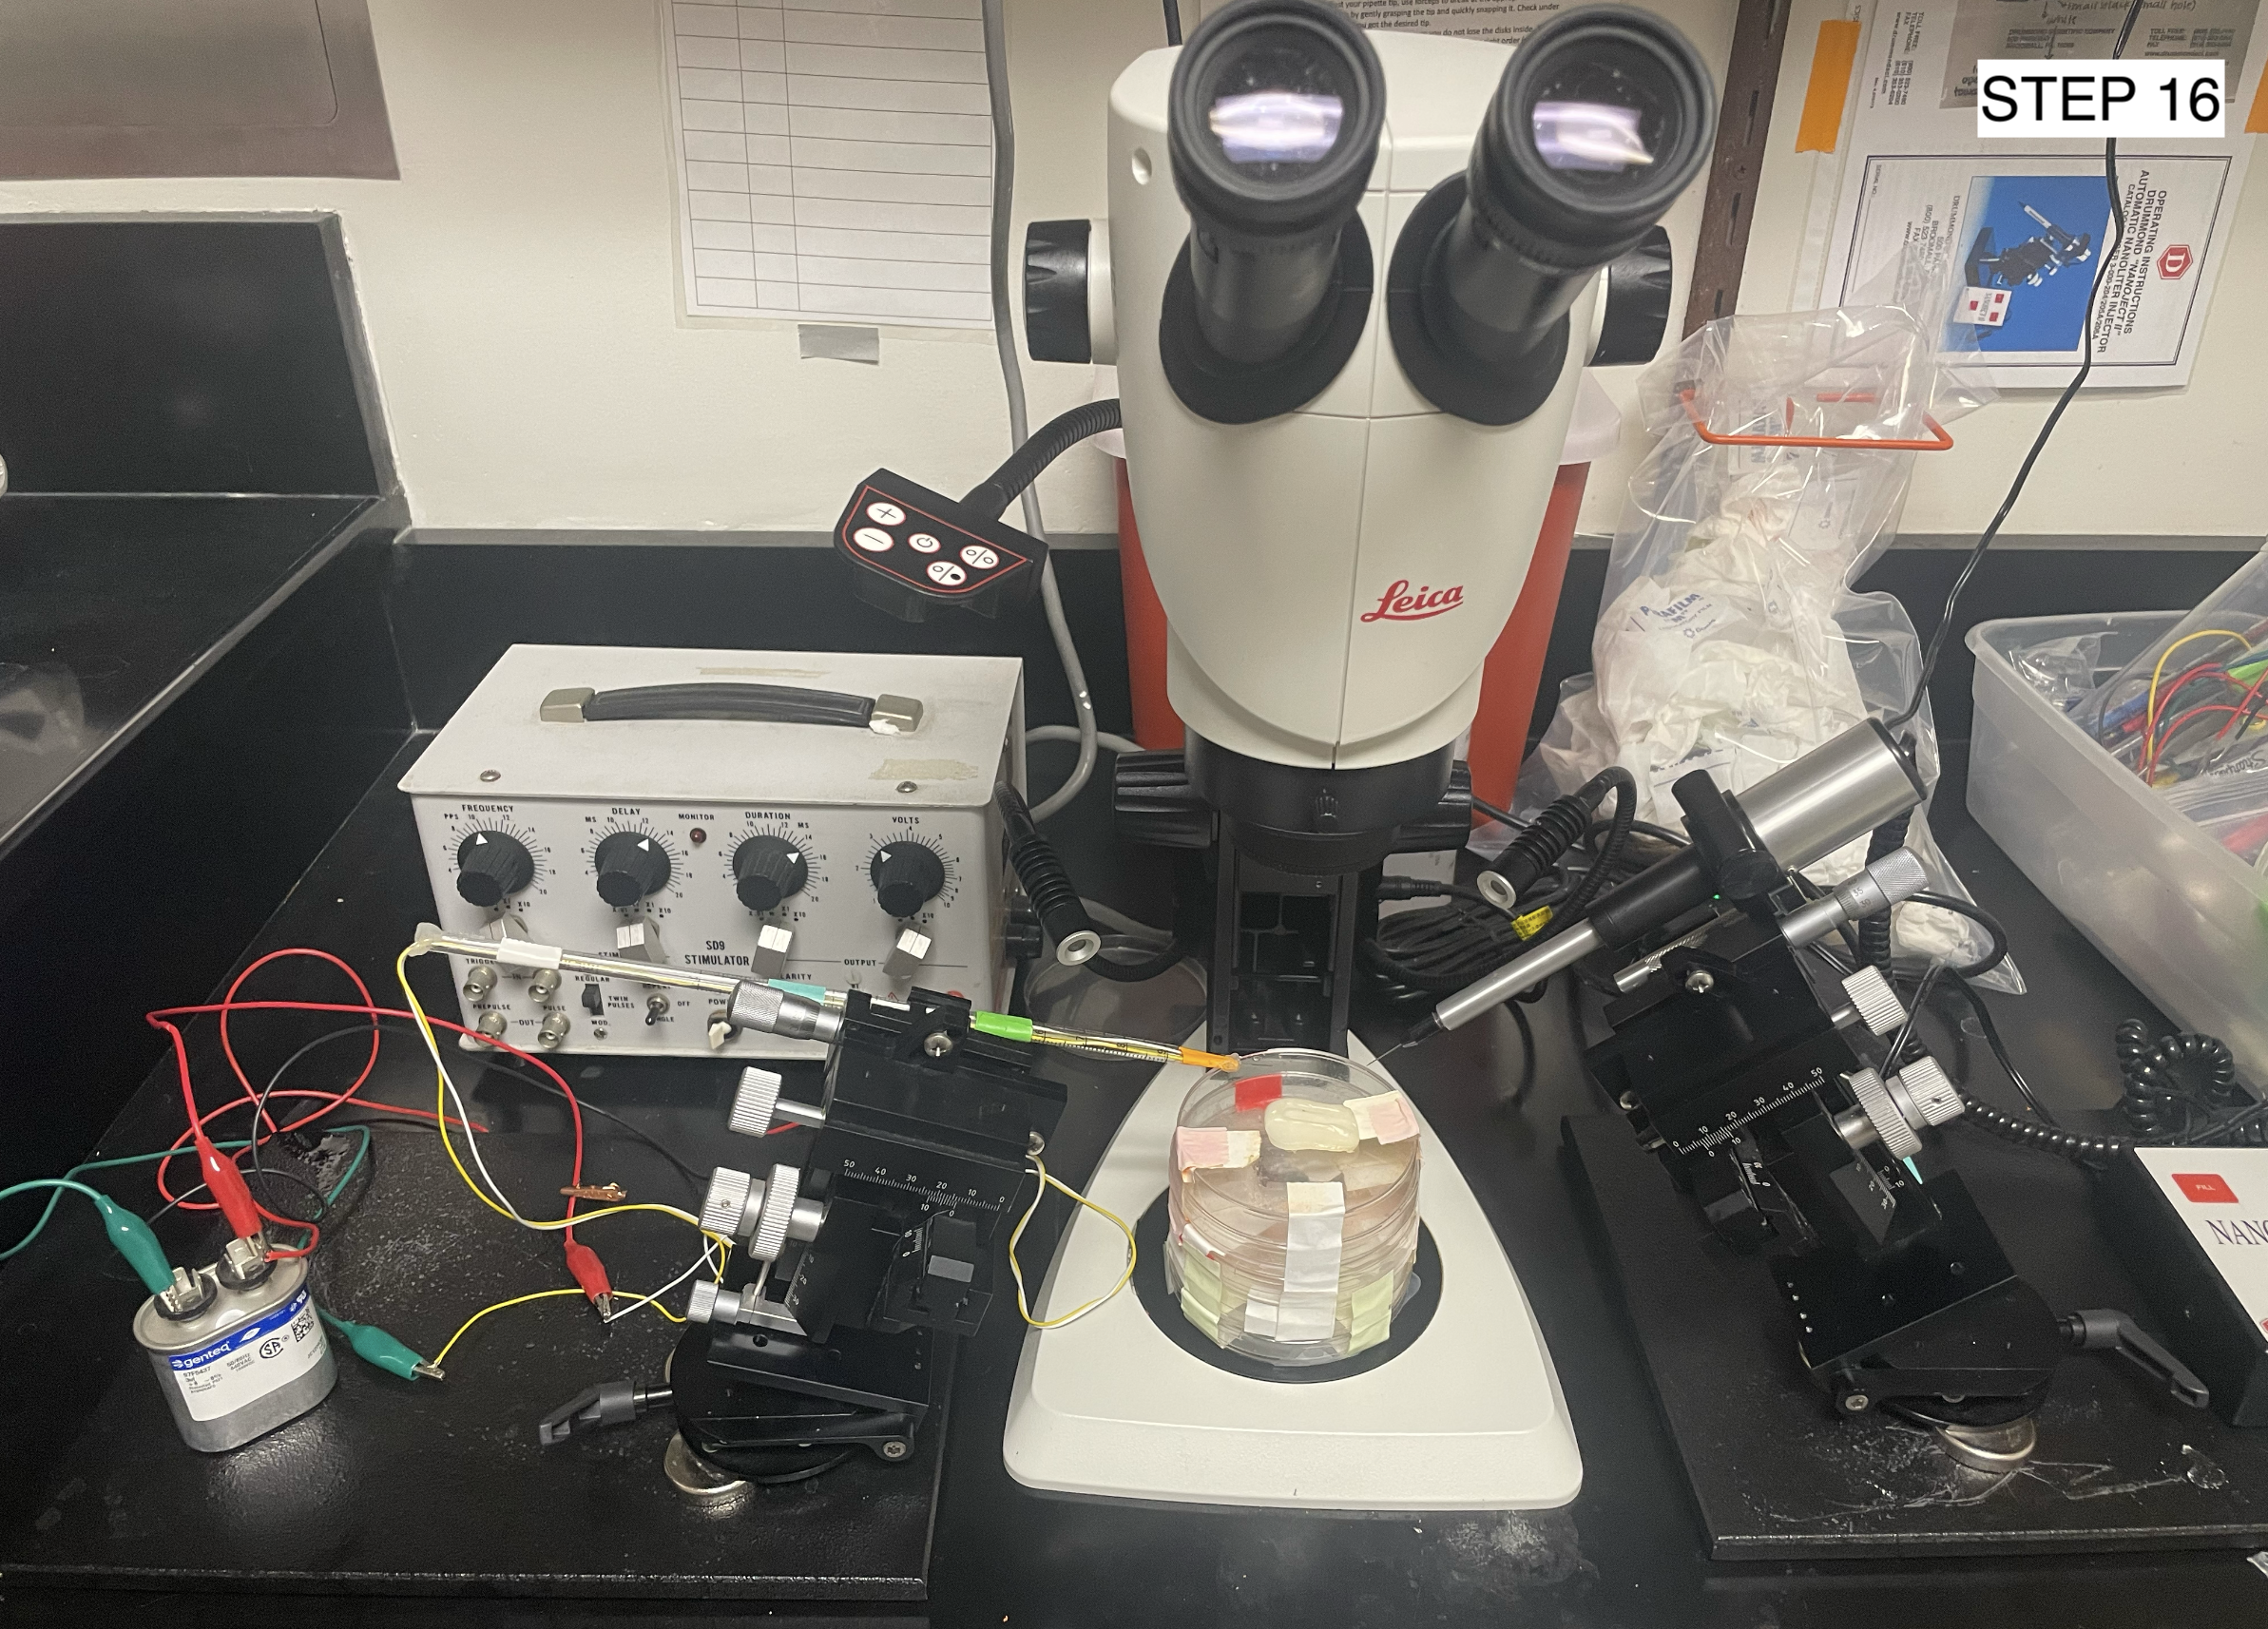
Attach the wires from the electrode needles to the capacitor and then to the stimulator. Set the stimulator parameters to 1 pps, 15 ms duration, 1 ms delay, and 30-50 V
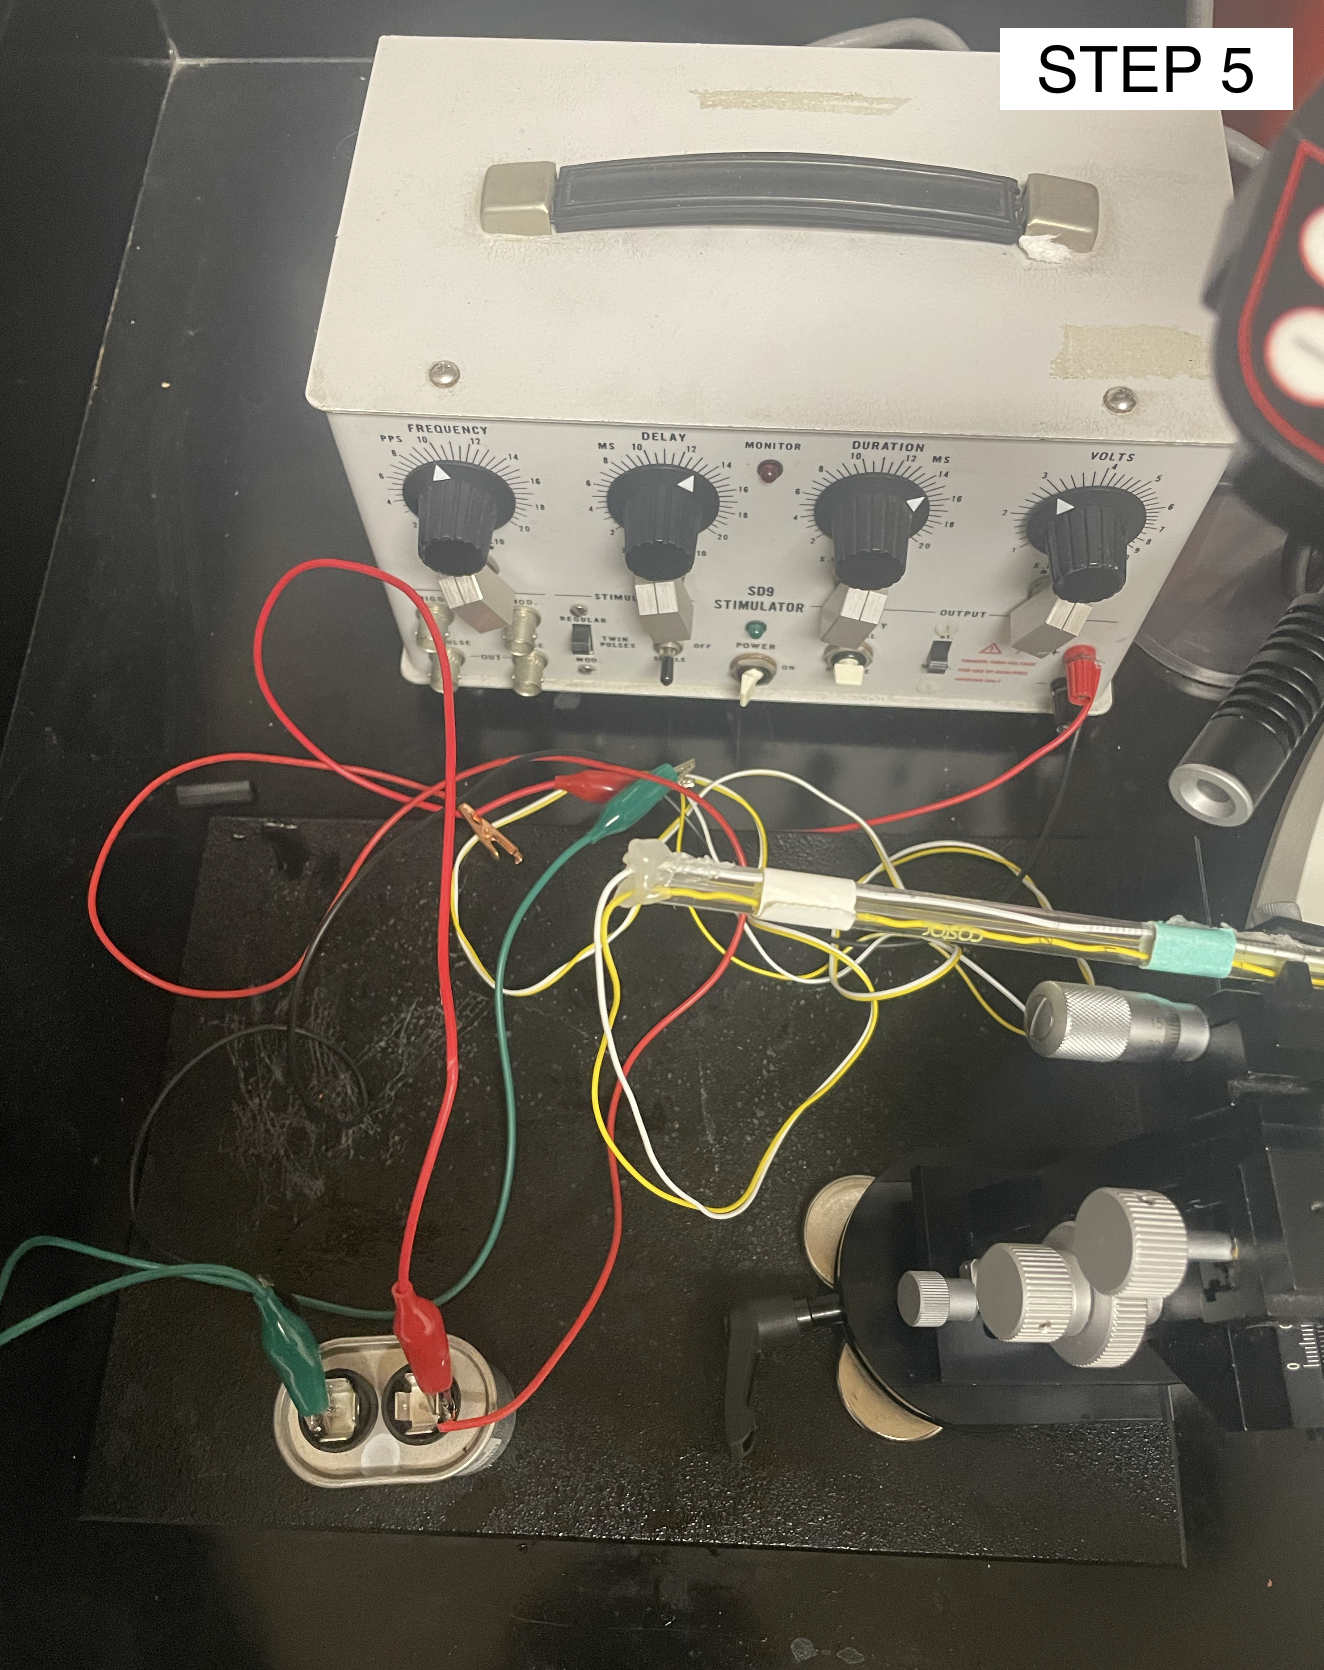
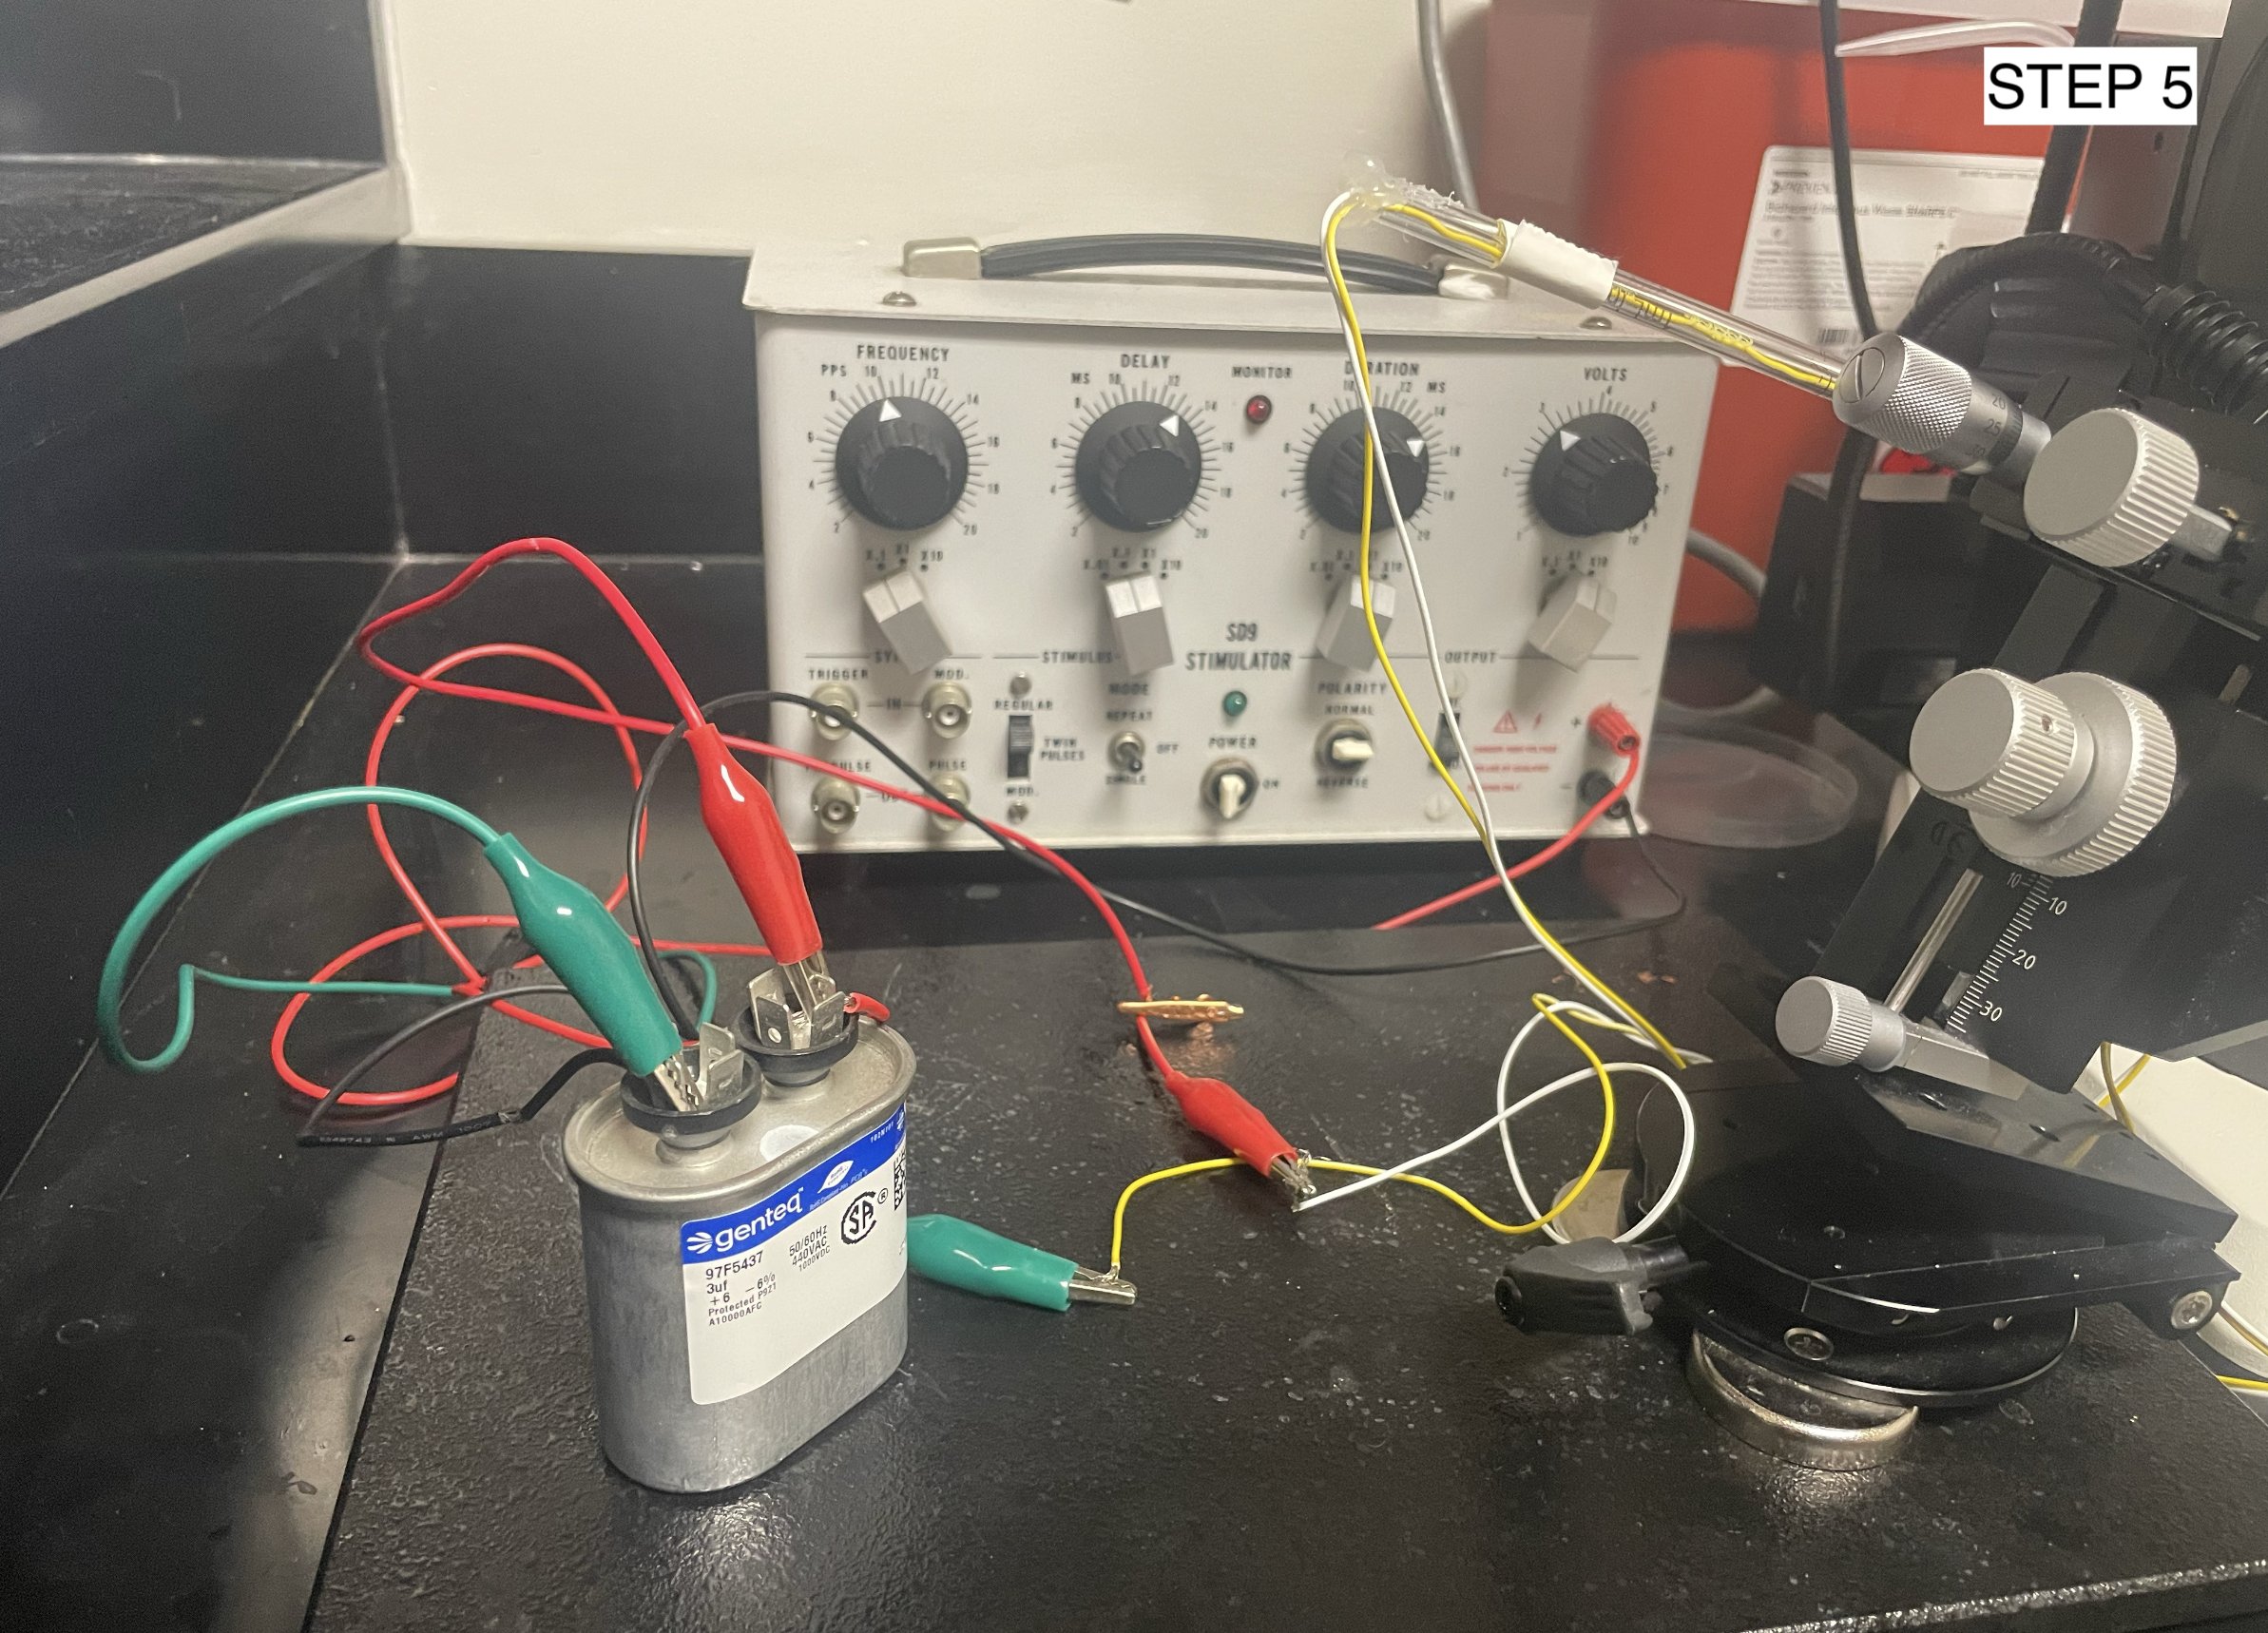
Injection Set-Up
Reconstitute morpholino solution (0.5 - 1.0 mM working concentration) in nuclease-free water
Pull micropipettes from glass capillaries using a pipette puller
Backfill the micropipette with mineral oil using a 28 gauge needle and 1 mL syringe
Using forceps, break the micropipette at an angle to create a beveled tip. Performing this task using a dissection microscope is recommended
Place the micropipette onto the injector plunger and tighten the collet
Select an injection volume between 23-56 nL and set the injection rate to slow
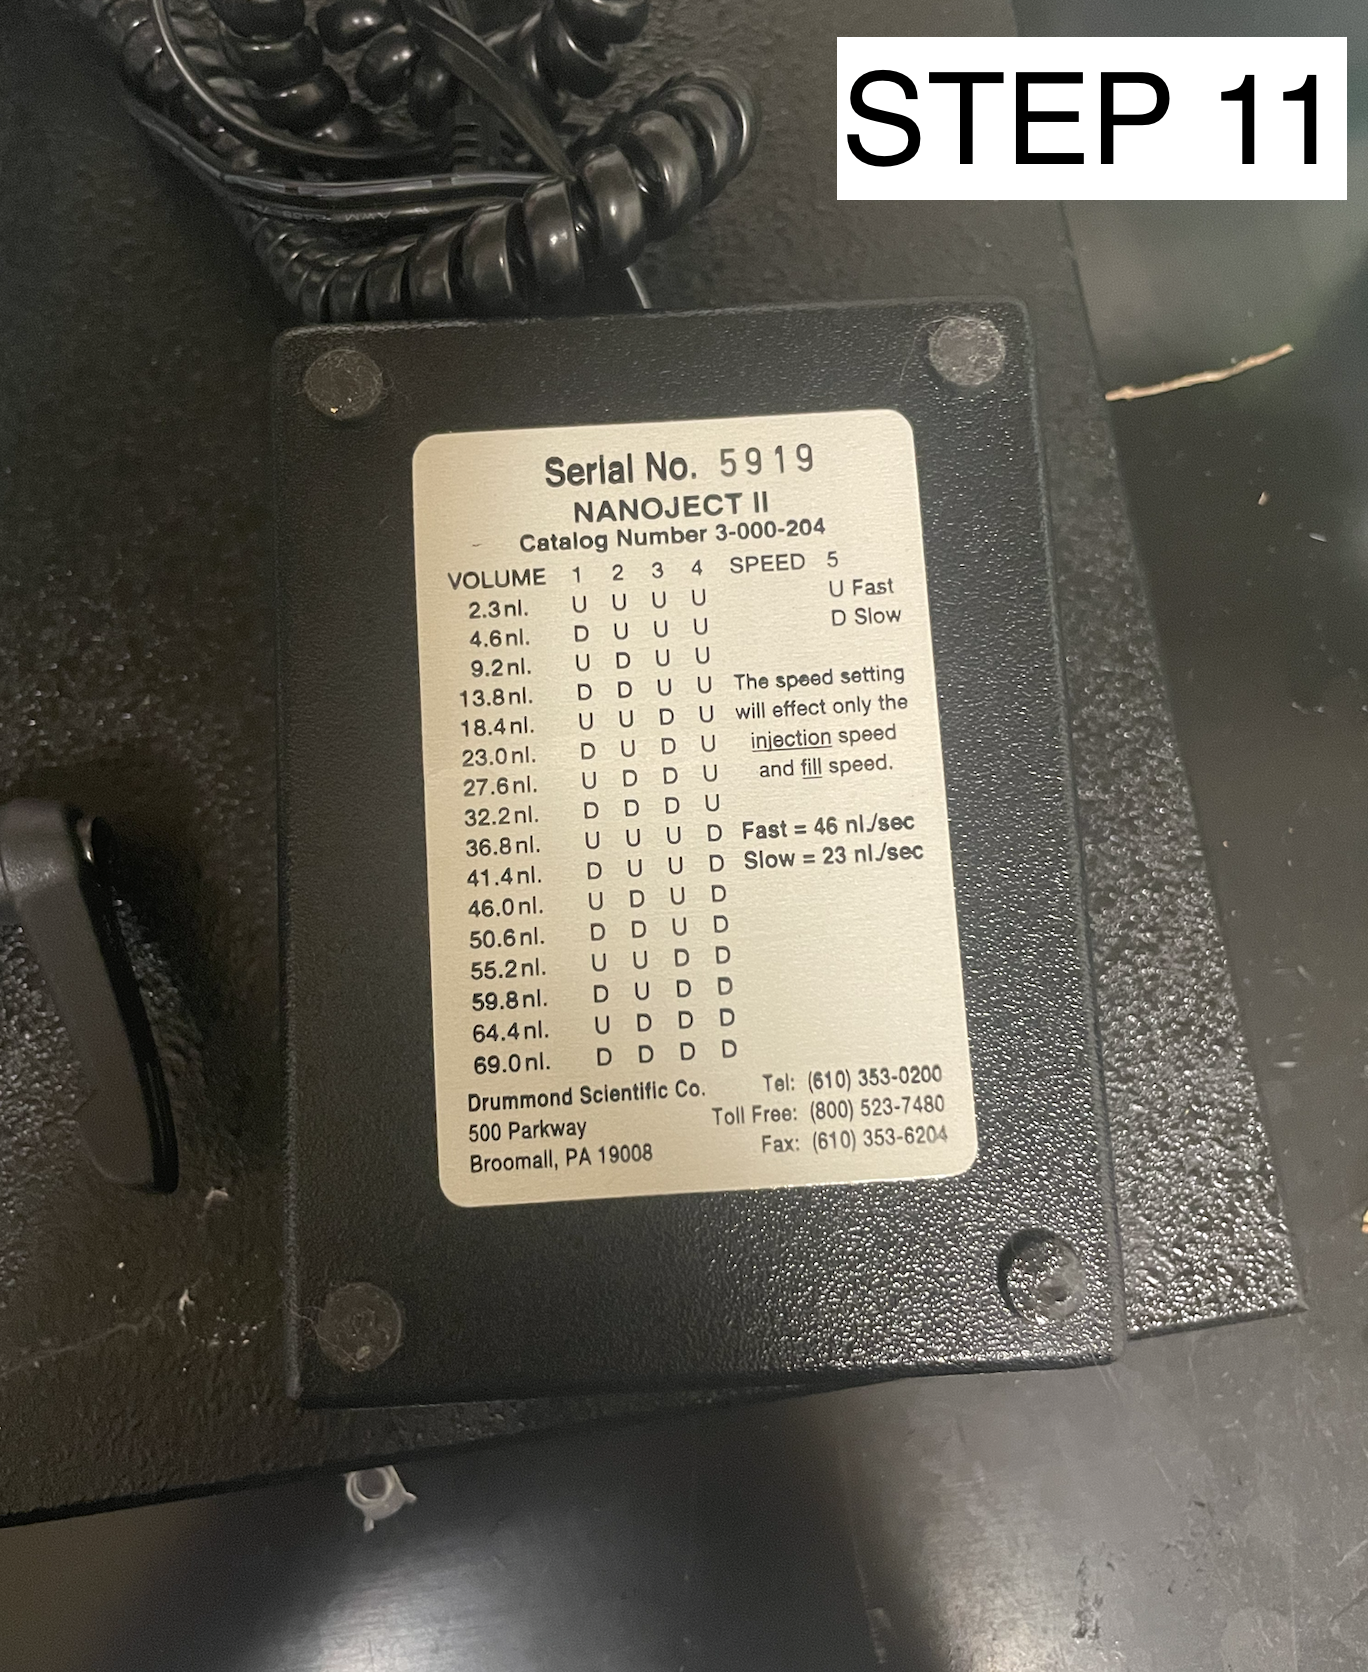
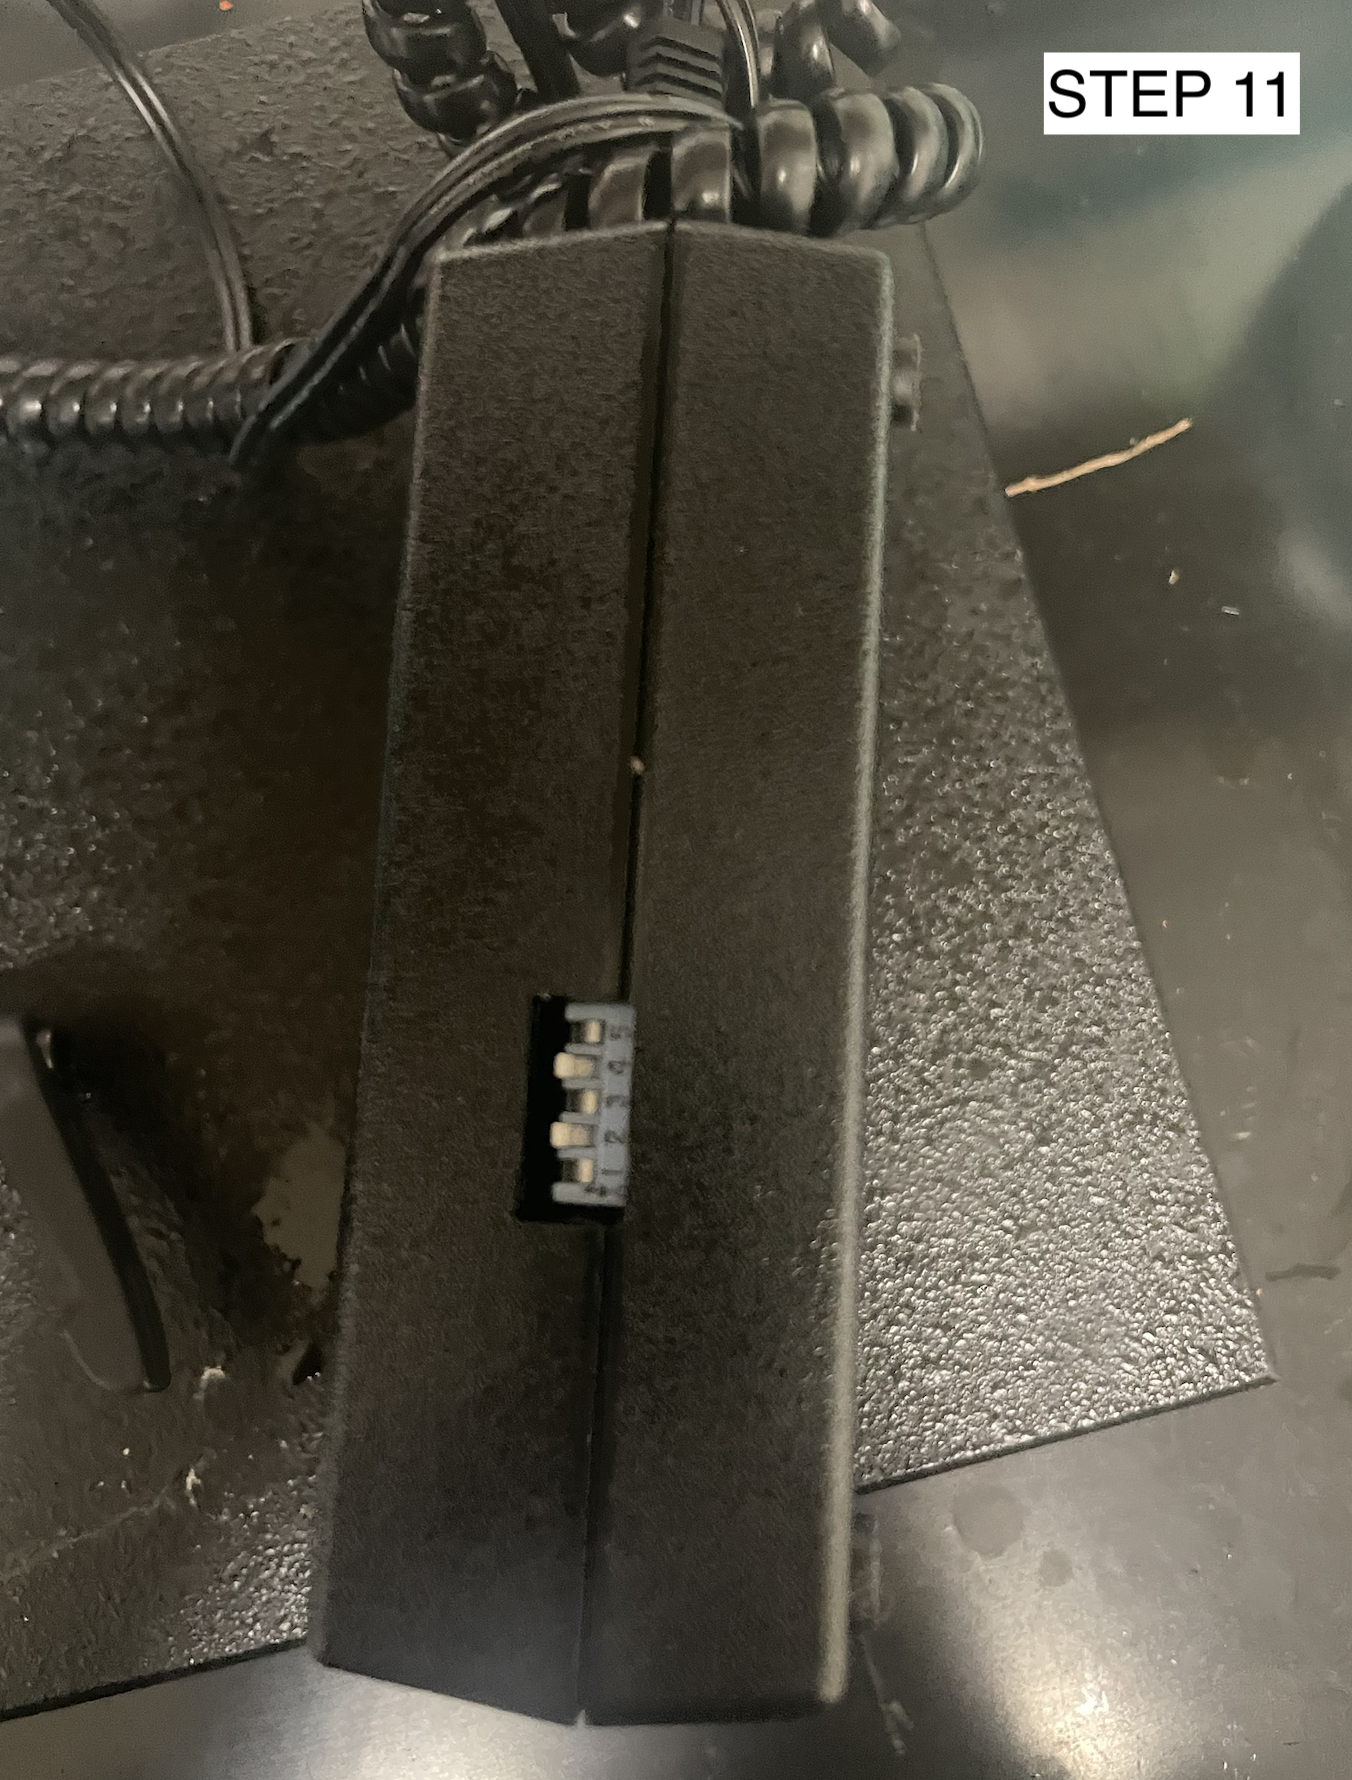
Empty enough mineral oil to remove any bubbles and load 1-2 uL of morpholino solution
Pipette 1-2 uL of morpholino solution onto a piece of Parafilm
Gently dip the needle into the morpholino solution on the Parafilm and fill the micropipette without introducing air bubbles
Injection and Electroporation
Anesthetize the tadpole by placing it in a Petri dish of room temperature 0.03% MS-222 for 3-5 minutes
Confirm the tadpole is completely sedated by checking for movement in response to stimuli
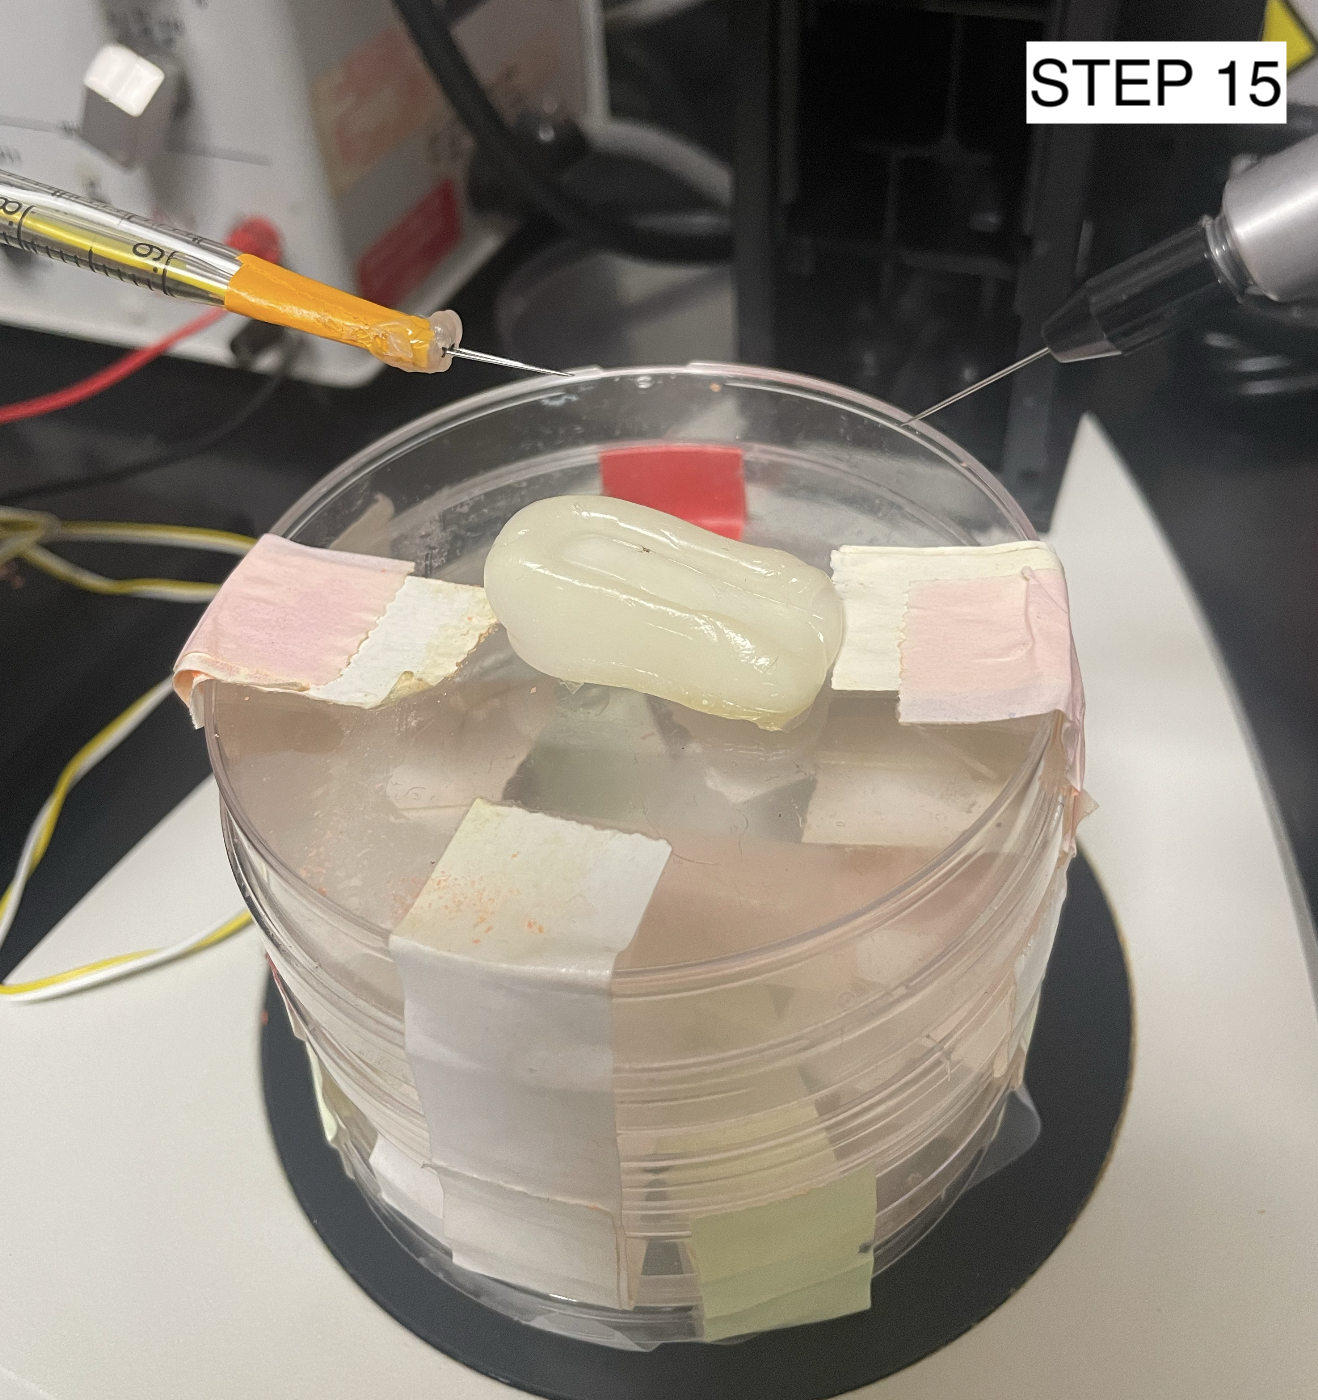
Cover the clay platform with a Kimwipe damp with tadpole water
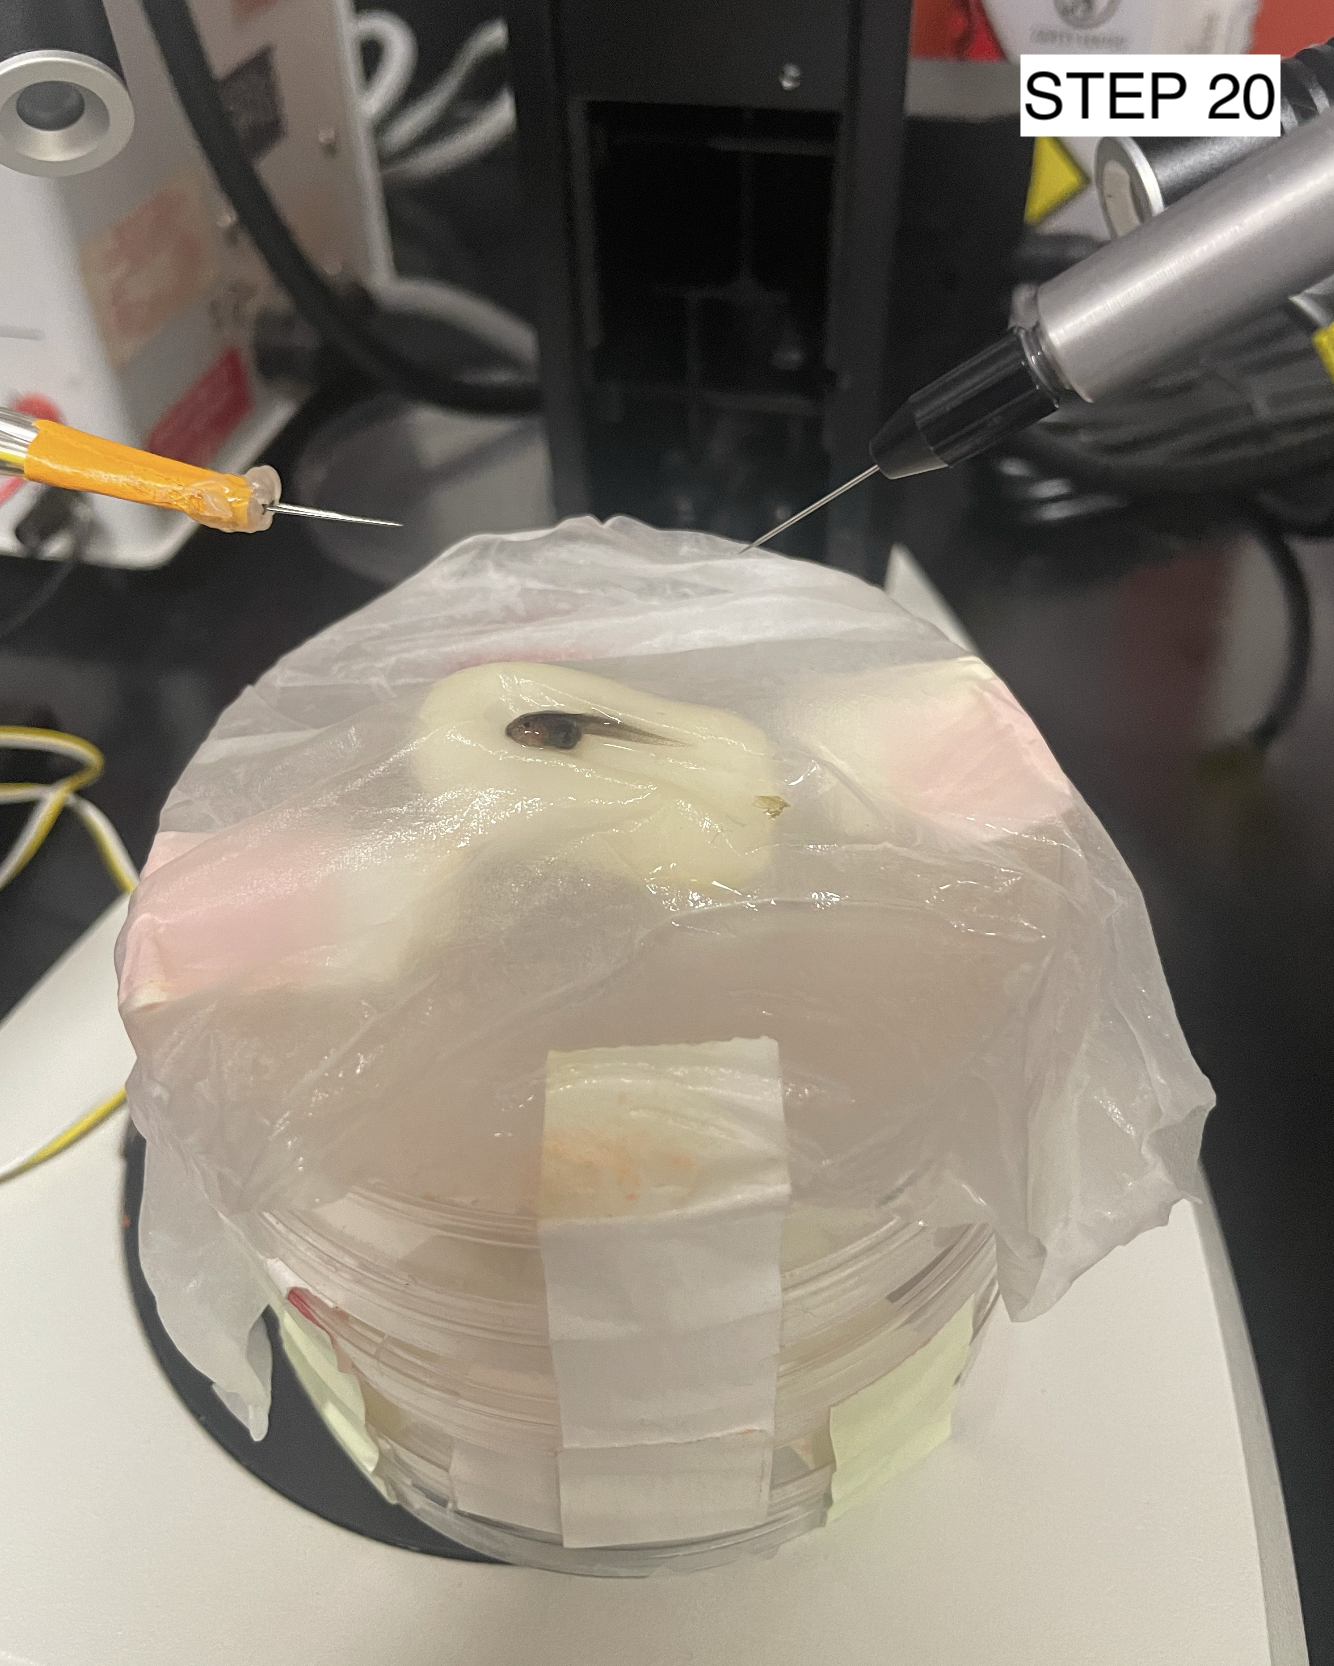
Adjust the position of the tadpole to be dorsal side up with its head in the clay depression
Orient the tadpole so the head is facing away from the injector
Lower the injector and insert the pipette needle into the brain, targeting the brain ventricle
Inject the morpholino solution
Remove the pipette from the tadpole brain. Allow 10-20 sec before electroporation
Orient the tadpole so the head is facing away from the electrode
Lower the electrode needles until it is in full contact with the tadpole head on either side of the injection site
Deliver the electrical pulses (4 total, half regular polarity and half reverse polarity)
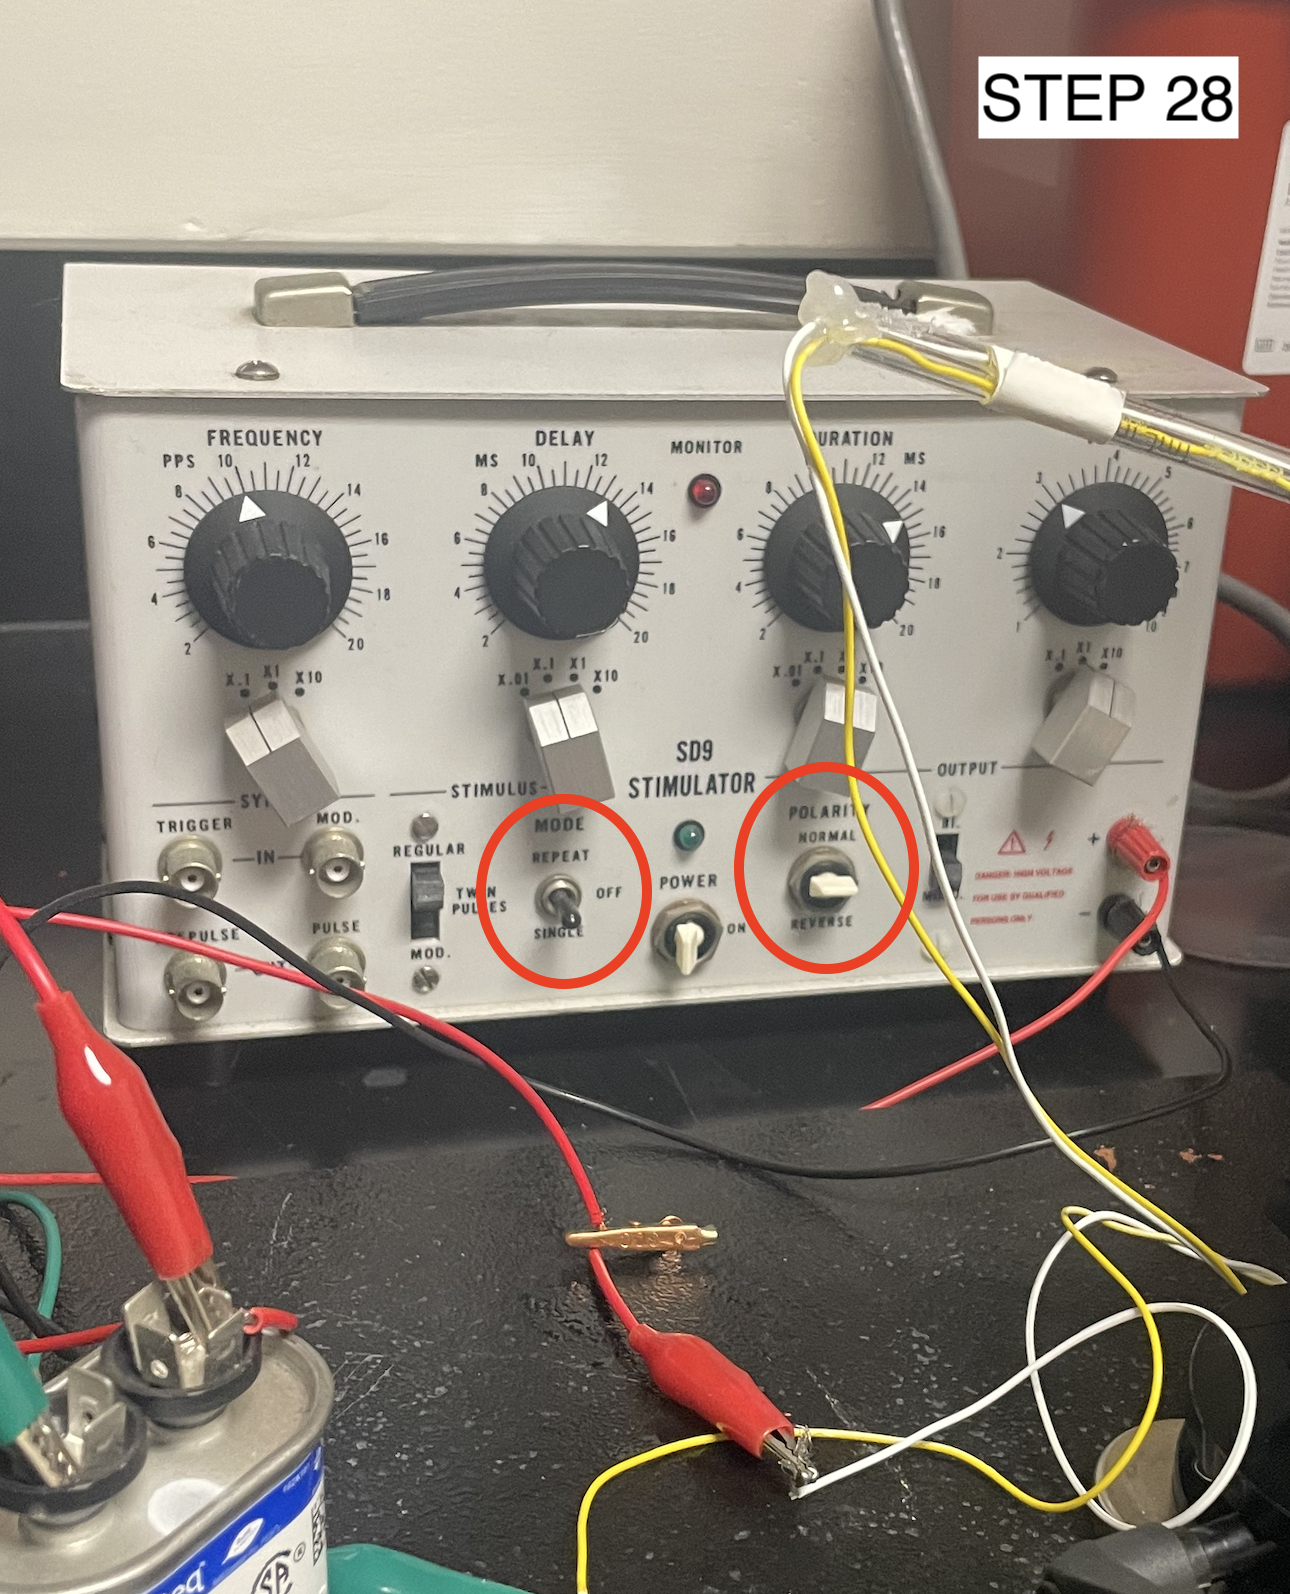
Deliver 2 pulses on regular polarity with a 1s interval between each pulse
Switch the polarity to reverse
Deliver 2 pulses on reverse polarity with a 1s interval between each pulse
Remove the electrode from the tadpole skin
Transfer the tadpole to fresh tadpole water for several hours to recover
In vivo Visualization of Standard MO
At least 24 hrs after electroporation, anesthetize the tadpole by placing it in a Petri dish of room temperature 0.03% MS-222 for 3-5 minutes
Move the tadpole to a new, small, and empty Petri dish using a cut transfer pipette
Place the Petri dish underneath the fluorescent stereomicroscope
Turn on the stereomicroscope and set the filter to GFP
Open the imaging software
Locate the tadpole under the stereomicroscope and zoom in, centered on the brain area
Capture and save the fluorescent image
Transfer the tadpole to fresh tadpole water for several hours to recover
Preparing Protein Extraction and Dot Blot Solutions
Prepare 1x Tris Buffered Saline (TBS)
Mix 800mL distilled water with 6.05g Tris HCl and 8.76g NaCl
Adjust pH to 7.6
Add distilled water to bring to volume
Store at 4C for up to 3 months
Prepare 2% SDS in 1x TBS
Mix 800 uL of 1x TBS with 200 uL of 10x SDS
Store at 4C for up to 3 months
Prepare 7x protease inhibitor stock
Add 1 cOmplete Mini EDTA-free tablet to 1.5 mL of distilled water
Store at 4C for up to one month
Prepare lysis buffer
Mix 857 uL 2% SDS in 1x TBS with 143 uL 7x protease inhibitor stock
Prepare 1x TBST wash buffer
Mix 500 mL of 1x TBS with 500 uL of Tween-20 (=0.01%)
Protein Extraction
Anesthetize the tadpole by placing it in a Petri dish of room temperature 0.03% MS-222 for 5 minutes
Sacrifice by rapid decapitation and dissect out tadpole brain
Put the brain directly into 50-100uL of lysis buffer in a clean 1.5 mL microcentrifuge tube
Homogenize the brain by hand with pestle or motorized tissue grinder
Centrifuge tubes at 13000 rpm/18928 rcf for 90 min
Measure protein concentration on Qubit
Calculate sample amounts for desired protein concentration (i.e. 15 ug protein) brought to volume in 1x TBS for dotting 6 ul of sample onto each of two nitrocellulose membranes
Transfer the supernatant to a new 1.5 mL microcentrifuge tube
Dot Blot
Using a narrow-mouth pipette tip, carefully dot 2-4 uL of samples onto two nitrocellulose membranes in the same pattern
Allow the membranes to fully dry, then rewet in 1x TBST for 10 min
Block non-specific binding in 5% dry milk in 1x TBST for 1 hour at room temperature with gentle agitation
Incubate with primary antibody against target of interest on one membrane and primary antibody against reference protein on second membrane (1:100-1000) in 5% dry milk in 1x TBST for 1 hour at room temperature with gentle agitation
Wash three times with 1x TBST for 10 min each at room temperature with gentle agitation
Incubate with secondary antibody with HRP conjugate (1:2000-5000) with 2% BSA in 1x TBST for 1 hour at room temperature with gentle agitation
Wash three times with 1x TBST for 5 min each at room temperature with gentle agitation
Incubate with Clarity ECL substrate (equal volumes of each component, mixed) for 5 min in dark
Image the membranes using a chemiluminescent imaging system (i.e. ChemiDoc)
Combine DI water, Opti-4CN dilutant, and Opti-4CN substrate according to Opti-4CN development kit and incubate membranes overnight
Rinse membranes in DI water for up to 10 min. Let dry at RT for up to 30 min and seal with tape
Image on brightfield next to normalized step ladder
Measure optical density in ImageJ using mean gray values for each sample blotted across both membranes
Calculate an optical density ratio of your protein of interested to that of your reference housekeeping protein

