SRA and Genbank BioSample-Linked Submission with Mercury_Prep and Mercury_Batch
Francis J Ambrosio
Abstract
Submitting sequencing data to public data repositories is a meaningful yet tedious procedure. Linking submissions between SRA and Genbank will enhance the value of both submissions the the public health community. The Mercury protocols offered by Theiagen Genomics allows users to efficiently and accurately produce all required inputs for SRA and Genbank submissions (the Mercury workflows also allow for GISAID submission, but that will not be covered in this protocol). This protocol provides a detailed procedure for submitting BioSample-linked sequencing data to SRA and Genbank.
Steps
Data Preparation
The Titan Genomic Characterization workflow must be run prior to submitting sequences to SRA and Genbank in order to prepare the data for submission. Please use the Titan workflow that is compatible with your sequencing data.


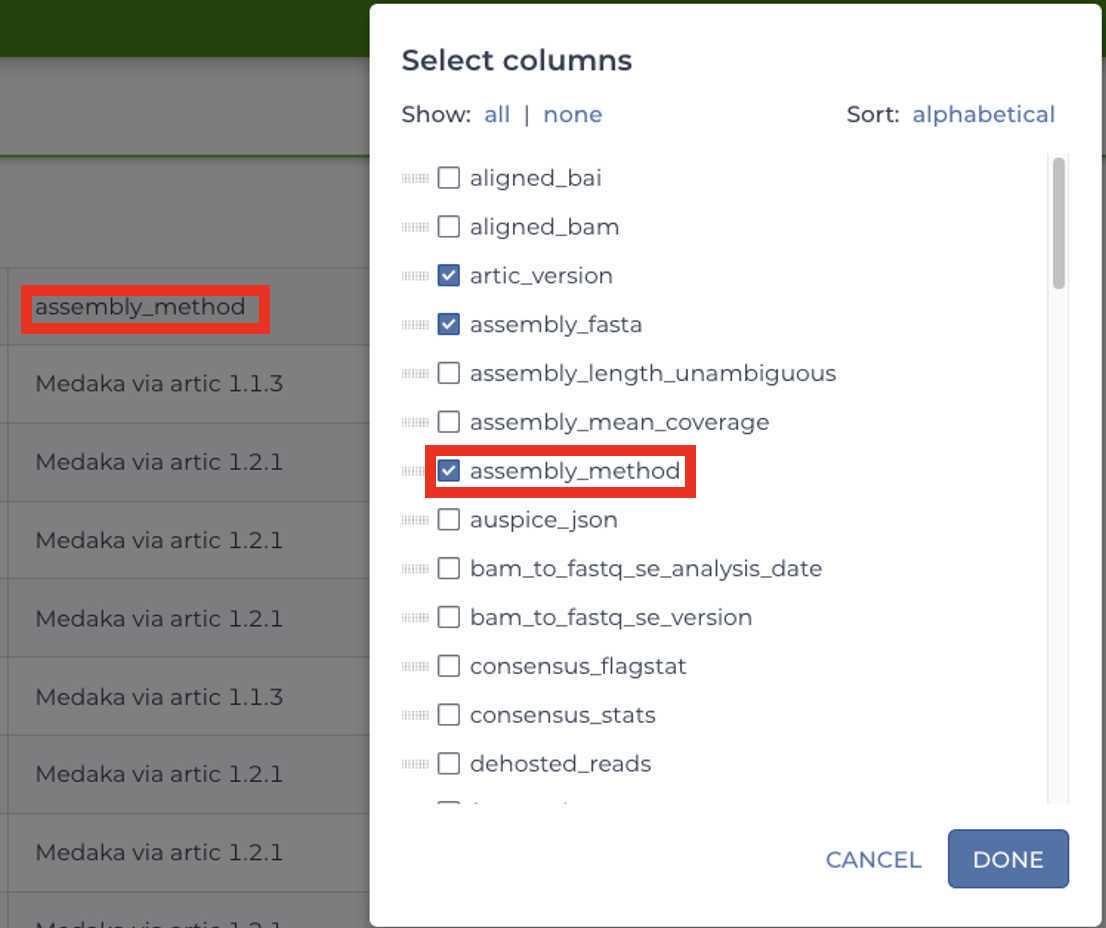
Please check that all samples have been analyzed using the appropriate Titan workflow prior to running the Mercury workflows by navigating to the 'Data' tab, selecting the data table of choice, and select the 'assembly_fasta' and 'assembly_method' columns.

Metadata Formatting
The Terra Metadata Formatter is an excel spreadsheet too that will help you by collecting all required metadata for each of the sequencing data repositories and formatting this data into a Terra-uploadable data table.

Download and open the Terra Metadata Formatter:
Enter the sample metadata into the 'User Input' tab of the Terra Metadata Formatter. The required fields are highlighted in blue. The optional fields are highlighted in grey. We recommend that you attempt to include as much data about your samples as is available at the time of submission, with particular emphasis on the fields of 'Purpose of Sampling' and 'Purpose of Sequencing', which will be used to correct for statistical biases in the data due to diversity of the sampling methodologies.
Note that some of the fields have dropdown menus. These have been implemented for fields that have a controlled vocabulary in order to reduce typo-based rejections from the various databases.

The General Metadata section consists of two required fields:
- Root Entity: This input will define the name of the Terra Data Table when this metadata is uploaded in subsequent steps.
- Submission ID Prefix: This input will be the prefix to the submission ID in the final NCBI submission files. Typical inputs are formatted as the state abbreviation and laboratory abbreviation separated by a hyphen.
The Laboratory Data section consists of eight required fields and one optional field:
- GISAID Submitter ID (required): the GISAID Submission ID in the final GISAID submission files (if you have already submitted these samples to GISAID then list the GISAID Submission ID that was used)
- Authors (required): the list of authors included in the final SRA, Genbank and GISAID submission files
- BioProject (required): the BioProject accession number used in the SRA and Genbank submissions
- State: the state of the Originating Laboratory
- Country (required): the country of the Originating Laboratory
- Continent (required): the continent of the Originating Laboratory
- Submitting Laboratory (required): the name of the Submitting Laboratory
- Submitting Laboratory Address (required): the address of the Submitting Laboratory
- Submitter Email (optional): The email associated with the NCBI account that will be used to submit to SRA and Genbank
The Sequencing Run section consists of five required fields and two optional fields:
- Platform (required): the sequencing Platform used to generate this sequencing data
- Instrument Model (required): the sequencing Instrument Model used to generate this sequencing data
- Library Strategy (required): the Library Strategy used to generate the sequencing libraries (if using Artic V3 or similar amplicon-based protocol then "AMPLICON" is the most accurate entry for this field.)
- Library Source (required): the material used as the Library Source in the generation of the sequencing libraries (if extracting viral RNA as starting material then "VIRAL RNA" is the most accurate entry for this field.)
- Library Selection (required): the tool used to select libraries to be sequenced
- Primer Scheme (optional): the Primer Scheme in the amplicon generation step of the library preparation
- Amplicon Size (optional): the average Amplicon Size of the Primer Scheme
The Sample Metadata section consists of nine required fields and nine optional fields:
-
Samples (required): the unique ID of the Samples
-
Submission ID Suffix (required): the second component of the Submission ID (this field can be the same as Samples)
-
Library ID Suffix (required): this input is used to keep track of samples that have been sequenced more than once, or on multiple platforms (for the first or only sequencing submission for these samples it is recommended to use "01" for this field)
-
Collection Date (required): the date the samples were originally collected
-
Originating Lab(required): the laboratory where the samples were originally collected
-
Originating Lab Address (required): the address of the laboratory where the samples were originally collected
-
Organism (required): the target organism of the sequencing run (if sequencing SARS-CoV-2 the "SARS-CoV-2" is the most accurate entry for this field
-
Isolation Source (required): source of the sample (if sequencing samples that were collected as part of a diagnostic assay or or surveillance program from humans then "Clinical" would be the most accurate entry for this field
-
Host Disease (required): disease caused by the target Organism (if sequencing SARS-CoV-2 the "COVID-19" would be the most accurate entry for this field)
-
Run ID (optional): the Run ID of the samples
-
Patient Gender (optional): the gender of the individual from whom the sample was collected
-
Patient Age (optional): the age of the individual from whom the sample was collected
-
County (optional): the county from which the sample was collected
-
BioSample Accession (optional): if the sample has already been registered with NCBI then include the BioSample here
-
Specimen Processing (optional): sample processing steps such as transport media and extraction method can be included here
-
Purpose of Sampling (optional): this input can be clinical diagnostics if the sample was taken as a human specimen for SARS-CoV-2 testing
-
Purpose of Sequencing (optional): this input can be used to tag samples as Baseline Surveillance or Targeted Sampling (for detailed guidance on what entry is most accurate for your samples please see the APHL guidance document here:https://www.aphl.org/programs/preparedness/Crisis-Management/Documents/Technical-Assistance-for-Categorizing-Baseline-Surveillance-Update-Oct2021.pdf) For Baseline Surveillance:
1. Sampled randomly for genomic surveillance 2. Those not identified in a targeted sampling effort (targeted efforts defined below) 3. Sampled across targeted sequencing efforts to be representative of the community **For Targeted Sequencing:** 1. Sampled based on cluster/outbreak investigations 2. Longitudinally or repeatedly sampled from the same individual 3. Sampled based on pre-screening for a particular variant (e.g., S-gene target failure) 4. Sampled for the purpose of vaccine escape studies 5. Sampled based on travel history 6. Sampled based on disease severity (i.e., targeted sequencing of cases resulting in hospitalization or death) -
Sequencing Protocol Name: if using a named sequencing protocol enter the name in this field
Upload Metadata
Upload the Terra Data Table
Once the sample metadata has been entered into the User Input tab of the Metadata Formatter click the 'Terra Data Table' tab:

Select the whole sheet by hitting control+'a' on your keyboard.
Copy the whole sheet by hitting control+'c' on your keyboard.

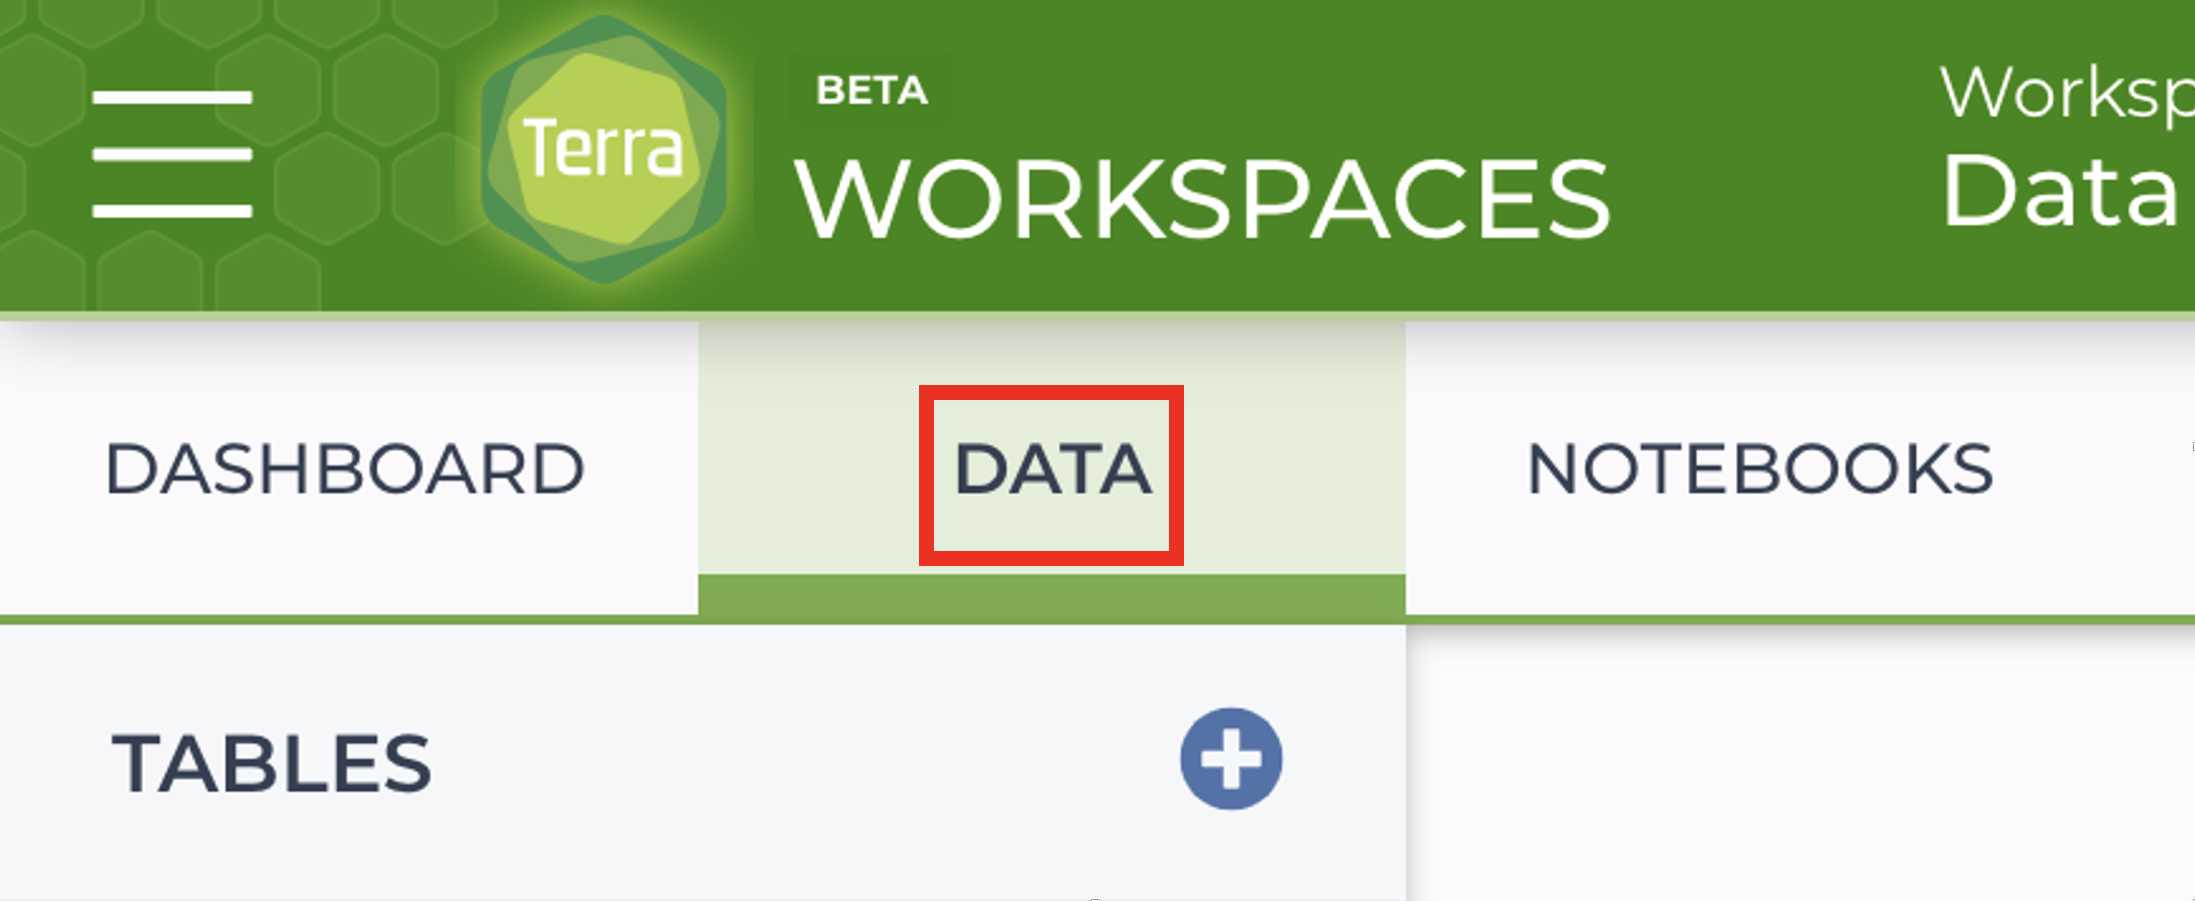
Log in and navigate to the Data tab in your workspace on Terra.bio:
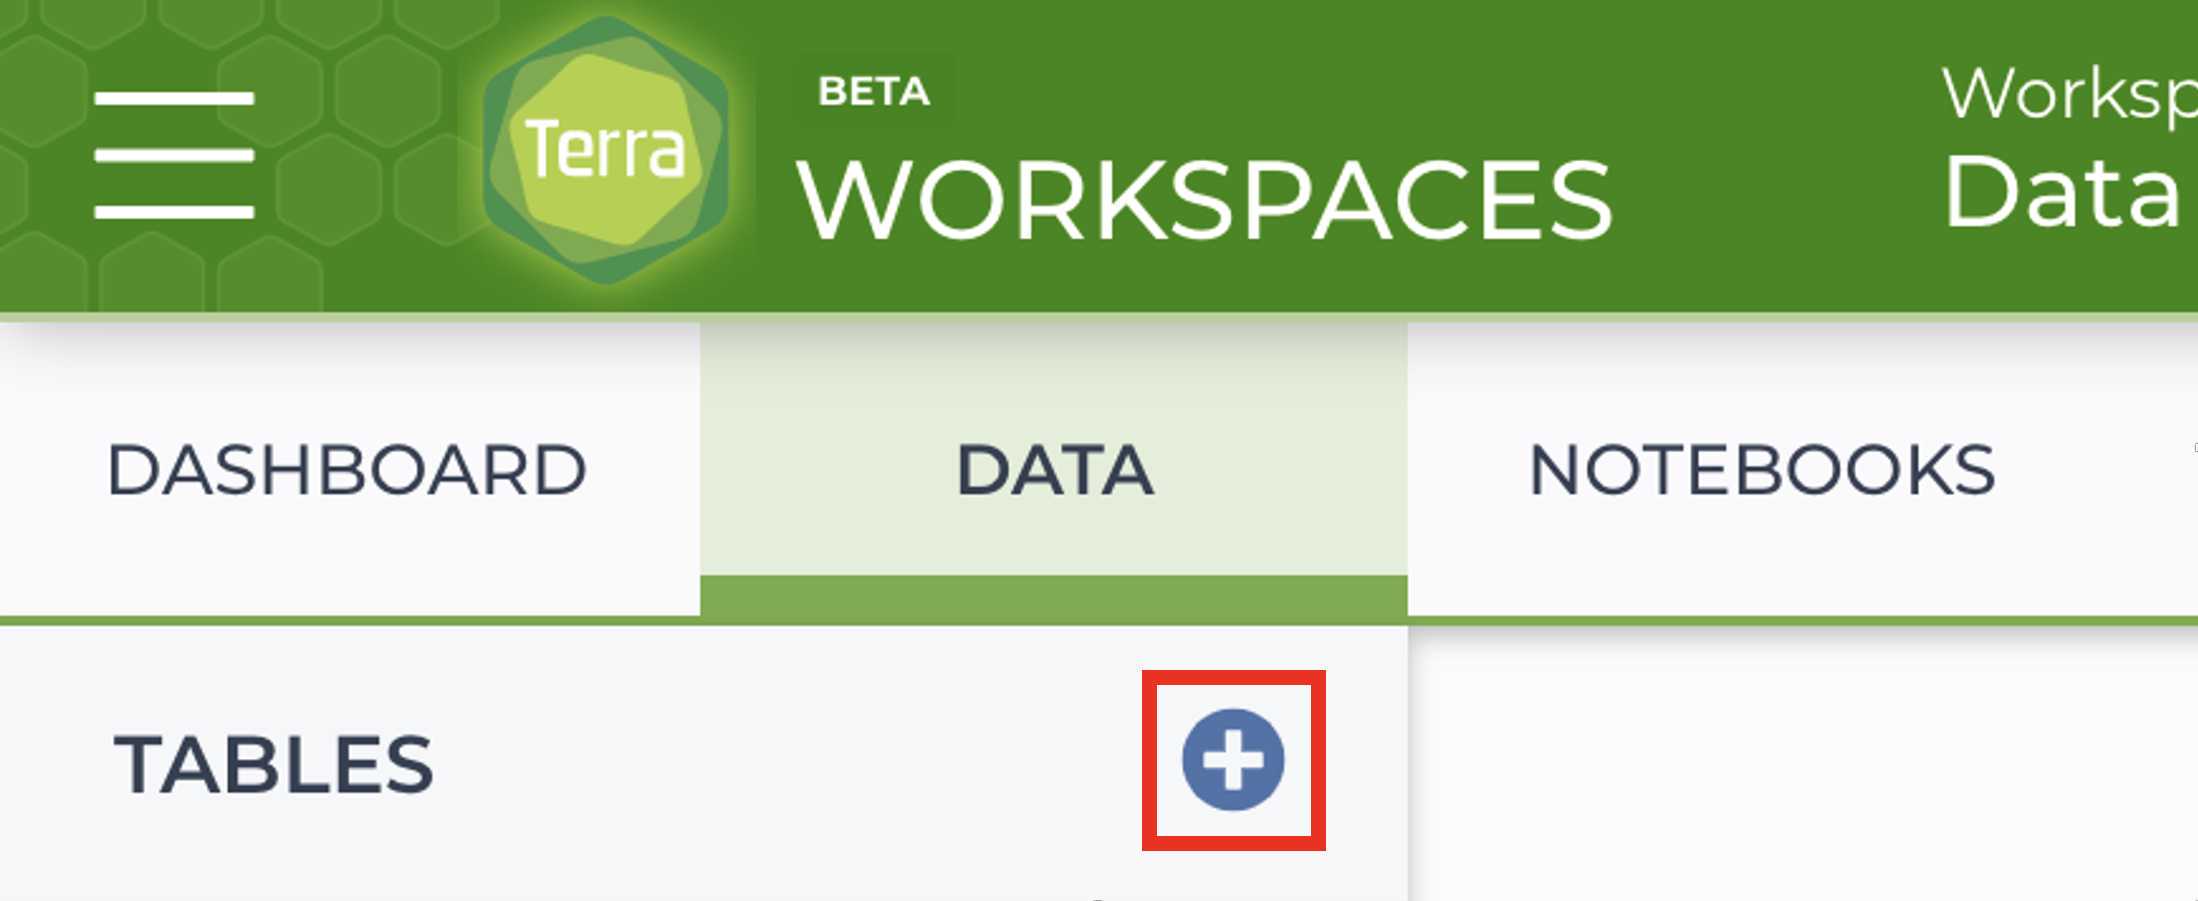
Select the plus button in the blue circle to add a Terra Data Table:
Select the Text Import tab:
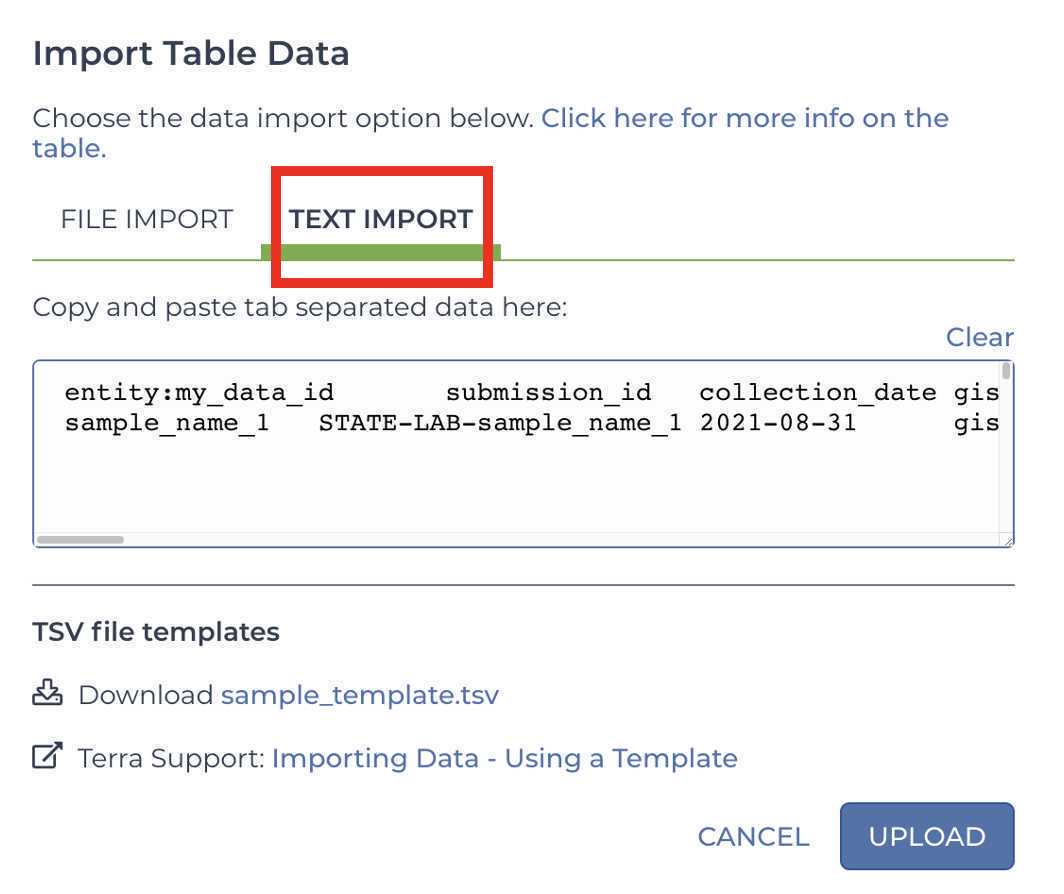
Paste your metadata into the text input field:
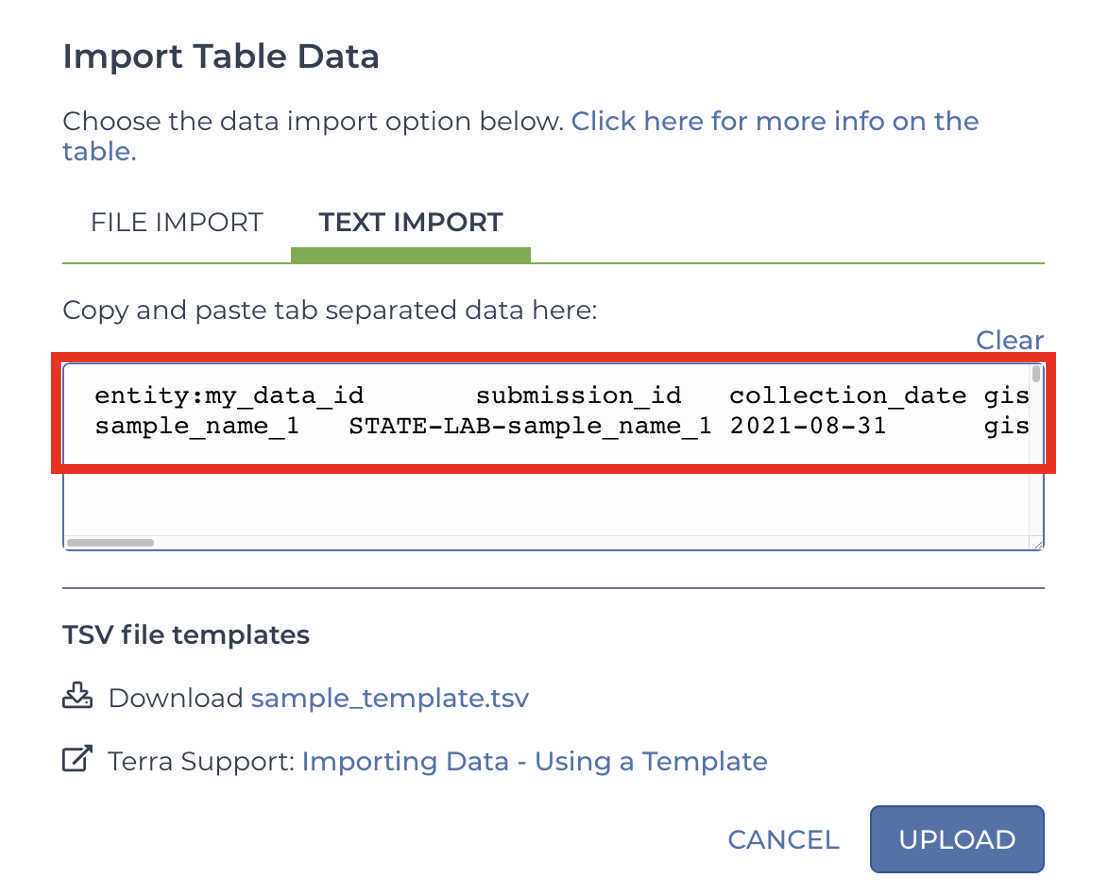
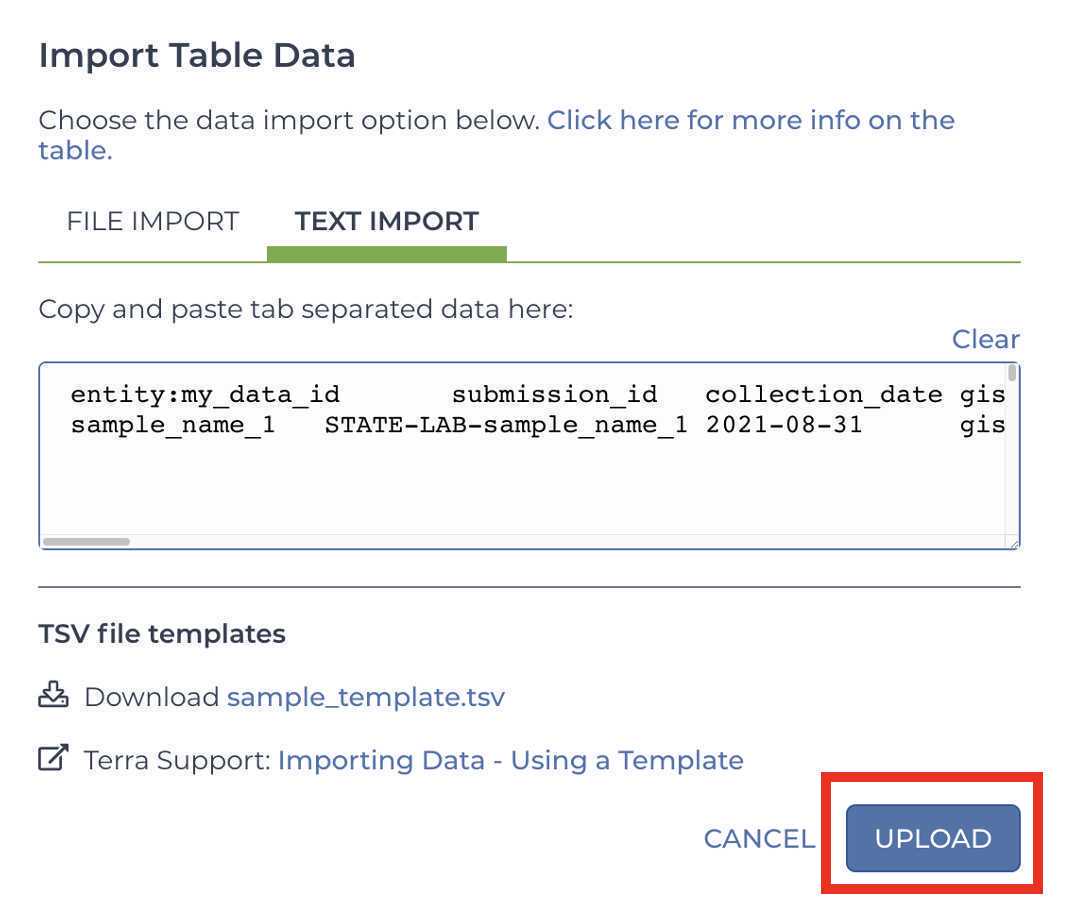
Click UPLOAD
Mercury
Mercury Prep
Select Mercury_Prep_SE or Mercury_Prep_PE from the Workflows tab in your Terra workspace:

Choose the appropriate Version and Root Entity, then click Select Data :
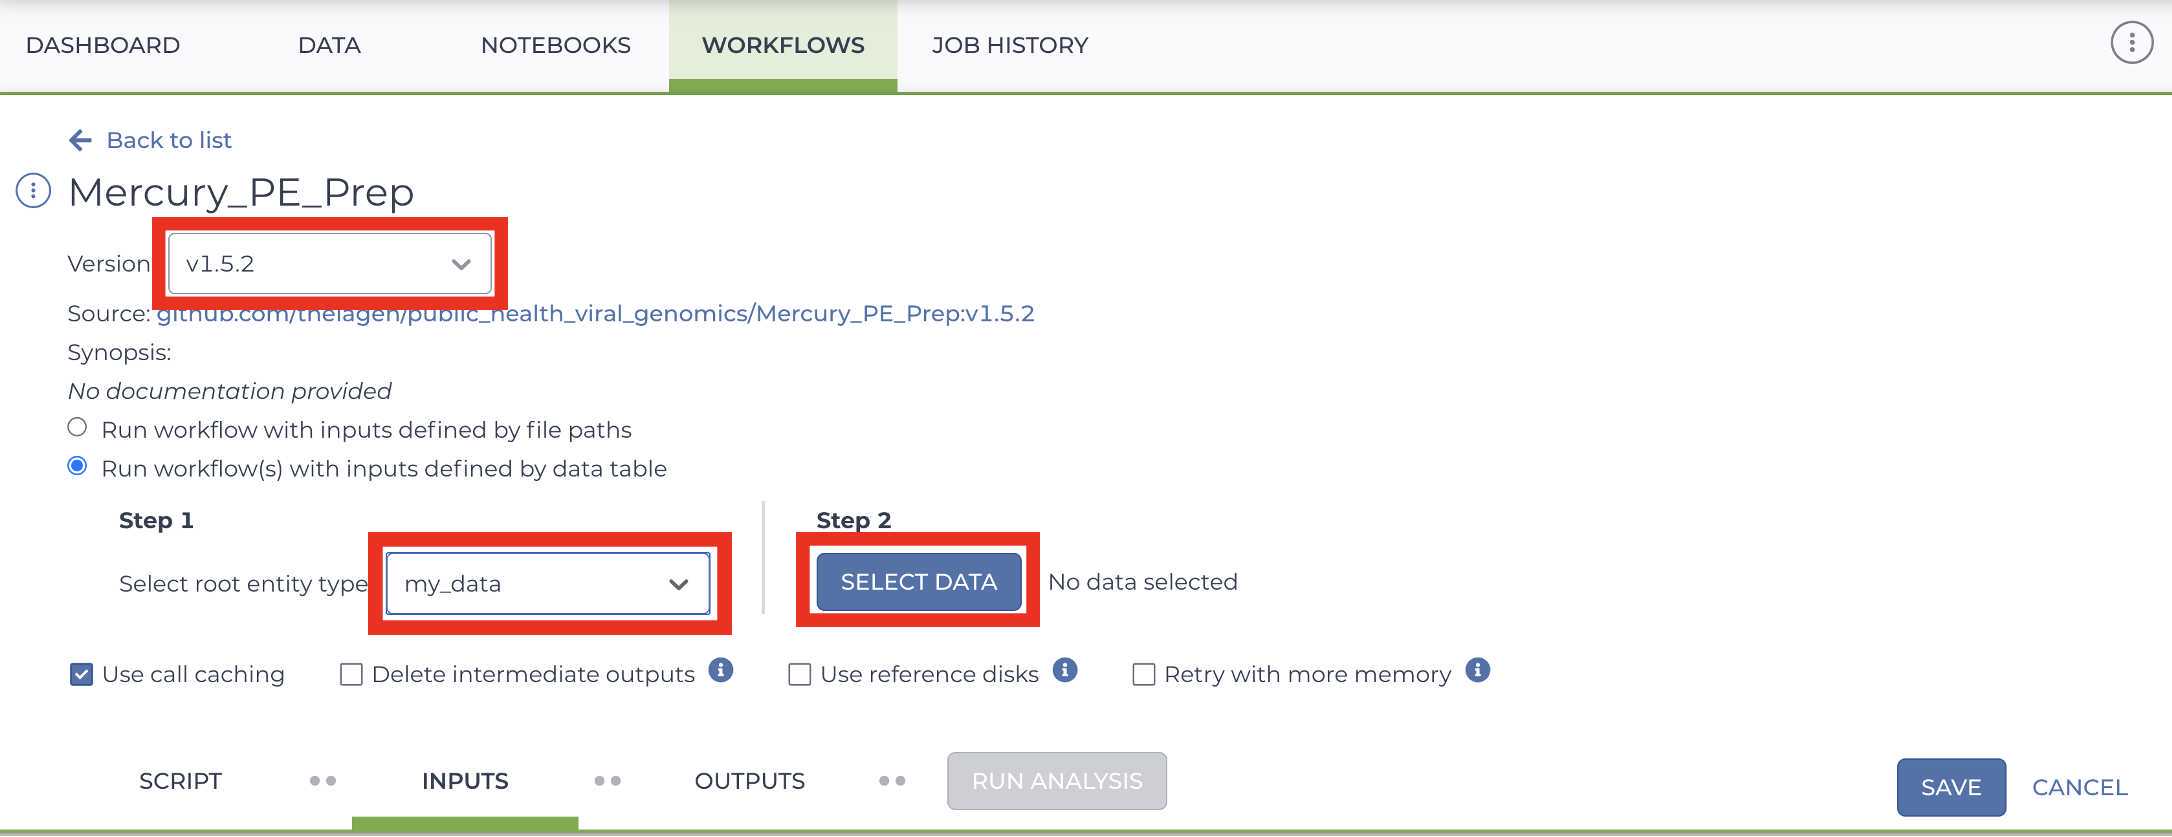
Select the samples that you would like to prepare for submission:

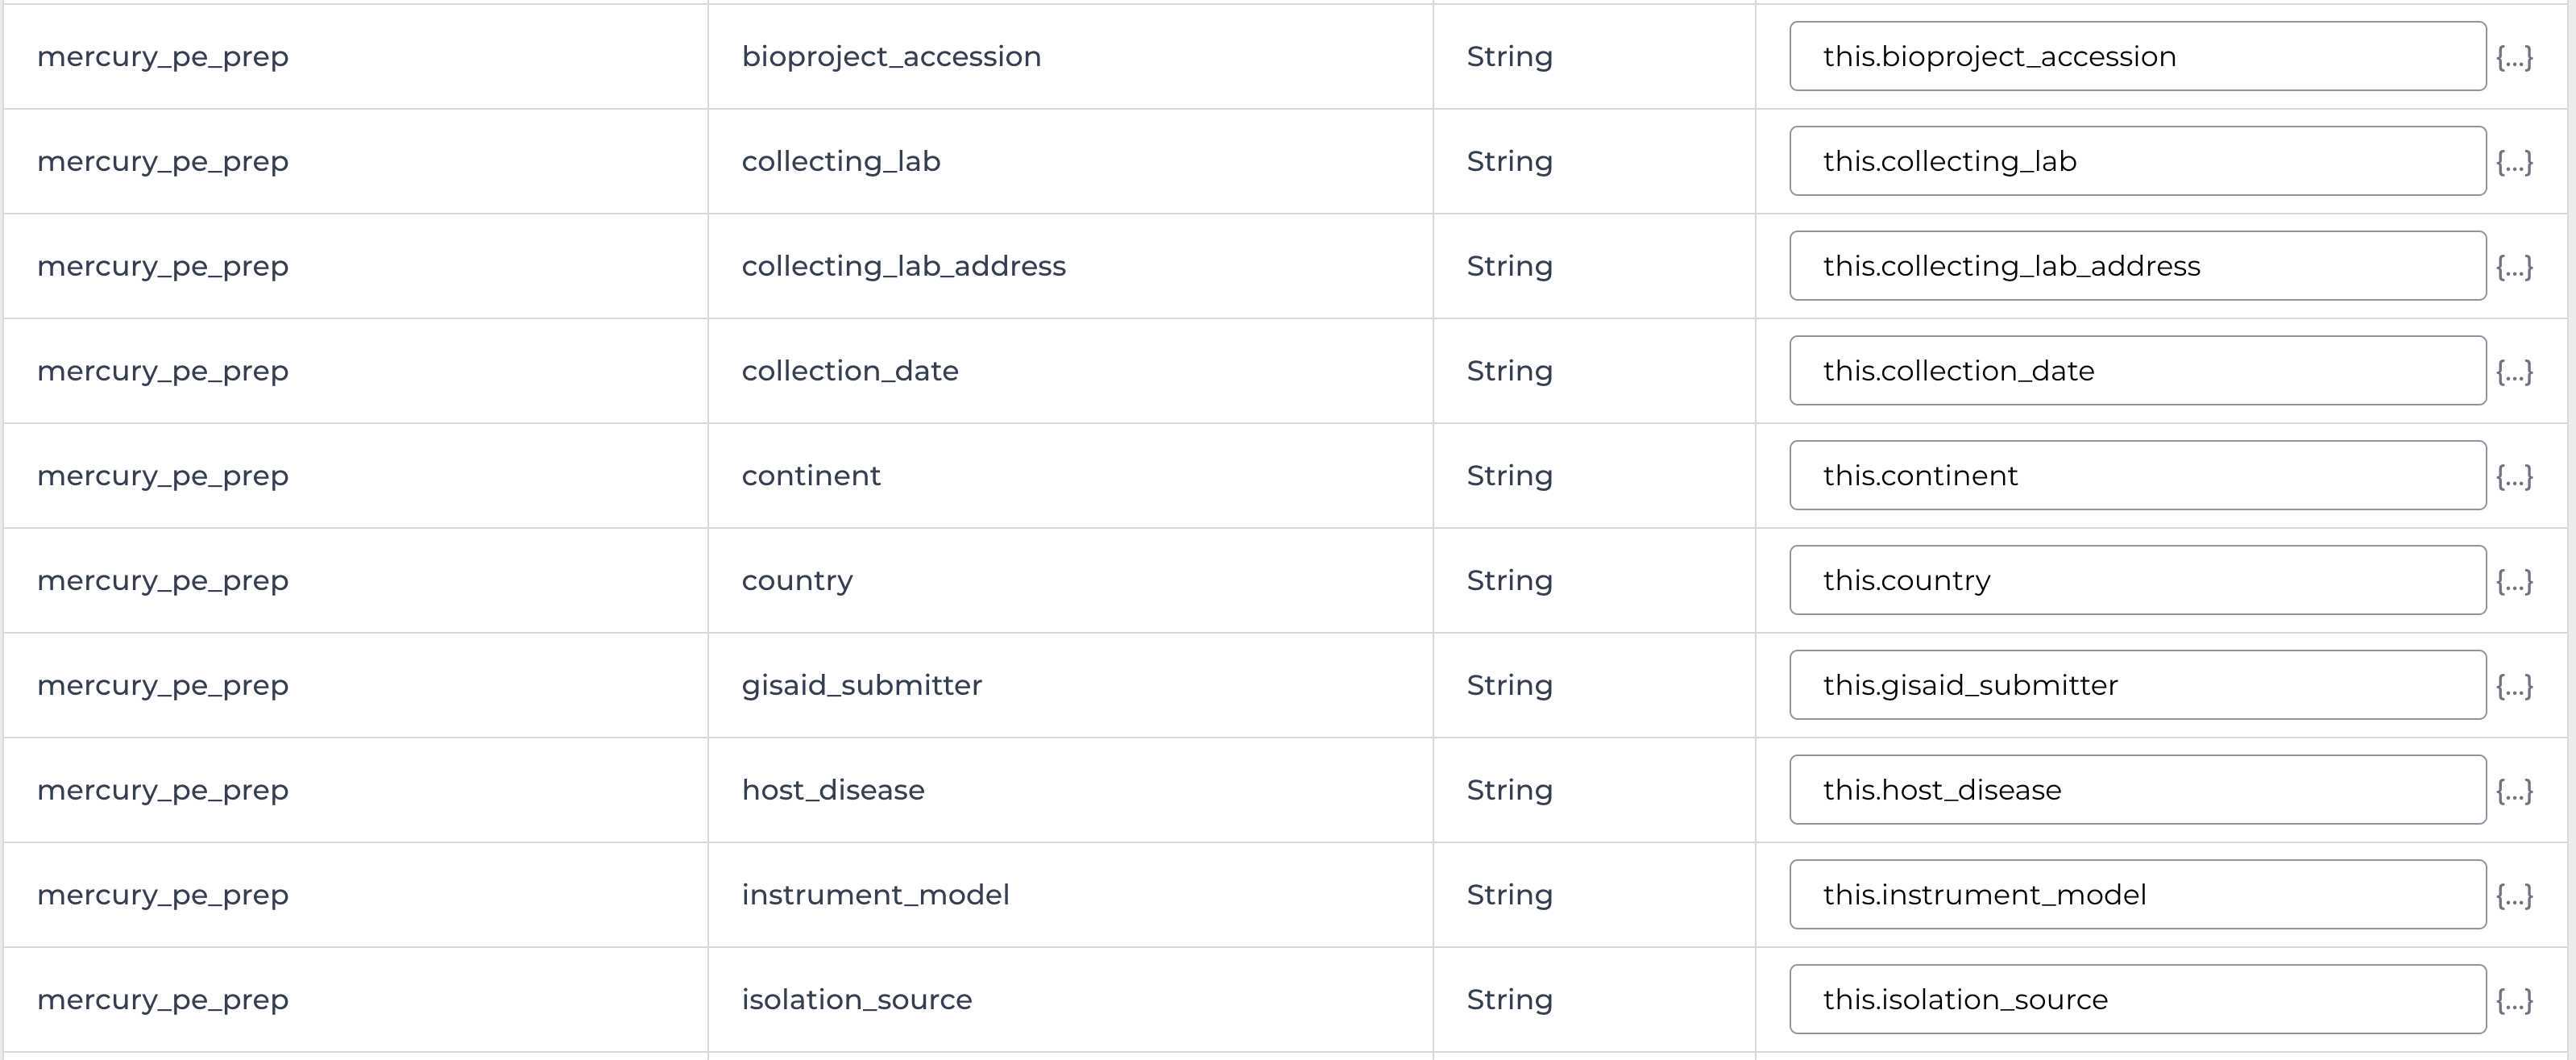
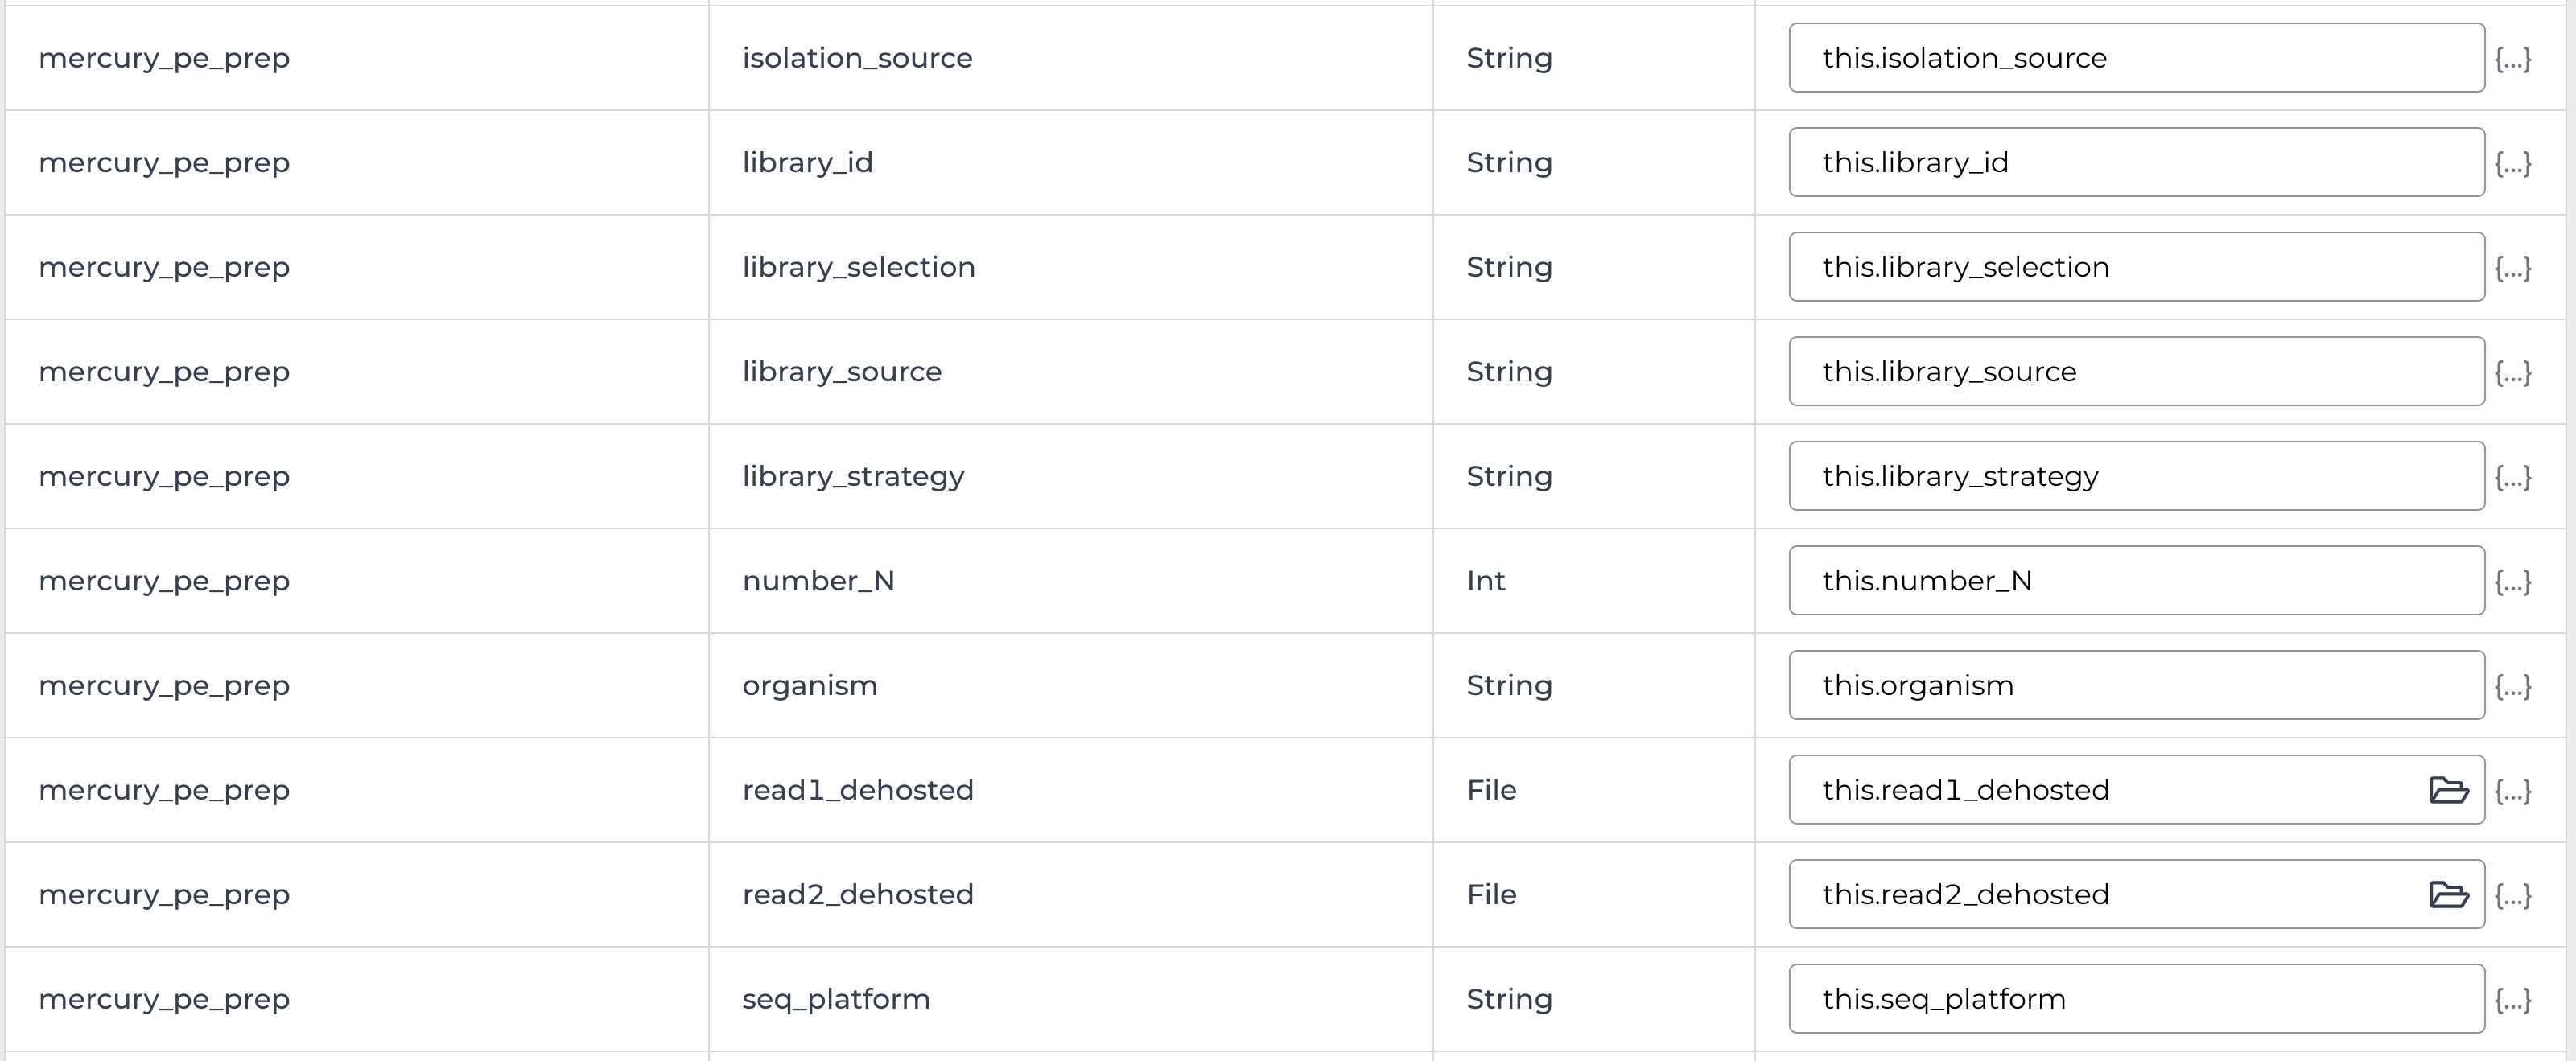
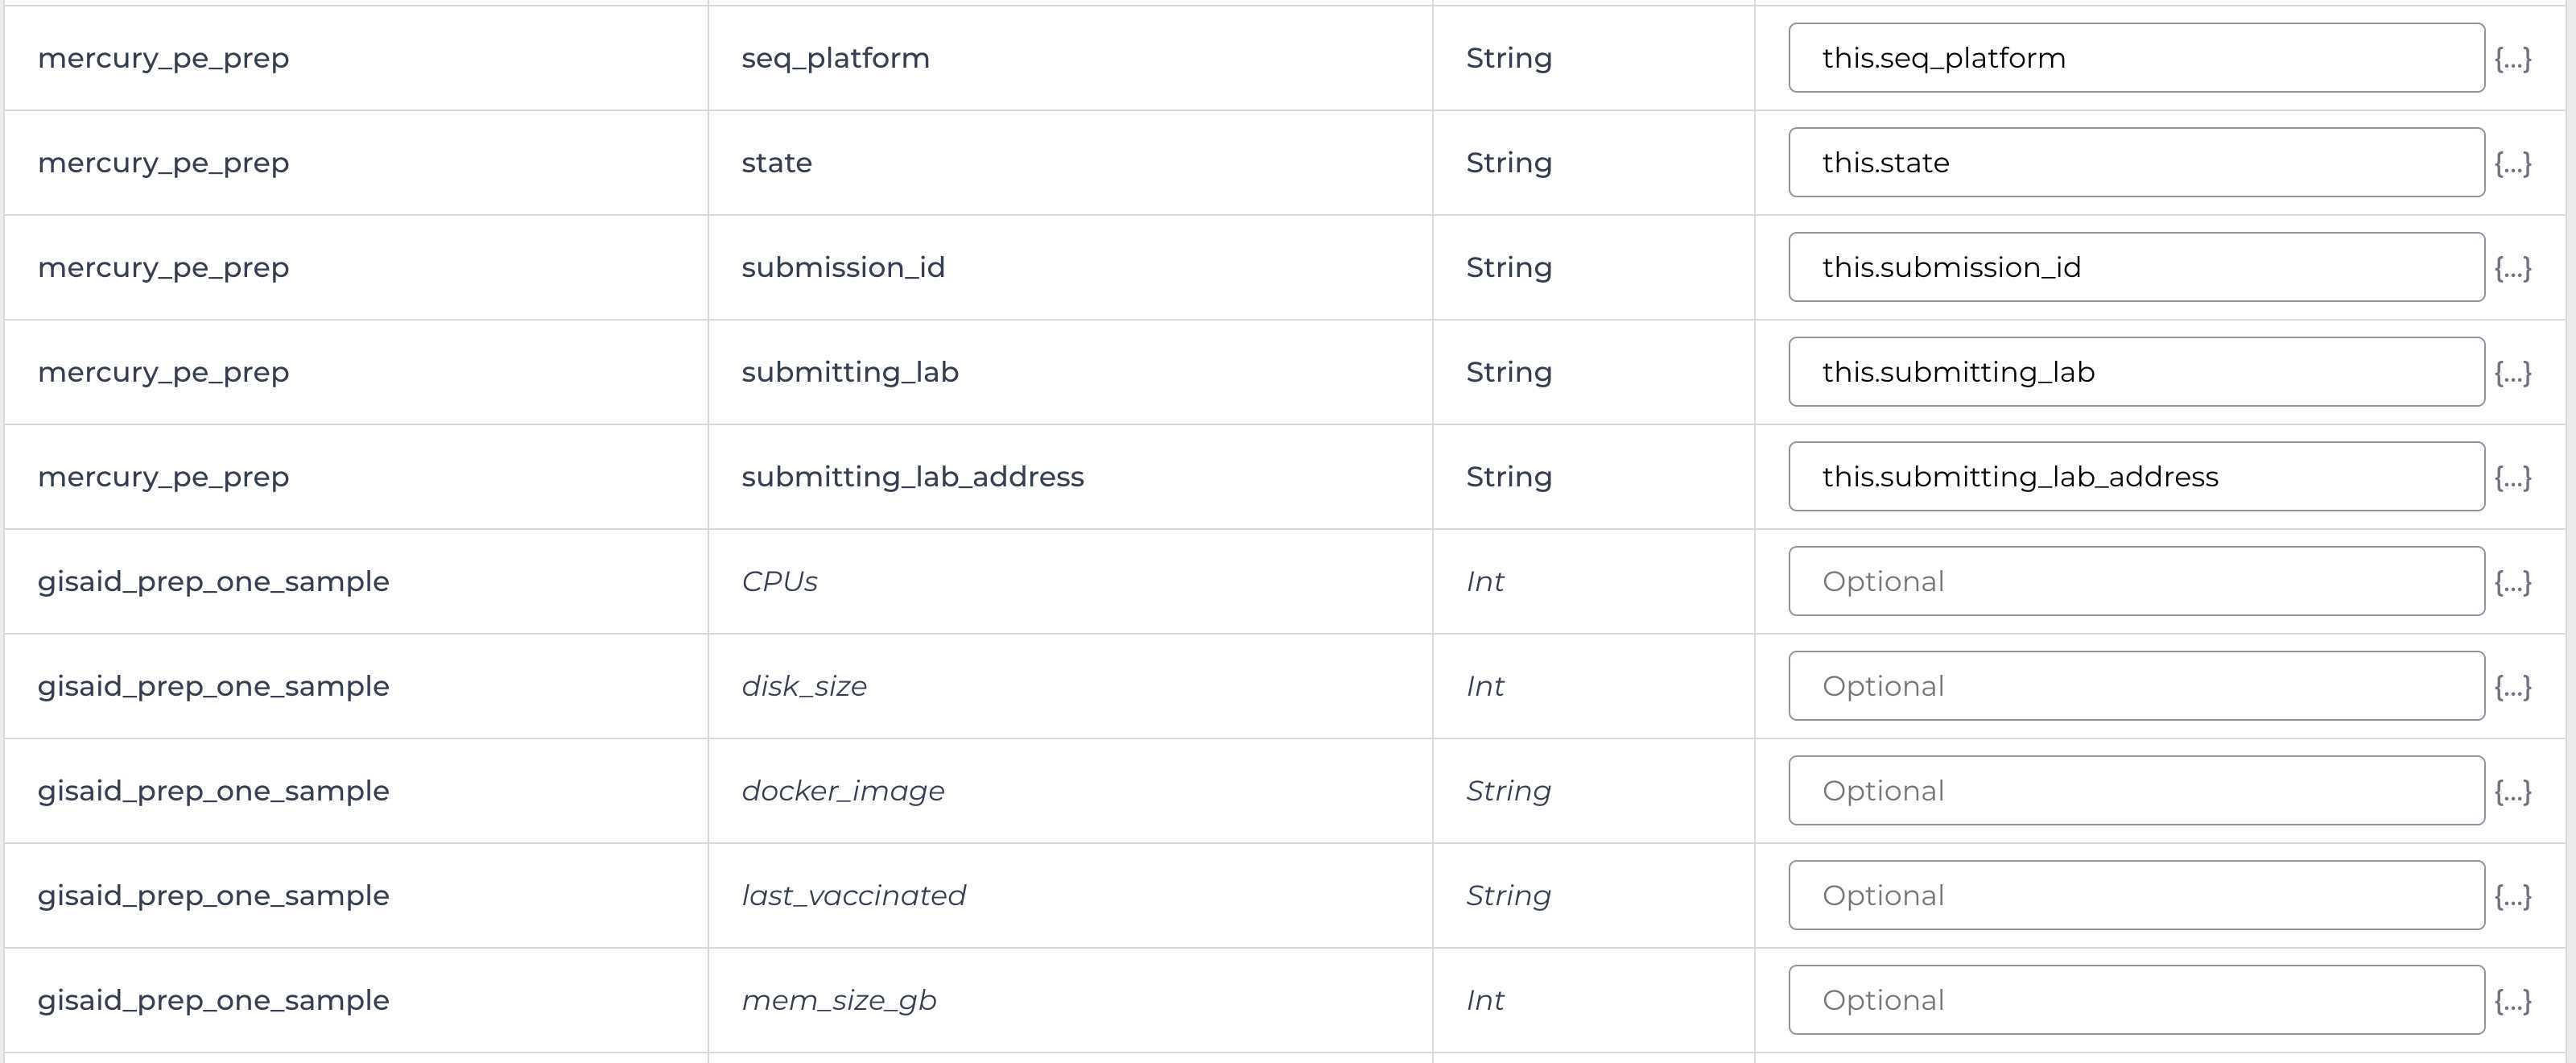
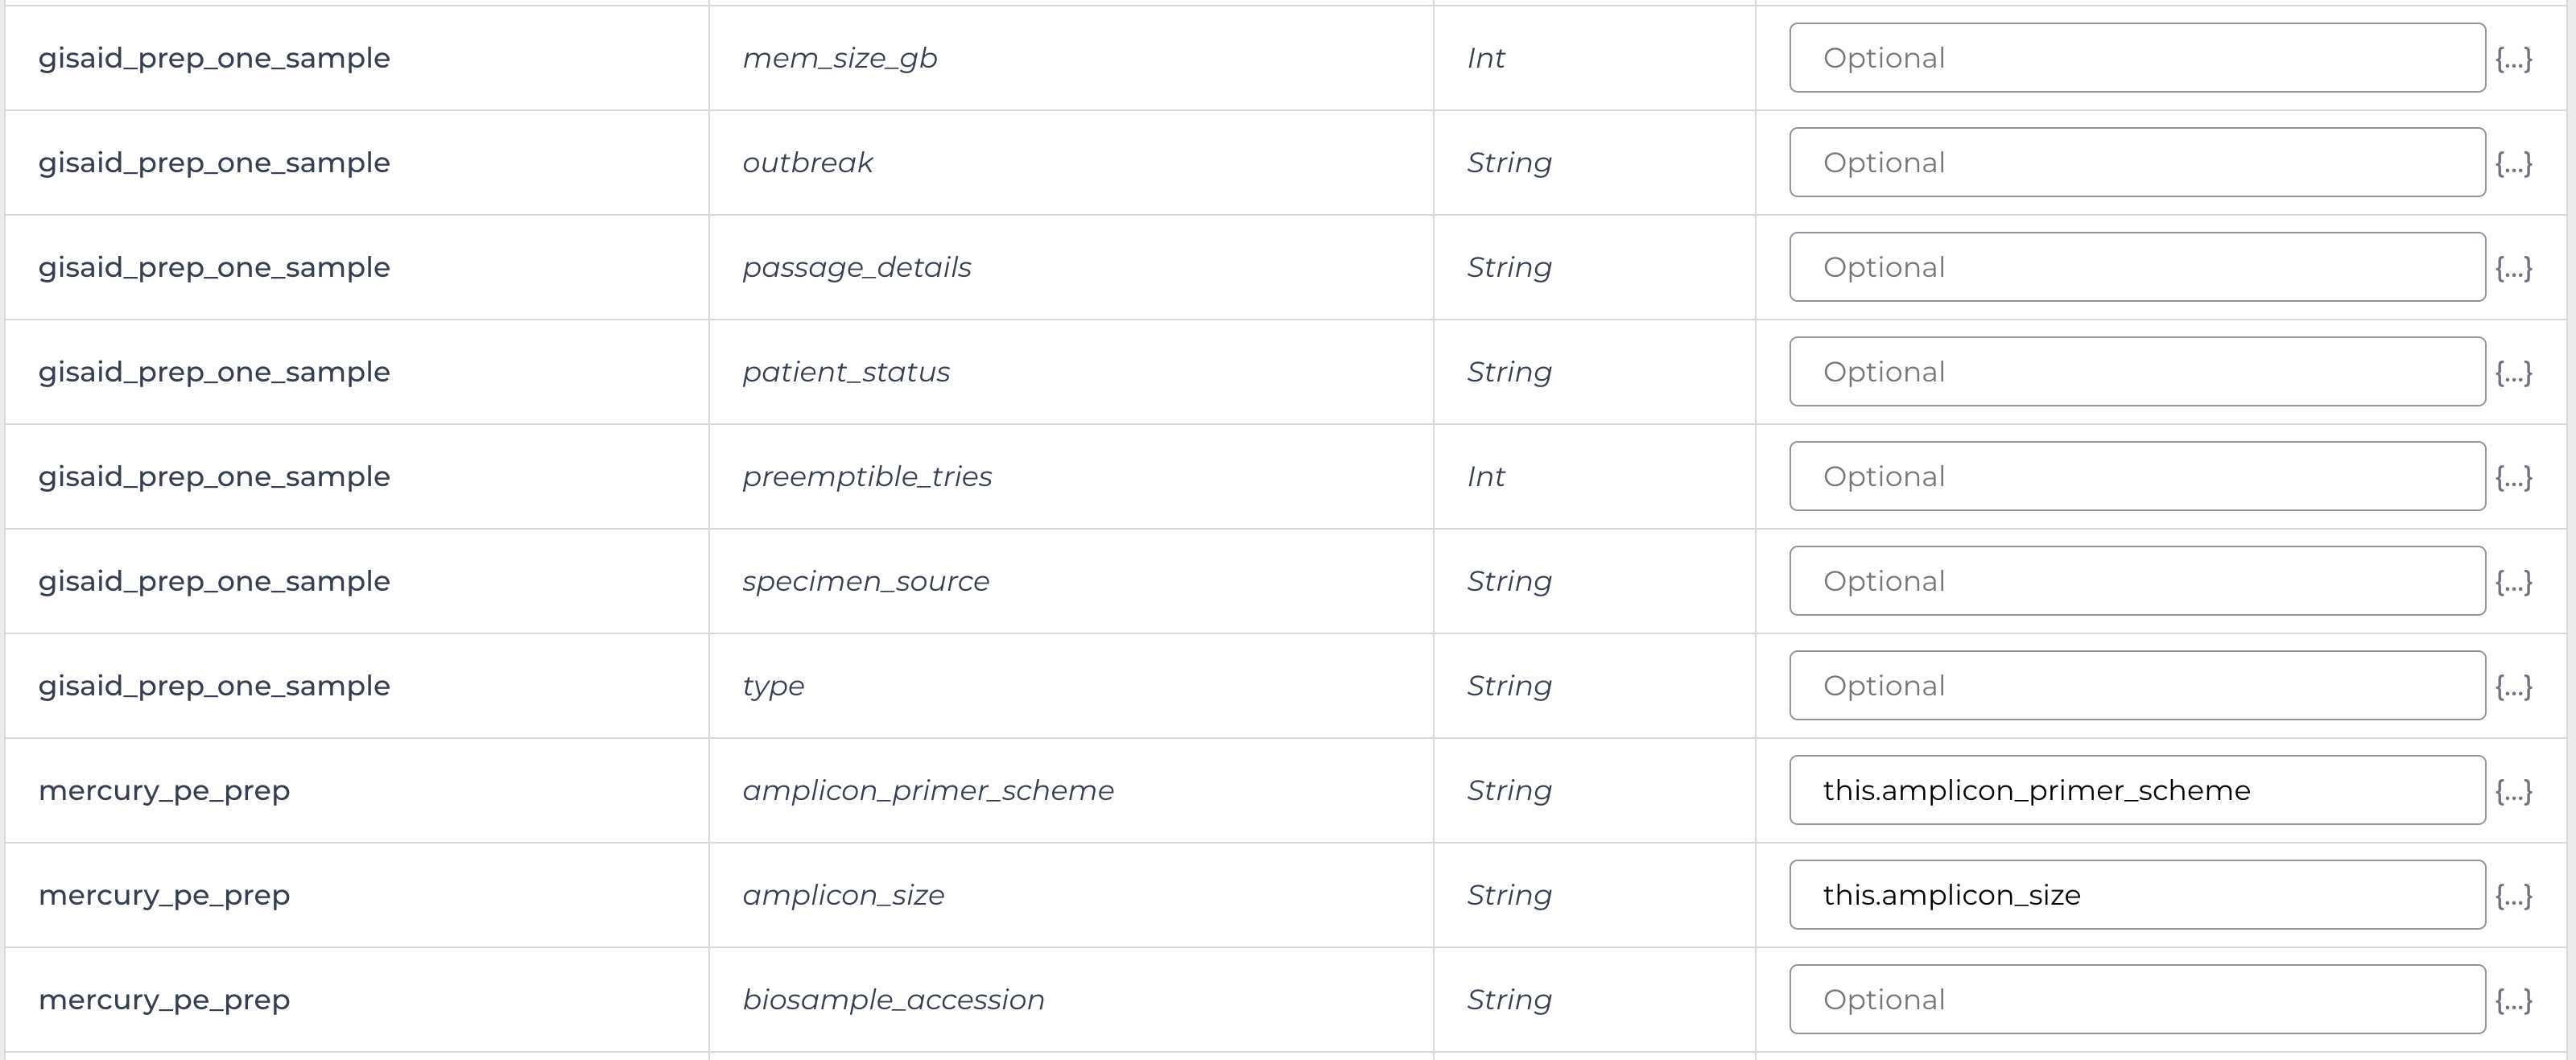
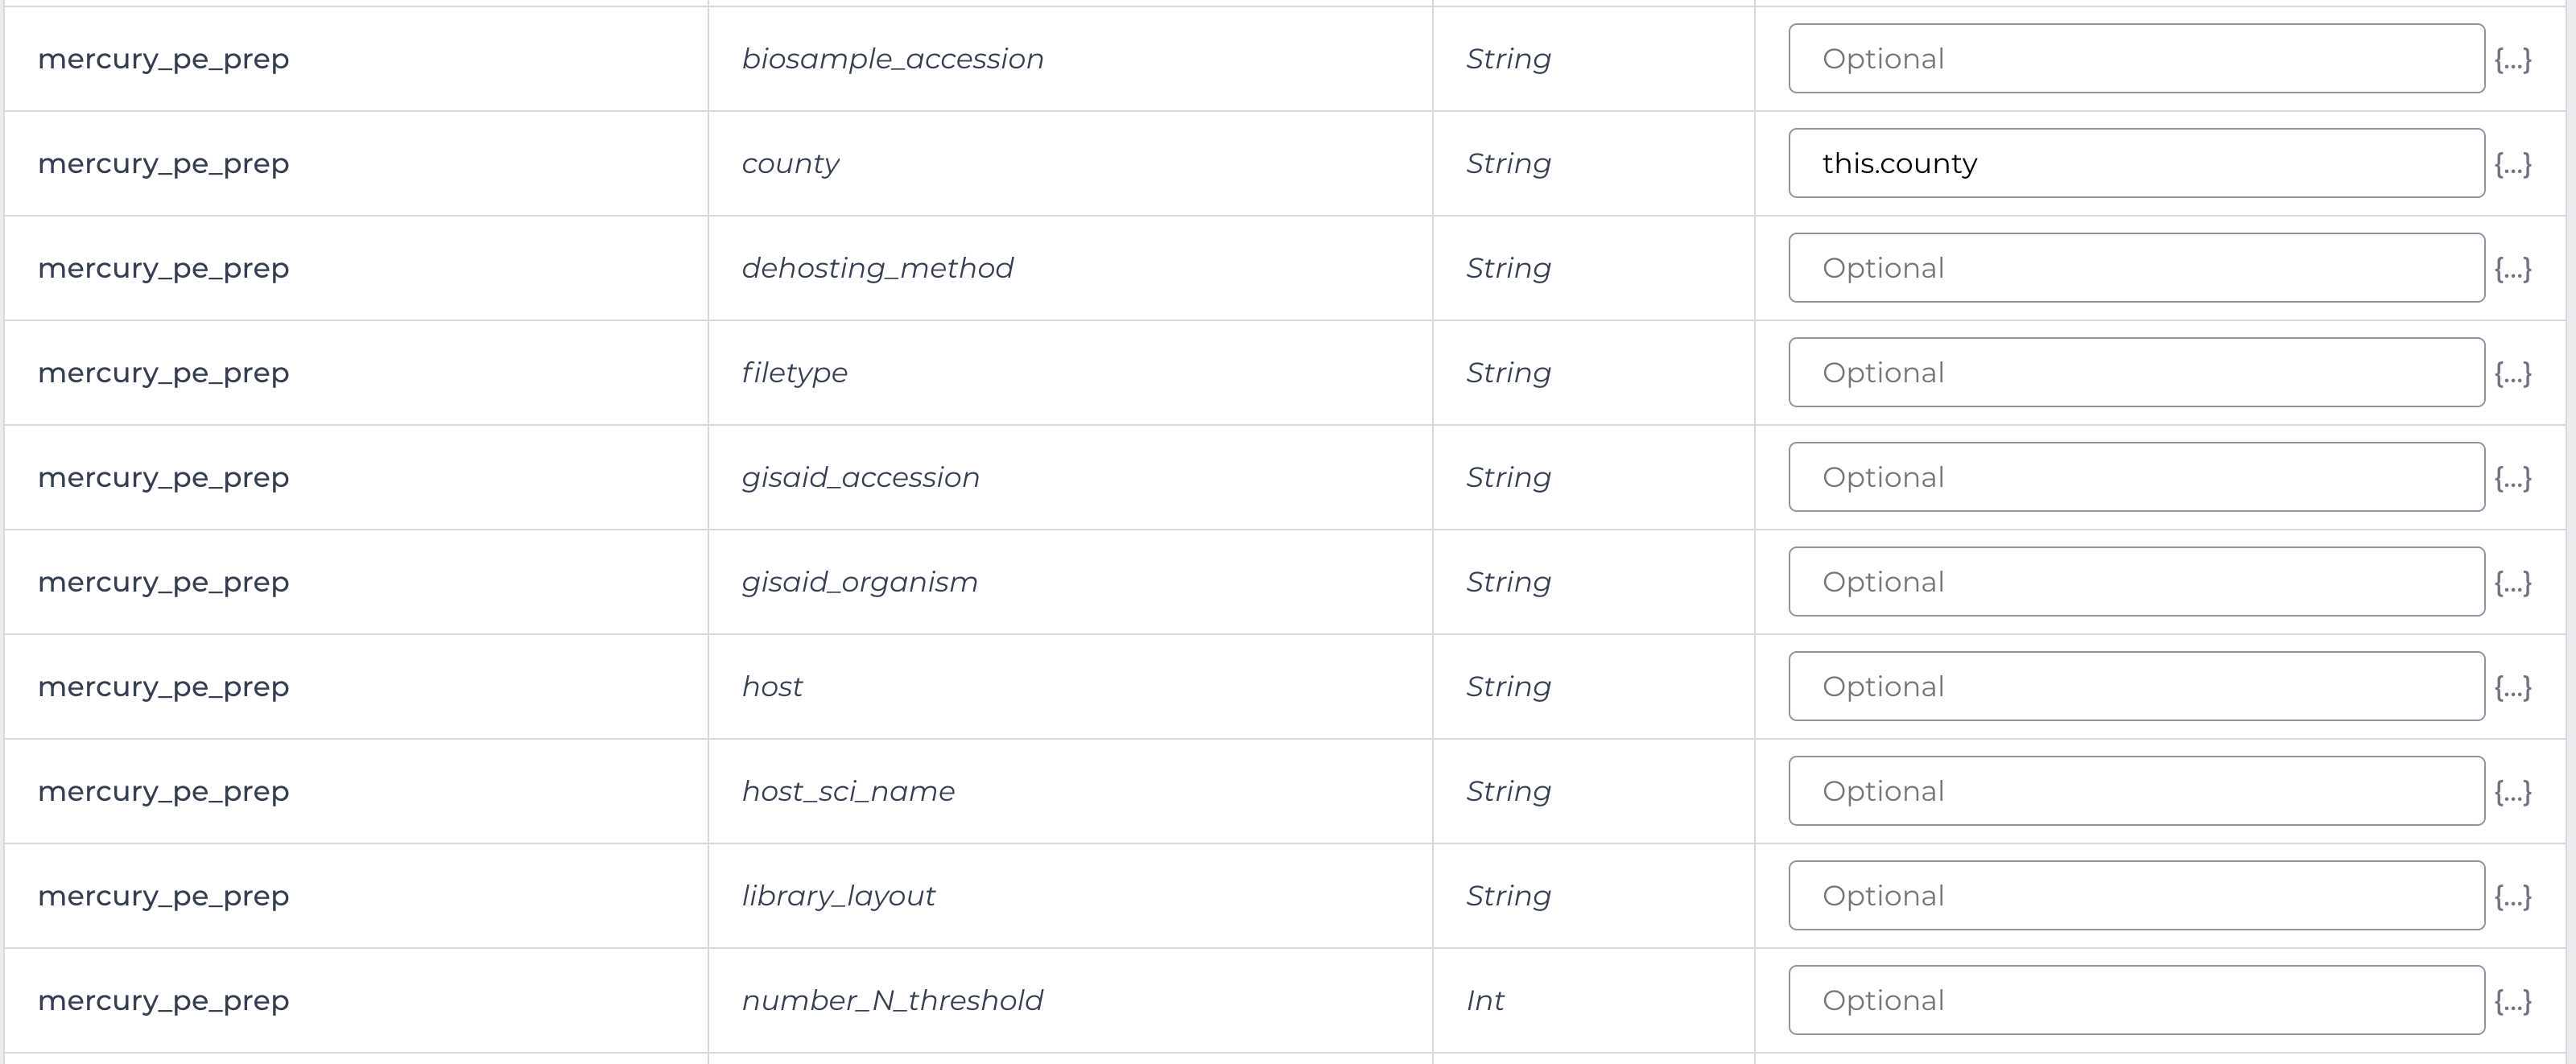
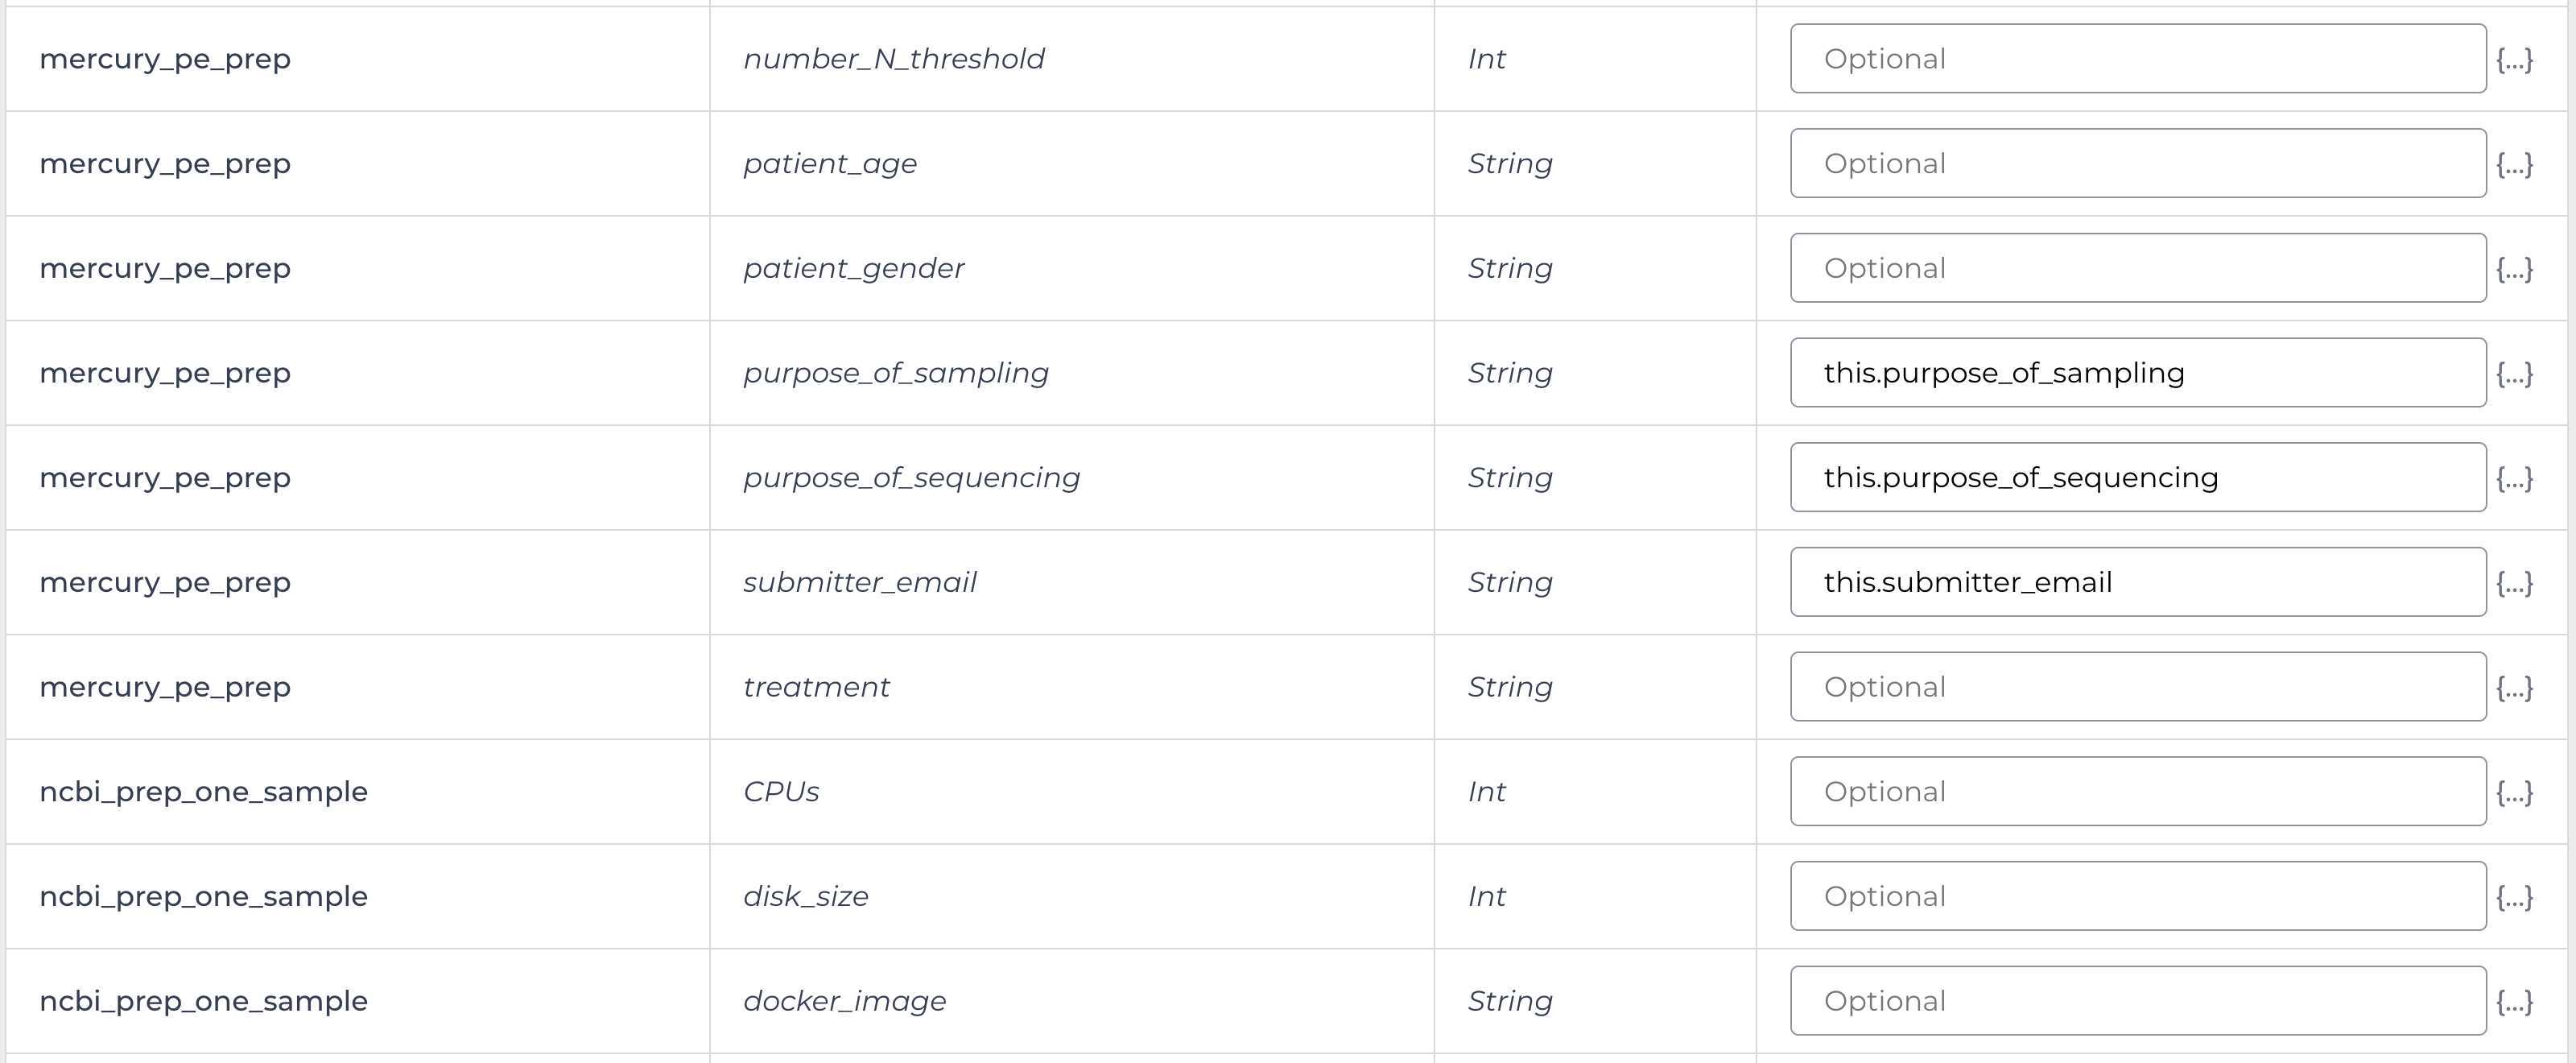
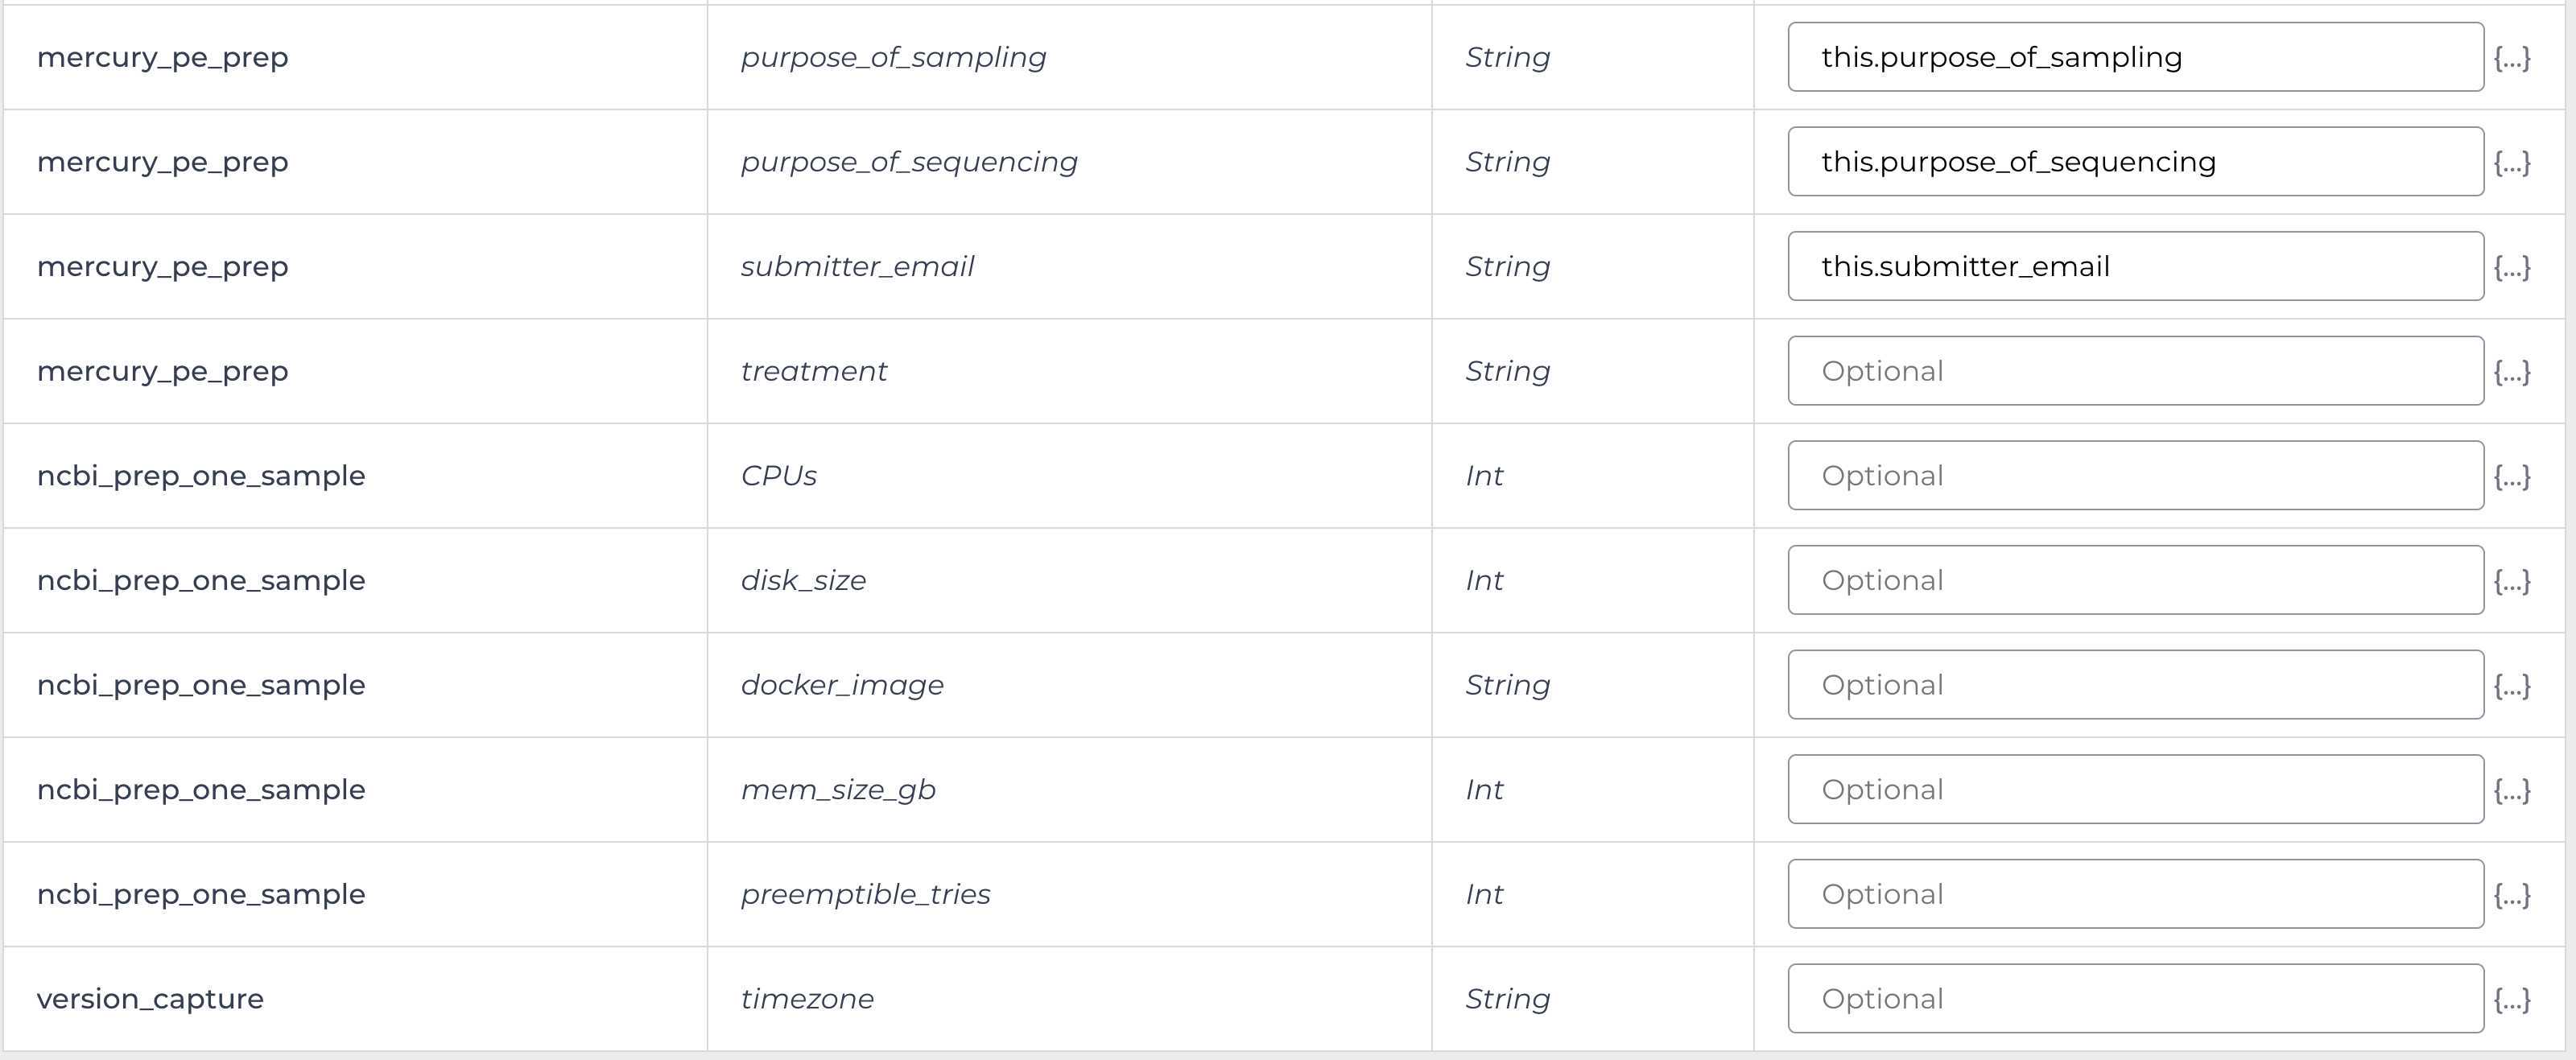
Enter the input attributes:
 the following fields must be modified:assembly_fasta -> clearlabs_fastaassembly_mean_coverage -> clearlabs_assembly_coveragereads_dehosted -> clearlabs_fastq_gz")
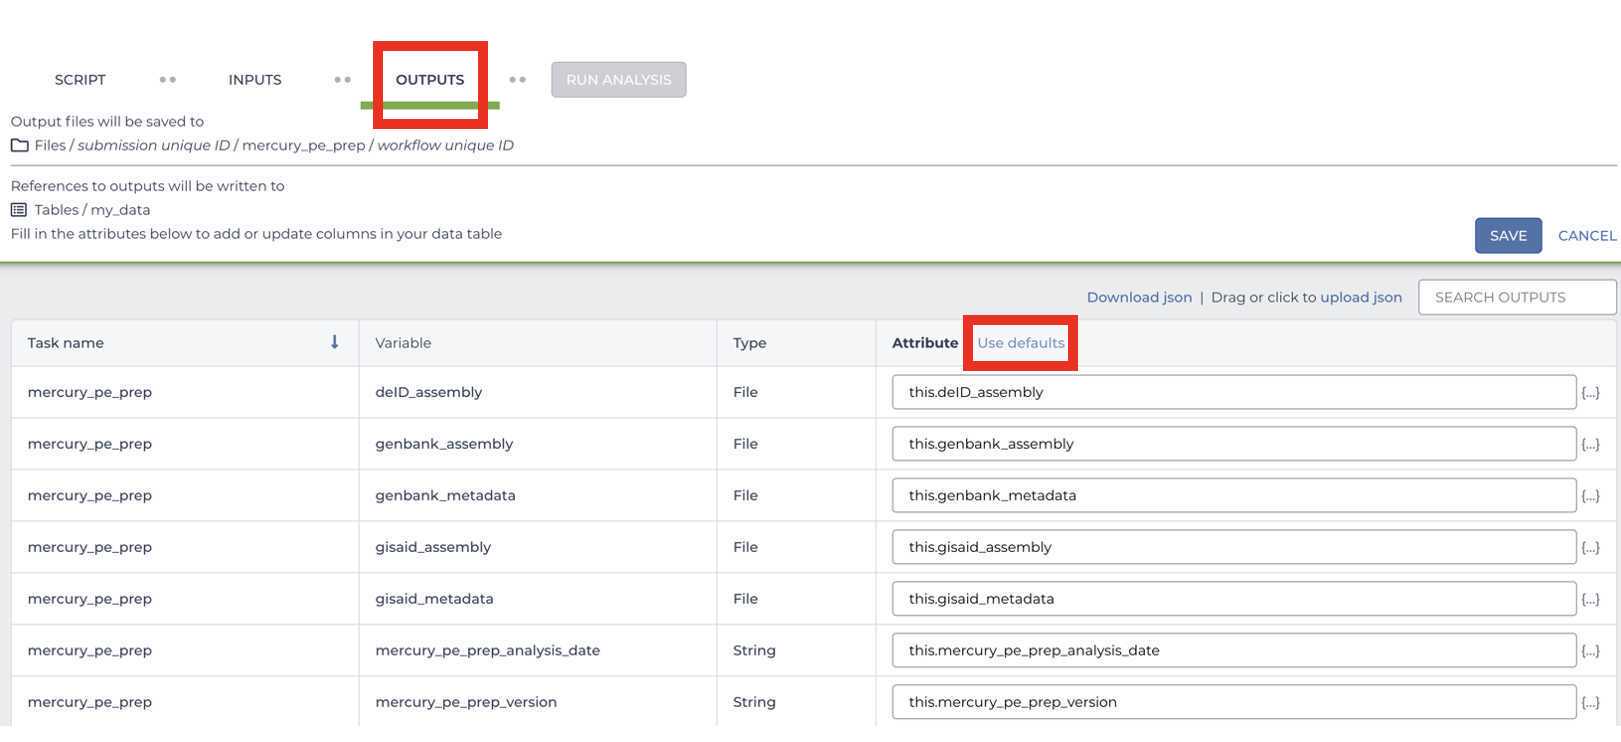
Select the default outputs:
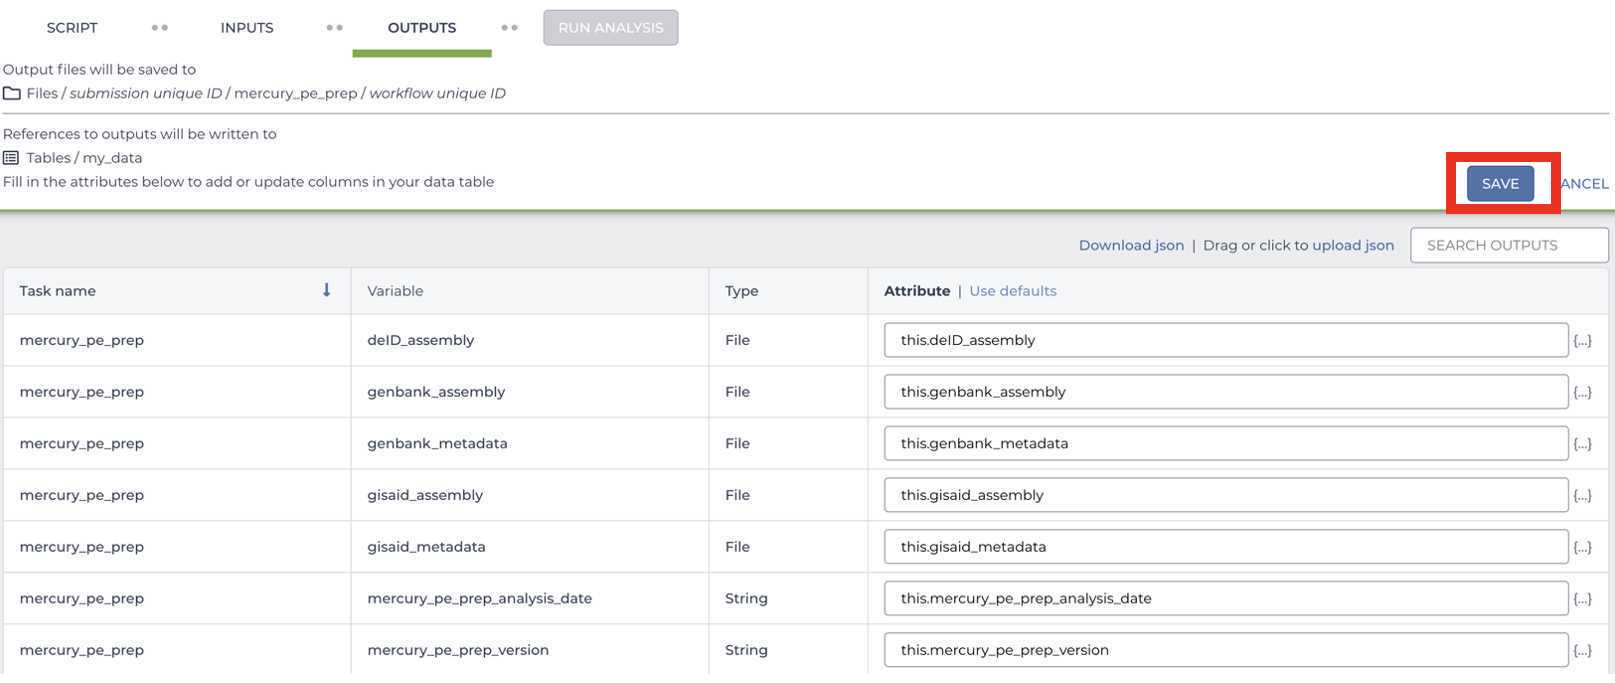
Once the inputs and outputs have been defined, Save the workflow parameters:
Click RUN ANALYSIS

Confirm and launch the analysis by clicking LAUNCH:
Mercury Batch
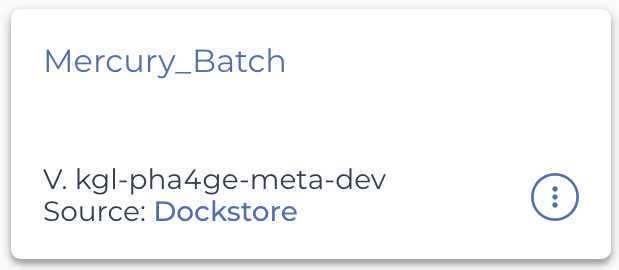
Once Mercury Prep has successfully completed navigate to the Mercury Batch workflow:
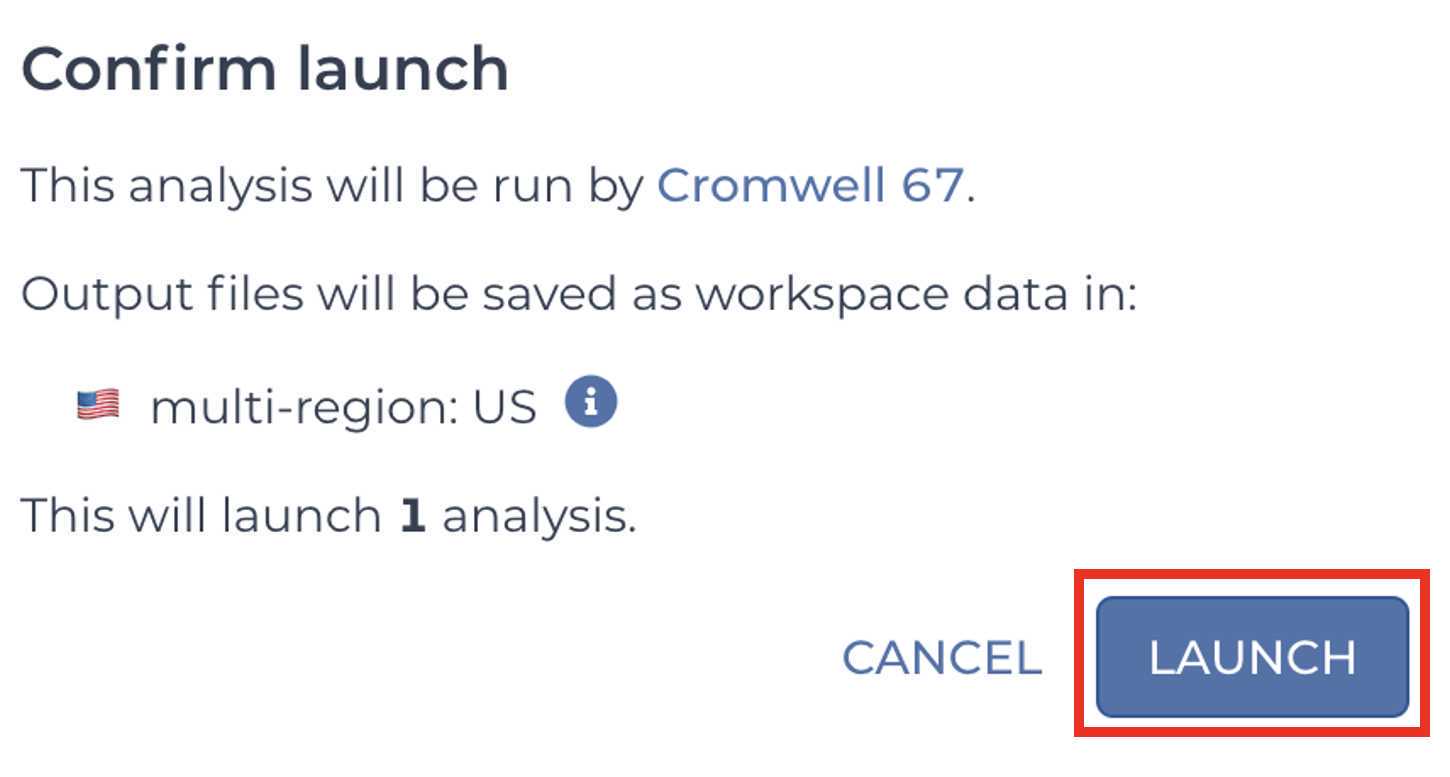
Click RUN ANALYSIS

Confirm and launch the analysis by clicking LAUNCH:

Retrieve your submission files by navigating to the Terra Data Table containing the Mercury Batch outputs:

Click on the file names in blue:

Download the files:
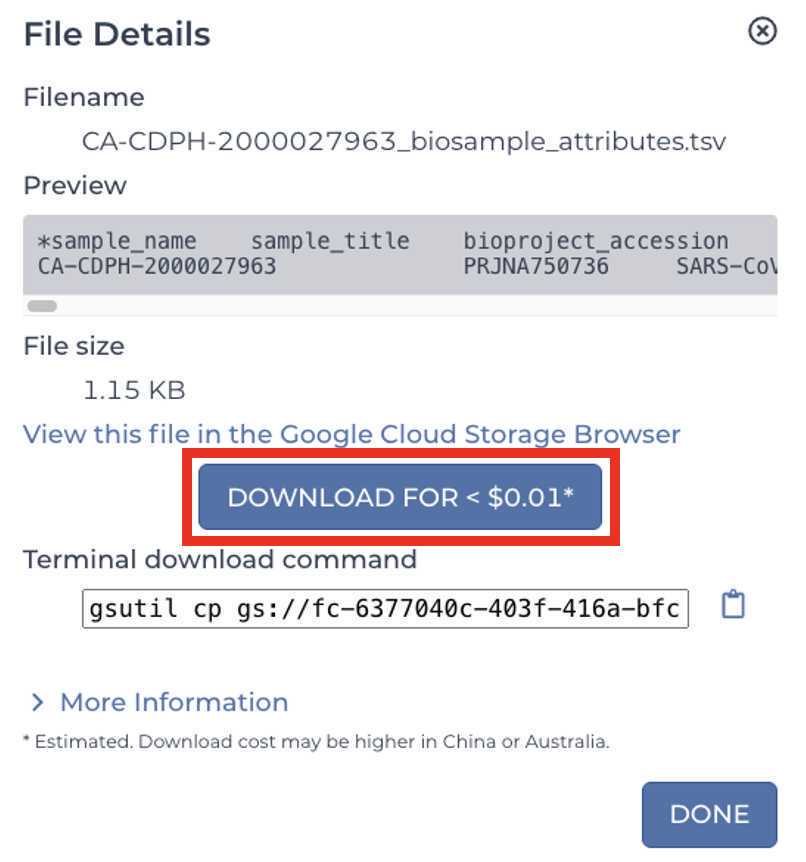
These are the four files that will be required for SRA and Genbank submission:

Select the appropriate version of the workflow:
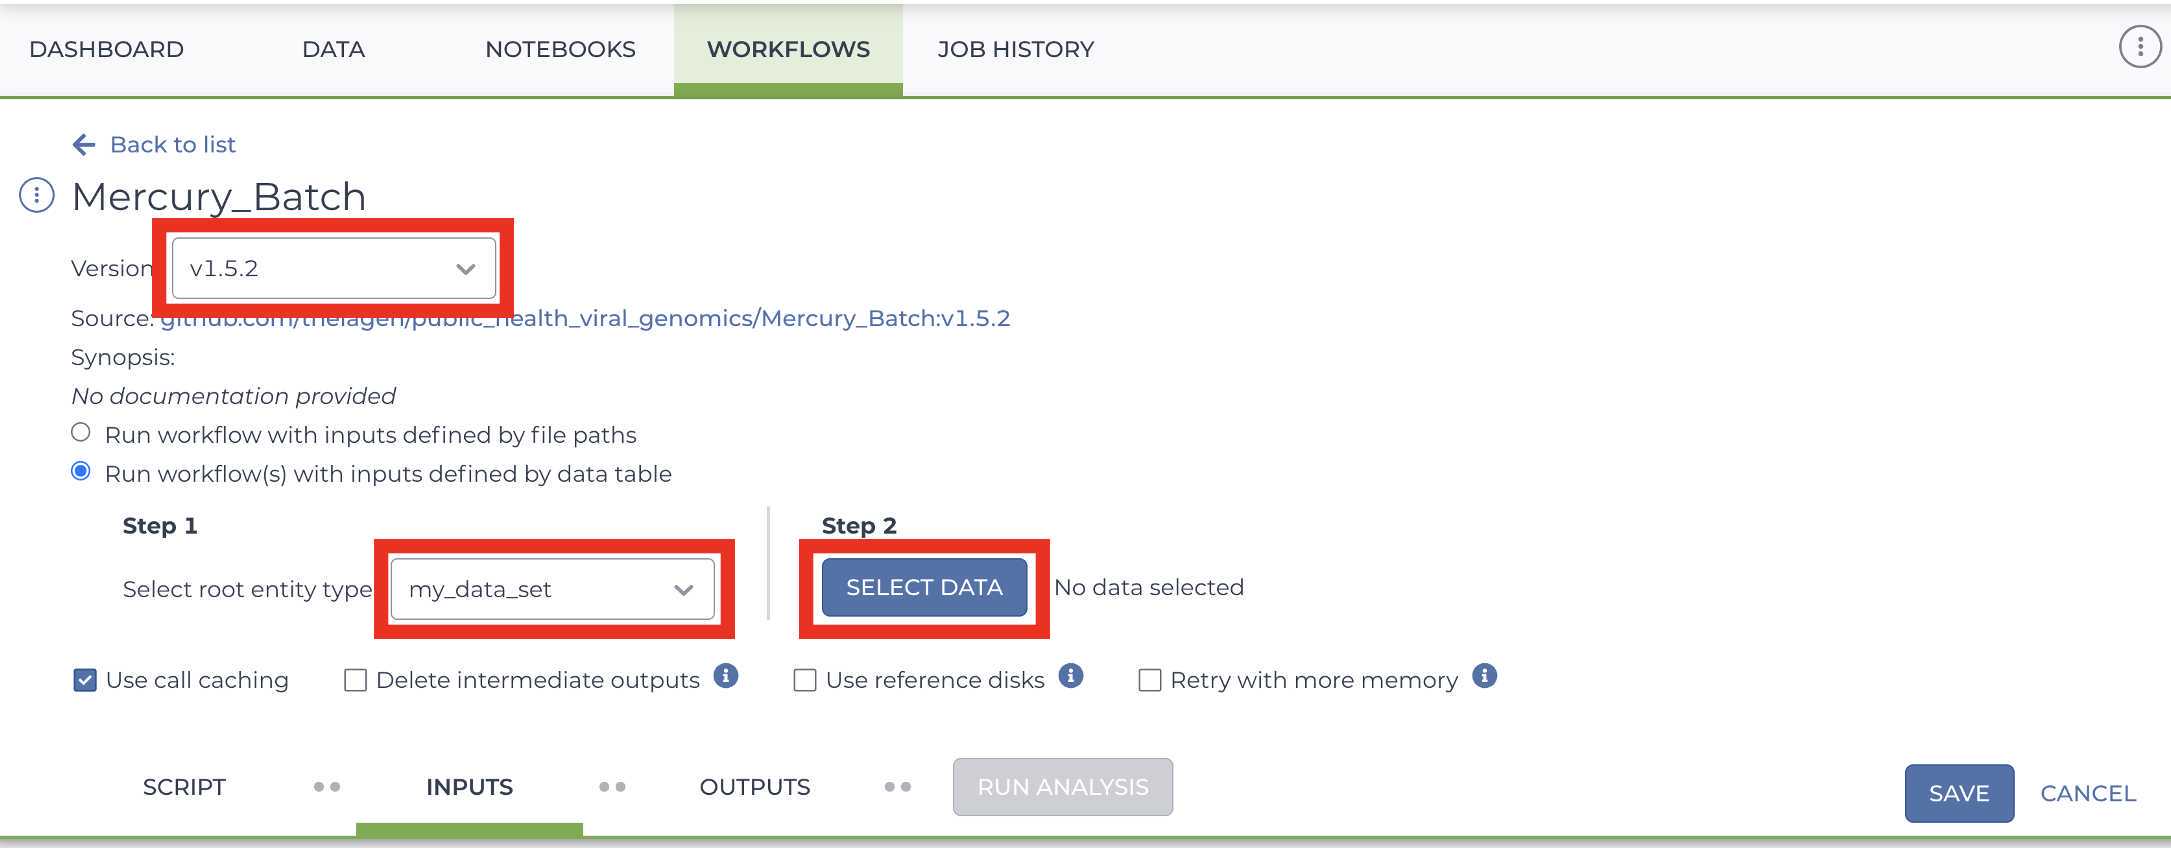
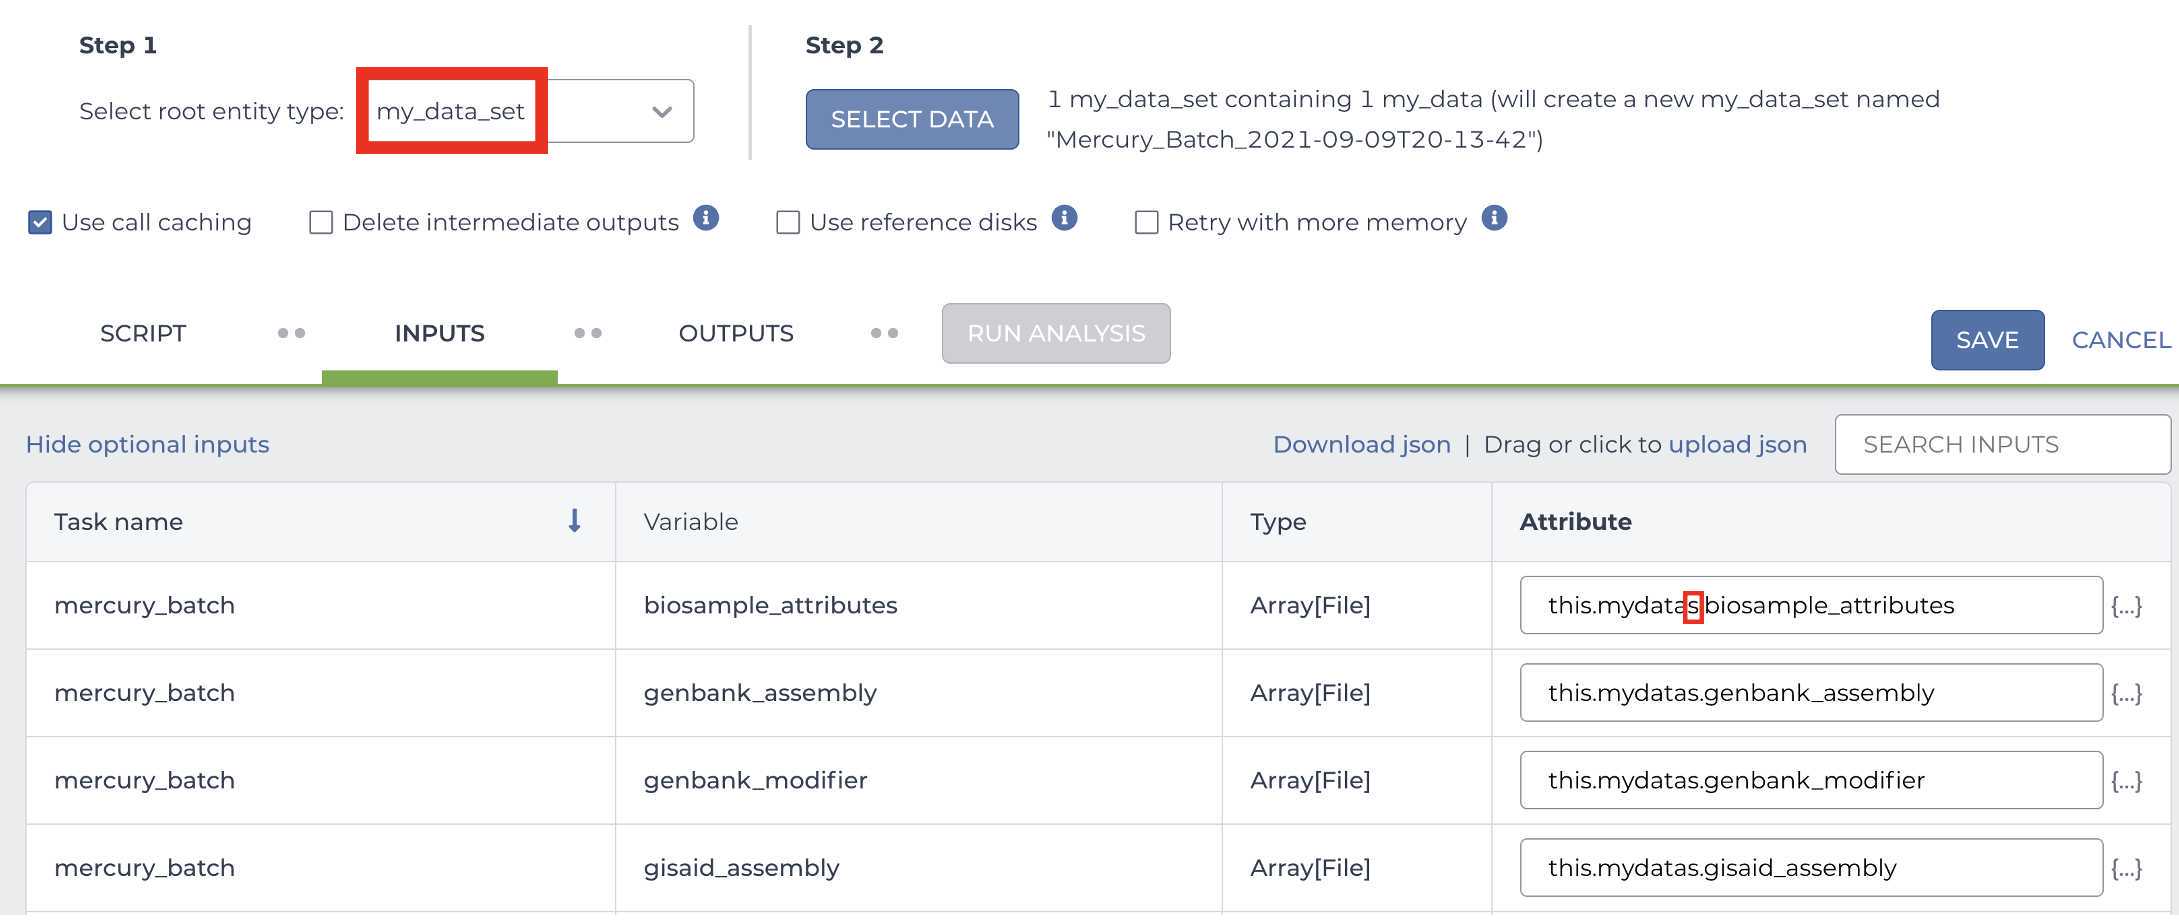
Select the SET LEVEL root entity type:
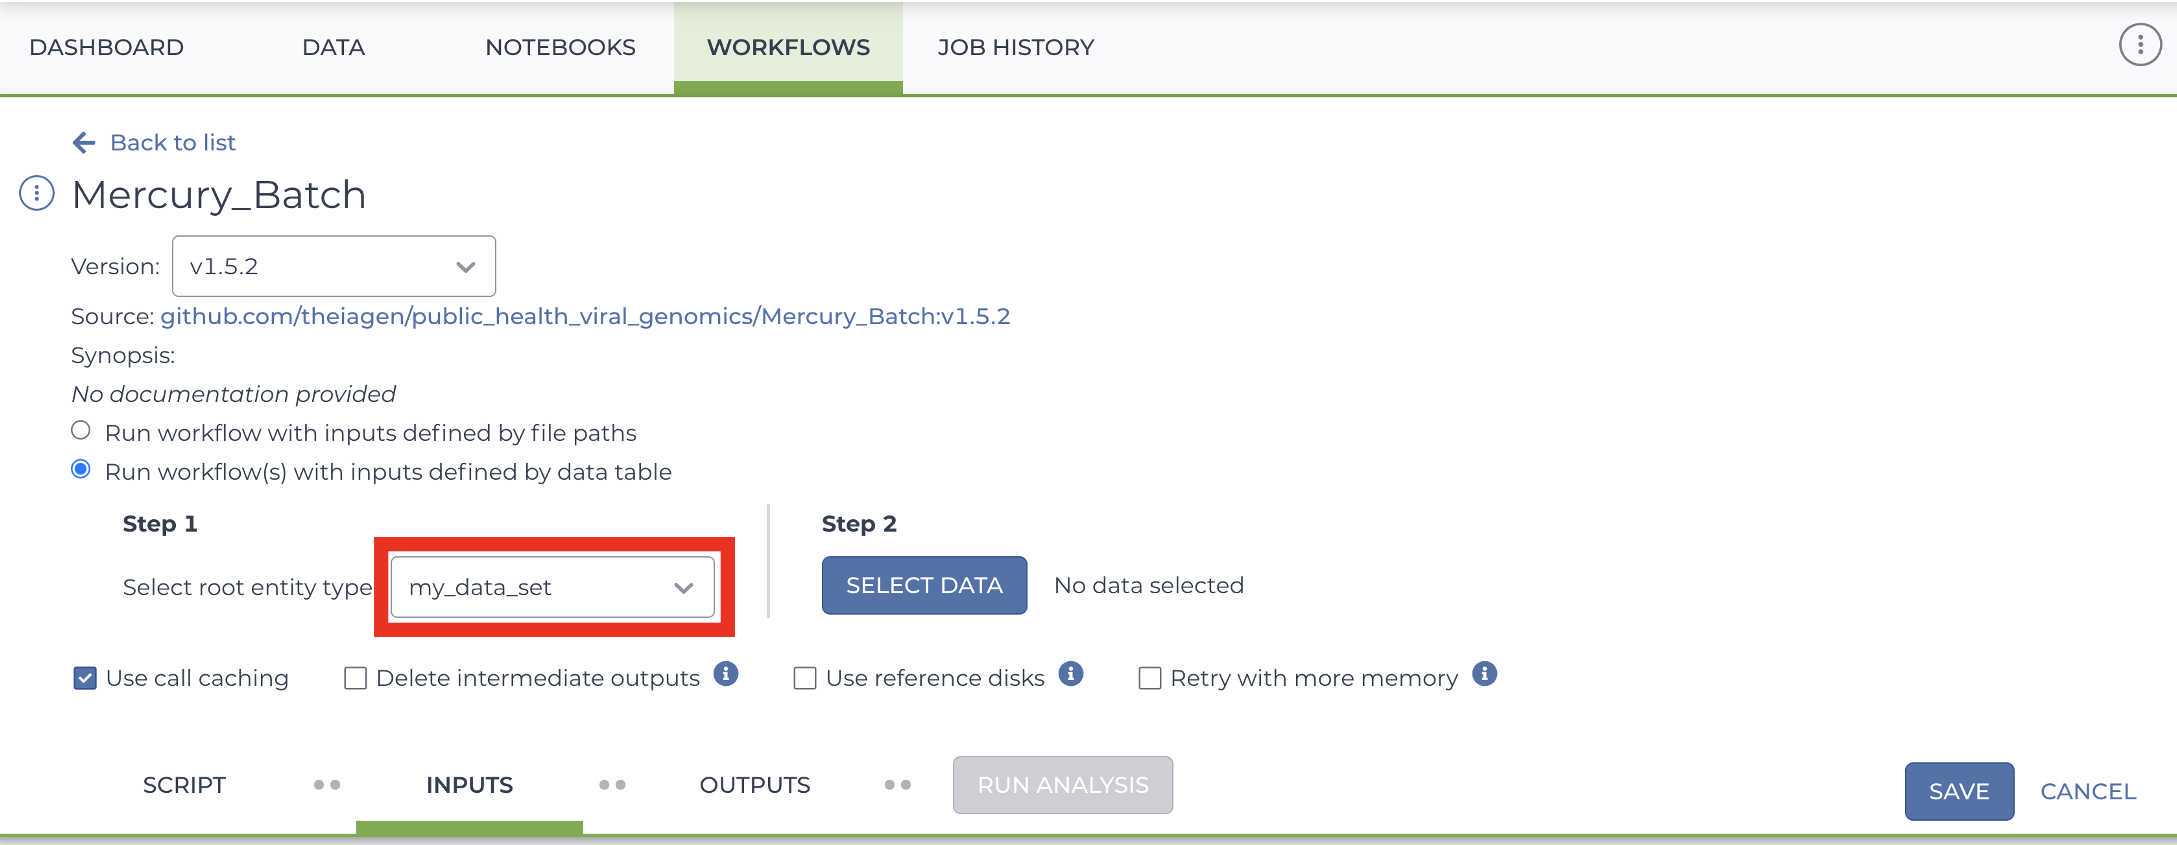
Click SELECT DATA:
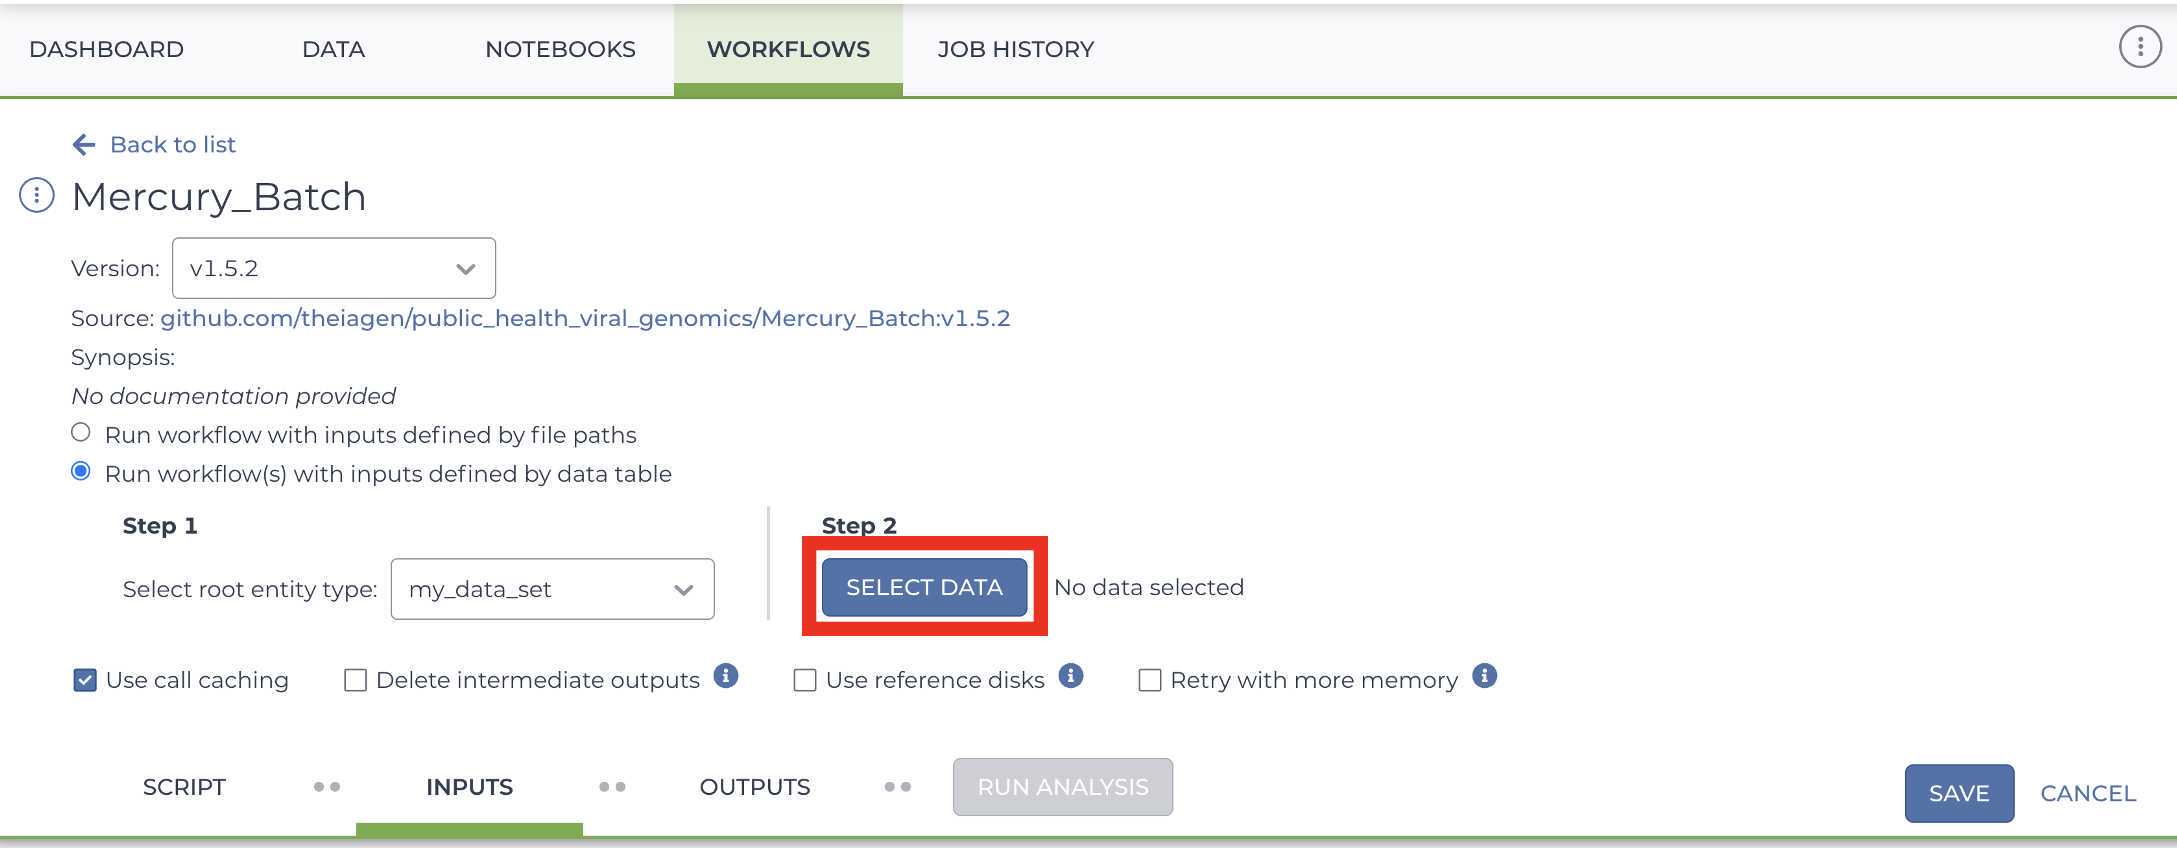
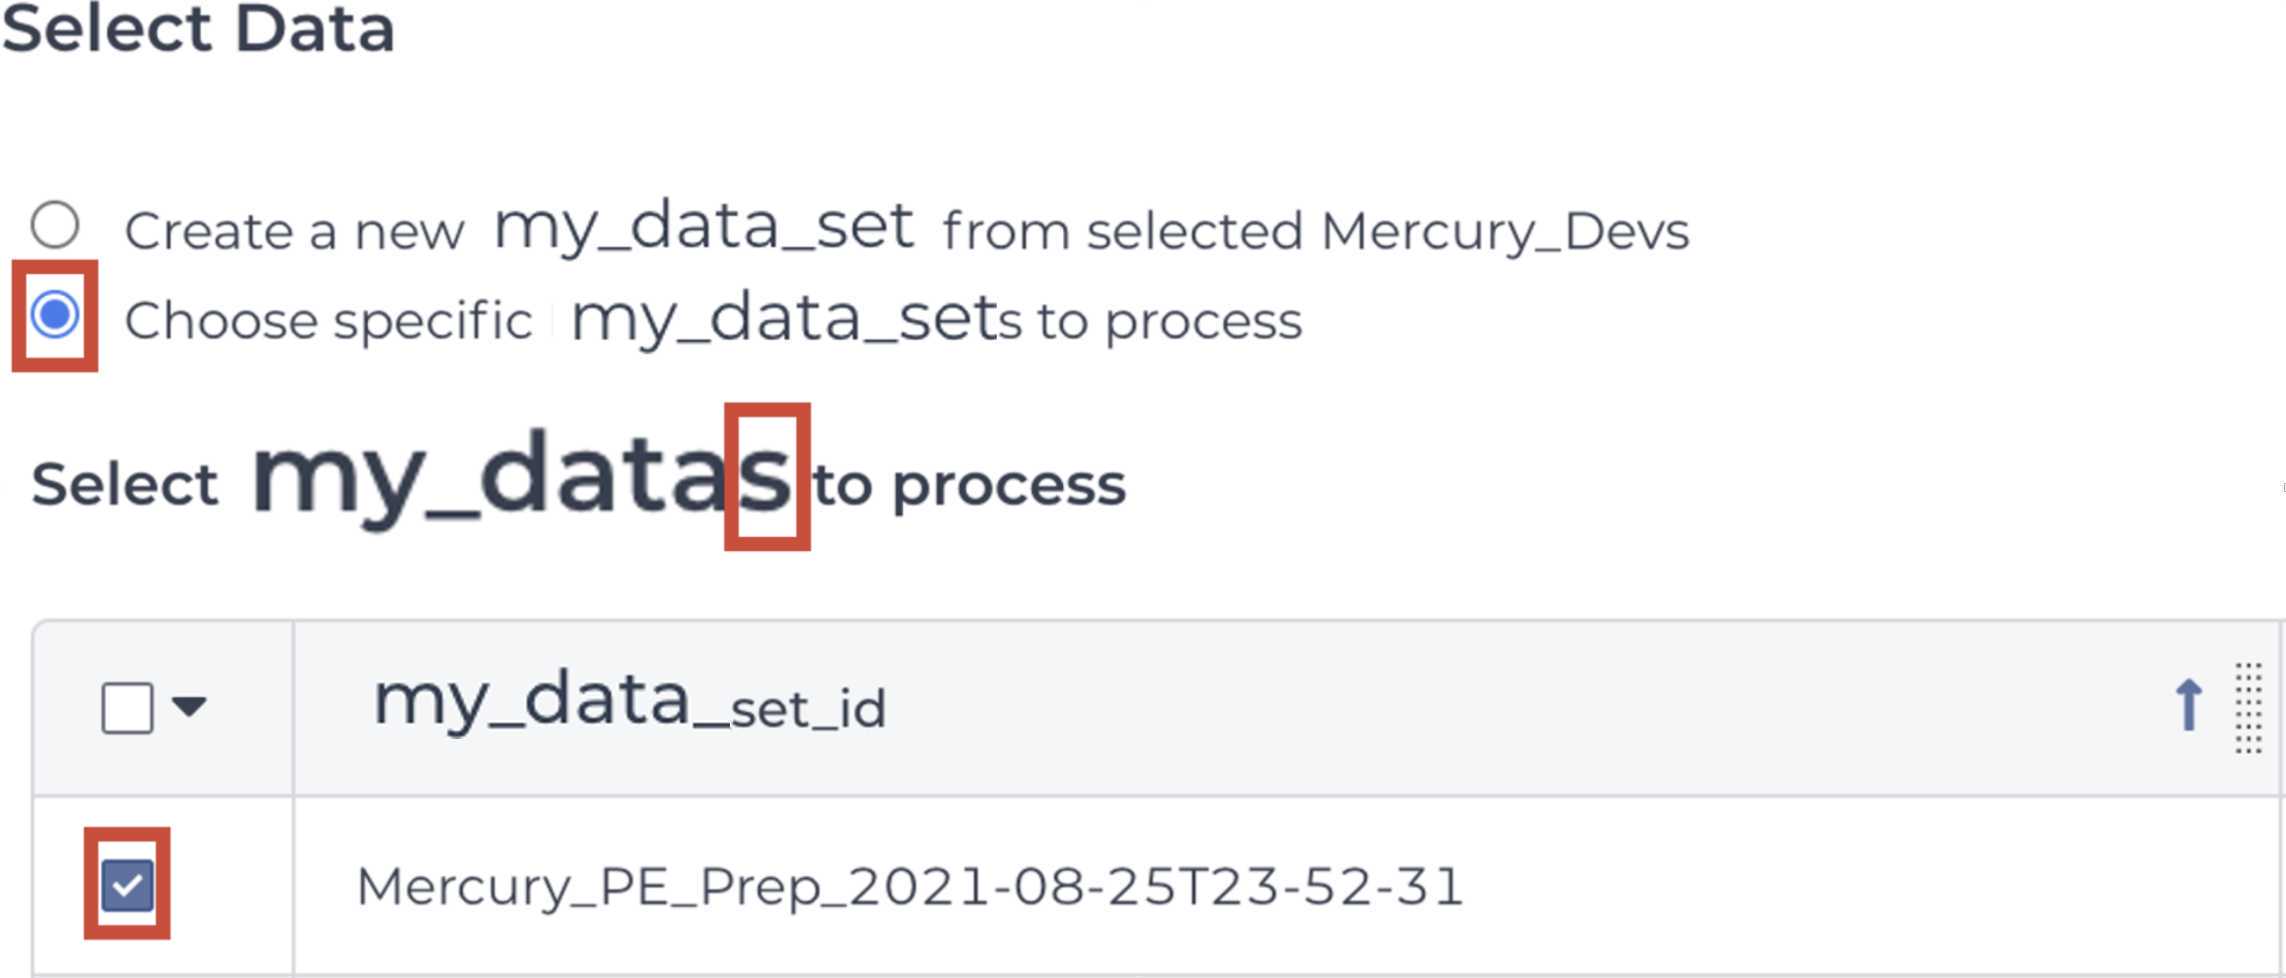
Select the dataset of sample that you would like to batch for submission (Note: the dataset root entity is the plural form of the original root entity):
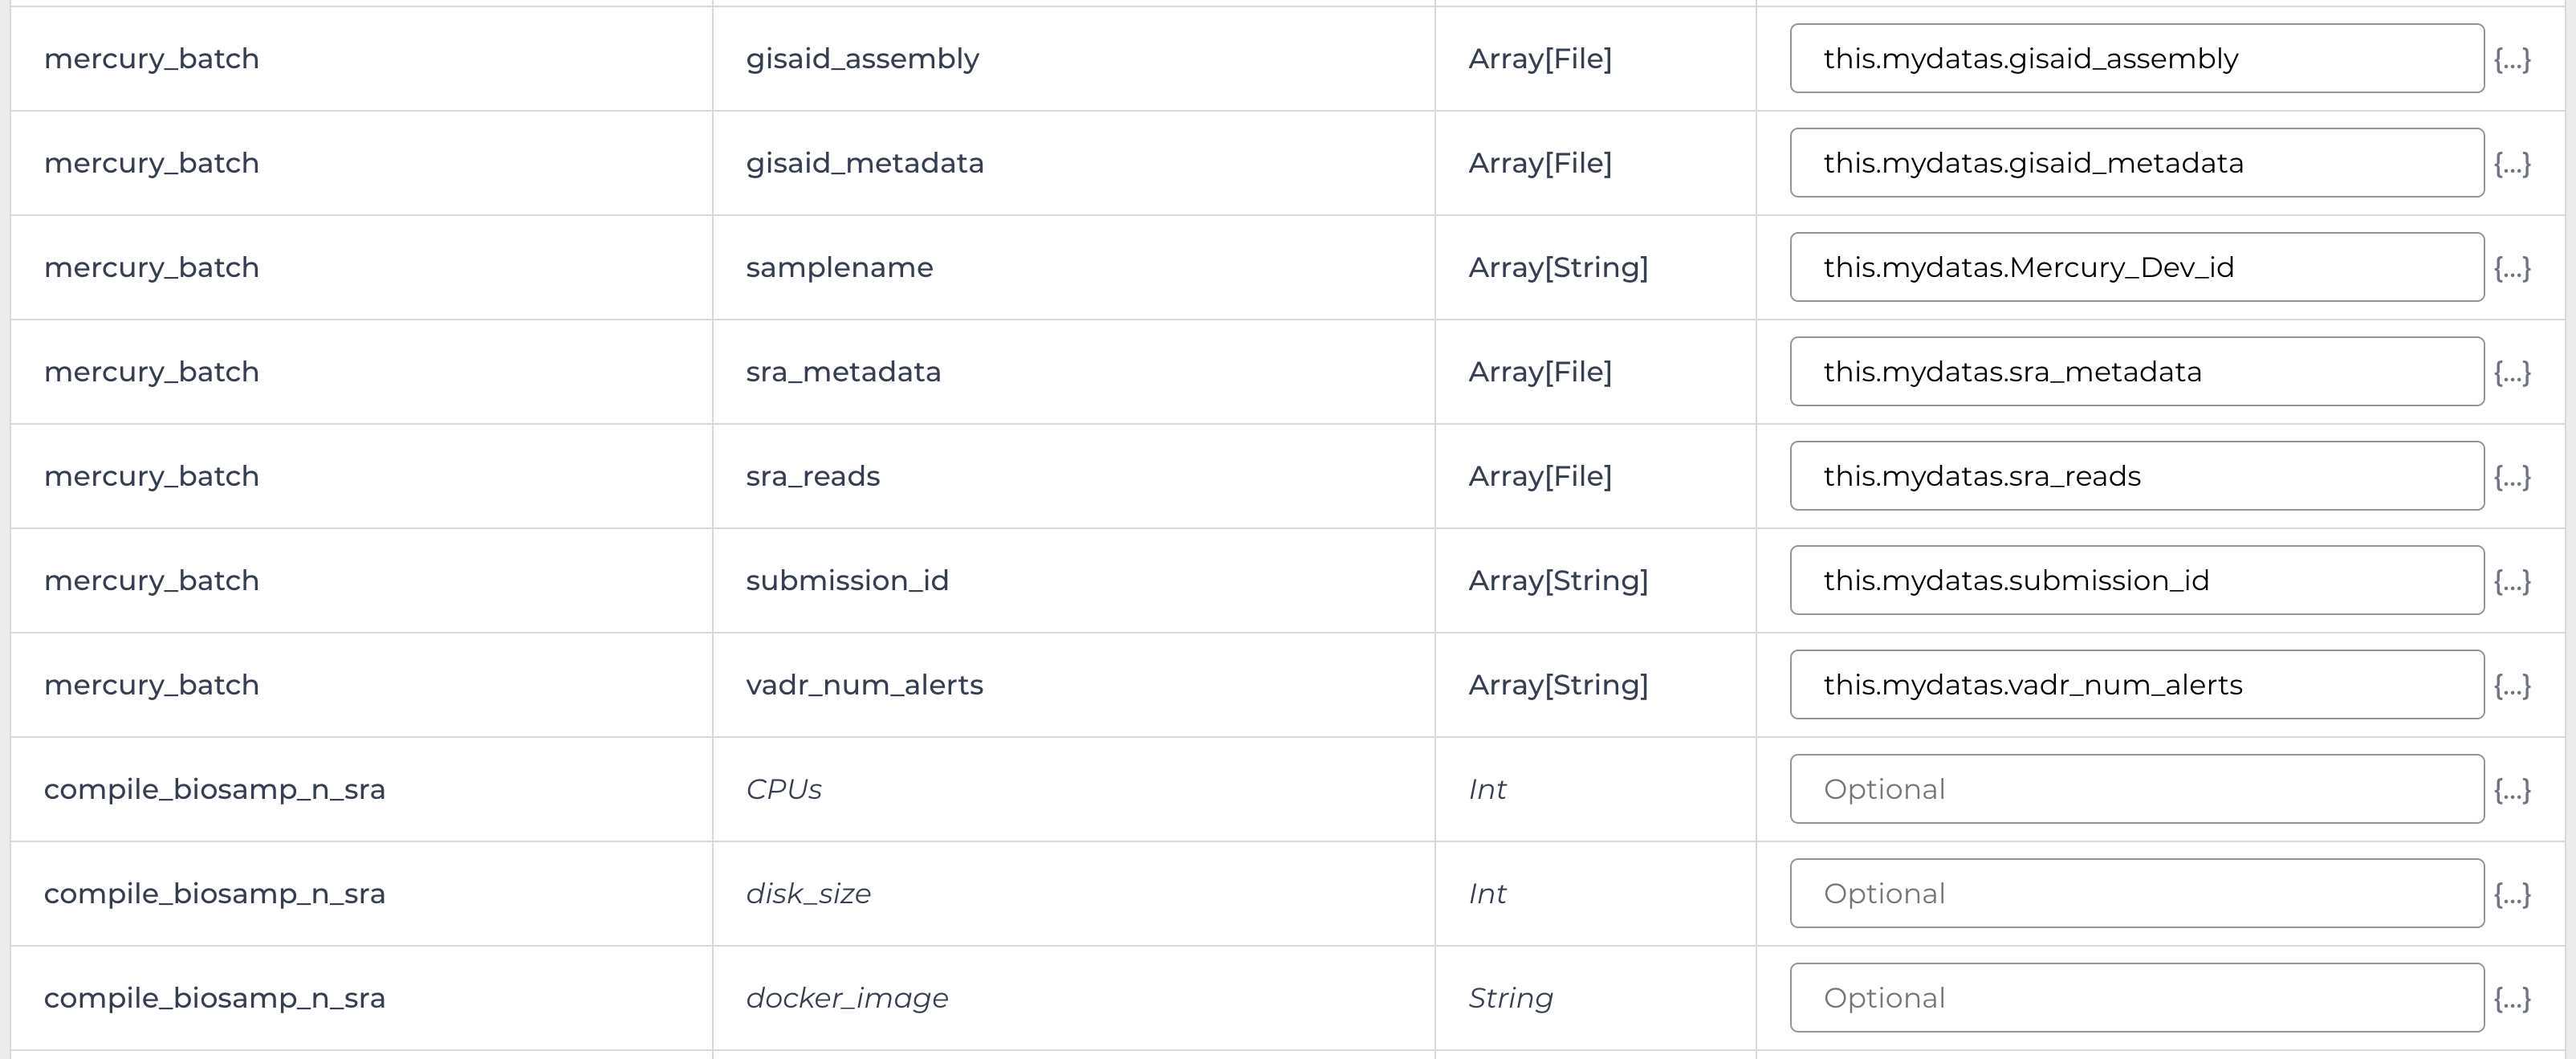
Enter the INPUTS. The inputs for Mercury Batch will be entered at the Array Level. This means the notation will be formatted as this.data_sets.{attribute}:
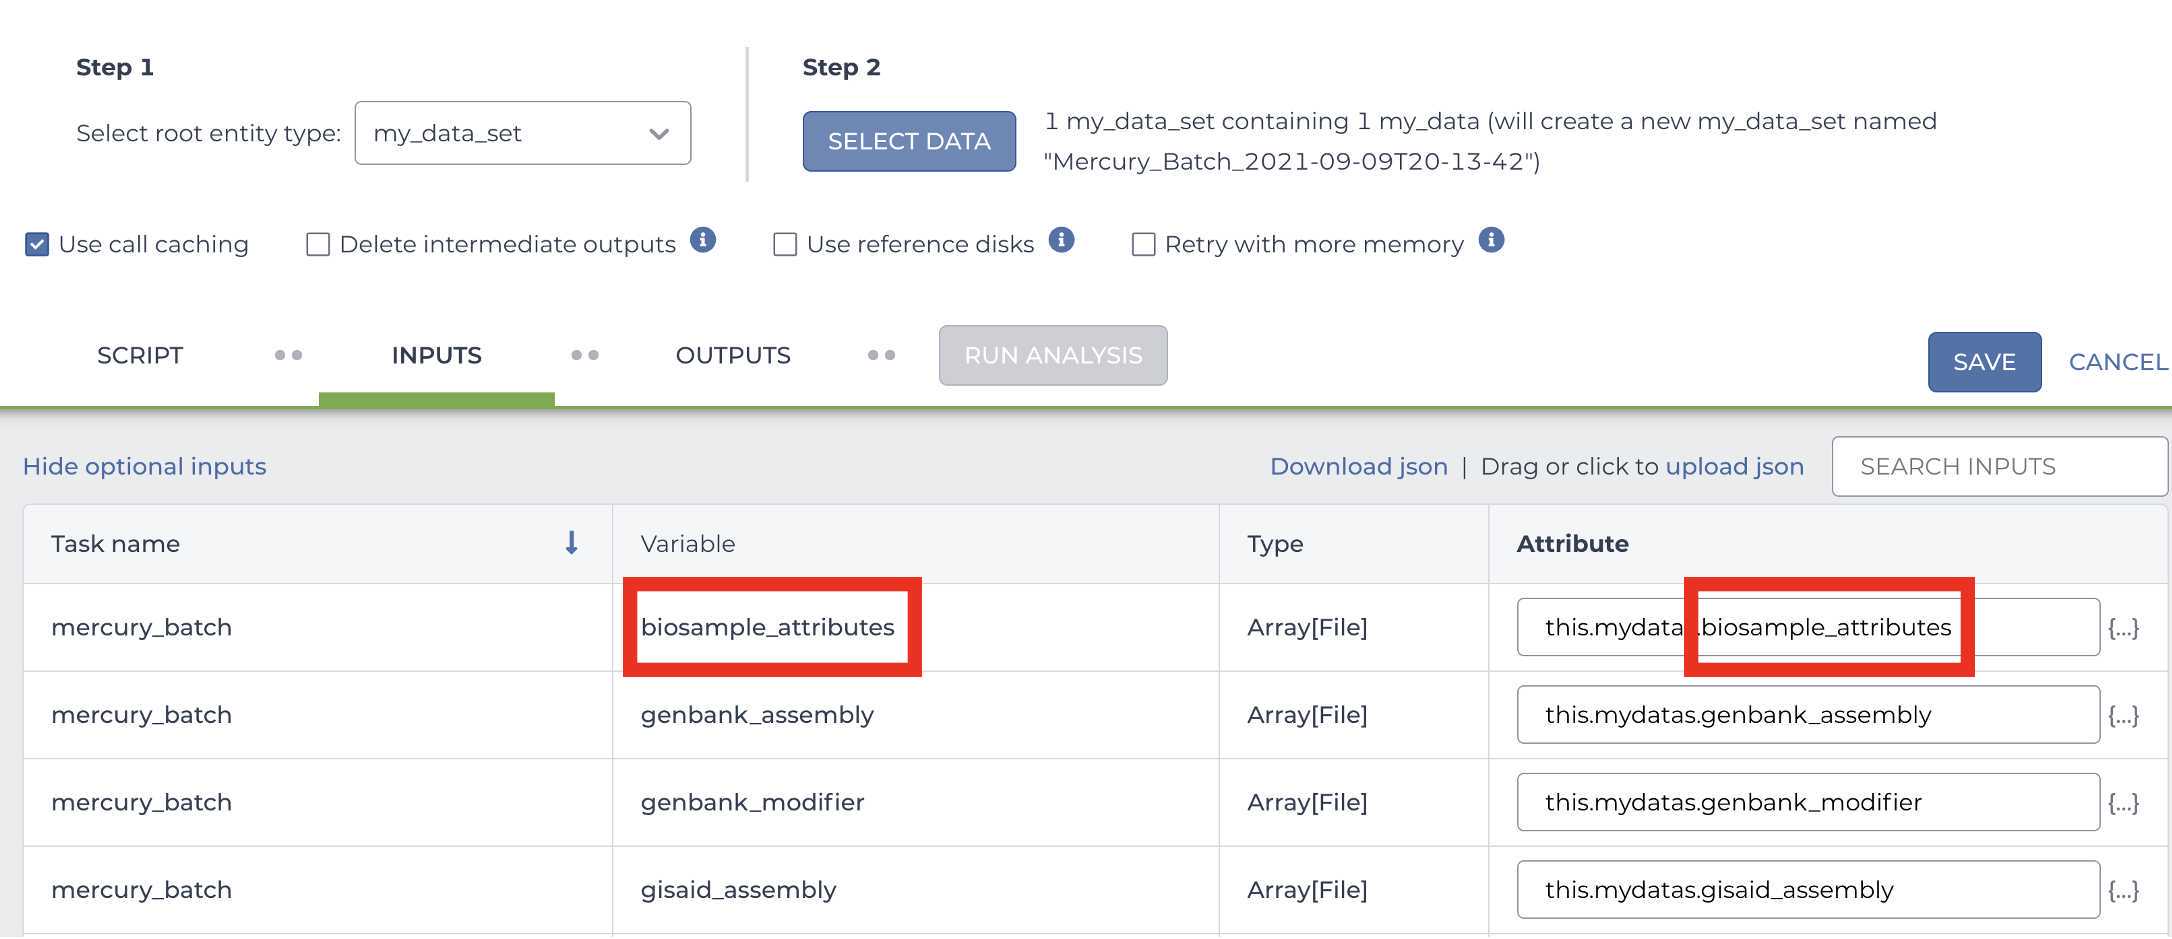
And note the set level attribute (middle of the two decimal points) is the pleural form of the original root entity.
<img src="https://static.yanyin.tech/literature_test/protocol_io_true/protocols.io.b3jaqkie/gbgxbmdfx32.jpg" alt="Note the gcp_bucket variable included here: "gs://theiagen_sra_transfer"" loading="lazy" title="Note the gcp_bucket variable included here: "gs://theiagen_sra_transfer""/>
Enter the public GCP bucket to stage your data for the final submission to NCBI SRA:
<img src="https://static.yanyin.tech/literature_test/protocol_io_true/protocols.io.b3jaqkie/gbhbbmdfx33.jpg" alt="Note: If you are using the theiagen_sra_transfer GCP bucket please ensure that you have write access to the public Theiagen GCP bucket for NCBI submission:"gs://theiagen_sra_transfer"If you are unsure or have any questions please reach out to our support emai:support@terrapublichealth.zendesk.comThis bucket location will be required by the NCBI SRA submission portal to retrieve your reads. When prompted by the submission portal in step 6.10 please use the gcp location only (without the url prefix, and without the quotes):theiagen_sra_transfer" loading="lazy" title="Note: If you are using the theiagen_sra_transfer GCP bucket please ensure that you have write access to the public Theiagen GCP bucket for NCBI submission:"gs://theiagen_sra_transfer"If you are unsure or have any questions please reach out to our support emai:support@terrapublichealth.zendesk.comThis bucket location will be required by the NCBI SRA submission portal to retrieve your reads. When prompted by the submission portal in step 6.10 please use the gcp location only (without the url prefix, and without the quotes):theiagen_sra_transfer"/>
Select the default OUTPUTS:
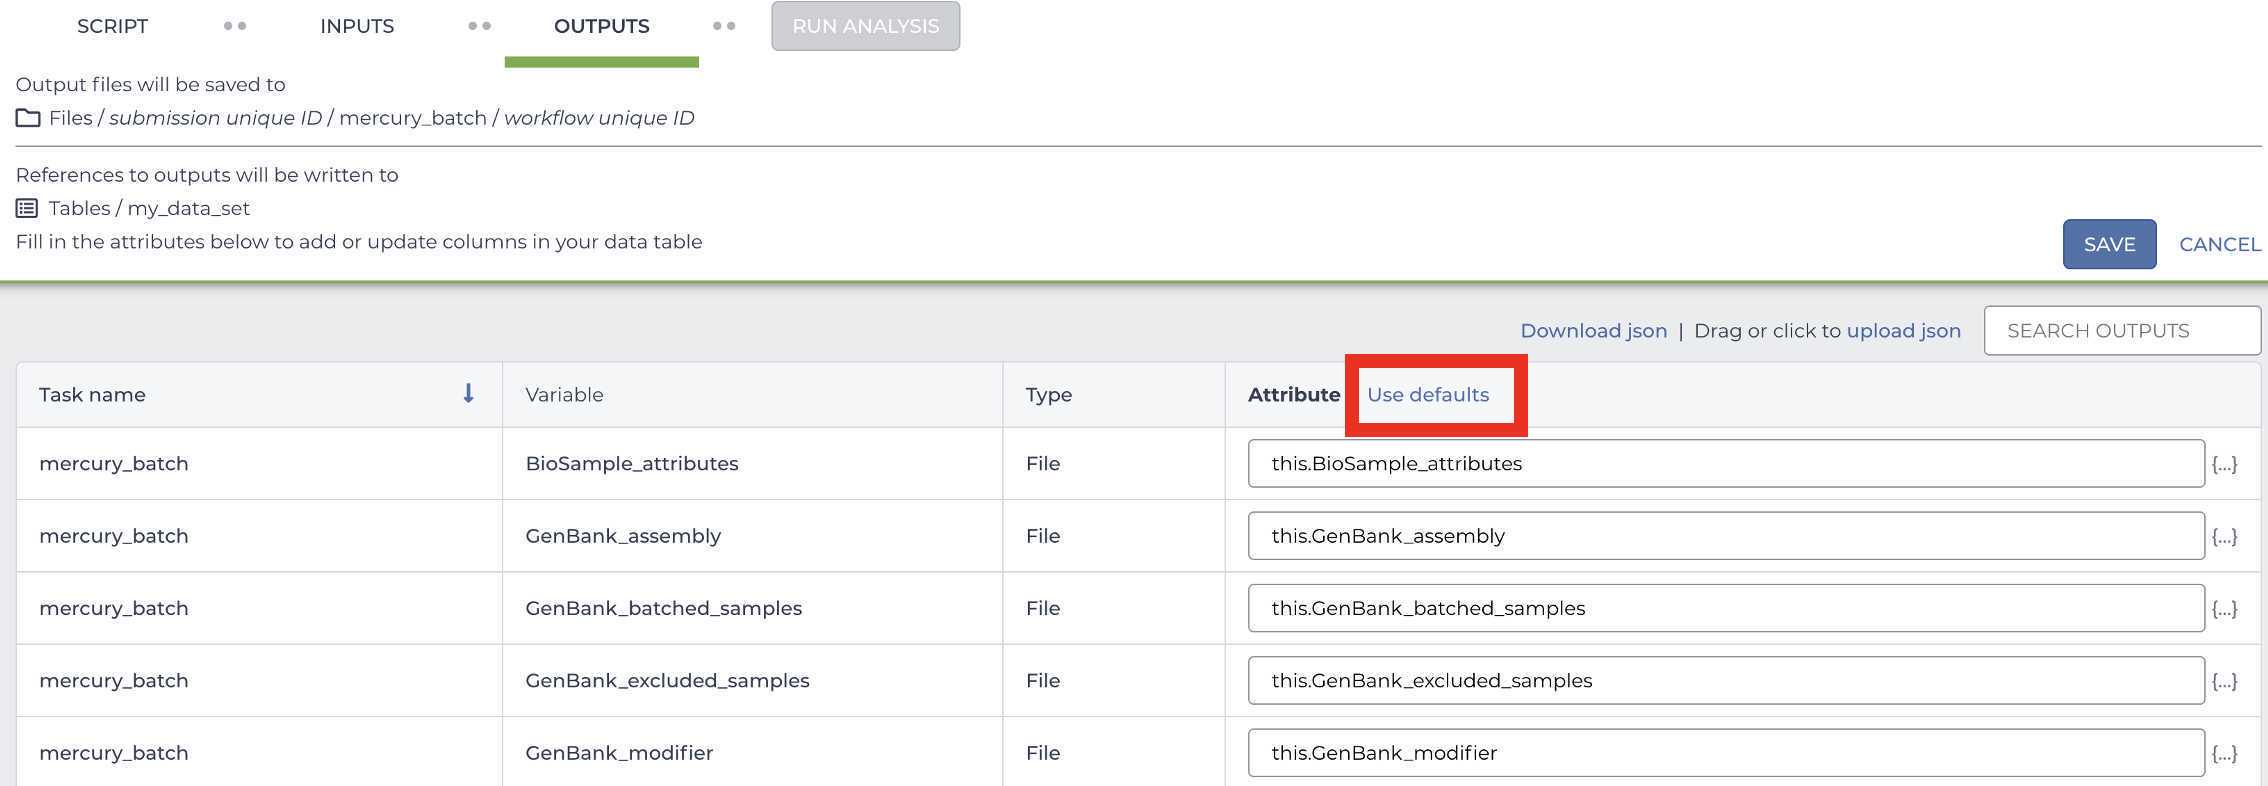
Once the inputs and outputs have been defined, Save the workflow parameters:

SRA Submission
Submit your data to SRA (and simultaneously generate BioSample accession numbers for your samples)
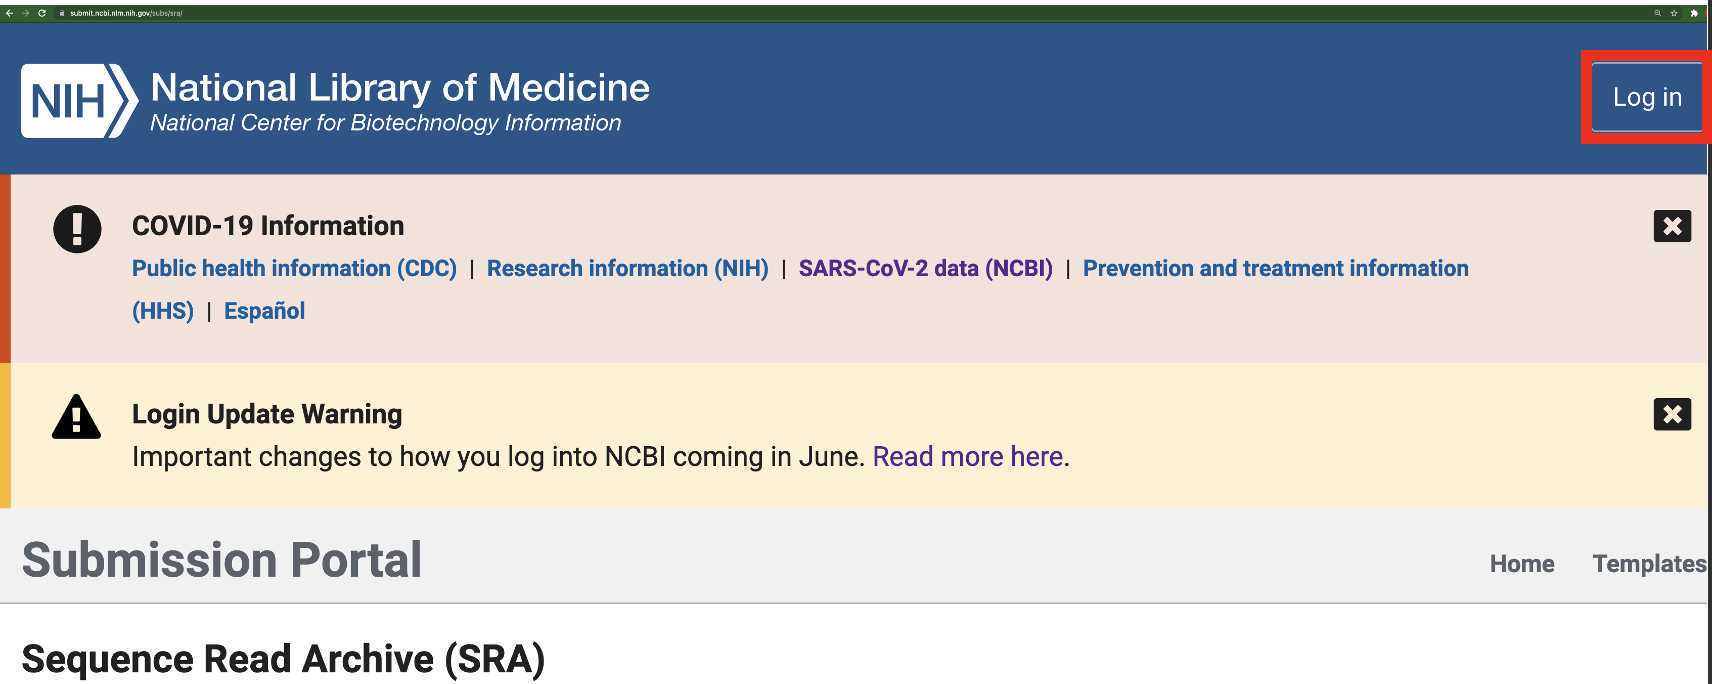
Navigate and Log in to the SRA Submission Portal:
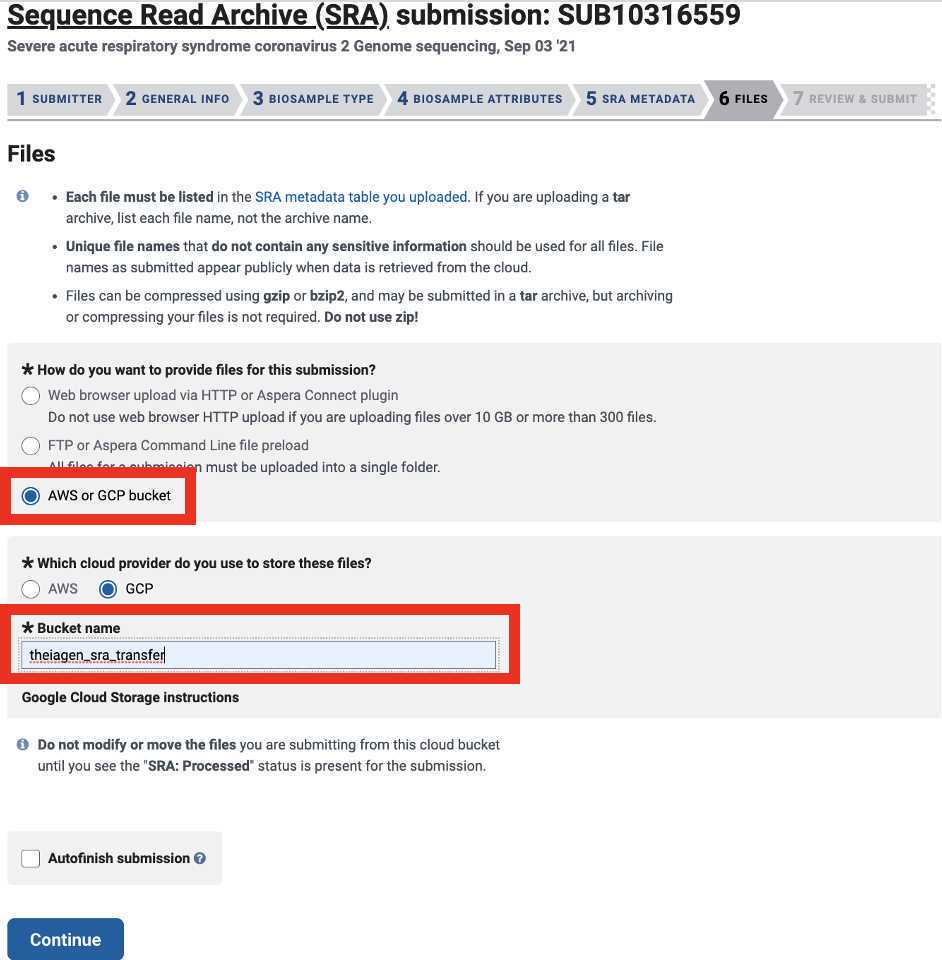
Select the 'AWS or GCP bucket' option and enter the name of the public data bucket where your reads have been placed in the staging phase of the data submission procedure:
Review and Submit to complete your SRA submission! You will be able to download your BioSample accession numbers from the SRA submission portal as soon as they become available.
Select New Submission:
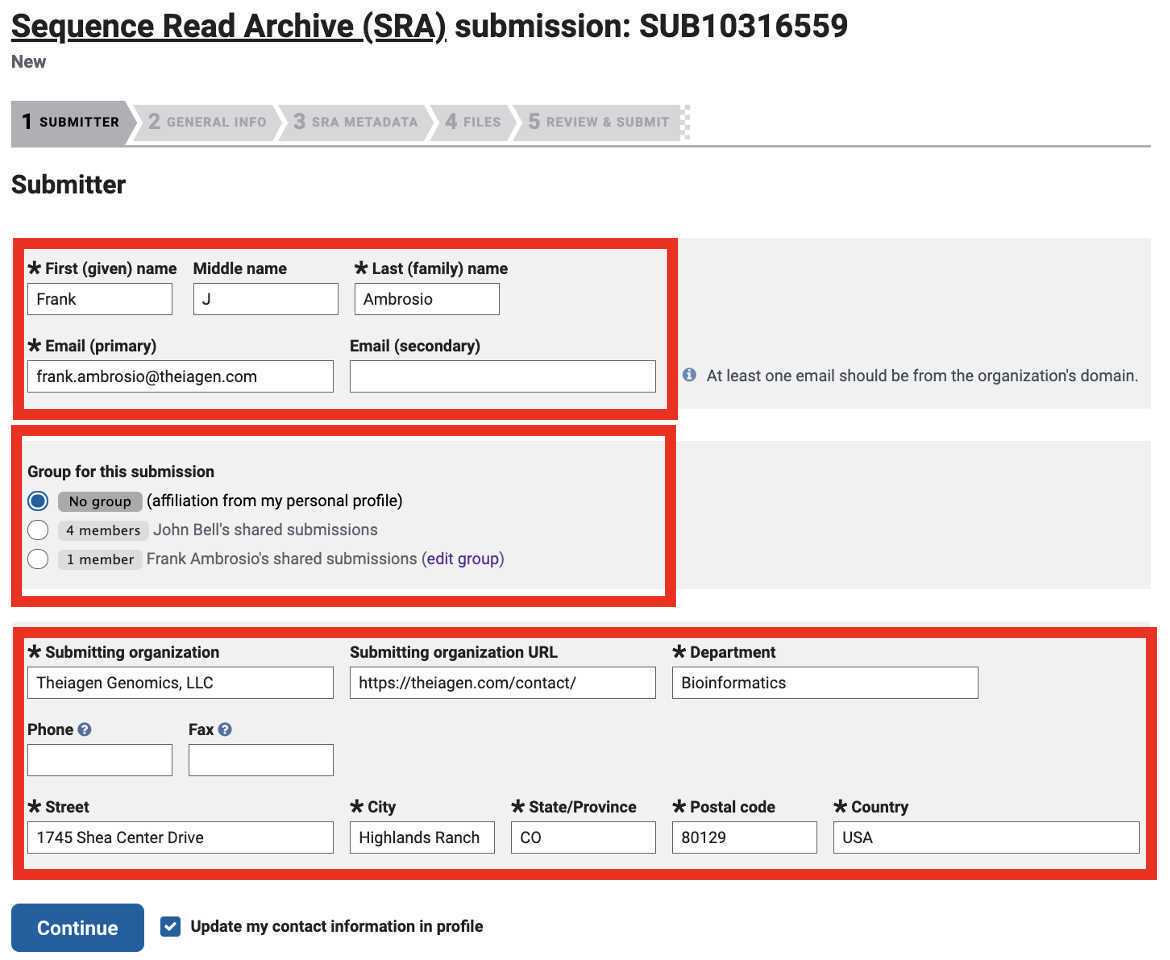
Enter your submitter information, select your submission group, and enter the information for your organization:
Enter your BioProject number:
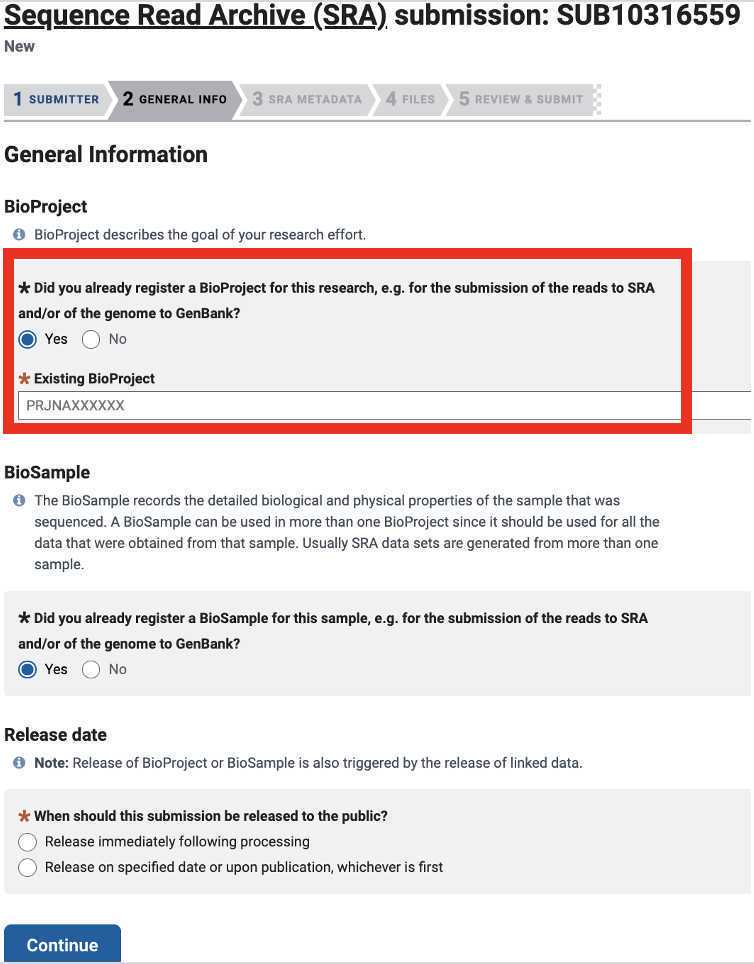
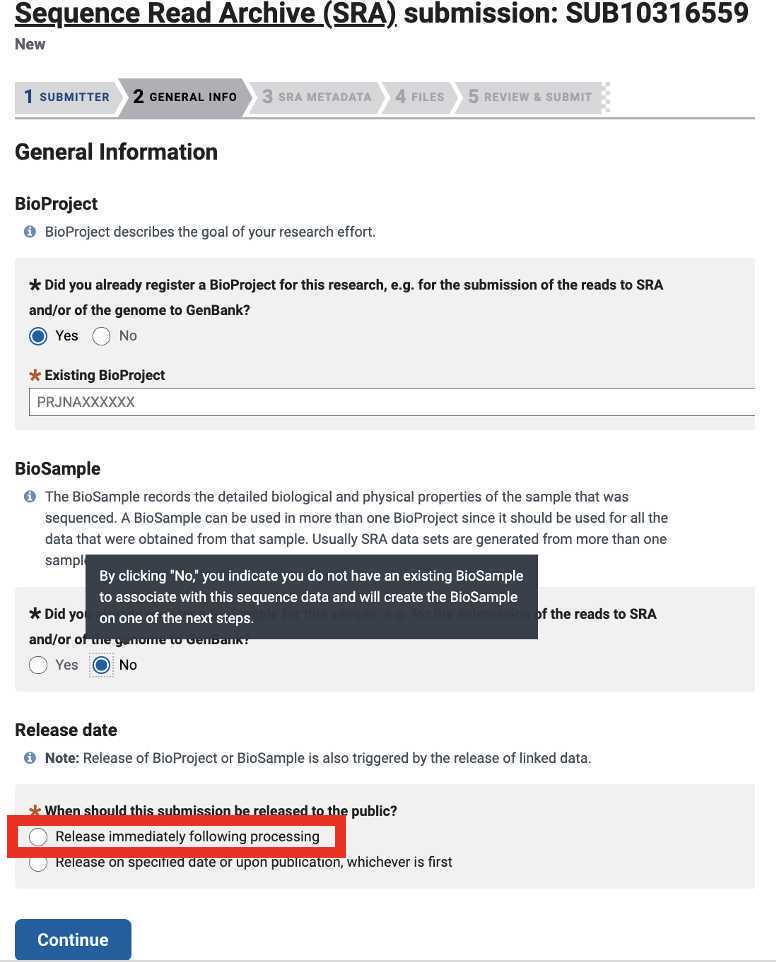
Select 'No' if you do not already have BioSample accession numbers for your samples in order to generate them upon SRA submission:

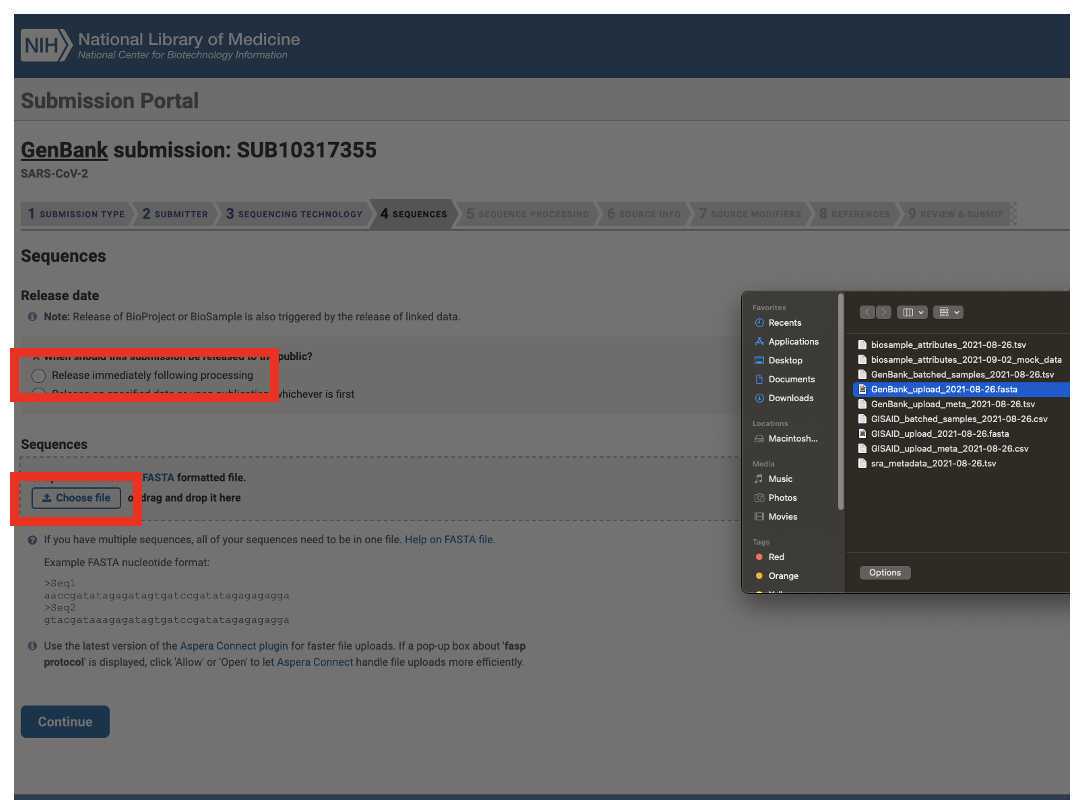
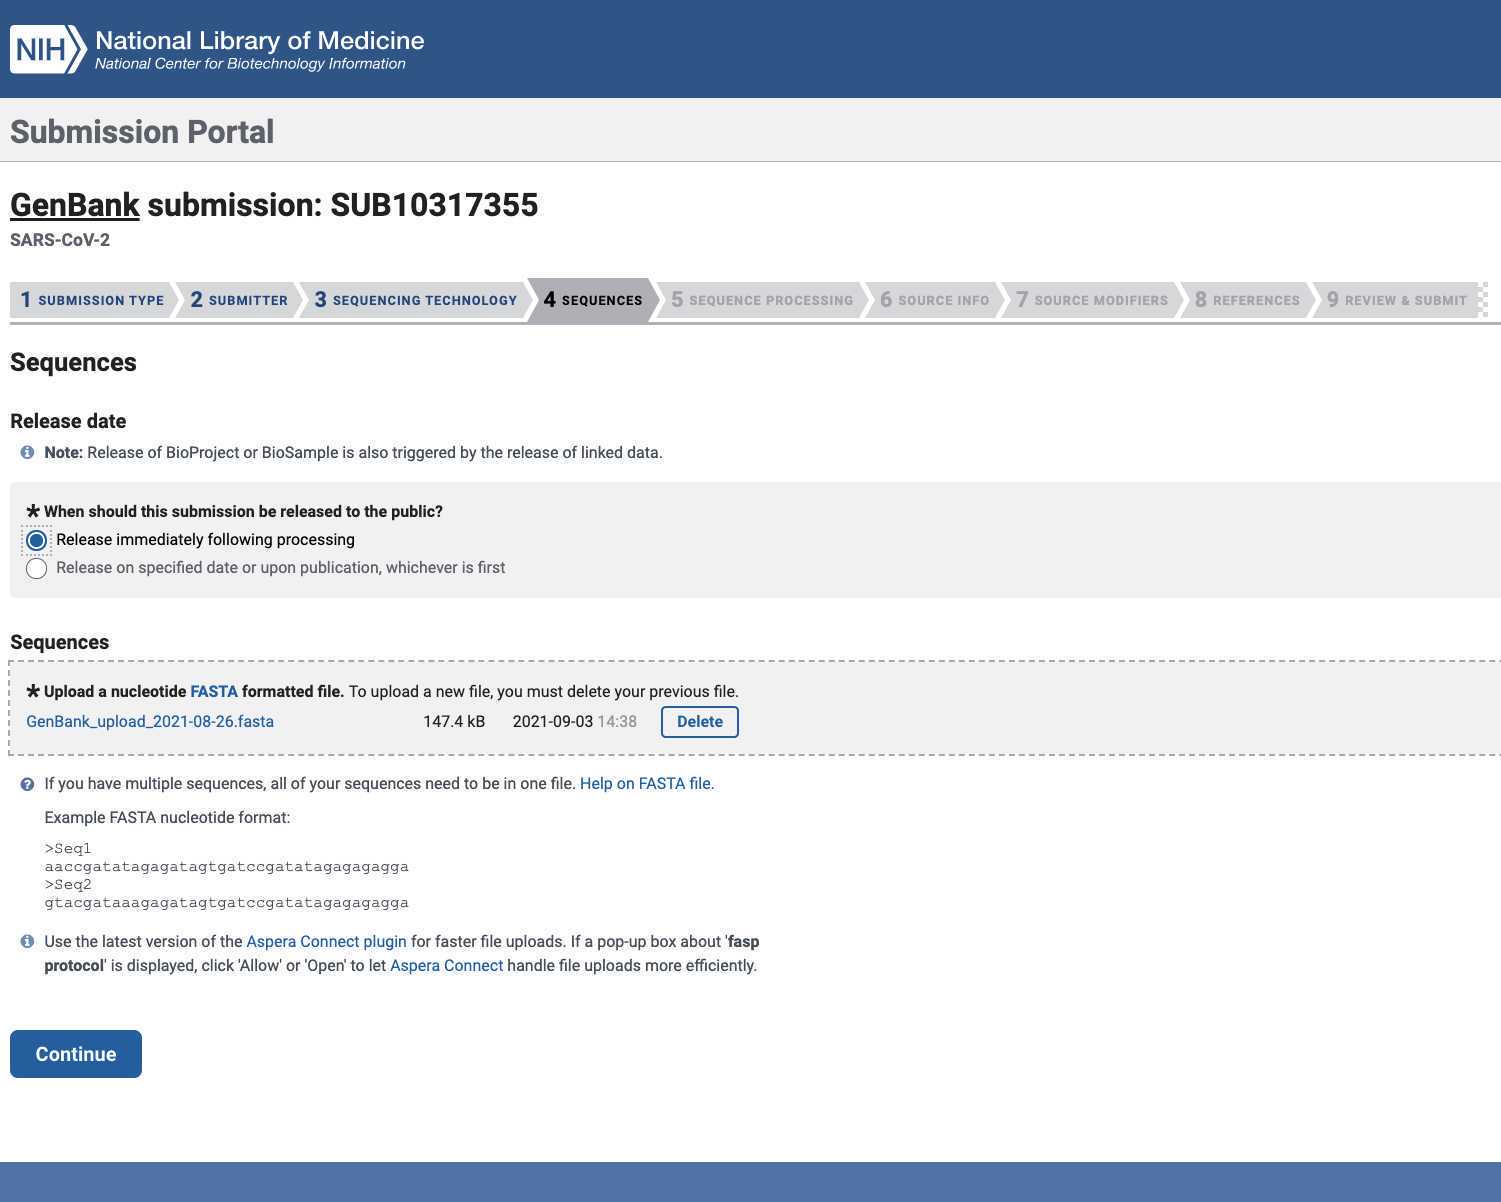
Select your Release Date (we recommend releasing your data immediately following processing:
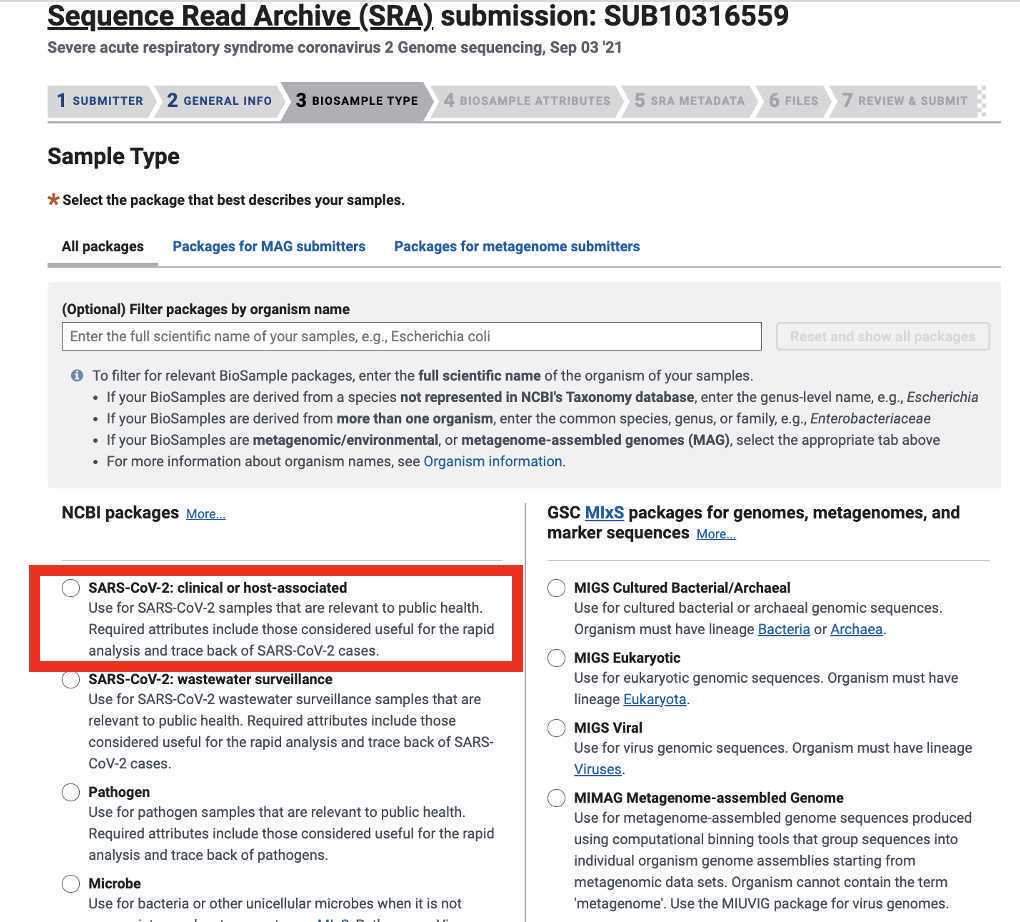
Select the appropriate submission package (if you are submitting SARS-CoV-2 sequences extracted from a human specimen please select the SARS-CoV-2 clinical or host-associated package):
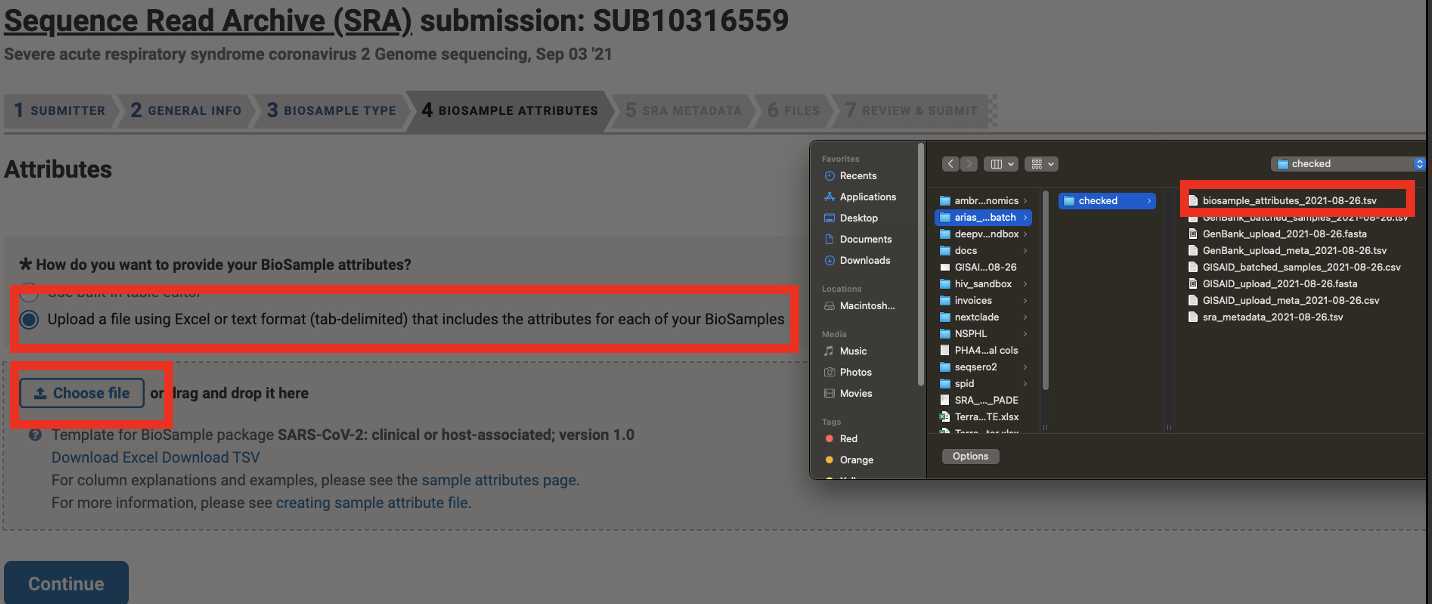
Choose the 'Upload a file...' option and upload the BioSample attributes file downloaded in previous steps:
Choose the 'Upload a file...' option and upload the SRA Metadata file downloaded in previous steps:

There may be a warning after the sra_metadata file is uploaded regarding the taxonomical identifier. If you are uploading SARS-CoV-2 data these warnings can be ignored:
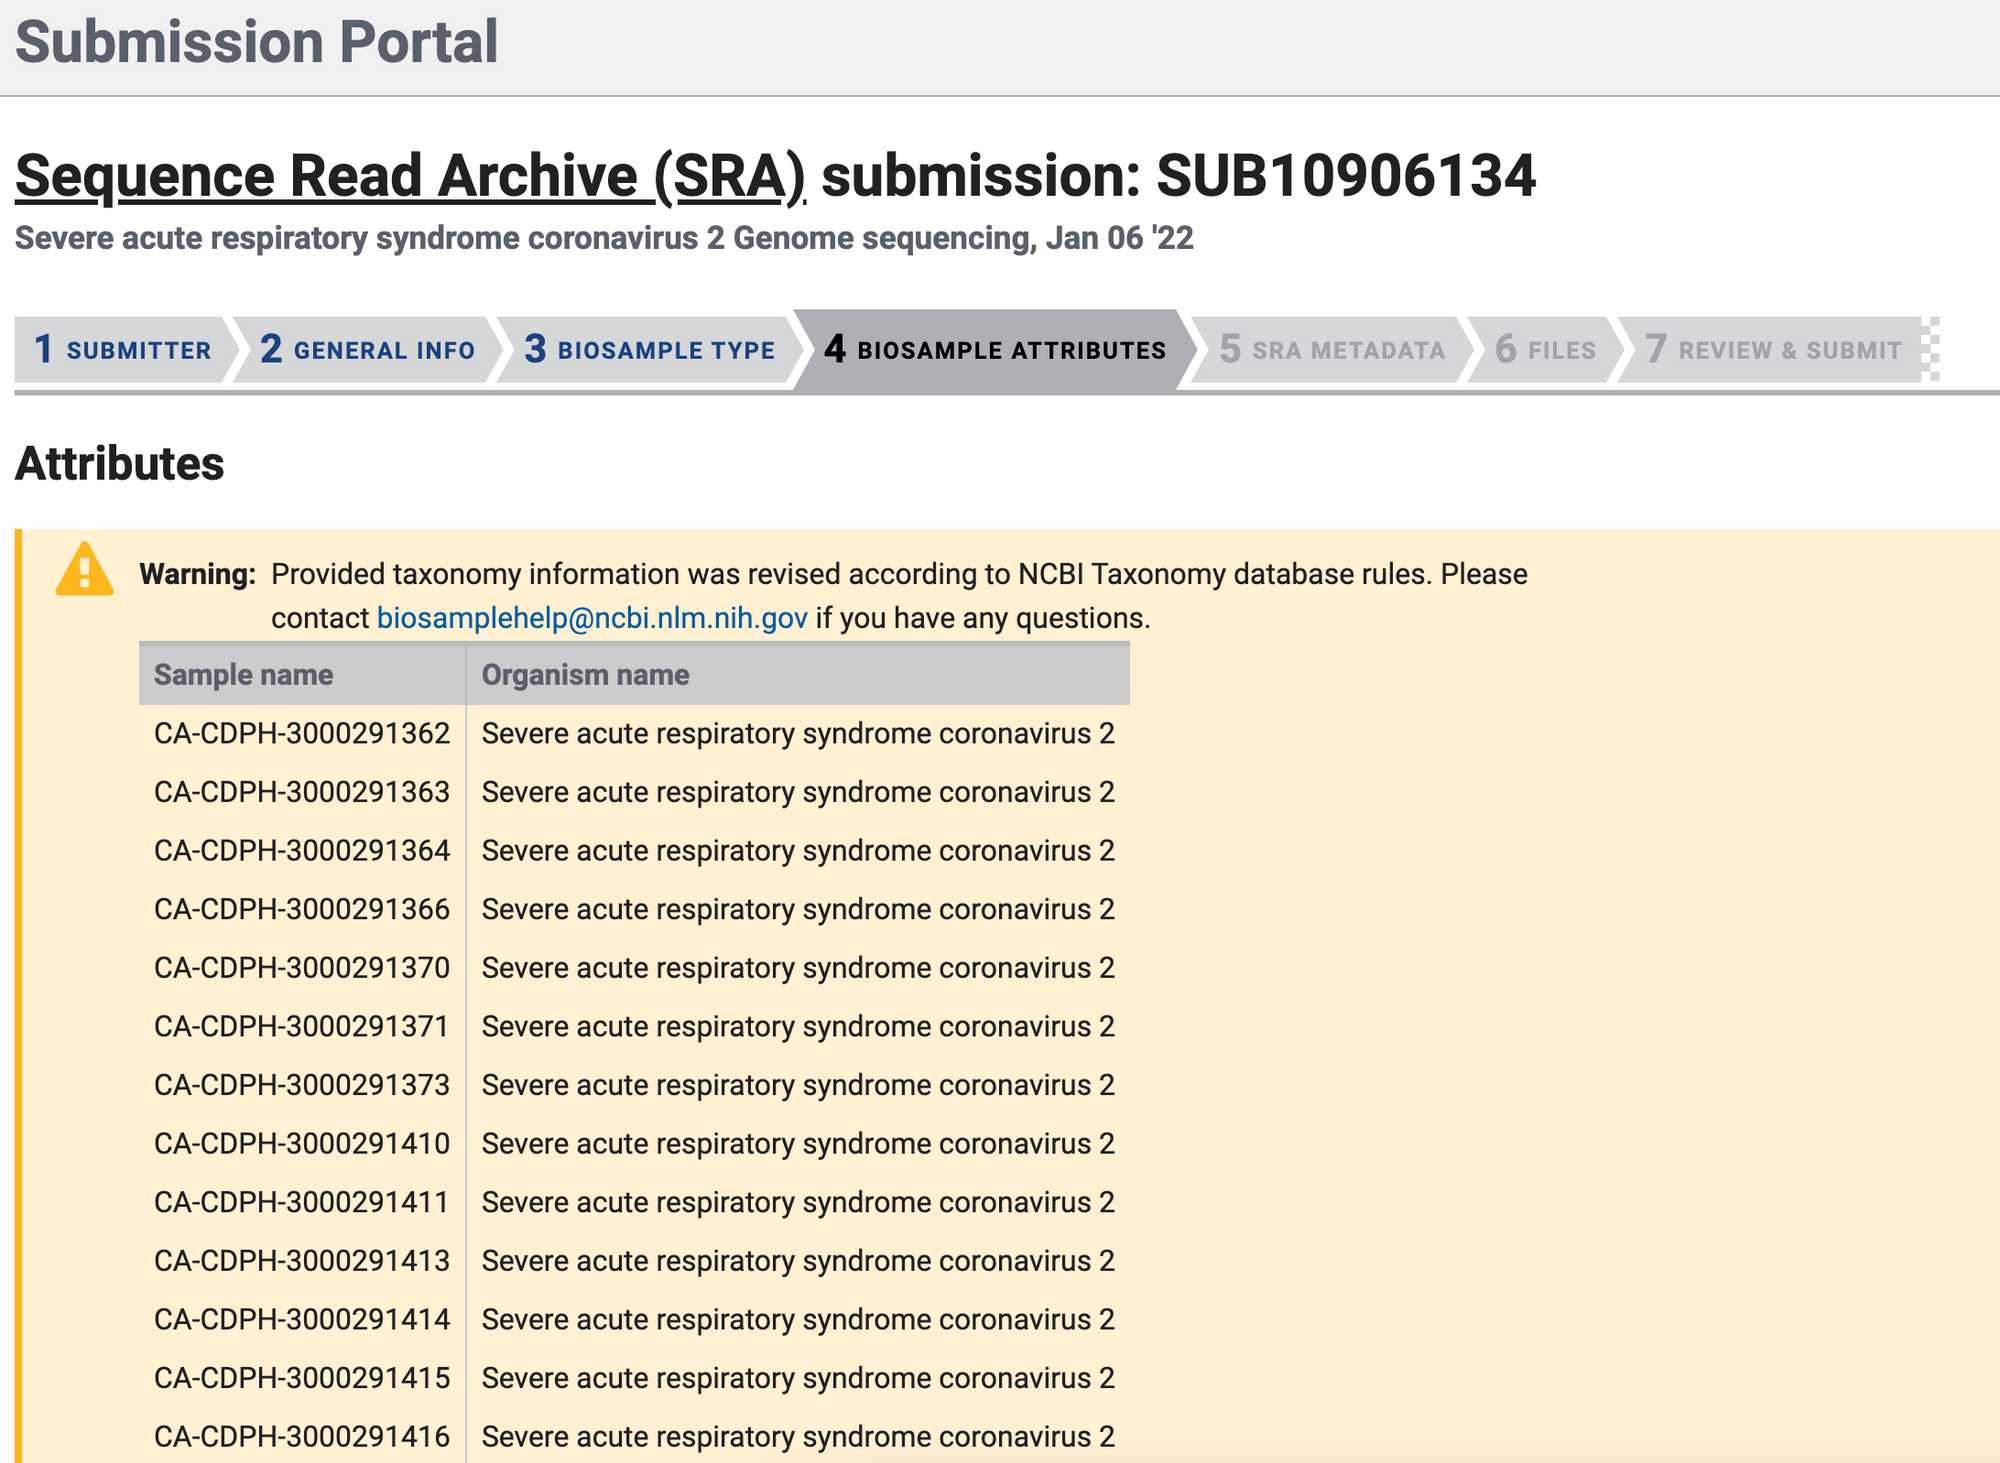
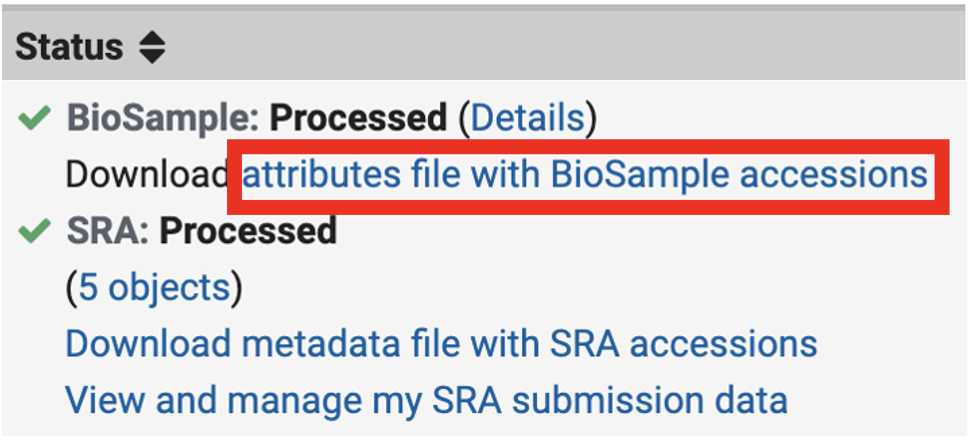
Retrieve the BioSample accession numbers '.tsv' file from the SRA portal
Navigate to the SRA Submission Portal (you should already be logged in)
Locate the Status column of the submissions table:

Click 'Download attributes file with BioSample accessions' for the SRA submission executed earlier in this protocol:
Genbank Submission
Add BioSample accession numbers to Genbank_meta_upload file
Open the attributes file downloaded from SRA containing the BioSample accession numbers

Open the Genbank_meta_sra file downloaded from Terra (the output from Mercury Batch)
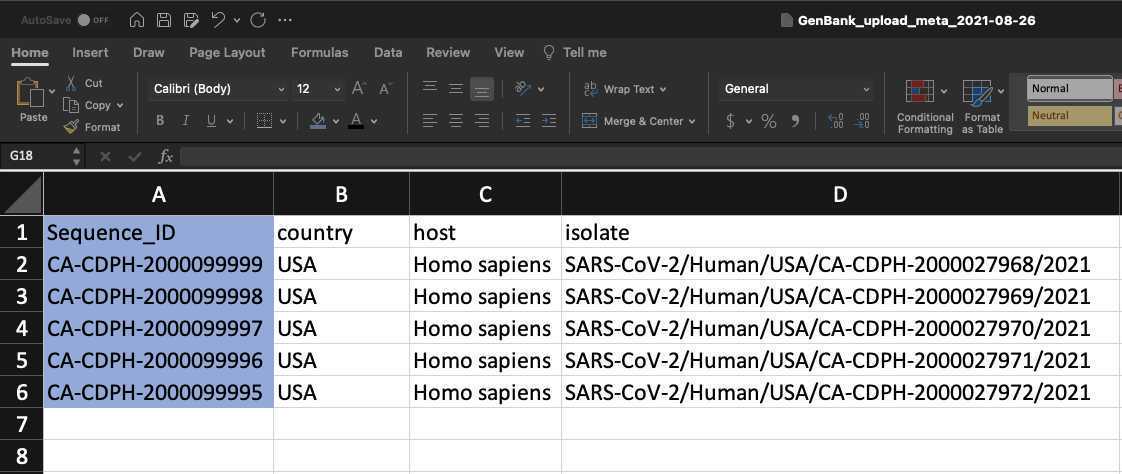
Use XLOOKUP to algorithmically add the BioSample accession numbers to the Genbank_meta_sra file.
")


Save the Genbank_meta_upload file (now including the BioSample accession numbers)
Genbank submission
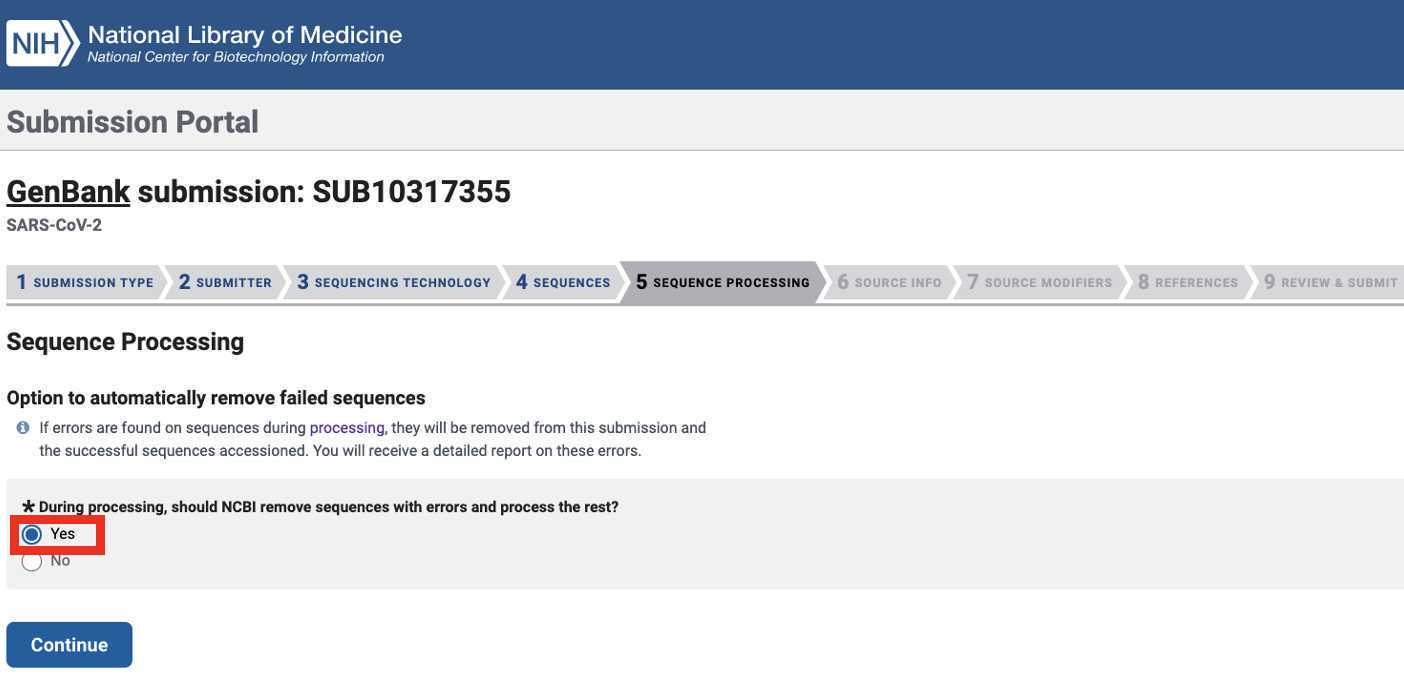
Navigate to the Genbank submission portal

We recommend selecting yes for the question ' During processing, should NCBI remove sequences with errors and process the rest? ':
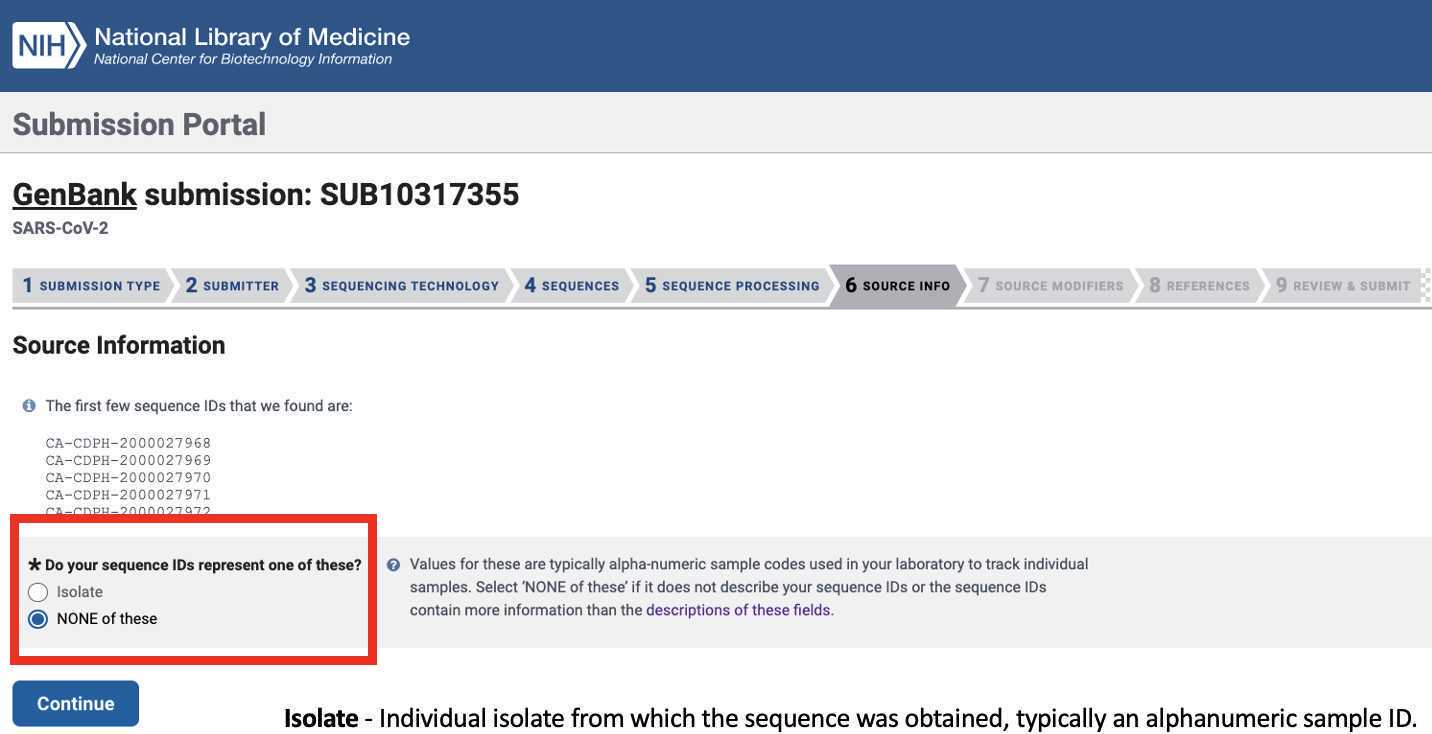
Indicate whether the source of your genomic material was an individual isolate:
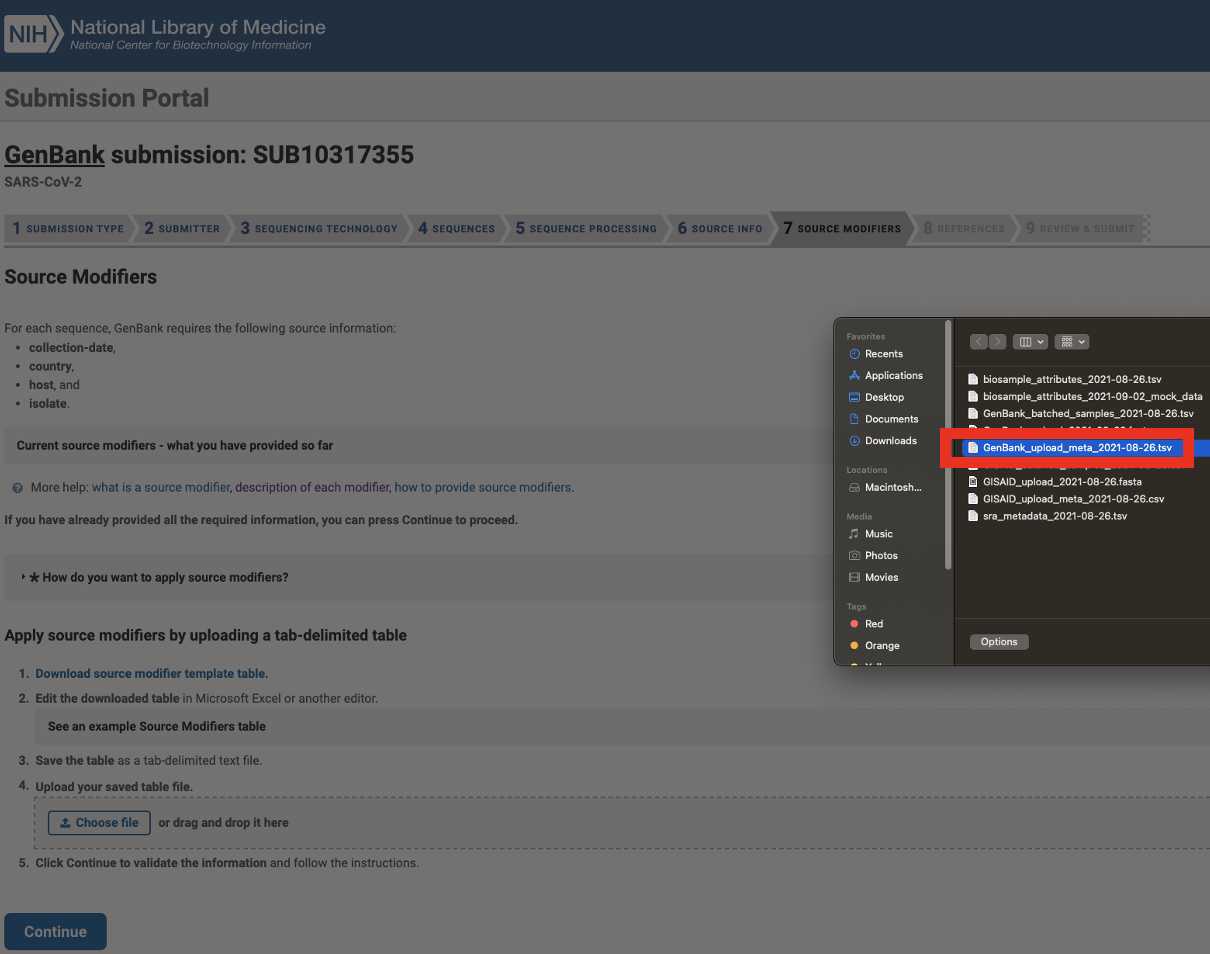
Upload the Genbank_meta_upload file downloaded from Terra in previous steps (Note: This should be the version with the BioSample accession numbers added in Step 8)
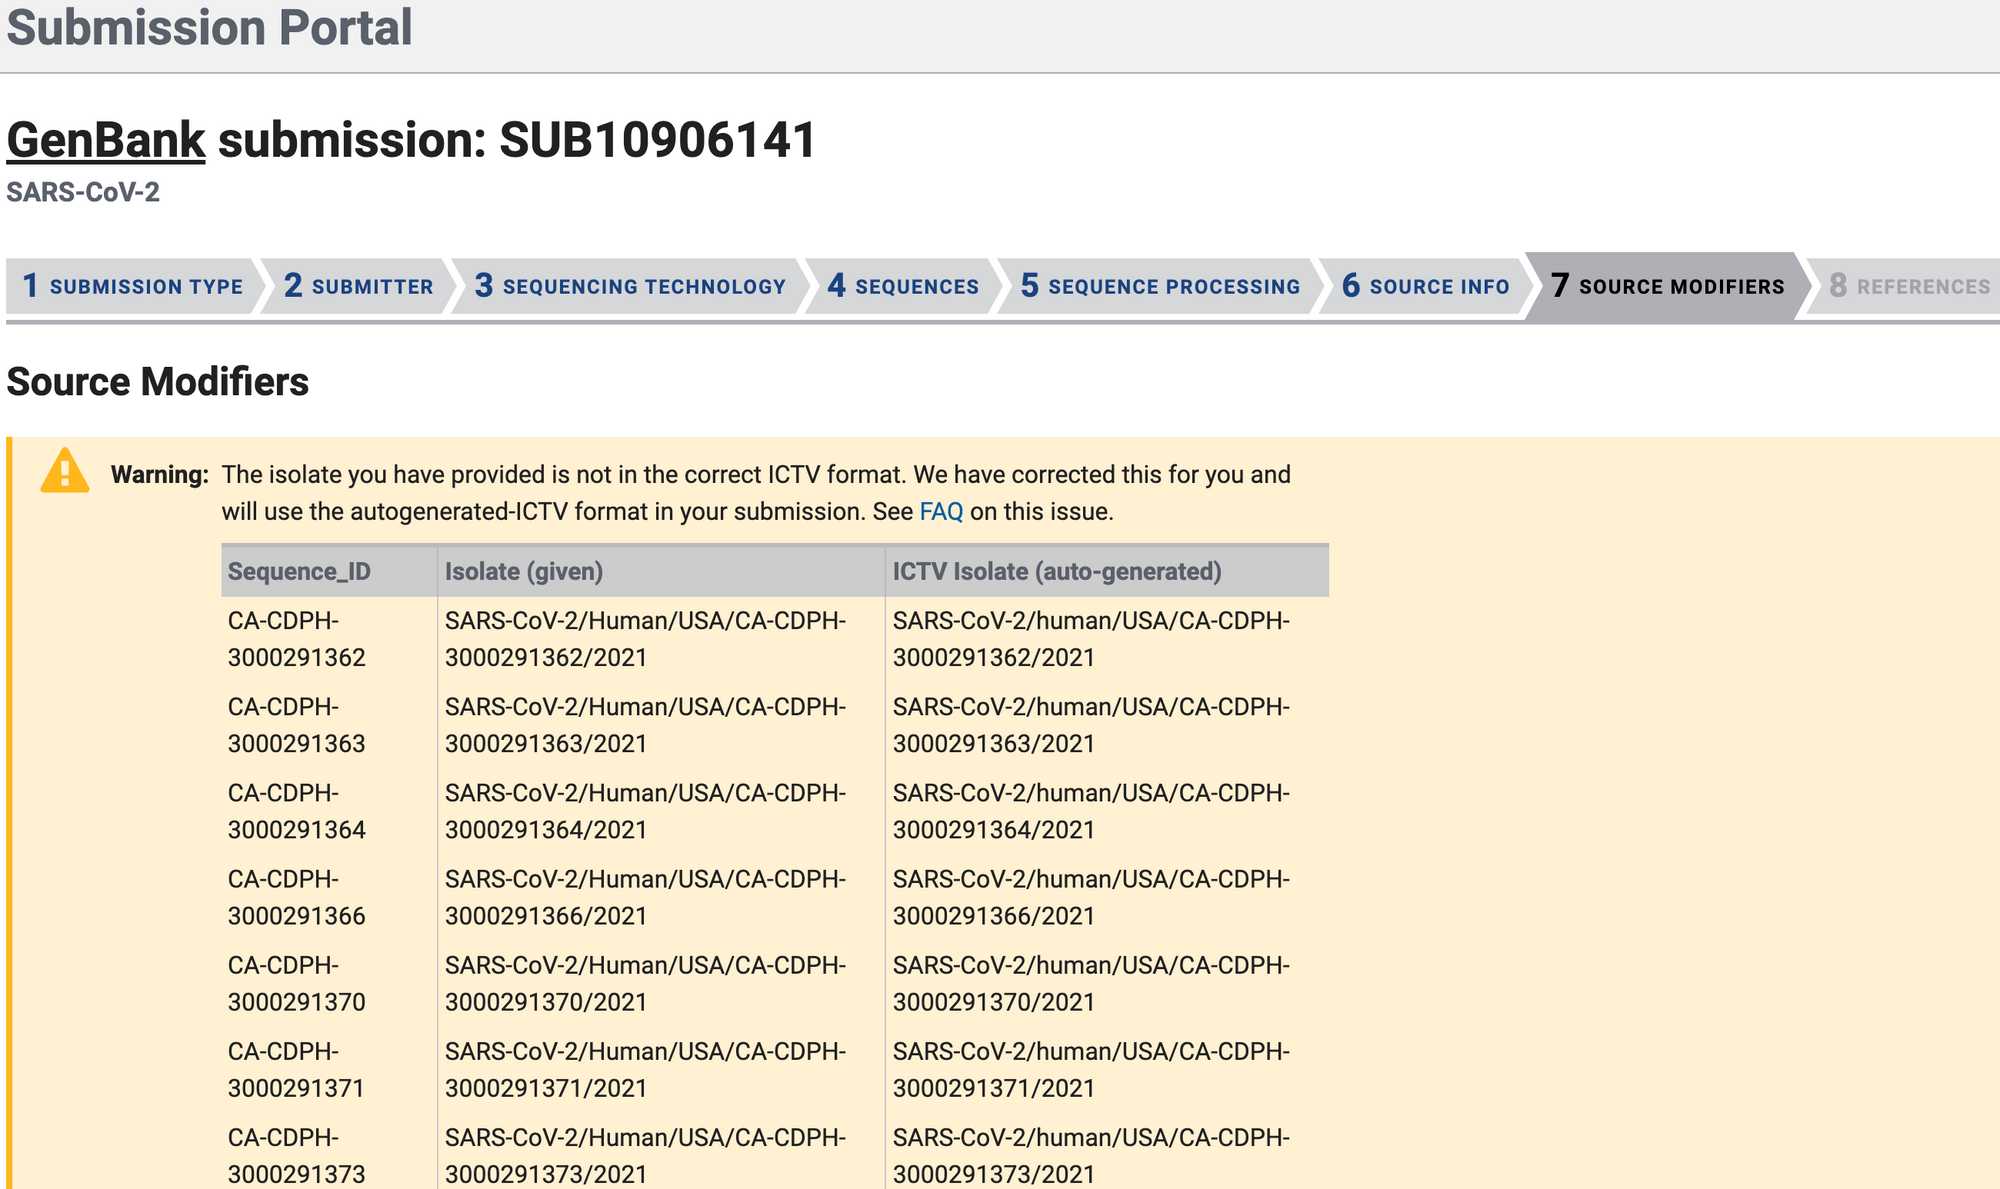
After submitting the Genbank metadata file a warning may be issued regarding formatting. If the entries in the warning look correct then this warning can be ignored:
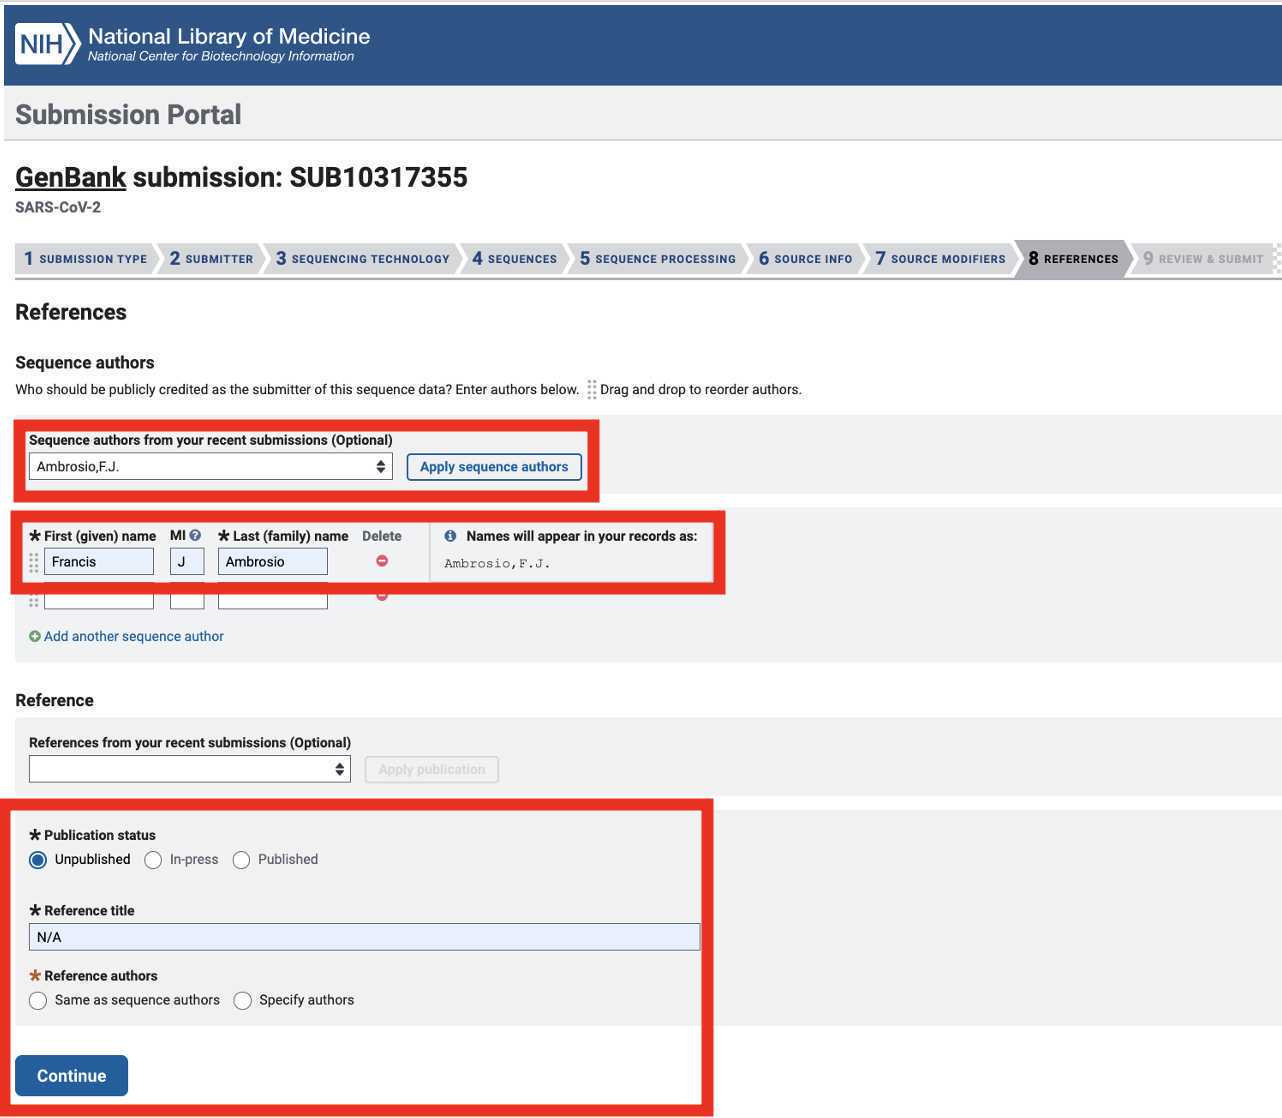
Enter authors to be publicly credited for the submission of this sequencing data. If there is a publication associated with thissequence data please enter the name of the publication as well as the authors listed on the publication:
Review your submission information and click 'Submit' to complete the Genbank submission process!
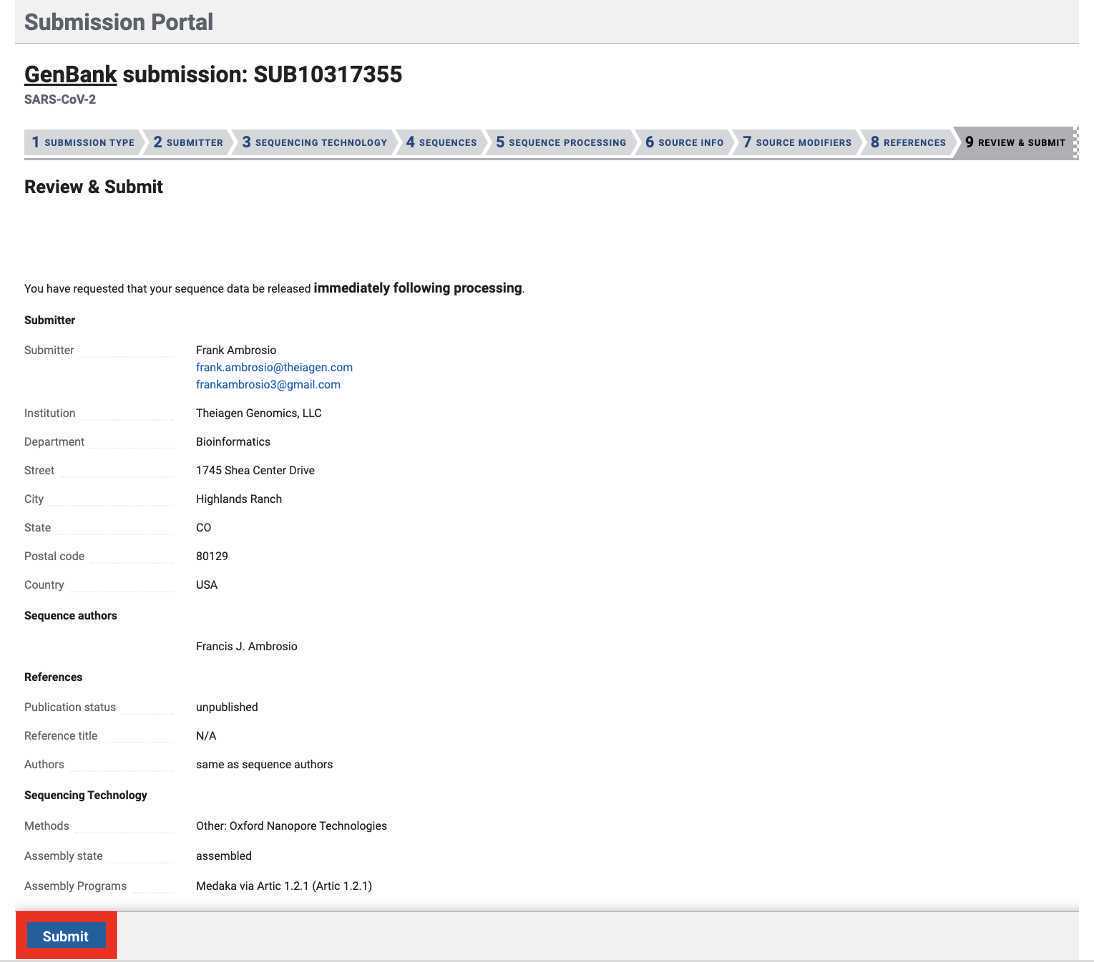
Congratulations! You have submitted both read and assembly data to NCBI, linked by the BioSample accession number. This type of submission greatly enhances the statistical power of the data in public genomic repositories. Thank you for your contribution to public health!
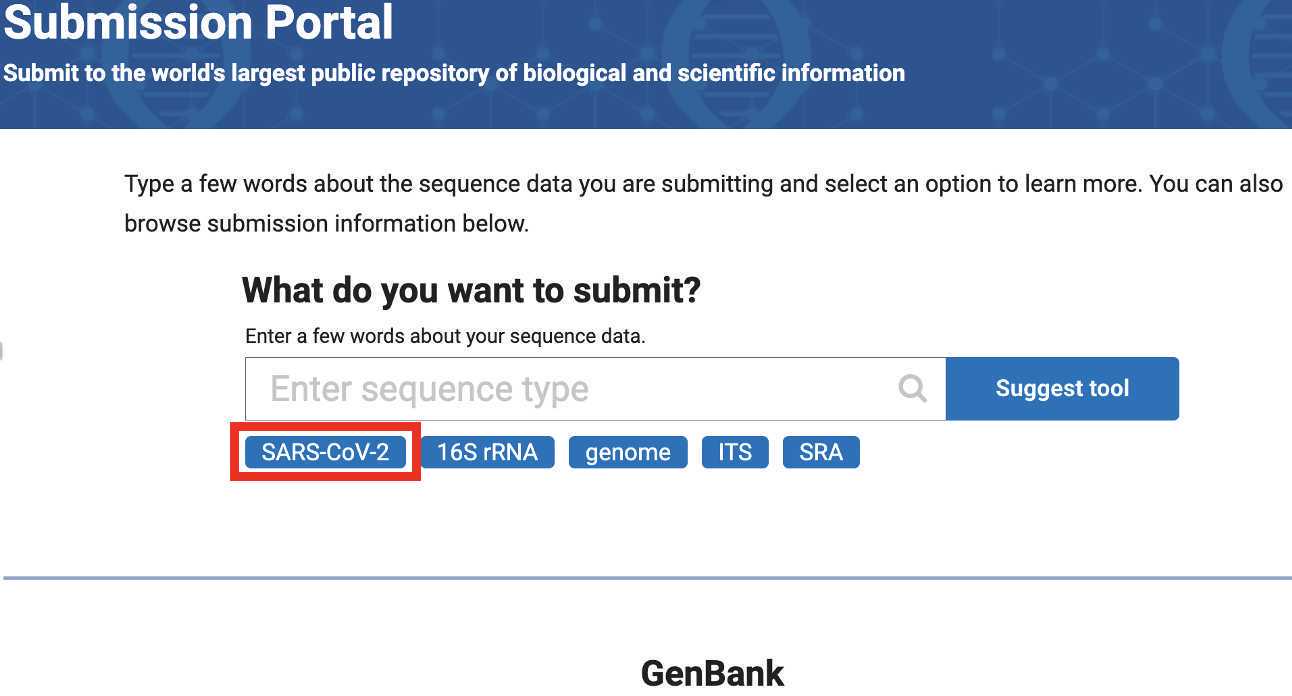
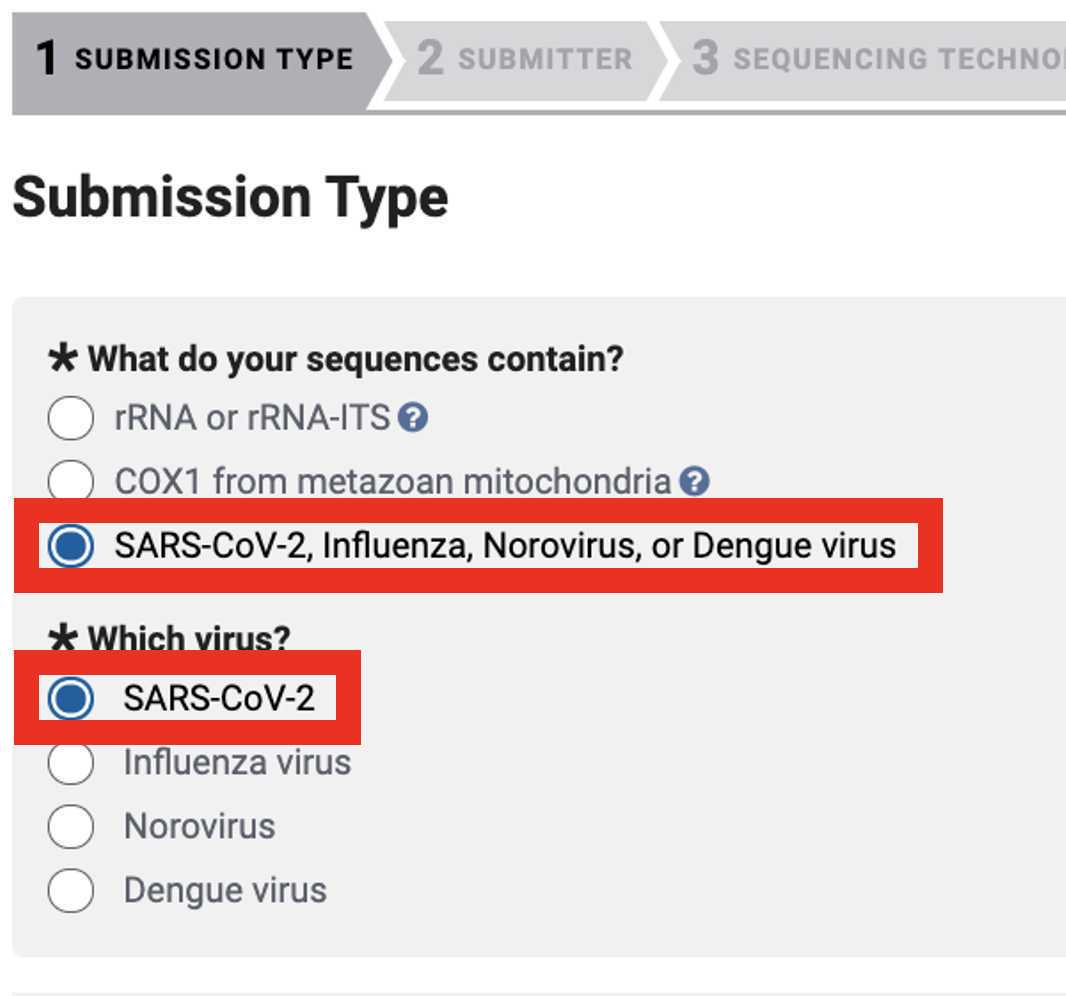
Select SARS-CoV-2
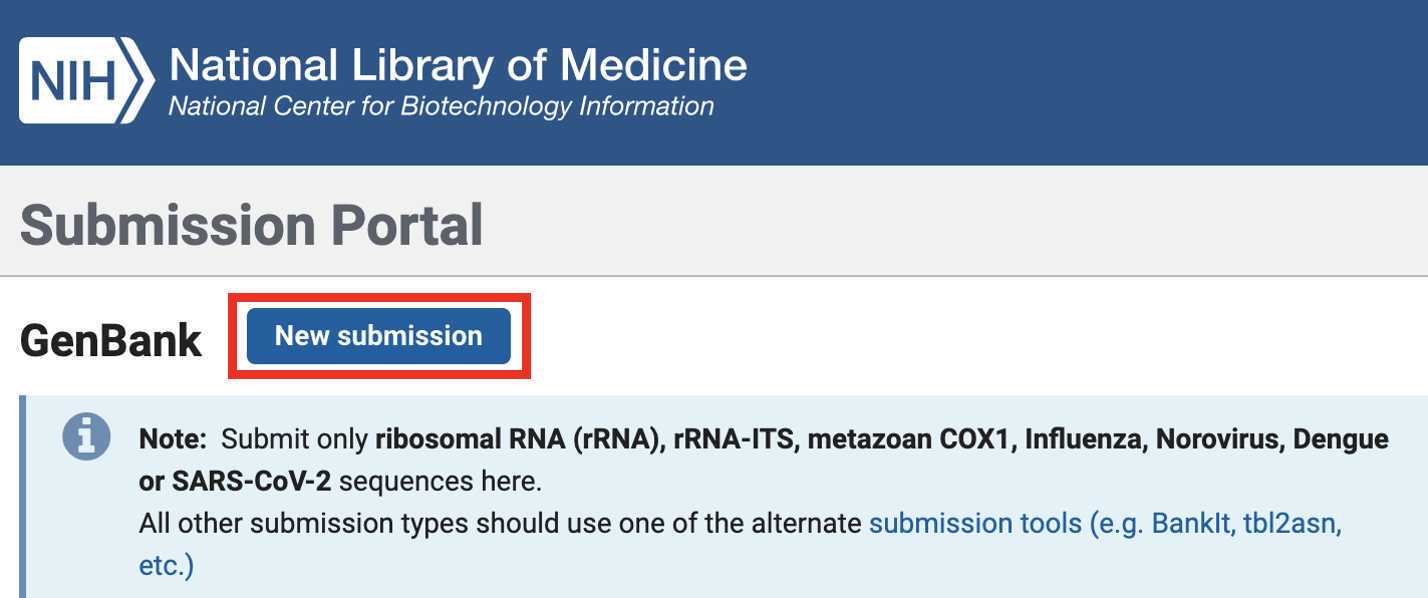
Click the submit button under the Genbank heading:

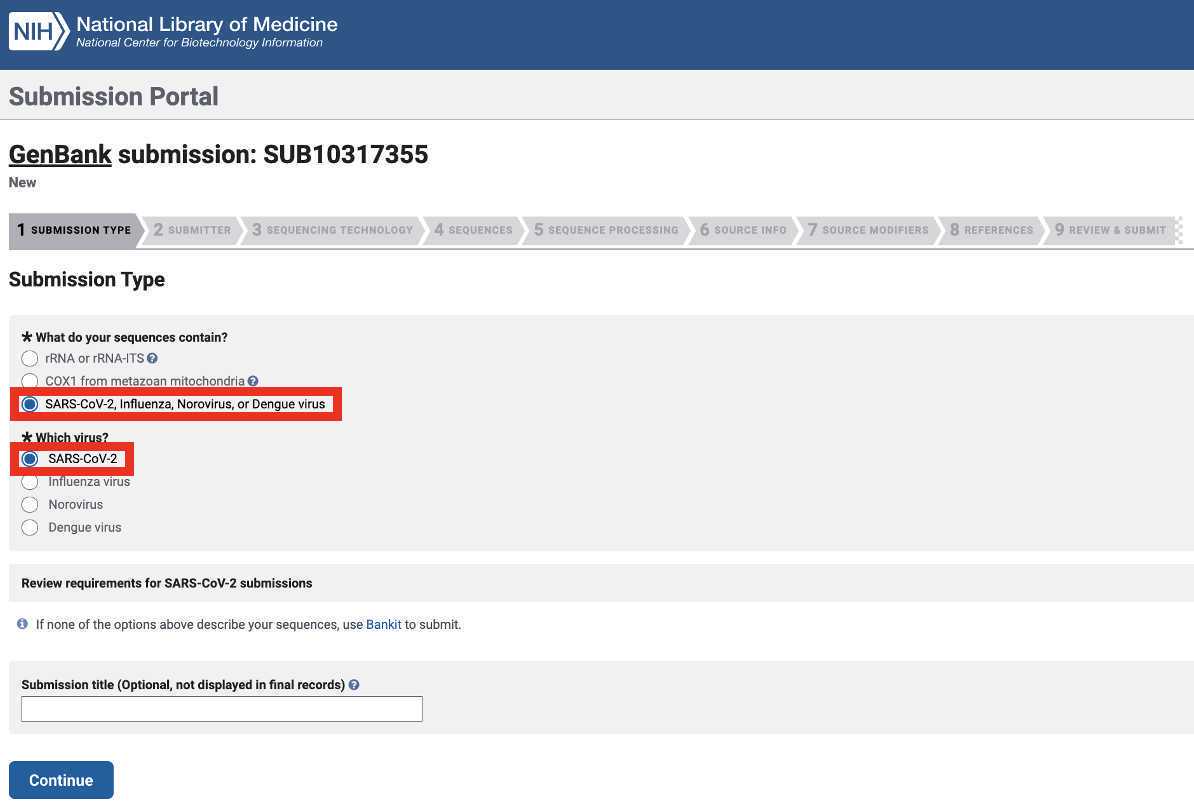
Select 'New submission':
Select 'SARS-CoV-2, Influenza, Norovirus, or Dengue virus' and 'SARS-CoV-2' t the questions ' What do your sequences contain? ' and ' Which virus? ', respectively.
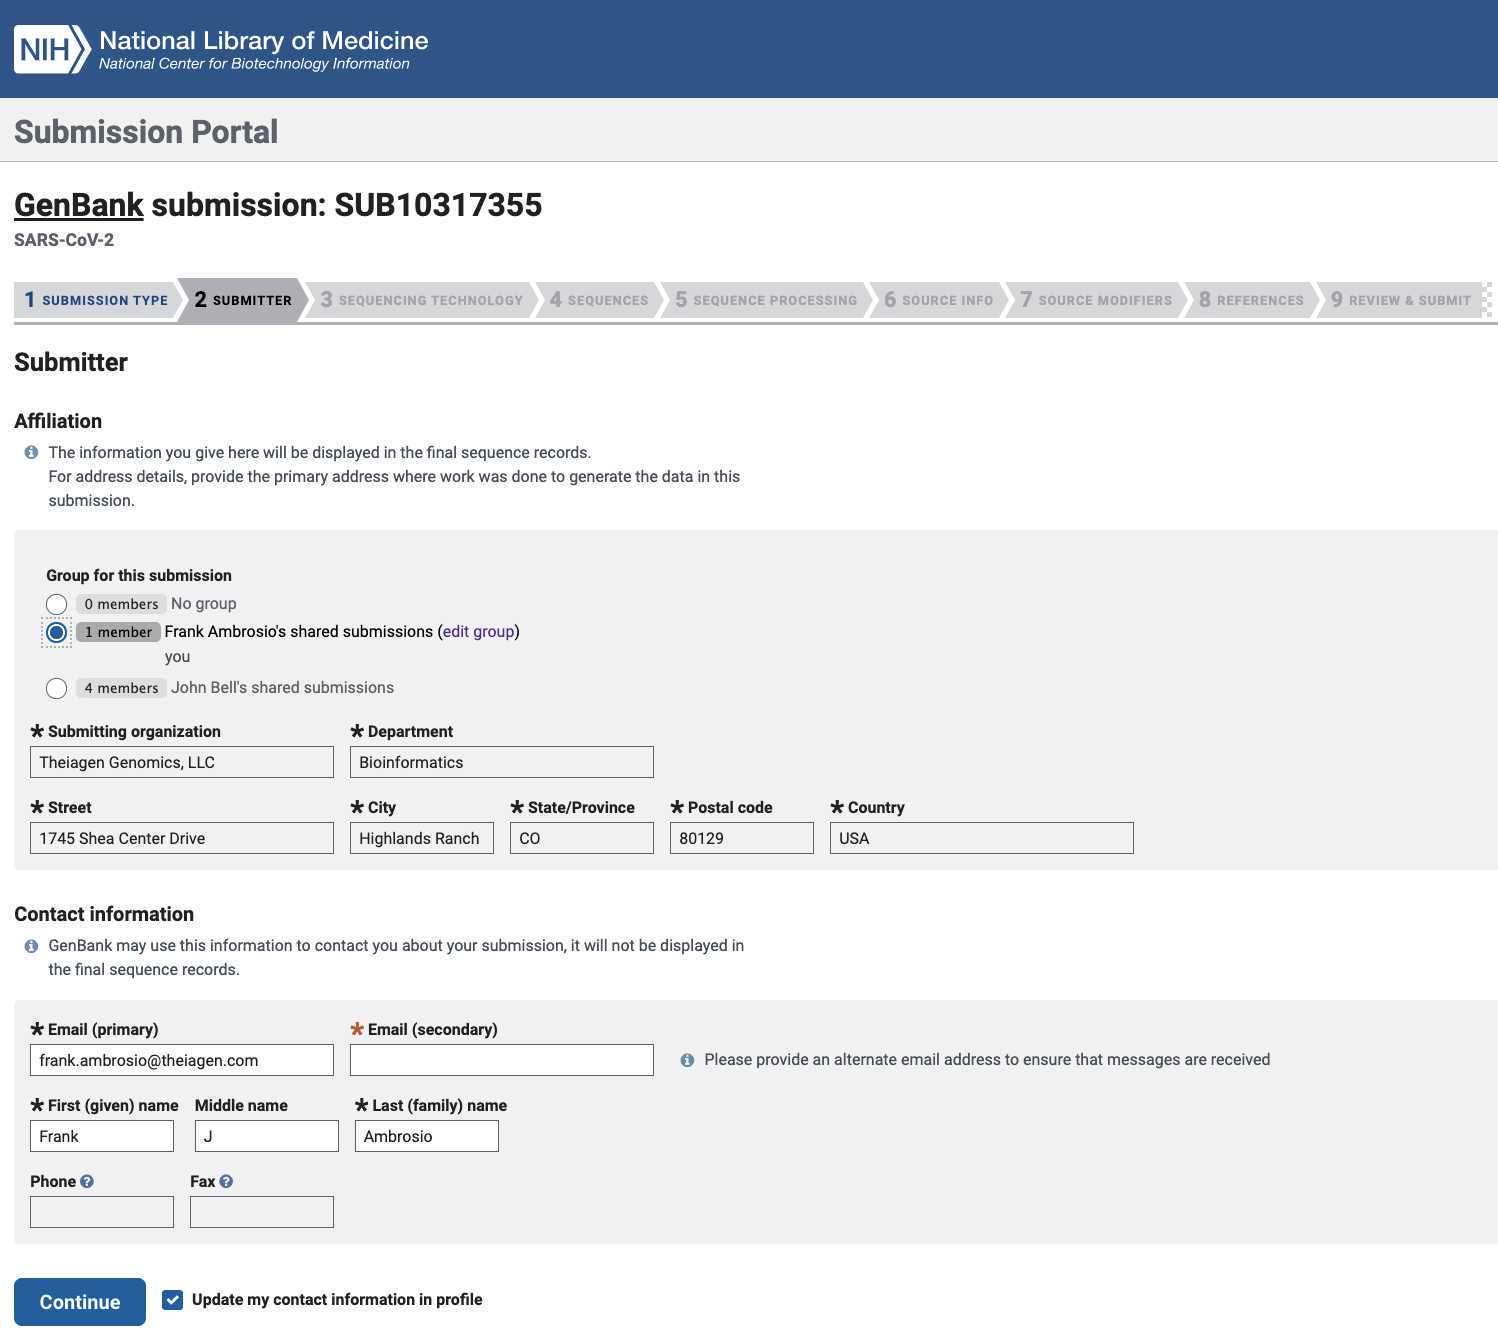
Enter the required submitter information:
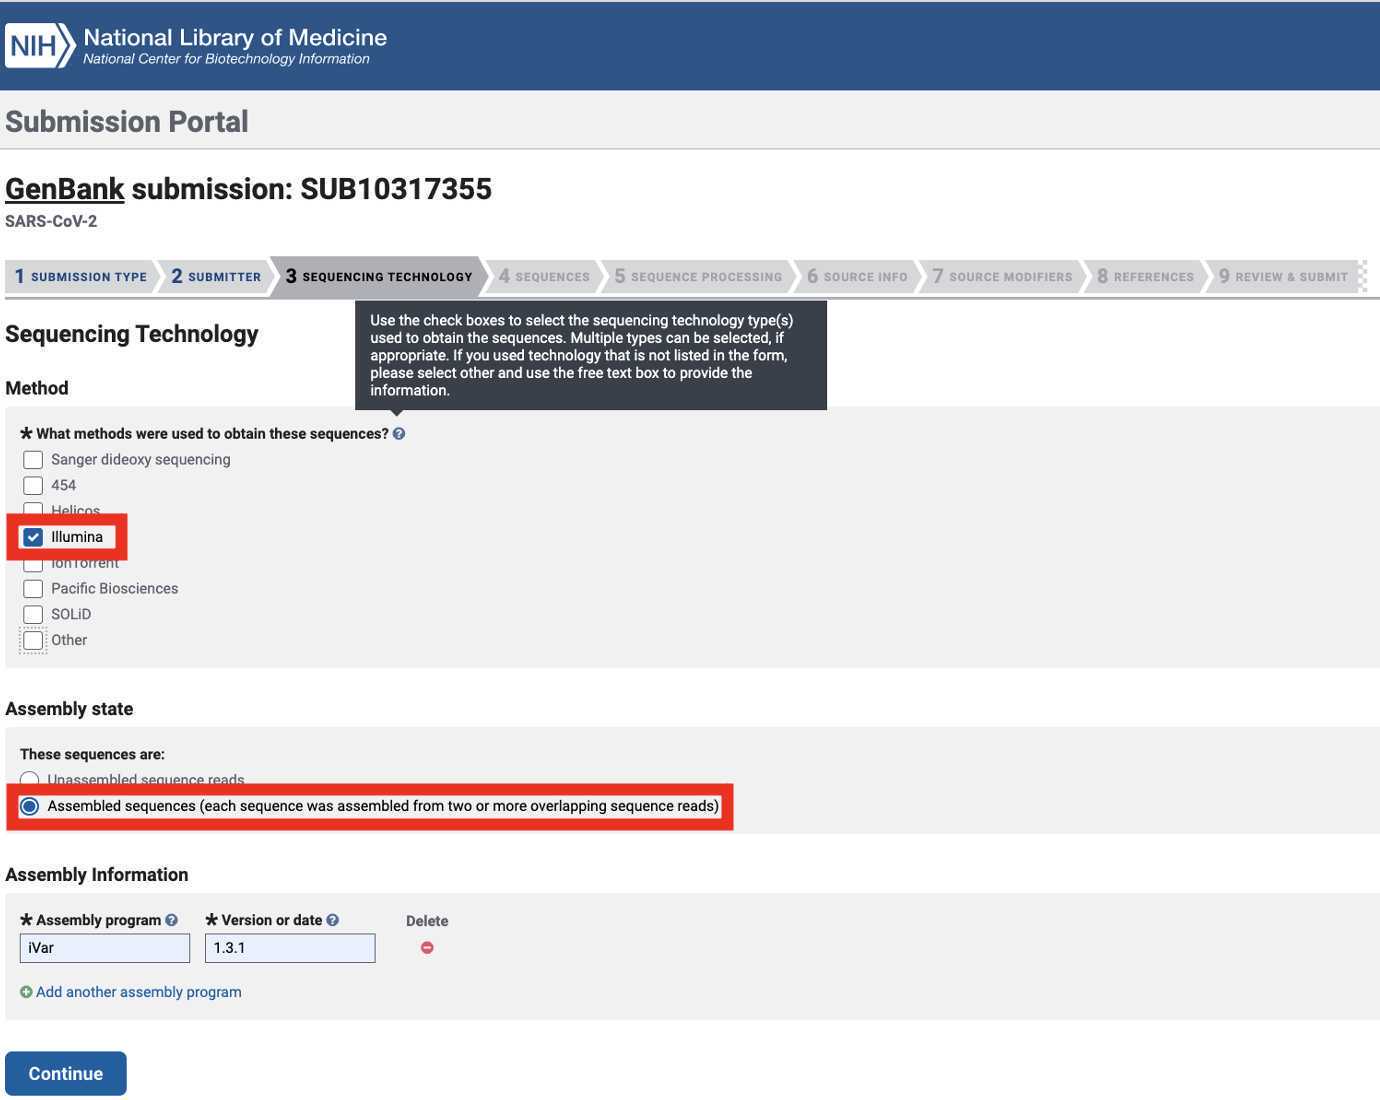
Select the Sequencing Technology used to generate the sequencing data of which the Genbank assembly submissions are composed. Select 'Assembled sequences (...)' as the assembly state:
Illumina:
Oxford Nanopore Technologies (and Clear Labs):

Note: the assembly method is a default output for the Titan Genomic Characterization workflow. The assembly software and version can be found in your Terra data table:
Select 'Release immediately following processing' and upload the Genbank_assembly.fasta file:
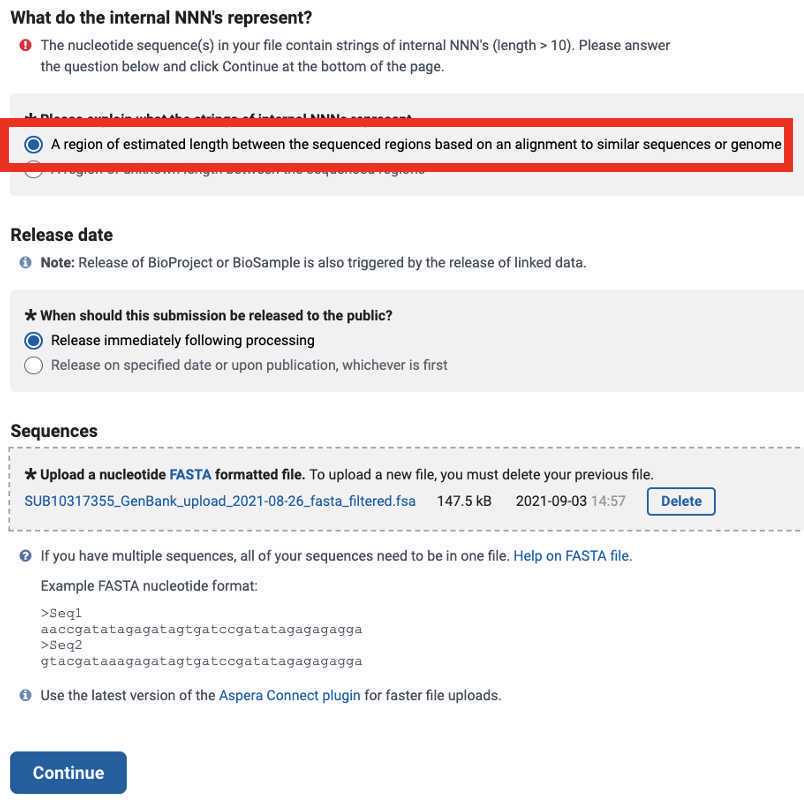
You will be asked to explain the strings of N's in your assemblies. The software used by the Titan Genomic Characterization Workflows estimates the length between sequenced regions using the Wuhan-1 reference genome for alignments: