Multiplex Cyclical Immunofluorescence on Fresh Frozen Tissue-V3
Elizabeth Neumann, Jeff Spraggins, Maya Brewer, Liz McDonough, Yuantee Zhu, Mark De Caestecker, Danielle Gutierrez
Abstract
Scope:
To obtain multiple cycles of immunofluorescence on fresh frozen human kidney tissue embedded in carboxymethylcellulose (CMC) or low melting point gelatin.
Expected Outcome:
Kidney tissue sections that have been tagged with antibodies for imaging microscopy.
Steps
Immunofluorescence
Place frozen slides from the -80˚C freezer directly into the formalin, and post-fix for 5 minutes.
Pour used formalin into the appropriate waste container, then fill jar with 1X PBS and wash sections for 5 minutes four times.
Using a hydrophobic pen, draw a large barrier around each section. Do not allow pen to touch section.
Place slides in humidified chamber and cover section in PBS by using a pipettor so that they do not dry.
Block sections for 30 minutes with 1X Universal Blocking Reagent (UBR) at room temperature.
Dilute 10X blocking reagent to 1X using 9-parts ddH2O to 1-part UBR.
Dilute primary antibody to desired working concentration in Antibody Diluent Reagent during blocking step.
Add diluted antibody to section and incubate overnight at 4˚C.
Remove solution, and wash sections with PBS for 5 minutes twice.
If primary antibody is directly conjugated with a fluorophore, skip to #16.
If using indirect immunofluorescence, dilute fluorophore-conjugated secondary antibody using Antibody Diluent Reagent.
Add antibody solution to sections and incubate for 60 minutes at room temperature.
Remove solution, and wash sections with PBS for 5 minutes three times.
Incubate sections in Hoechst 33342 (1:5,000 dilution of 20mM solution in 1X PBS) for 10 minutes.
Remove Hoechst 33342, and wash sections with PBS for 5 minutes twice.
Mount slides in 50% glycerol in PBS. Do not seal the coverslips as they will need to be removed later.
Because slides are not sealed, they must be kept horizontal to prevent the coverslip from falling off, and in the humidified chamber to keep them from drying out.
Image
Store slides at 4˚C in a moisture chamber.
De-Coverslipping
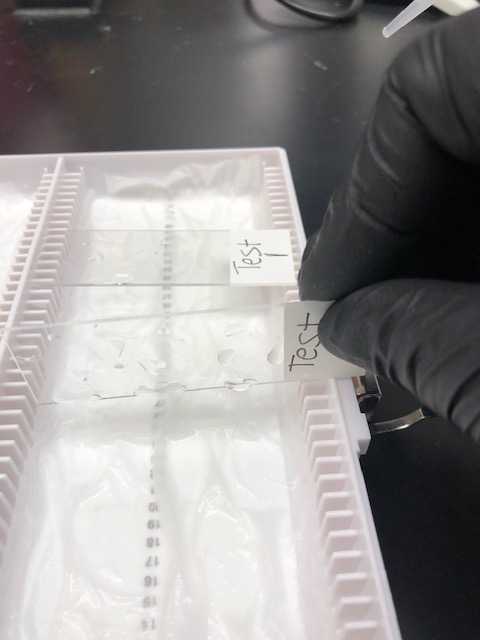
Remove coverslip from sections by incubating slides in a vertical staining jar filled with PBS for 30 minutes with slight agitation (i.e. plate rocker).
Slowly lift slide from vertical jar and allow coverslip to release from slide via gravity.
If the coverslip does not release from the slide, return the slide to PBS for an additional 15 minutes.
Wash slide in PBS for 5 minutes three times to remove any residual glycerol.
Place slides back in vertical staining jar full of PBS with slight agitation to wash.
Fluorophore Inactivation
Prepare basic solution of 0.5 M sodium bicarbonate (NaHCO3), pH 11.2 (acceptable range: 10.9-11.3).
Mix 21 g of sodium bicarbonate with 500 ml ddH2O thoroughly.
Using sodium hydroxide pellets, bring the solution to a pH 11.2 (acceptable range: 10.9-11.3). Measure the pH each week it is used and adjust as needed.
Solution can be stored at 4C for 6 months.
Prepare a solution of 0.1 M NaHCO3,3% H2O2 in ddH2O.
As an example, to make up 10 ml of inactivation solution, add 2 ml of 0.5 M NaHCO3and 7 ml ddH2O.
Solution is aliquoted into five tubes (1.8 ml per tube).
200 µl of hydrogen peroxide is added to each tube prior to the solution being added to the section. Solution must be made fresh and added to sections immediately after the addition of H2O2. This reaction is time sensitive. 2O2. This reaction is time sensitive.
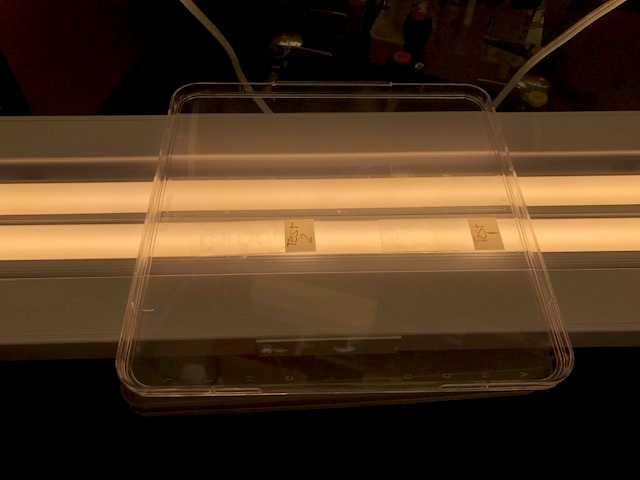
For this, place slides on a plastic surface on top of the LED light. We often use multiple plates for this.
Repeat this process with fresh solution four more times.
Remove solution and wash sections in PBS for 5 minutes four times.
After inactivating the fluorophores, slides are mounted in 50% glycerol and imaged to confirm complete fluorophore inactivation, followed by the removal of the coverslip, and three 5 minutes washes in PBS. Hoechst stain will not bleach and is necessary for image registration later.
Subsequent Immunofluorescence Cycles
Dilute fluorophore-conjugated primary antibodies using Antibody Diluent Reagent.
Add diluted antibodies to each section and incubate overnight at 4˚C.
Remove antibody solution and wash sections with PBS for 5 minutes three times.
Incubate sections in Hoechst (1:5,000 dilution in 1X PBS) for 5 minutes (this may not be necessary, but does no harm).
Remove Hoechst, and wash sections with PBS for 5 minutes twice.
Mount slides in 50% glycerol in PBS.
Image
Store slides at 4˚C in a moisture chamber.
Sections II-IV are repeated for each remaining cycle.
Quality Controls
Controls: When testing new antibodies, extra sections are used for controls to determine the autofluorescence and specificity of each antibody.
Negative control: Used to observe autofluorescence of the tissue. No primary or secondary antibody is added to the section.
Isotype control: Checks for any non-specific interactions of the primary antibody. A non-immune antibody of the same species and isotype (i.e. mouse IgG1) of the primary antibody being tested is incubated at the same concentration. A secondary antibody is added.
Positive control: Most antibodies used have targets that are found in kidney tissue in high amounts. For the immune cell markers used within this project, the antibodies are first tested in spleen tissue to confirm they work. They are then validated in kidney tissue.
Antibody Validation
All antibody validation is done on the same tissue block. When that block is no longer available, all antibodies must be validated on the new block.
Working dilutions are determined by the recommendations from the company. A series of dilutions are tested based on these recommendations.
If there are no references from the company, antibody dilutions range from 2-20 µg/mL depending on the concentration of the stock.
Directly conjugated antibodies are validated in the same steps as those that are unconjugated. A secondary antibody in a different fluorophore from the direct conjugate is added to confirm the conjugation.
The working dilution for directly conjugated antibodies is determined based on the specificity, intensity (secondary vs. direct conjugate), and signal: noise ratio.
Directly conjugated antibodies are tested for the ability to withstand one freeze/thaw cycle. This is completed by freezing a small aliquot of the conjugated antibody at -20C. This aliquot is thawed and stained on a section adjacent to a section stained with an aliquot of the antibody that has not been frozen.
All antibodies conjugated in the lab are validated via quantifying the moles of dye: moles of protein (acceptable range: 0.7-2). See Antibody Purification and Labeling Protocol for details.
Each antibody is evaluated and validated using other antibodies to determine the sensitivity and selectivity. They are then placed in specific groups based on the imaging results.
Enhanced (orthogonal): Co-labeling with a different antibody to the same antigen.
Approved: Different antigens, yet the cell expression is the same.
Supported: Localization is the right cell type, but there is not a second antibody for validation.
New lots of antibodies are validated by staining the old lot while simultaneously staining the new lot using a series of dilutions including the optimized dilution of the old lot.
Multiplexing Qc
Prior to multiplexing, each cycle is stained independently and imaged.
The antibodies are compared to when they were previously stained alone to ensure the specificity and intensity remains the same.
A practice run of MxIF must be successfully completed prior to starting an experiment.


