Microwave synthesis of low molecular weigth deacylated chitosan
Geisianny AM Moreira, Eric S McLamore, Maria J Torres
Disclaimer
Abstract
This protocol describes the synthesis of low molecular weight deacylated chitosan using microwave irradiation. The process requires approximately 2.5 hours (including baseline analysis).
An Anton-Parr microwave reactor (Monowave 50p) was used throughout this protocol. ADA-compliant procedures are used throughout the protocol (including building lab space/design and analysis of synthesized particles).
Before start
Wear appropriate safety PPE throughout (lab coat, gloves, eyewear).* An electronic or physical lab notebook may be used throughout.
- See the experimental plan guide for tips on planning your work.
Steps
SECTION 1) Materials and solution preparation
Prepare Solution (1% deacylated chitosan -0.05M Acetic Acid)
- In a glass container or sealed plastic weight
2gof Chitosan (CHI) 85% deacetylated and solvated in98mLof 0.1M of acetic acid, mix and look carefully to ensure no precipitates. Use the magnetic stirrer base to provide a mix of the solution. - Add
49mLof the previous solution and mix with49mLof DI/nano-pure water to obtain 1% deacylated CHI - 0.05M acetic acid solution. Use the magnetic stirrer base to provide a mix of the solution. - Shake/stir well and look carefully to ensure there are no precipitates. Use the magnetic stirrer base to provide a mix of the solution.
- Seal the vial immediately (contamination is a common problem).
Prepare reaction vials
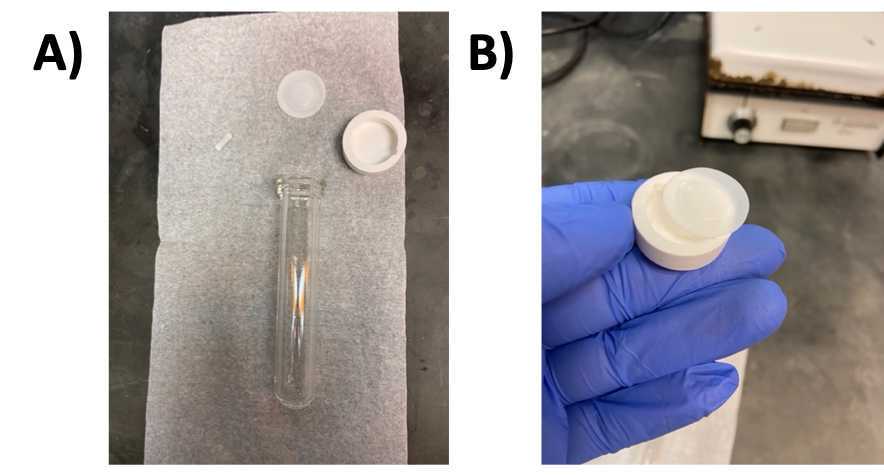
- Check the vial cap and Teflon liner to make sure neither is damageddamage to the cap and both are clean ( Fig 1A-B )

Add solution to the reaction vial .
- Pipette
8000µLof 1% deacylated chitosan -0.05M acetic acid solution to a glass reactor vial. - Add a nano stir bar to the reactor vial.
- Place Teflon liner in cap.
- Seal the reaction vial with cap.
- Invert the vial three times to mix solutions.
- Place in a test tube rack.
SECTION 2) Particle synthesis
Set up microwave reactor .
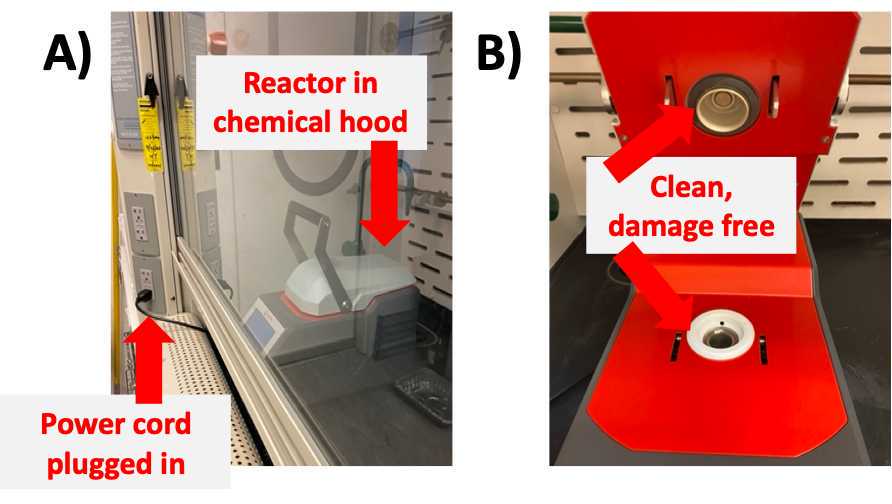
- Ensure the Anton-Paar reactor is in the chemical hood and plugged into the power outlet ( Fig 2A ).
- If not placed in the chemical hood, the institutional safety committee must approve the exhaust hose. setup (using either a snorkel exhaust and/or a valid tube/hose system).
- Open the lid and place the glass reactor in the Anton-Paar reactor chamber ( Fig 2B ).
- Close the chamber lid and seal it shut with the handle.

- Before starting the Monowave, go to the third bottom option on the screen to ensure the settings are correct and have not been changed. Then, press "step type" and "ramp to temp" and click "✓".

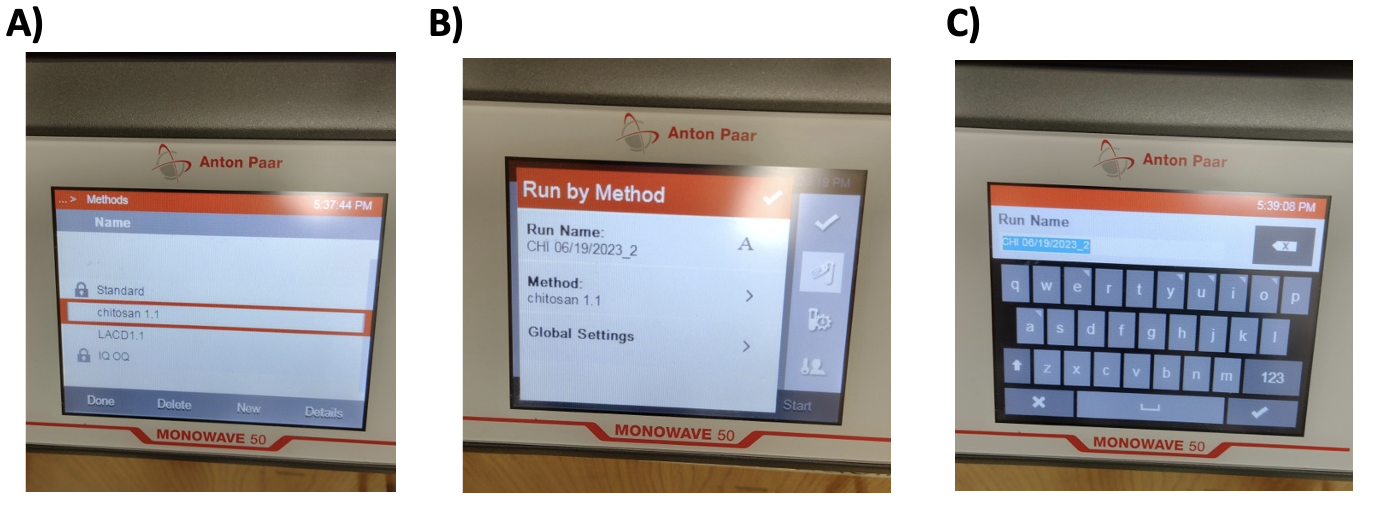
- Press “Run by Methods” section ( Fig 3 ) by pressing the Menu button.
- Check the settings above (see note) and ensure “Run by Methods” is correct in the instrument ( Fig 3 ).
- Press Menu
- Press the "Methods" required to complete button required to complete
- Choose the method, then "Done."
- Click back.
- Choose Run Name and name in the text box as your preference.
- Click "START".
SECTION 3) Reactor data collection
Download reactor temp/pressure profile
- Insert USB to port on right side of Monowave 50 p.
- Press “Details”.
- Press “Export”.
- Choose the Export option, and press “OK” when done.
- Remove USB.
SECTION 4) Stabilization and analysis (post cook)
Qualitative analysis (color)
- The first step of qualitative analysis is visual inspection of the solution color.
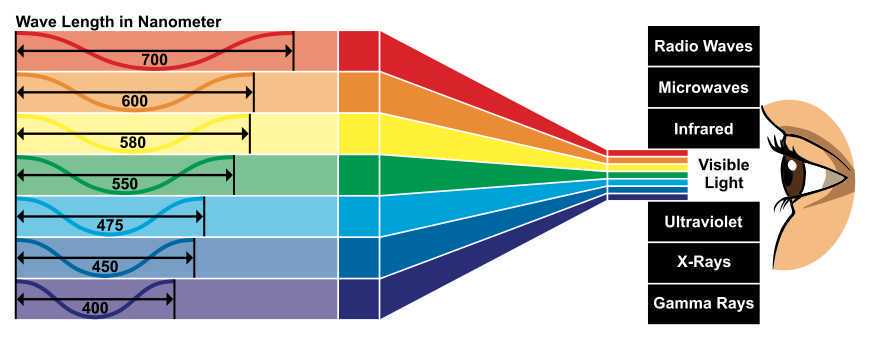
- Analysis of polychromatic visible (VIS) color is an important quality control mechanism in particle synthesis ( Fig 4 )

- Observe the glass vials under white light (valuable lab lighting)
- Representative photos of "as prepared" particle solutions are shown in Fig 5 .

- In addition to visual inspection, UV-VIS may be used to analyze the samples.
- Color determination to evaluate the quality of the sample after the use of microwave to reduce the molecular weight of deacylated chitosan is shown in Fig. 6

Figure 6. Analysis of solution color using an iPhone app (Color Name AR). A) Sample of lower molecular weigth deacylated chitosan. B) associated color identification using Color Name AR (identified as Russet; RGB 196, 194, 150).
Qualitative analysis (fluorescence emission)
- Using either low light conditions or a prepared lightbox for analysis (e.g., black styrofoam), position a 395 nm UV pen perpendicular to the glass storage vial,
- Turn on the pen and inspect for an emission beam.
- Fig 7A shows an example of fluorescence for a sample following the protocol described here.
- This rapid analysis is helpful for quality control immediately after synthesizing particles but should be supported by subsequent quantitative analysis (shown in the step below).

SECTION 5) Cleanup
Clean up space and dispose of waste .
- Turn off Monowave and unplug it from the waste area. It has a dedicated chemical disposal container for the chitosan outlet.
- Dispose of used chemicals according to the lab safety plan.
- Wash all glass reactors with mild detergent and warm water.
- Carefully remove the Teflon lining from the cap and wash with mild detergent and warm water. If the cap or the Teflon lining is damaged, it should be discarded according to the lab safety plan.
SECTION 6) Data management
Data management (reactor data only).
-
File naming : For saving all versions of this protocol, use the following file structure: Method_(insert date here).ai
-
File storage : Store all methods in the Desktop folder.
-
Backup files : At least once per year, ensure the folder is backed up on the lab's external hard drive.

