Live cell microscopy sample preparation (yeast culture)
Jakub Zahumensky, Jan Malinsky
Abstract
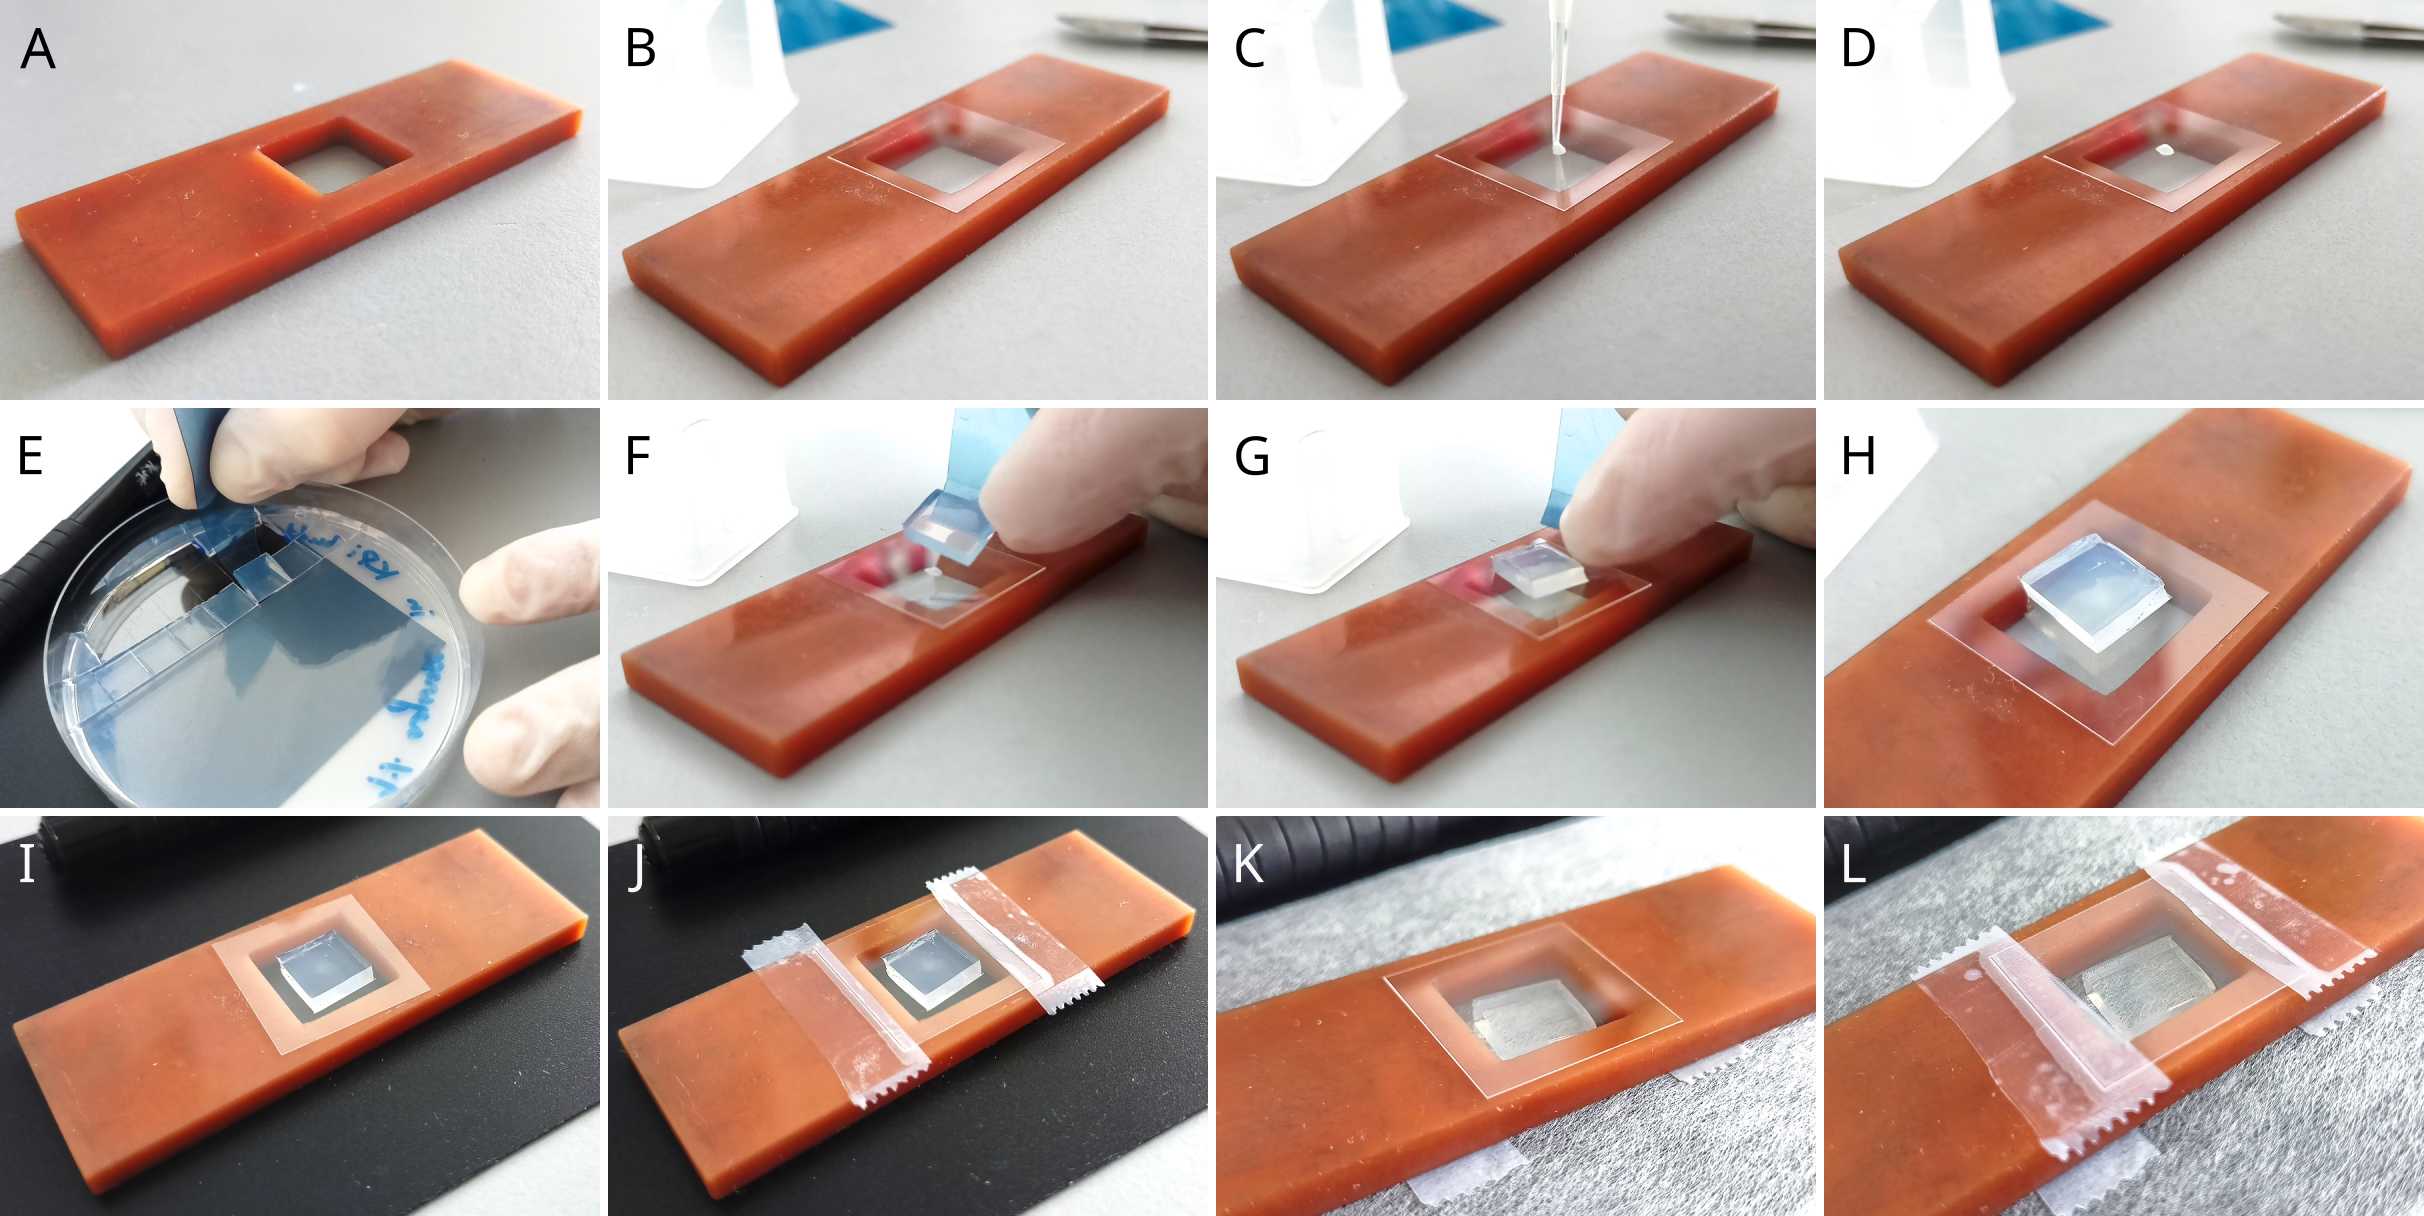
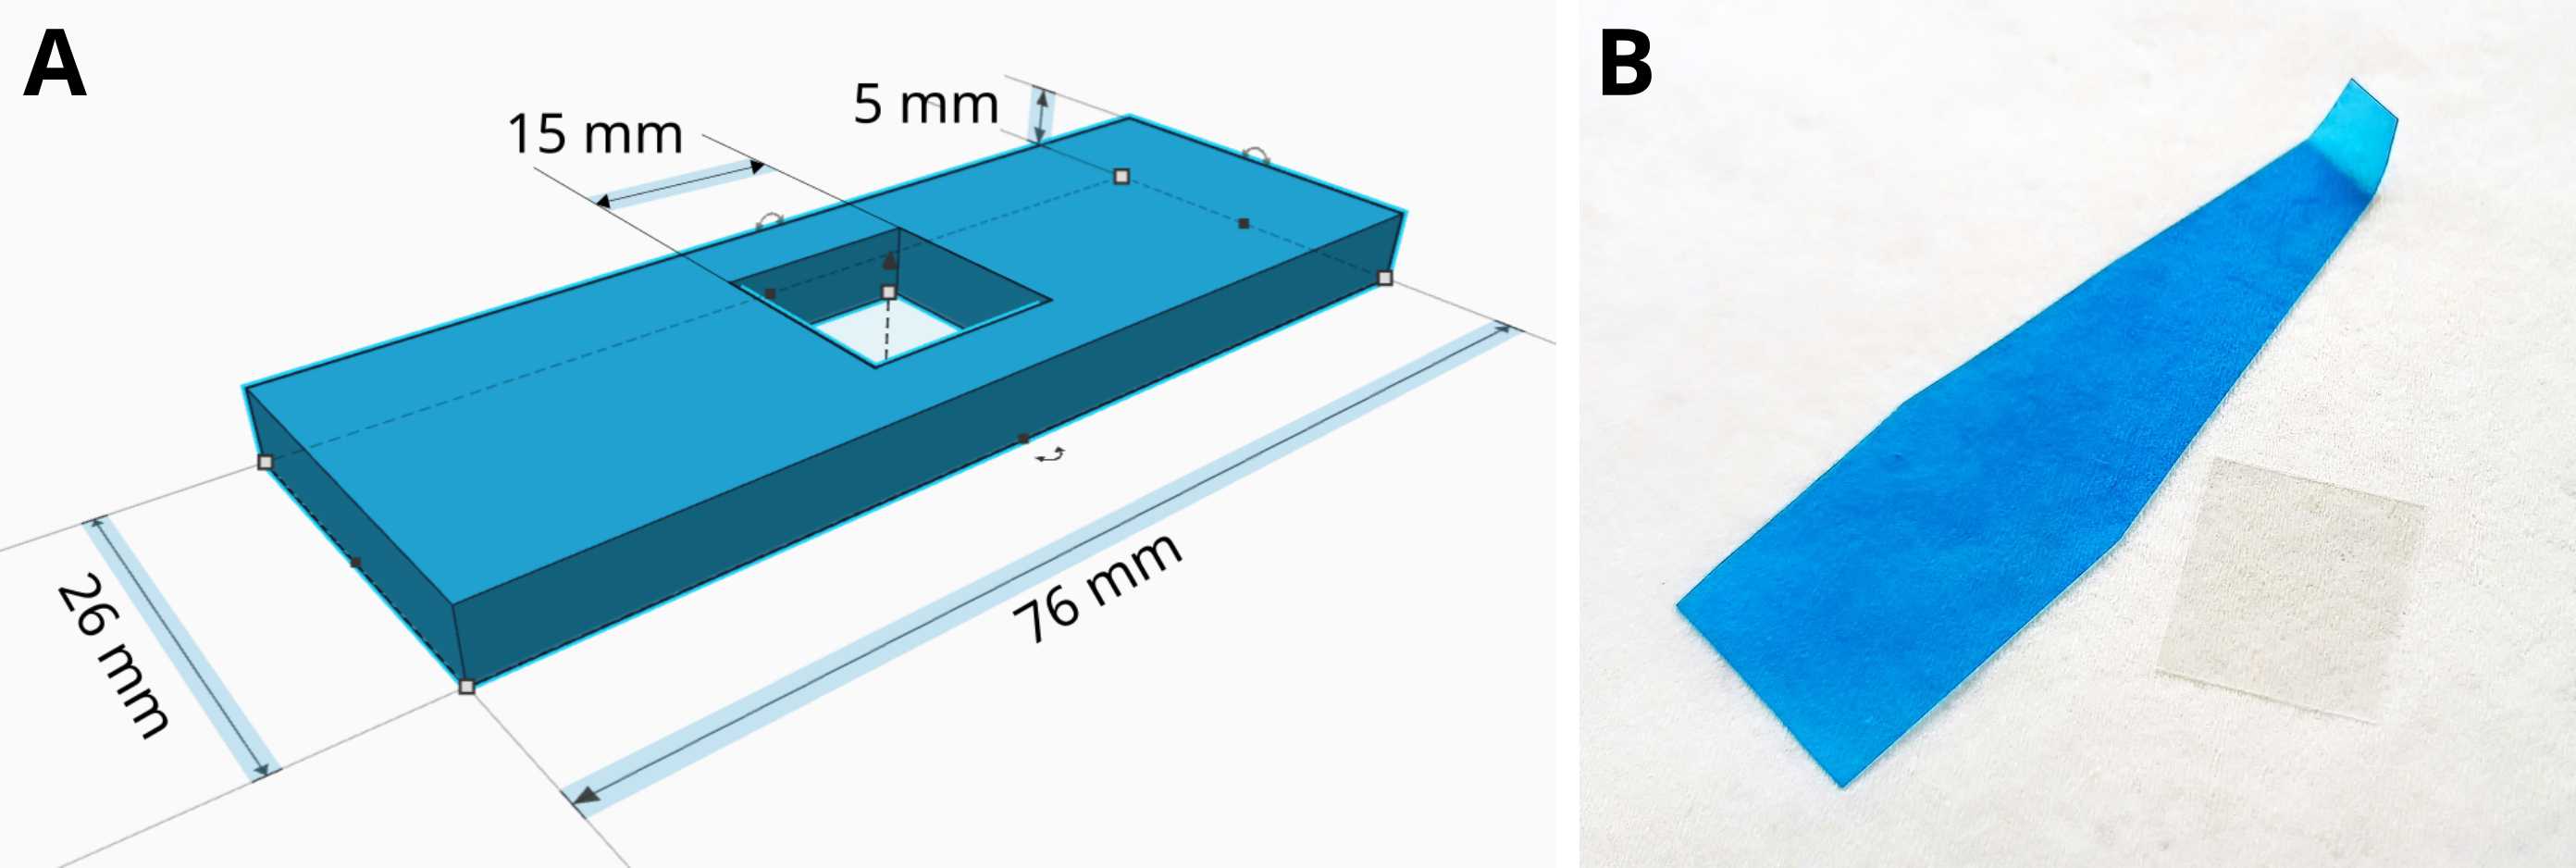
In our approach, (cell-walled) cells in thick suspensions are placed on microscopy cover glass and overlaid by a small block of 1% agarose prepared either in buffer or cultivation medium identical to that of the respective cell culture, ensuring a close-to-natural environment. The cover glass is taped to a custom-made microscopy sample holder (Tinkercad file for 3D printing can be downloaded here). In this approach, the cells are immobilized on the cover glass just by mild mechanical forces, which does not induce a cellular stress response, as documented by normal actin structure in C. elegans (Chen and Pan, 2021) and by the absence of stress granules S. cerevisiae cells (Grousl et al., 2015; Vaškovičová et al., 2017). Furthermore, the cells spontaneously prefer a monolayer arrangement, i.e., they are mostly in the same focal plane. This makes microscopy imaging more efficient, saving both time and storage space. Since the agarose is permeable for small molecules, cells can be treated by directly adding chemicals onto the agarose block (in an inverted microscope) during time-lapse experiments (Grossmann et al., 2007; Grousl et al., 2015; Vaškovičová et al., 2017). Adding a cover glass on the other side of the sample holder (Fig. 2) prevents water evaporation and shrinking of the agarose block enabling long time-lapse experiments. The described arrangement thus represents an alternative to both surfaces coated with concanavalin A or poly-L-lysine, and expensive microfluidics systems.
Steps
Graphical guide

Microscopy sample preparation
Cultivate cells under desired conditions.
Transfer the whole culture to a 50 ml Falcon tube (if not already used for cultivation) or remove 1 mL aliquot to a 1.5 mL microcentrifuge tube.
Centrifuge for 2 min at 1430 rcf at RT (room temperature).
Remove most of the supernatant by pipetting or decanting.
Vortex pellet in 3 one-second pulses (850 rpm).
Note: Alternatively, keep the supernatant and gently disturb the pellet by pipetting.
Note 2: If 1 ml of exponential culture is centrifuged in a 1.5 mL tube, repeat steps 2-5, pipetting the supernatant in step 4 both times.
Pipette 1 μL of the cell suspension onto a clean microscopy cover glass.
Cover the glass with a block of 1% agarose gel prepared with either buffer or cultivation media (see Recipes). Use a small flat spatula (Fig. 1B) to manipulate the agarose block.
Place the cover glass into the sample holder (Fig. 1A), with the agarose block inside the chamber (Fig. 2).
Tape the cover glass to the holder with Scotch tape and mark with a permanent marker if you have more than one sample.
Optional: If you are performing a time-lapse experiment and/or use a microscope stage incubator to control temperature, flip the sample holder upside down onto a lens cleaning paper and tape another cover glass from the other side (this prevents the agarose block from drying out during longer experiments)
Note: steps 6-10 are depicted in Fig. 2.


