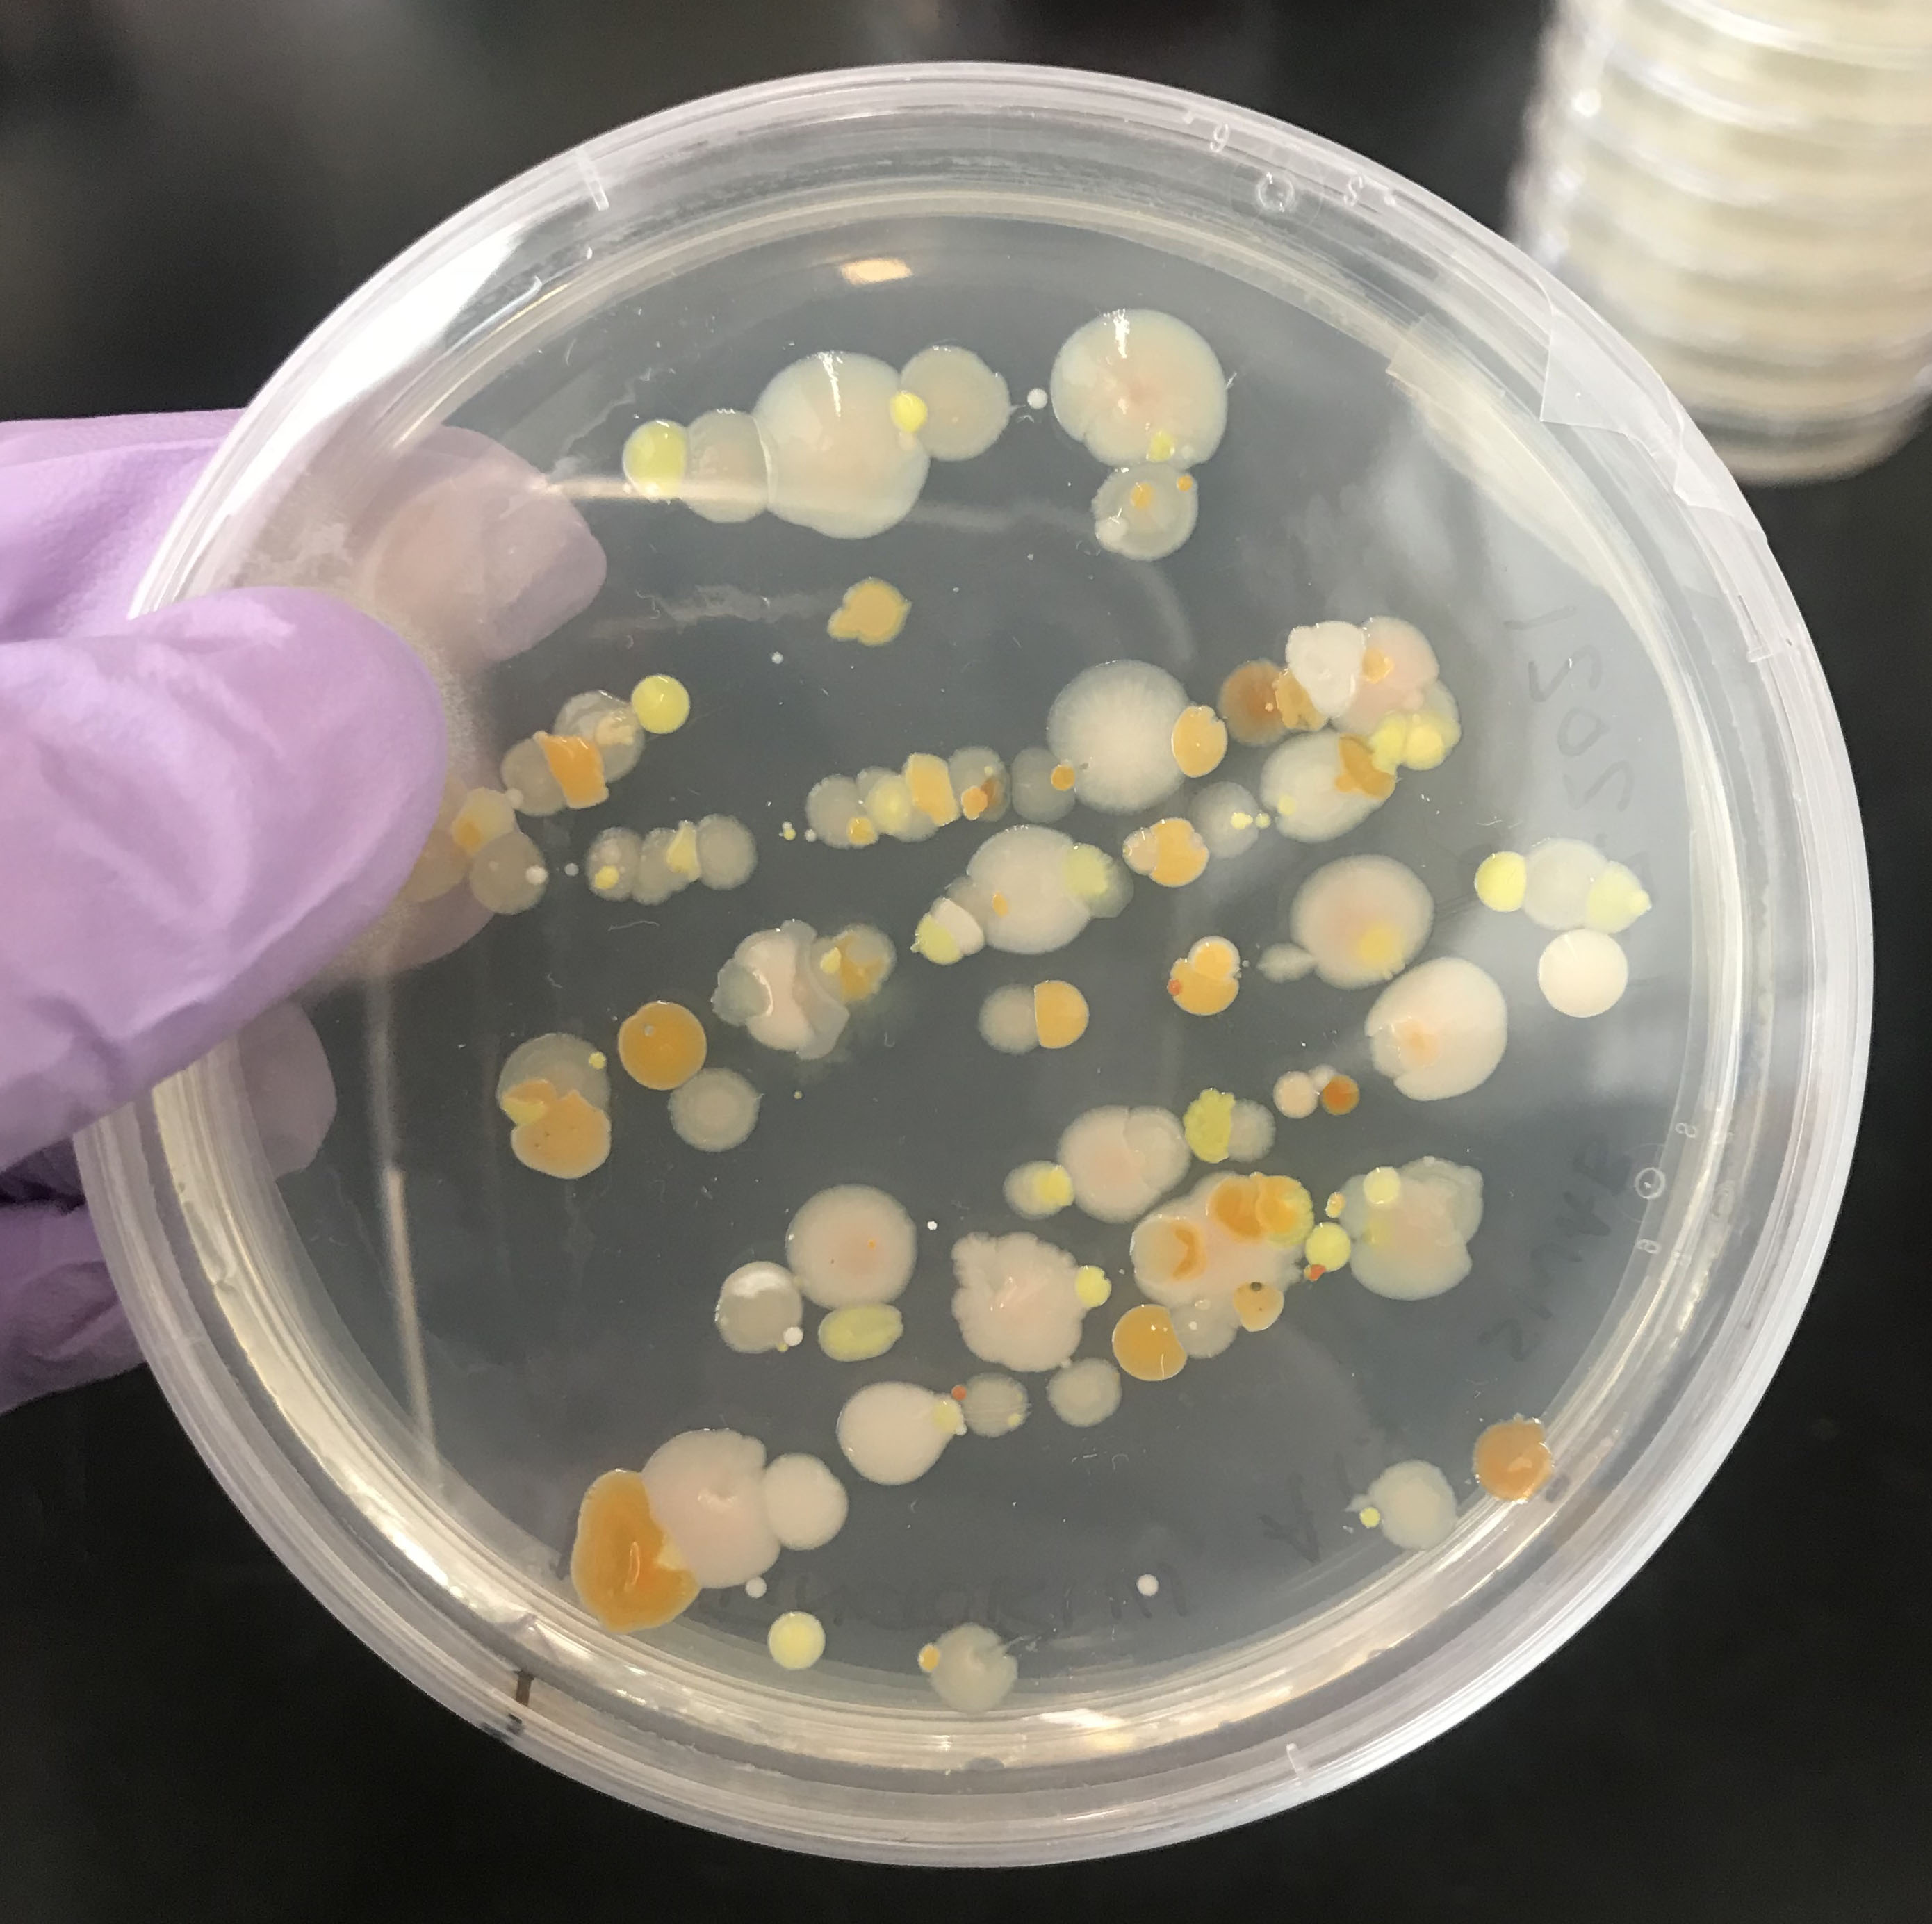
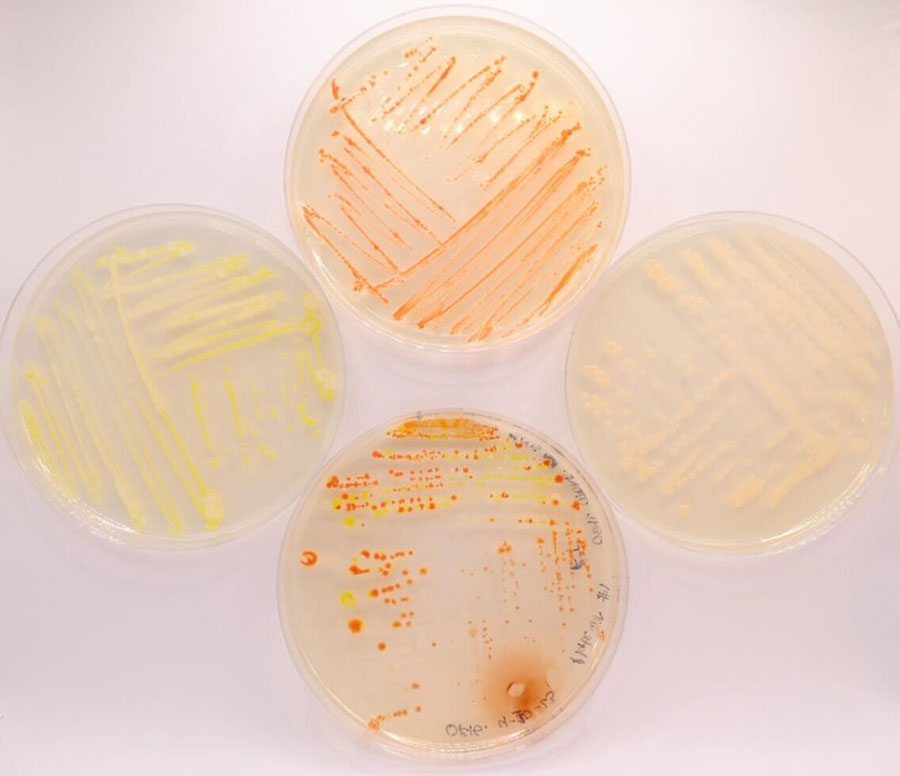
Isolation of microbes from the skin of terrestrial frogs
Cooper Vasek, Daniel A. Shaykevich, Lauren A O'Connell, Stephanie N. Caty, Marie-Therese Fischer, Amanda Muñoz Meneses
Abstract
The microbes on amphibian skin are critical for host health. Beneficial skin microbes regulate the growth of other microbes and influence many important host physiological processes. This protocol details how to isolate microbes from the skin of terrestrial frogs, using poison frogs as an example. This assay is useful in research laboratories, undergraduate teaching laboratories, and in field sampling of wildlife. Completion of the protocol should result in the isolation of several bacteria or fungi that can be identified using DNA barcoding and used for further experimentation in microbial ecology.
Before start
This work should be done in a sterile environment, if possible. Perform all work on a clean and disinfected benchtop with a Bunsen burning flame on. Always work close to the flame, as the flame produces an upward current of the air that keeps microbes in the air from contaminating your plate.
Attachments
Steps
Prepare plates for isolation of microbes
Prepare a number of rich, non-specific media plates for growing as many strains as possible. One or all types could be used, or alternative media could be used when appropriate. All media are autoclaved at 121°C to sterility and specific times depend upon the volume of media you make.
Prepare 1% Tryptone mixture for pouring 500mL or 25 100mm x 15mm plates.
Wear gloves disinfected with 70% ethanol throughout the procedure.
Place an autoclaved magnetic stir bar into a sterile 1L glass culture media bottle.
Add 250mL of MilliQ water into the bottle. Set the bottle on a heat plate at room temperature, ensuring the stir bar is active.
Incorporate dry Ingredients to the stirring solution:
8gof Agar4gof Sodium chloride (NaCl)5gof Tryptone
Add an additional 250mL of MilliQ water to the mixture. Allow all ingredients to mix thoroughly.
Autoclave the media to sterilize the contents.
To autoclave the mixture, use the Liquid cycle at 121°C for 0h 40m 0s. Place the bottle in a suitable container and fill it with water up to the level of the mix inside the bottle.
When the cycle is finished, open the autoclave door about one inch for 0h 10m 0s to let the steam out.
Discard the water from secondary container and place the bottle with the mixture on the heat plate.
Visually inspect the mixture to ensure homogeneity, verifying that it has a yellow appearance.
If the mixture displays distinct clear and yellow phases or streaks, mix again on the heat plate and repeat the liquid cycle.
Allow the media to cool to a suitable handling temperature.
Pour the autoclaved media into plates.
Sterilize the surface thoroughly with 70% ethanol to ensure aseptic conditions.
Light a Bunsen burner and allow enough space to work around it when pouring the plates. Only open the lid of the media bottle close to the flame.
Set five plates close to the burner and start pouring the mixture until the bottom surface of the plate is covered. To avoid contamination, lift the cover of every plate, pour the mixture, and immediately cover the plate again.
Stack the plates to help clear condensation in the lid. Allow 120h 0m 0s to verify that there is no contamination in the plates before storing or using. Store at 4°C until ready for use.
Preparation of 1L of solid media with Defibrinated Sheep's Blood
40gTryptic Soy Agar (BD 236950)50mLSheep Blood (defibrinated)950mLMilliQ or DI Water
Autoclave water and Tryptic Soy Agar, let cool to ~47°C, add sheep blood, then dispense into plates.
Preparation of 1L of Tryptic Soy Broth with Defibrinated Sheep's Blood
30gTryptic Soy Broth (BD 211825)50mLdefibrinated Sheep Blood950mLMilliQ or DI Water
Autoclave water and Tryptic Soy Broth, let cool to ~ 47°C, then add sheep blood.
Other media used for characterization:
R2A
Liquid and solid media are made following manufacturer's instructions. (BD 218263)
LB
Liquid and solid media are made following manufacturer's instructions. (BD 244620)
YPD
Liquid and solid media are made following manufacturer's instructions. (BD 242720)
YPD is especially useful for culturing fungi.
Prepare liquid media for growing isolated microbes
Preparation of 1L of Tryptone 1% Liquid Medium for Microbial Cultures
Mix together 4g of Sodium chloride (NaCl) and 5g of Tryptone in 900mL water a large beaker Stir using a magnetic stir bar.
When ingredients are incorporated into the water, add additional water to a final volume of 1L.
Transfer the mixture into small glass bottles, aiming for approximately 12 bottles per liter and ensuring they are not filled beyond half capacity. Utilize a pipet to prevent any spillage onto the bottle sides.
Secure the bottle lids loosely and place them in an autoclave for a minimum of 0h 30m 0s within a secondary containment, with 2 centimeters of water.
Once autoclaved, tighten the bottle lids and seal the opening with tape, indicating the date.
Tear the tape when the bottles are opened.
Liquid media is used for making glycerol stocks, as outlined in Step 21 below.
Transfer of skin microbes from frog to plate.
Maintain a sterile environment throughout the work. Keep gloves on at all times and disinfect them with 70% ethanol. Allow ethanol to evaporate before handling frogs and change gloves before handling the next individual.
Open a sterile cotton applicator and wet the applicator with sterile water.
Catch the frog with a fresh plastic bag. Hold one or both legs between thumb and index finger, then open the bag and expose the frog. Rinse the frog with sterile distilled water using an autoclaved squirt bottle. This process minimizes transient bacteria or soil particles on the skin.
Swab the frog 10 times on each side of your interest (up and down the back is once), e.g. on the dorsal side, the legs, on either side and on the ventral side, including the fingers. Different body parts of the frog will have different microbes. For example, chytrid fungi will be found primarily on the ventral side and between the digits.
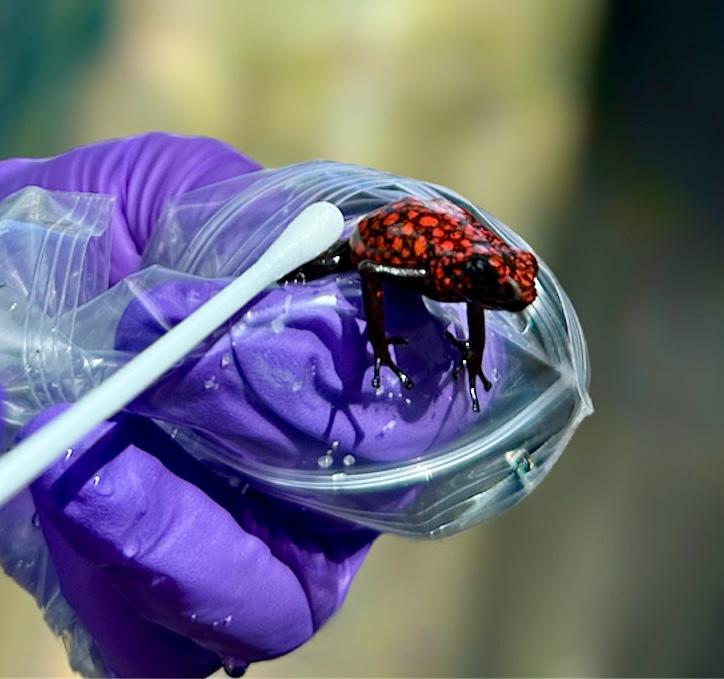
Transfer microbes from the swab to a growth plate.
Open the plate. Hold the swab in one hand and pick the plate up with the other hand. Streak the cotton applicator across the plate. Turn the plate and repeat the streaking a second time.
Close the plate, turn it around and label the outer rim of the bottom carefully with experimenter initials, plate type (ex. 1% Tryptone or YPD), the date and the name of the frog species that was swabbed.
Isolation of microbe strains
When colonies are large enough to be picked, touch a sterile loop or needle tool to an individual colony, and streak out onto a new plate of the same media type. Label plate and wrap with parafilm. Incubate overnight or until new colonies are visible.

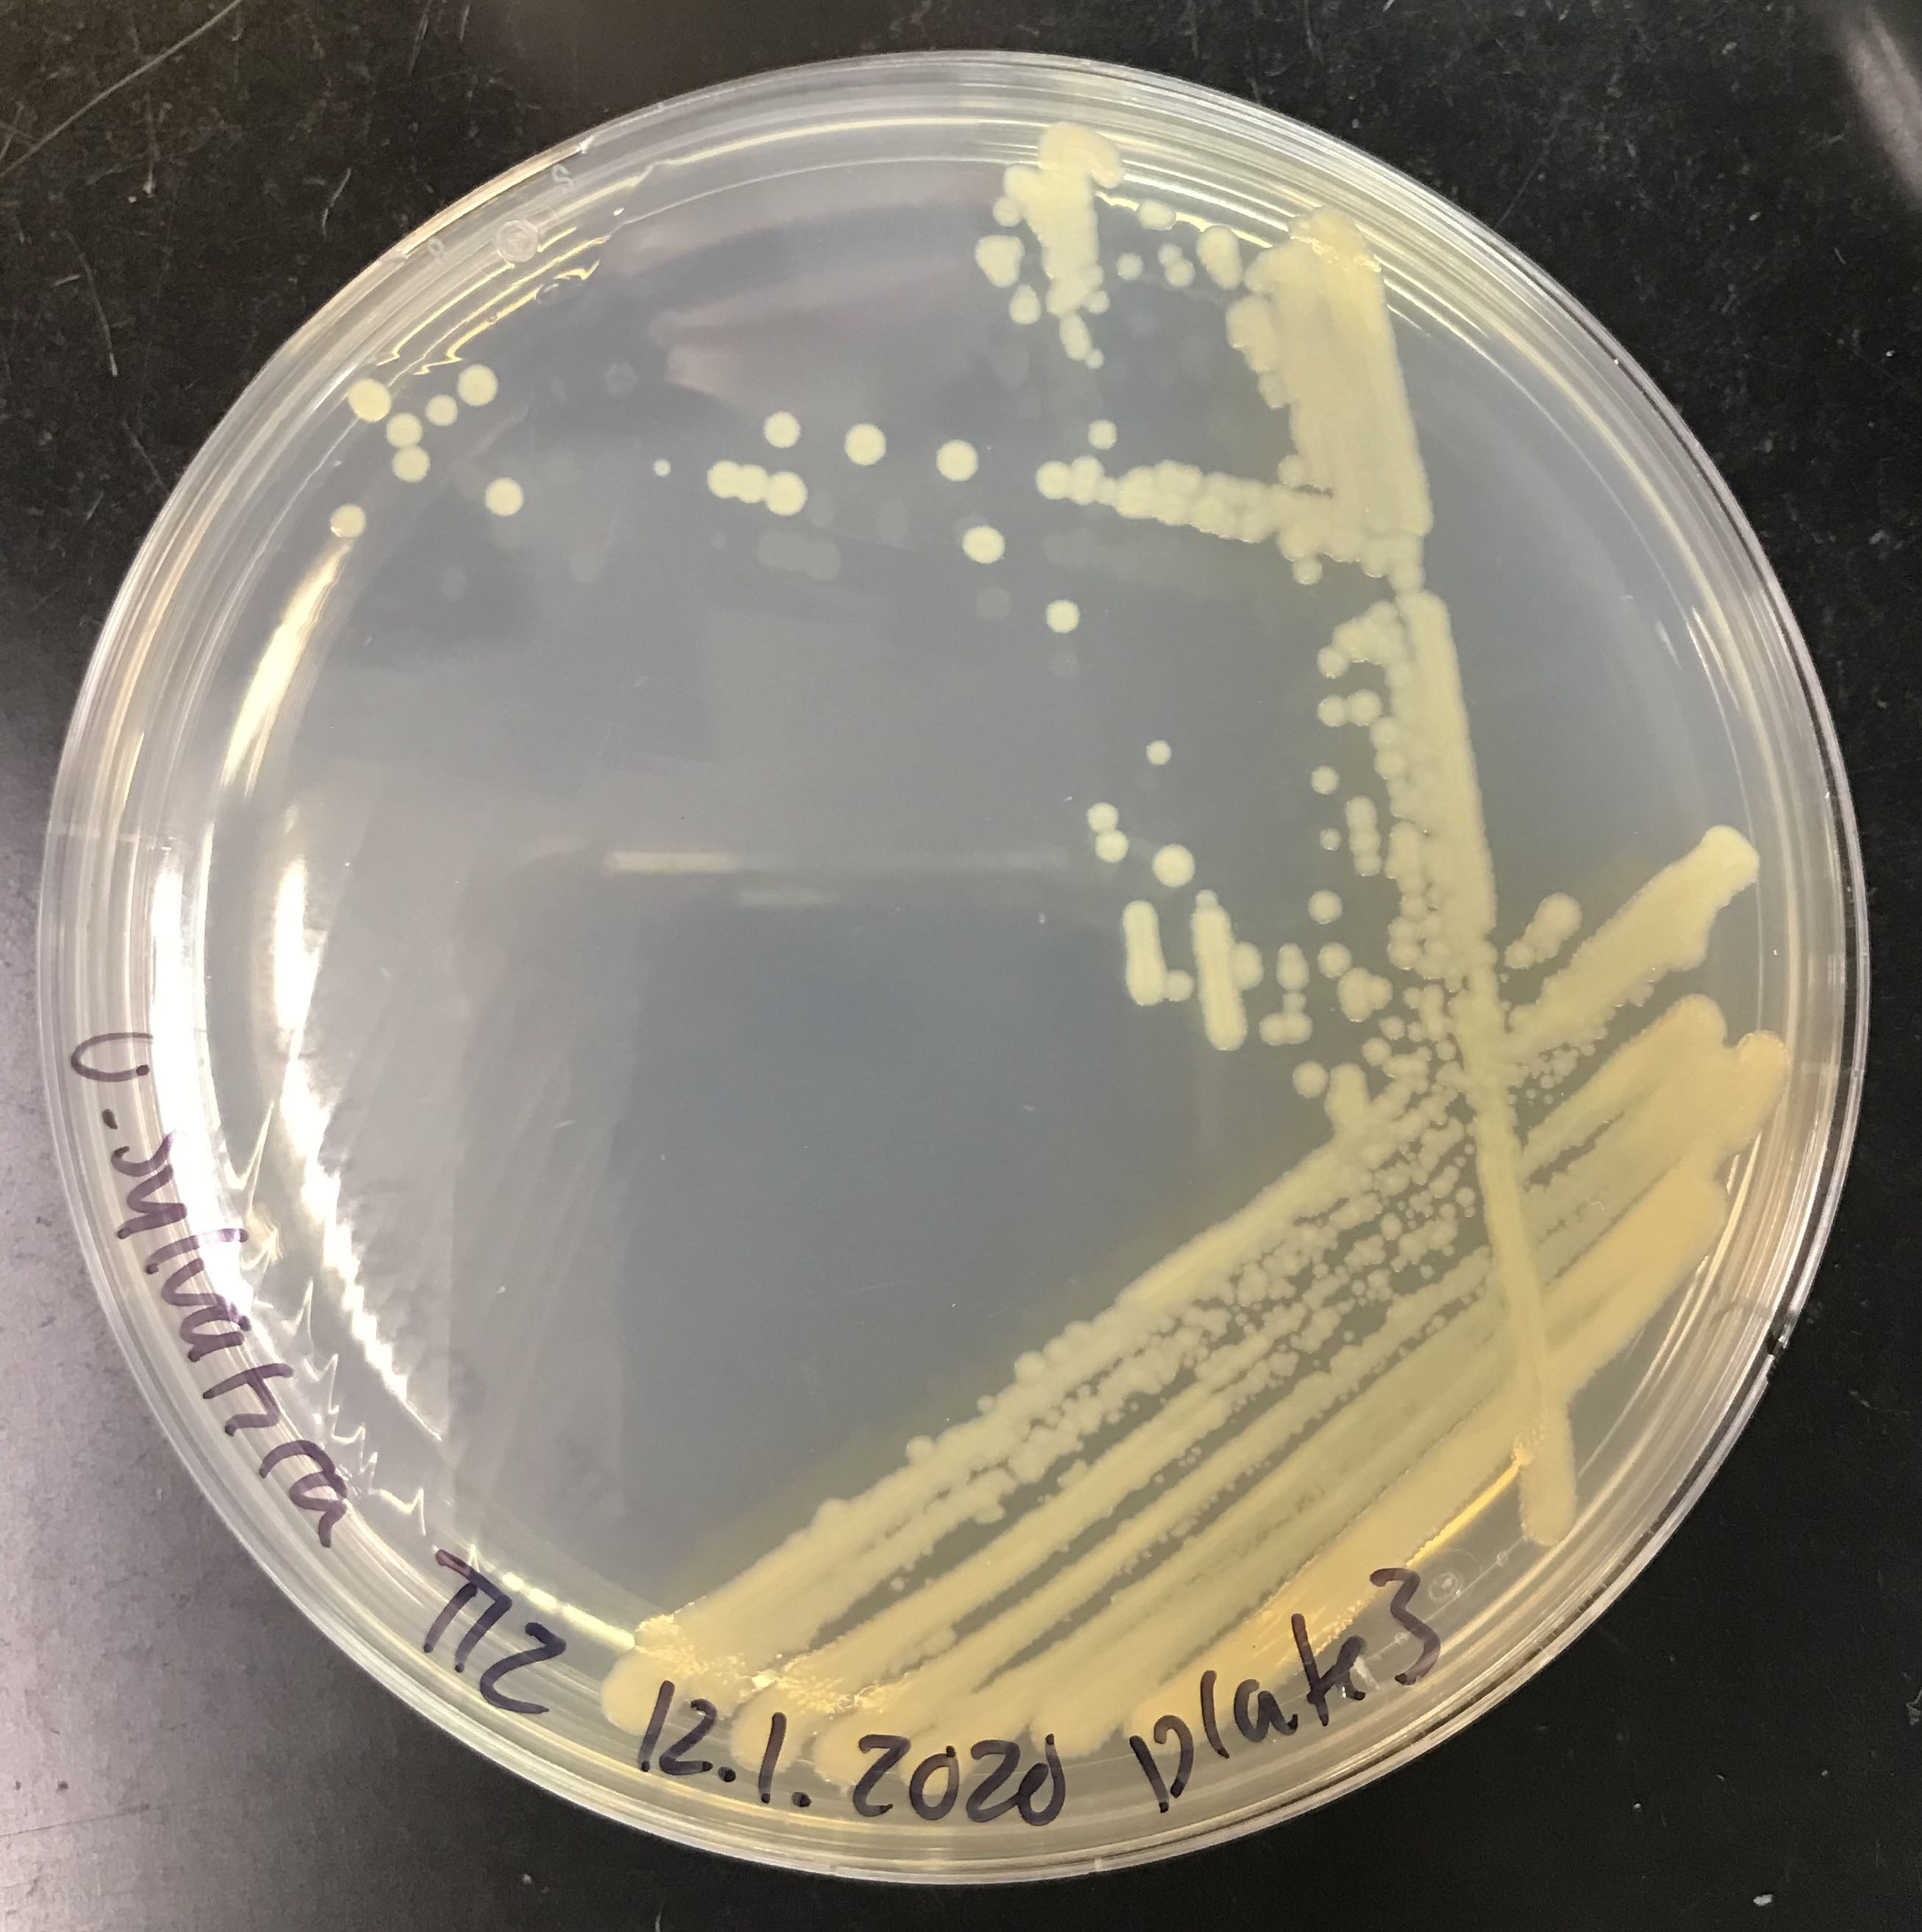
Repeat Step 17 for a third isolation step.
To identify colonies, scrape half of the colony selected for strain identification off the plate using a pipette tip. Use half to grow the microbe overnight (see Step 20) and the other half place the pipette tip into 10µL nuclease free water (See PCR below).
Grow the strain overnight in liquid media that corresponds to the isolation media.
Combine equal amounts of 50% glycerol solution with the overnight cultures. Store at -80°C for future use. Making several stocks is recommended.
Make glycerol:
- Combine 1:1 glycerol and milliQ water and gently mix to combine
- Vacuum filter with 0.22 µm filter
- Label two cryotubes per isolate
- In each tube, add:
500µLof glycerol500µLof liquid culture
- Store in
-80°C
PCR amplification of microbial DNA
Dilute the strains in water by placing half of a single colony into 10µL of sterile water using a pipette tip. Use 1µL of diluted strains as input for PCR.
Set up a PCR reaction amplify regions of the microbial genome for sequencing.
To identify bacteria, set up a PCR reaction to amplify the full length 16S gene. Each reaction should contain:
1µLdiluted strain1µLforward primer (27F)1µLreverse primer (1492R)12.5µLOneTaq or other polymerase suited for amplification of long pieces of DNA9µLnuclease free water
To identify fungi, set up a PCR reaction to amplify a portion of the ITS gene. Each reaction should contain:
1µLdiluted strain1µLforward primer (ITS4)1µLreverse primer (gITS7)12.5µLOneTaq or other polymerase suited for amplification of long pieces of DNA9µLnuclease free water
Place the PCR reactions in a thermal cycler and run the amplification protocol.
For the bacterial samples, run a PCR with the following parameters:
1 cycle of 0h 0m 30s at 94°C
followed by
30 cycles of 0h 0m 15s at 94°C, 0h 0m 30s at 55°C and 0h 2m 0s at 65°C,
then a final extension period of 0h 5m 0s at 65°C.
For fungal samples, run a PCR with the following parameters:
1 cycle of 0h 0m 30s at 94°C followed by
30 cycles of 0h 0m 15s at 94°C, 0h 0m 30sat 55°C and 0h 2m 0s at 68°C,
then a final extension period of 0h 0m 15s at 68°C.
Confirm successful amplification with gel electrophoresis. If amplification is unsuccessful, the strain may be a fungus or a Gram-positive bacteria, which will not lyse easily in water.
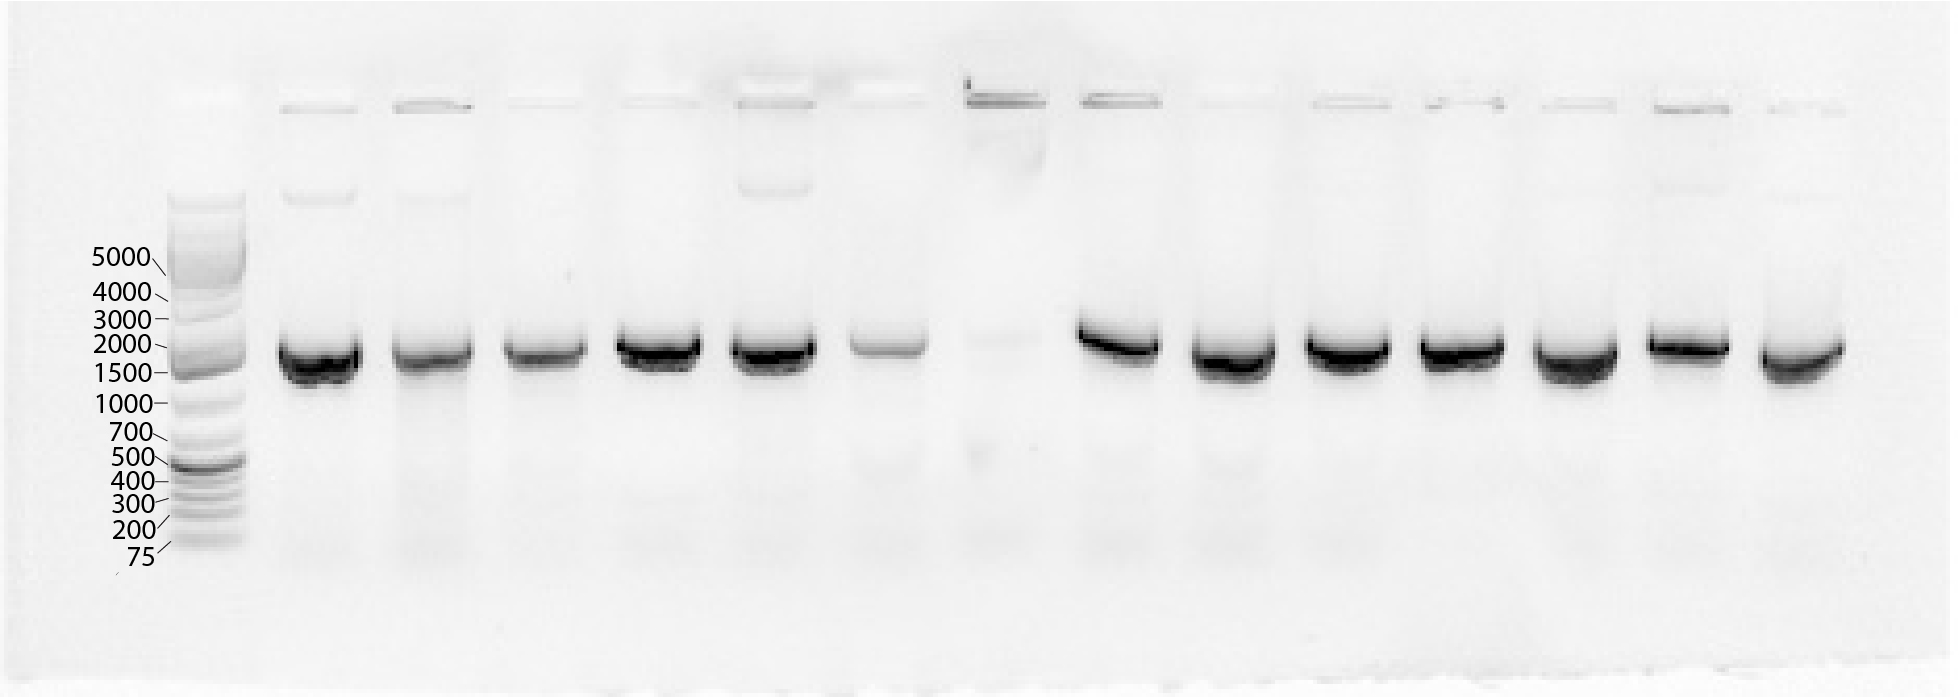
If no amplification occurred, grow up new colonies from the glycerol stock and extract DNA using the Qiagen Blood and Tissue Kit adapted for samples from Gram positive bacteria.
Purify the PCR products for sequencing using a PCR purification kit.
Suggested kit: E.Z.N.A Cycle Pure Kit from Omega.
Submit samples for Sanger sequencing. Provide primers for sequencing in both directions (forward and reverse) separately.
Identification of microbe strains
Align forward and reverse reads and compare to reference databases with BLAST on the NCBI platform.

