Formalin Fixed Paraffin Embedded (FFPE) Tissue Preparation for Digital Pathology Quantification Using QuPath
Toby J Curless, Zane Jaunmuktane, Yau Lim
ASAPCRN
FFPE Tissue
Digital Pathology Quantification
QuPath
Bright Field
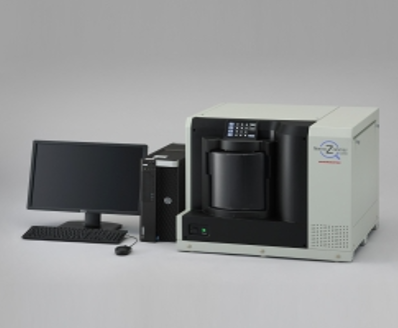
NanoZoomer
NZConnect
Annotations
Abstract
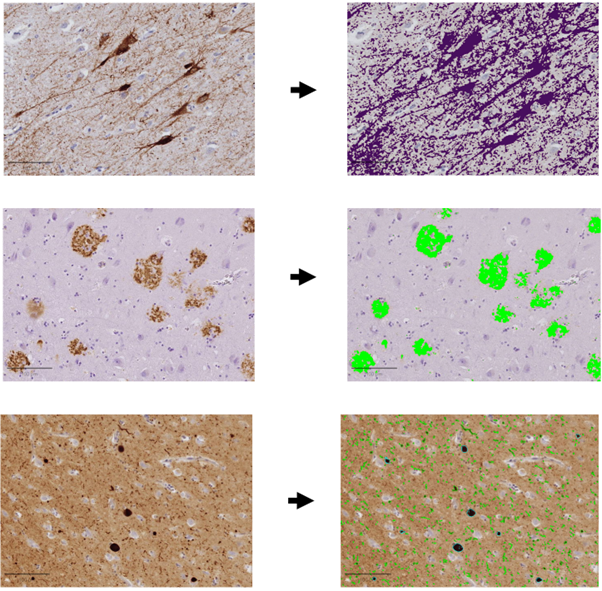
QuPath is an open-source digital pathology analysis software. Here, it is used to quantify various misfolded proteins across anatomical regions.
This protocol is appropriate for both human and mouse tissue, and will outline the methods of tissue preparation, digitisation, segmentation and importing images into QuPath.
Steps
Tissue Preparation
Generate tissue sections using standard microtome sectioning protocols.
Perform immunohistochemistry staining as per standard protocols.
Coverslip stained slides as per standard protocols.
Following cover slipping, wipe slides with 100% ethanol to remove ink/debris, then wipe slides with a dry microfiber cloth to remove any residual dust/debris.
Insert slides facing upwards into the NanoZoomer slide rack.
Digitisation and Segmentation of Tissue Sections, and Importing Images to QuPath
Select the scan profile in “Scan Settings” – full scan profile can be seen in the table below
| A | B |
|---|---|
| Illumination | Bright Field |
| Lens | 40 x |
| Z-stack | Single |
| Sample Validation | Enable (Threshold: 80) |
| ReScan | Disable |
| Sample Detection Area | Automatic |
| Focus Point No. | 9 Points |
| Focusing Mode | Rough&Fine |
| Threshold | 25 – 97 |
| Minimum Size | 1 mm2 |
| Focus Offset | Disable |
| Split Tissue | 5 mm |
| Sample Pieces | Each |
| Excluded Area | Exclude |
| Coverslip Filter | Enable |
Table 1 Full Scan Profile
Select the output profile in “Scan Settings” – full output profile can be seen in the table below – asterisks (*) are in place of file names – choose file as appropriate.
| A | B |
|---|---|
| Output Path | * |
| File name: | |
| Inc. Reference | REF |
| No Reference | yyyy-MM-dd HH.mm.ss |
| Reference | Use Barcode |
| Image Format: | NanoZoomer Digital Pathology Image (ndpi) |
| Image File Priority: | File Size |
| Slide Image(Macro Image) | Include |
| Default Viewing Angle | 0 |
Table 2 Output Profile
Additional settings: Image compression set to JPEG (quality 70), resolution: 230 nm/pixel (110198 DPI), colour profile: NanoZoomer S360 (C13220_MI_00) default.
Scan slides by selecting "Start Batch".
Manually select focus points and areas to be scanned for each section.
Following slide scanning, remove slides from the scanner and store appropriately.
Access the scanned slides via NZConnect 1.0.36 (IVD) – the images will appear in the folder in which they were saved in the “output path settings” – note: if a temporary export path was chosen, files should be manually selected and moved (cut and paste) to the desired folders.
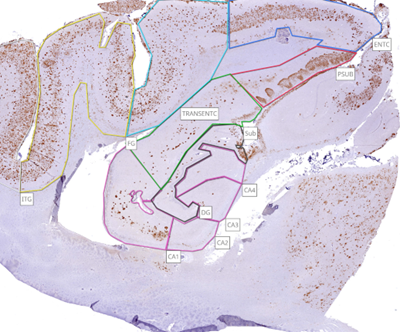
Select the desired anatomical regions to annotate, for example the hippocampus. Select the “Freehand” tool on NZConnect.
Either left-click across the perimeter of the region of interest, or click and drag around the perimeter. Once the perimeter is fully covered, double click to finish the annotation.
Once all annotations are completed, the annotations must be published – this can be done for each image individually, or whole folders can be published at once. When hovering over the image or folder with the mouse, 3 vertical dots will appear in the top right corner of the selection box. Left click the dots and select “Publish annotations” – publishing options can be modified to allow access to specific users, and to automatically share annotations when added. Choose the desired settings and select “Publish”
Download and install the most recent version of QuPath on your device (https://qupath.github.io/).
Open QuPath and select “create project” on the home page. Alternatively, select “file” → “Create New Project”.
Create a new folder and save to the desired location.
Once a new project is created, select “Add Images” – select all of the scanned images (.ndpi files) to be imported, In the drop-down boxes select: “Default (let QuPath Decide)” for the image provider, and “Brightfield (H-DAB)” for the set image type.
Annotations will need to be separated from the original ndpi file – this will require the use of a custom script. Once separated, 2 files for each scanned slide should be available – 1 .ndpi file (this is the original, non-segmented file), and 1 .ndpa file – this is the separated annotations.
The separated annotations will need to be imported to QuPath. This will require the use of another custom script – select “Automate”→ “Show script editor” → “File” → “Open”
Select the script from the file browser – here we used a script saved as a “GROOVY FILE”.
Select “Run” → “Run for project” – Using the arrows in the pop-up box (Select project image), select all of the desired images and transfer across to the “Selected” box.
Once all images are selected, click “Ok”.
All annotations should now be imported into QuPath and analysis can be conducted.


