Essential surgeries for the electrophysiological recording from a behaving non-human primate brain 1 (Head fixation post and recording chamber implantation)
Robert S Turner, Witold J Lipski, Daisuke Kase, Devin R Harsch
Abstract
The implantation of a head fixation post and recording chamber is the first step to performing electrophysiological recording of head-restrained awake non-human primates. Implants can last for many years if there are no infections. However, they may fail in a few months if an infection occurs, especially between the implant and the skull. Therefore, performing surgical procedures under strictly sterile conditions is the key to the successful progress of the project.
Steps
Planning for the head fixation post and recording chamber implantation
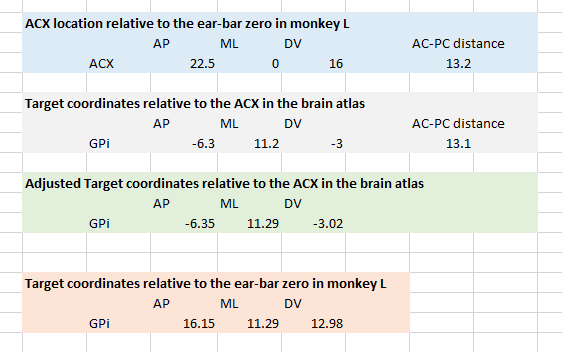
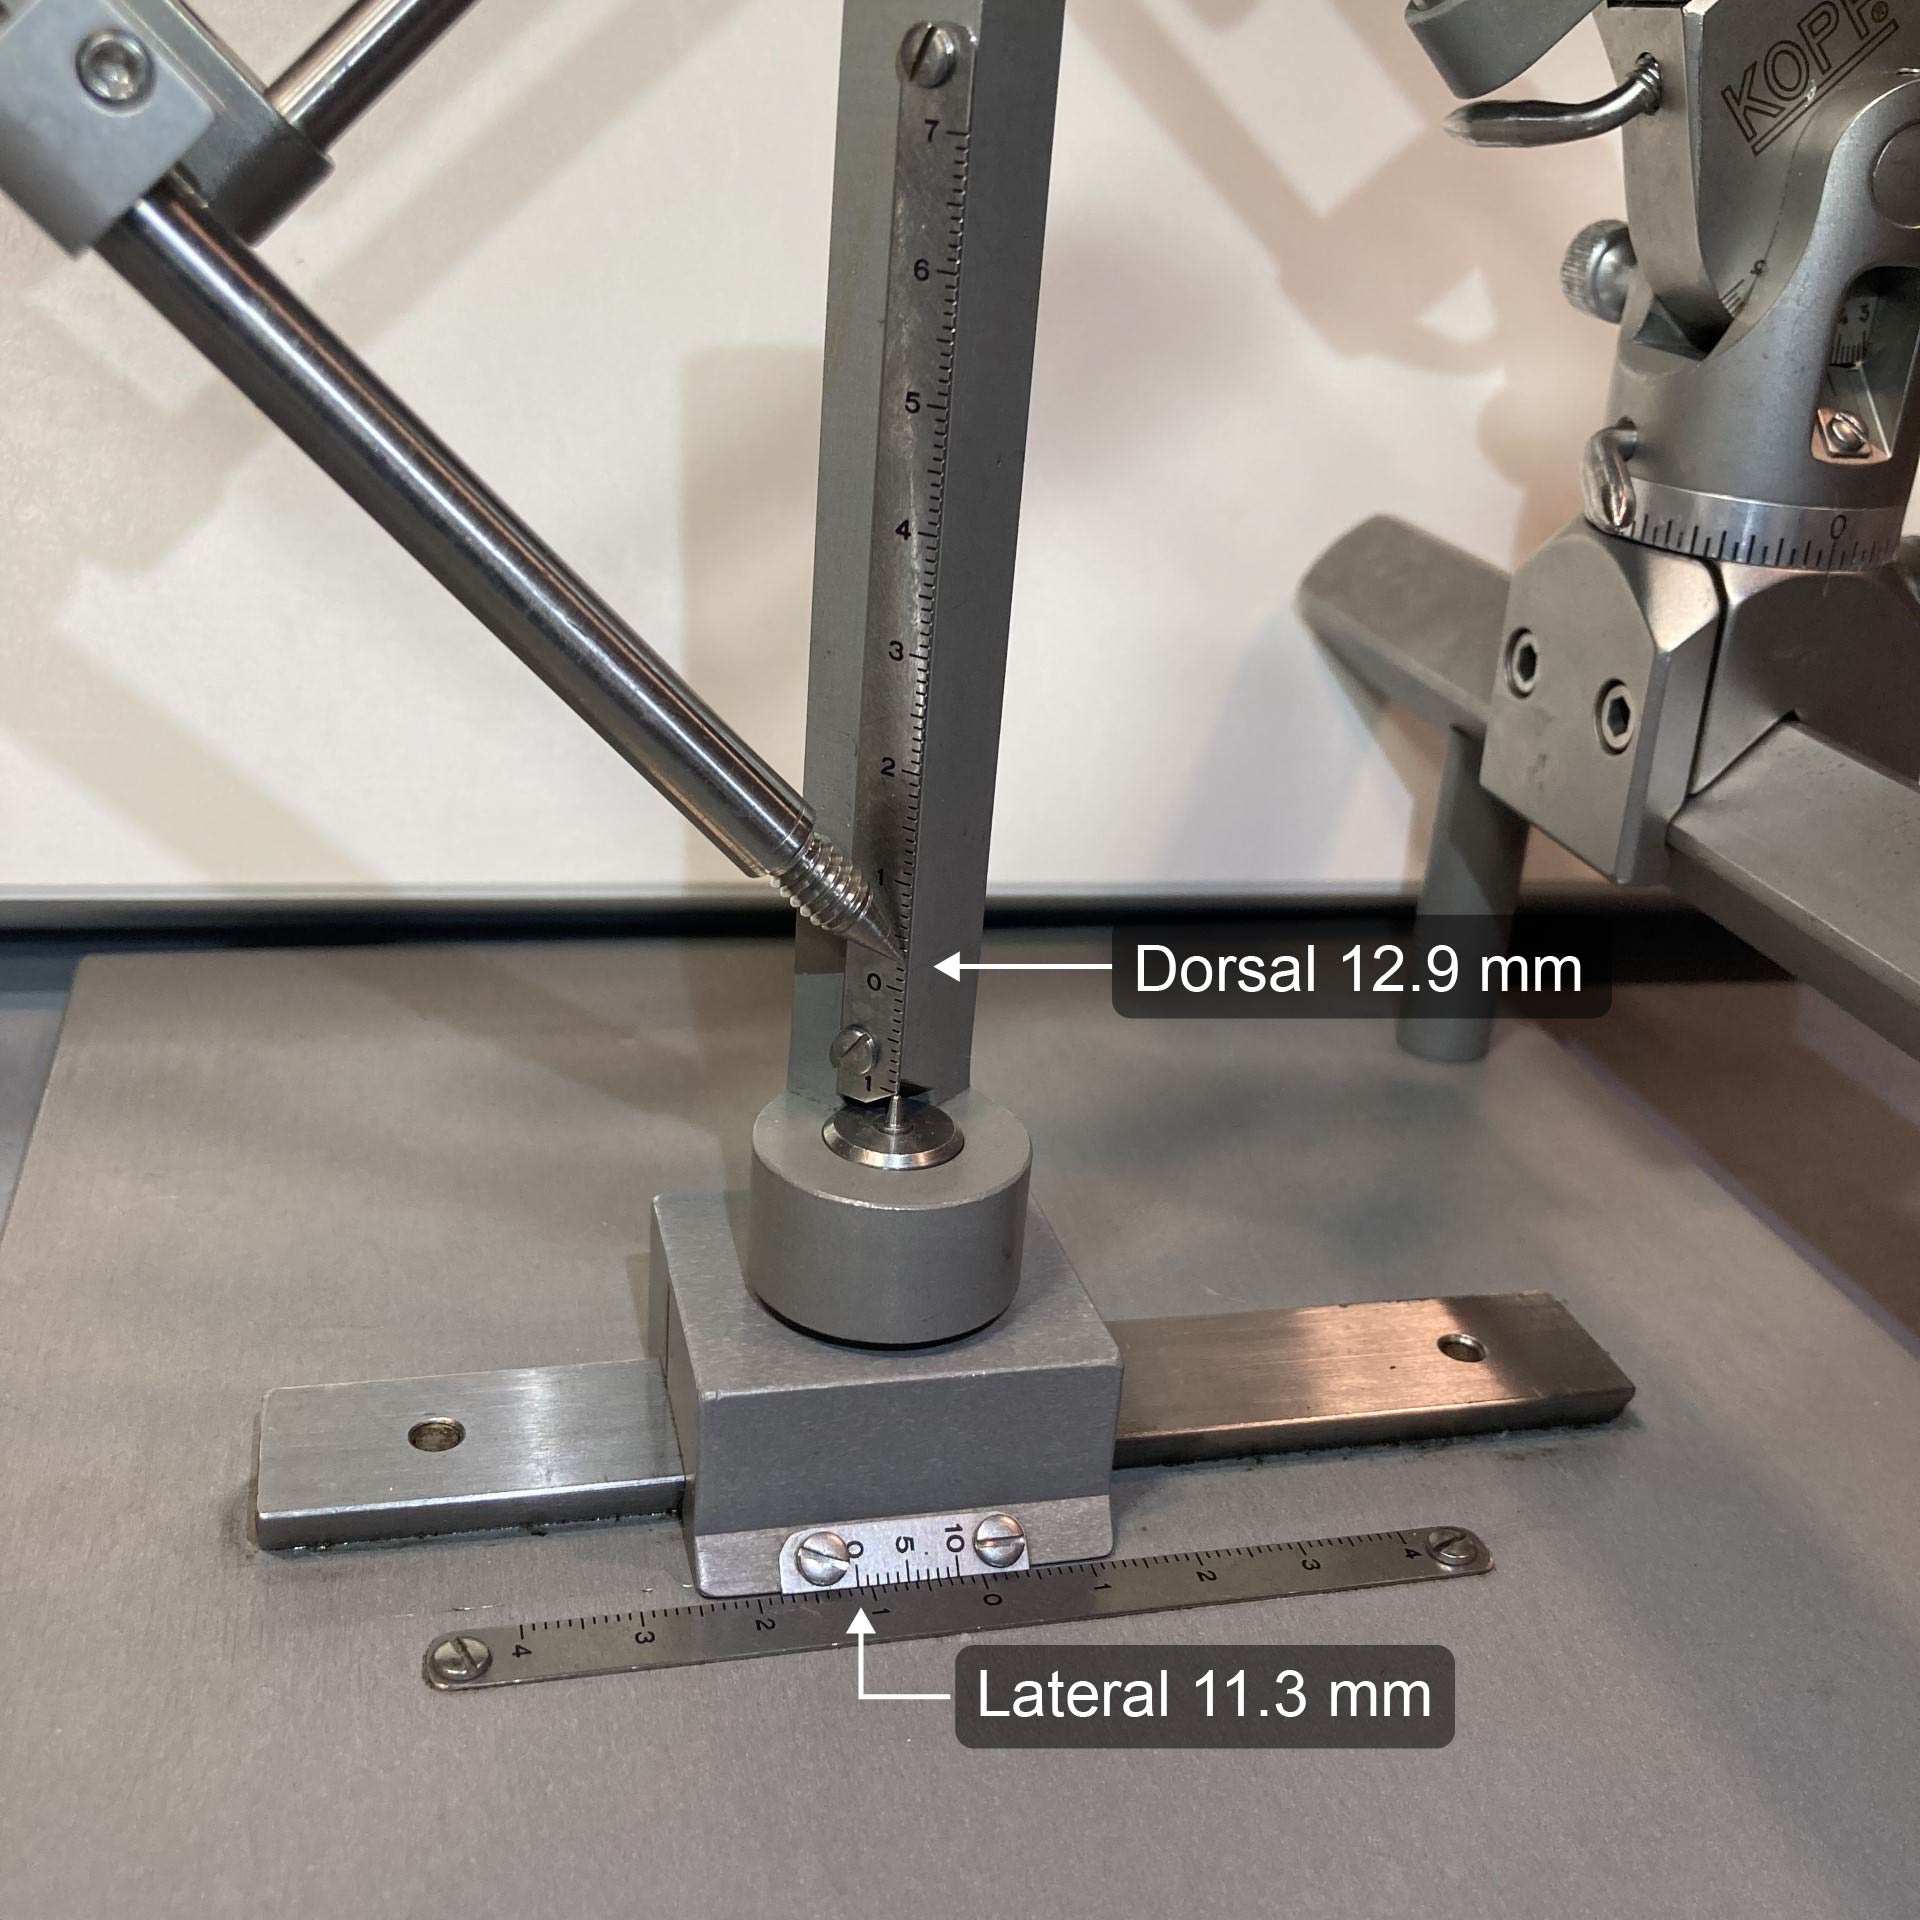
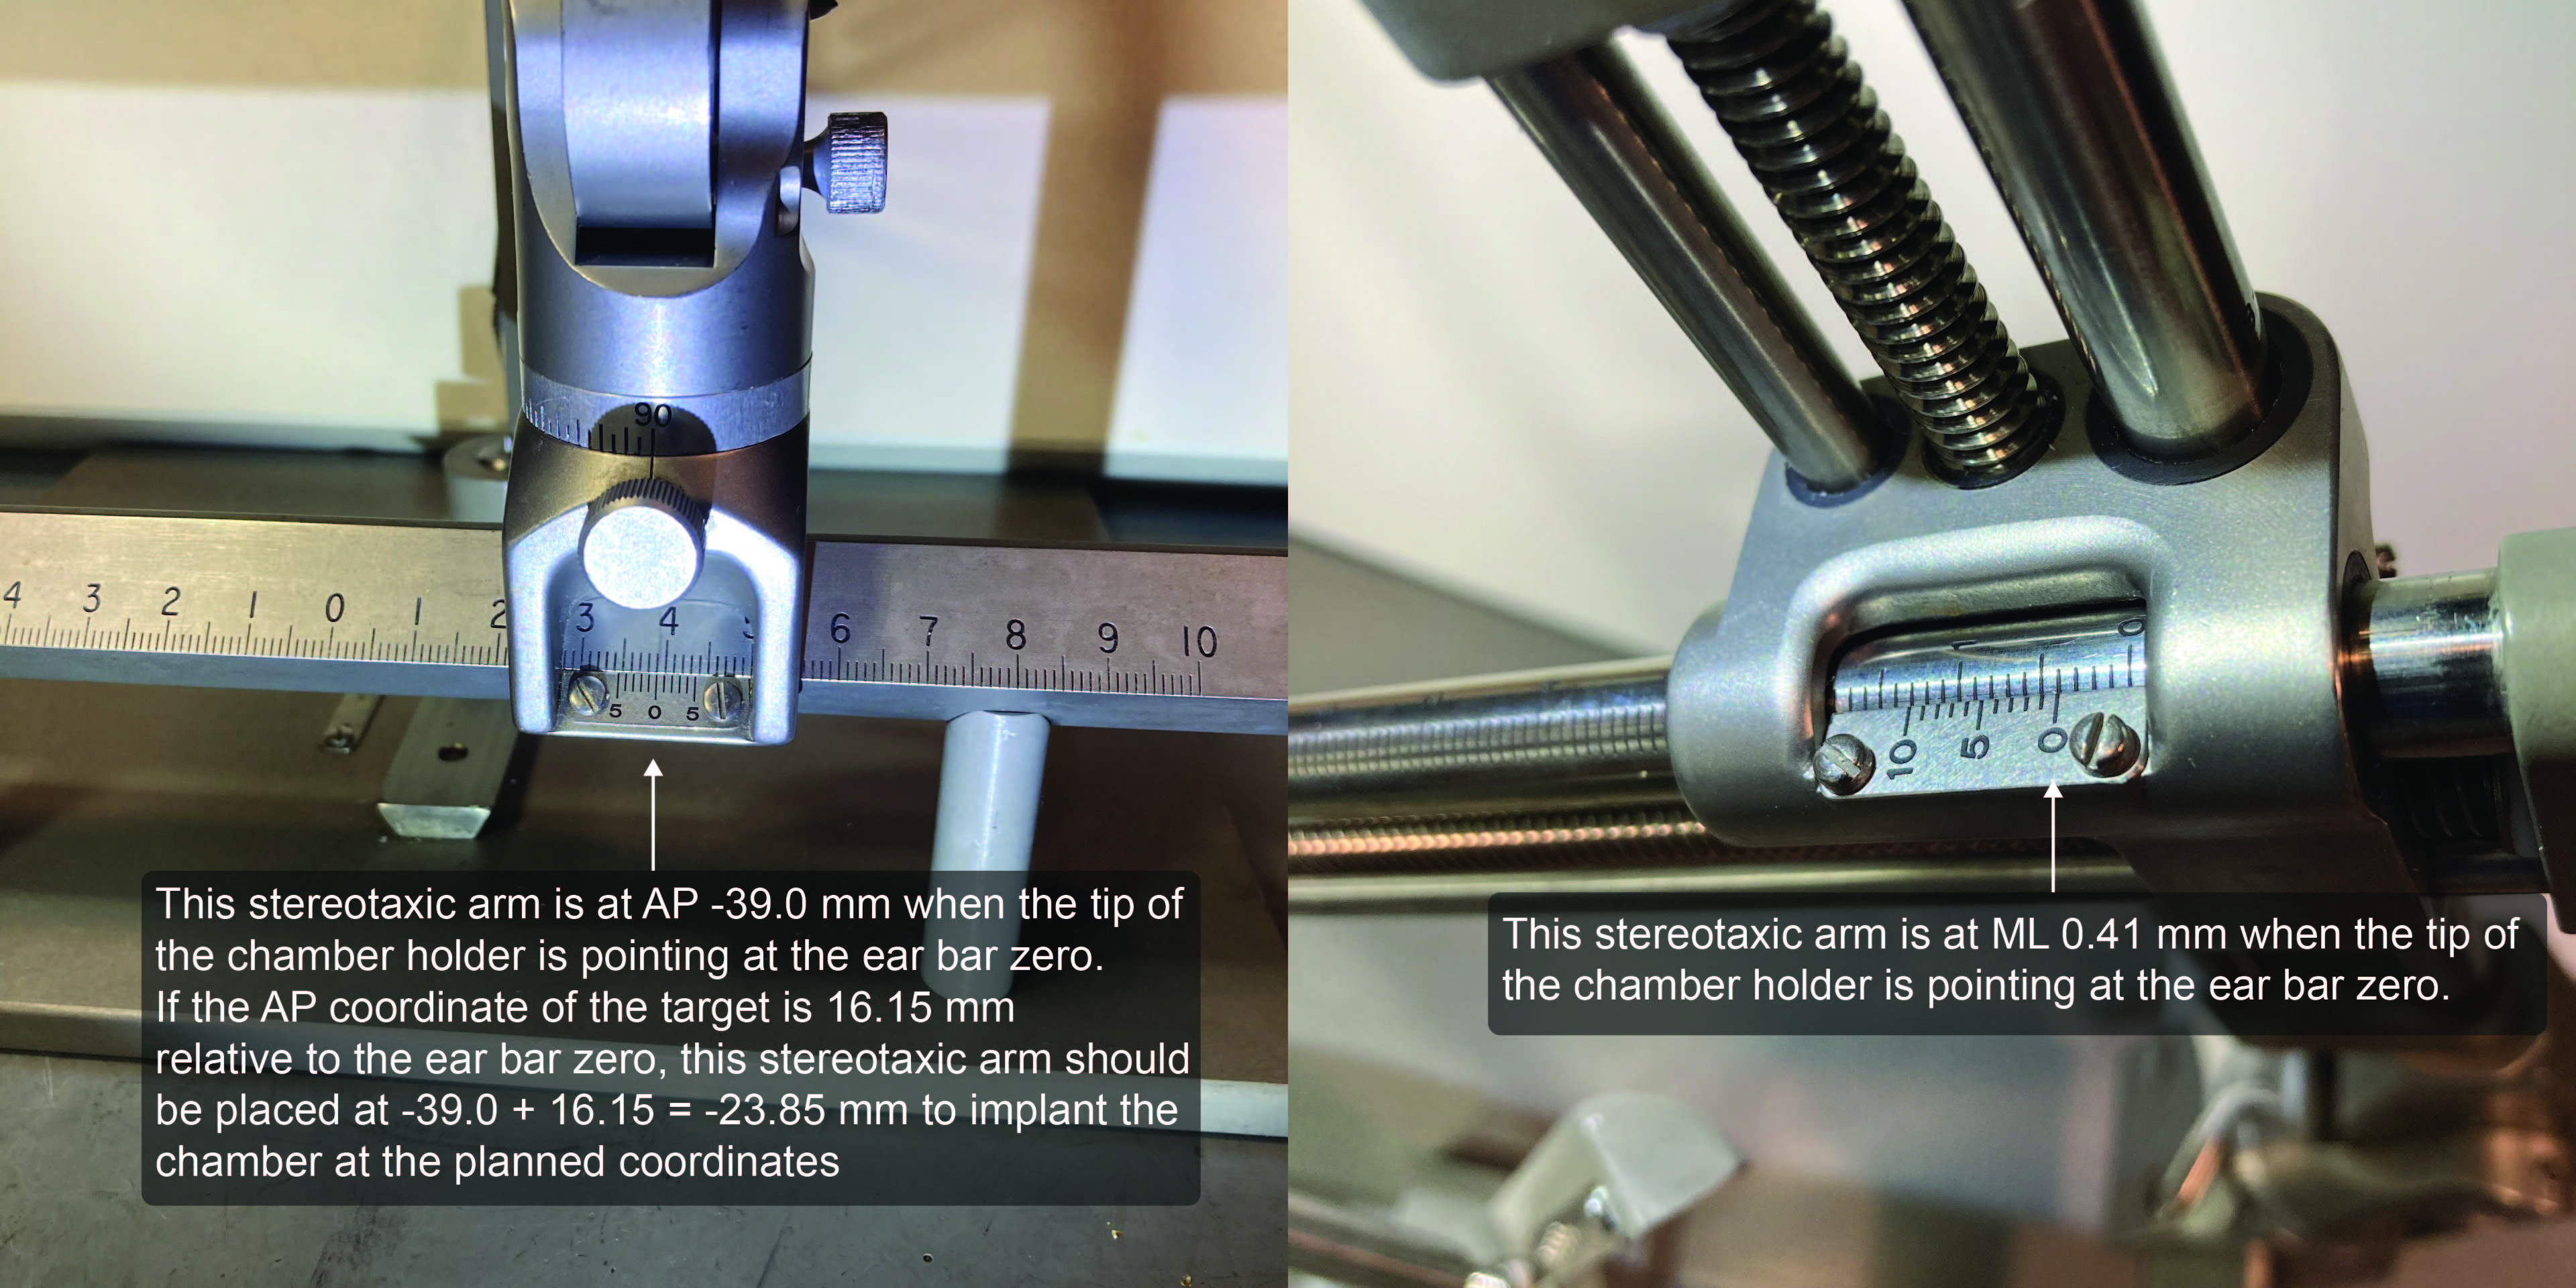
Calculate the coordinates of the target brain area relative to the ear bar zero.
Attach the chamber holder bar to the stereotaxic arm.
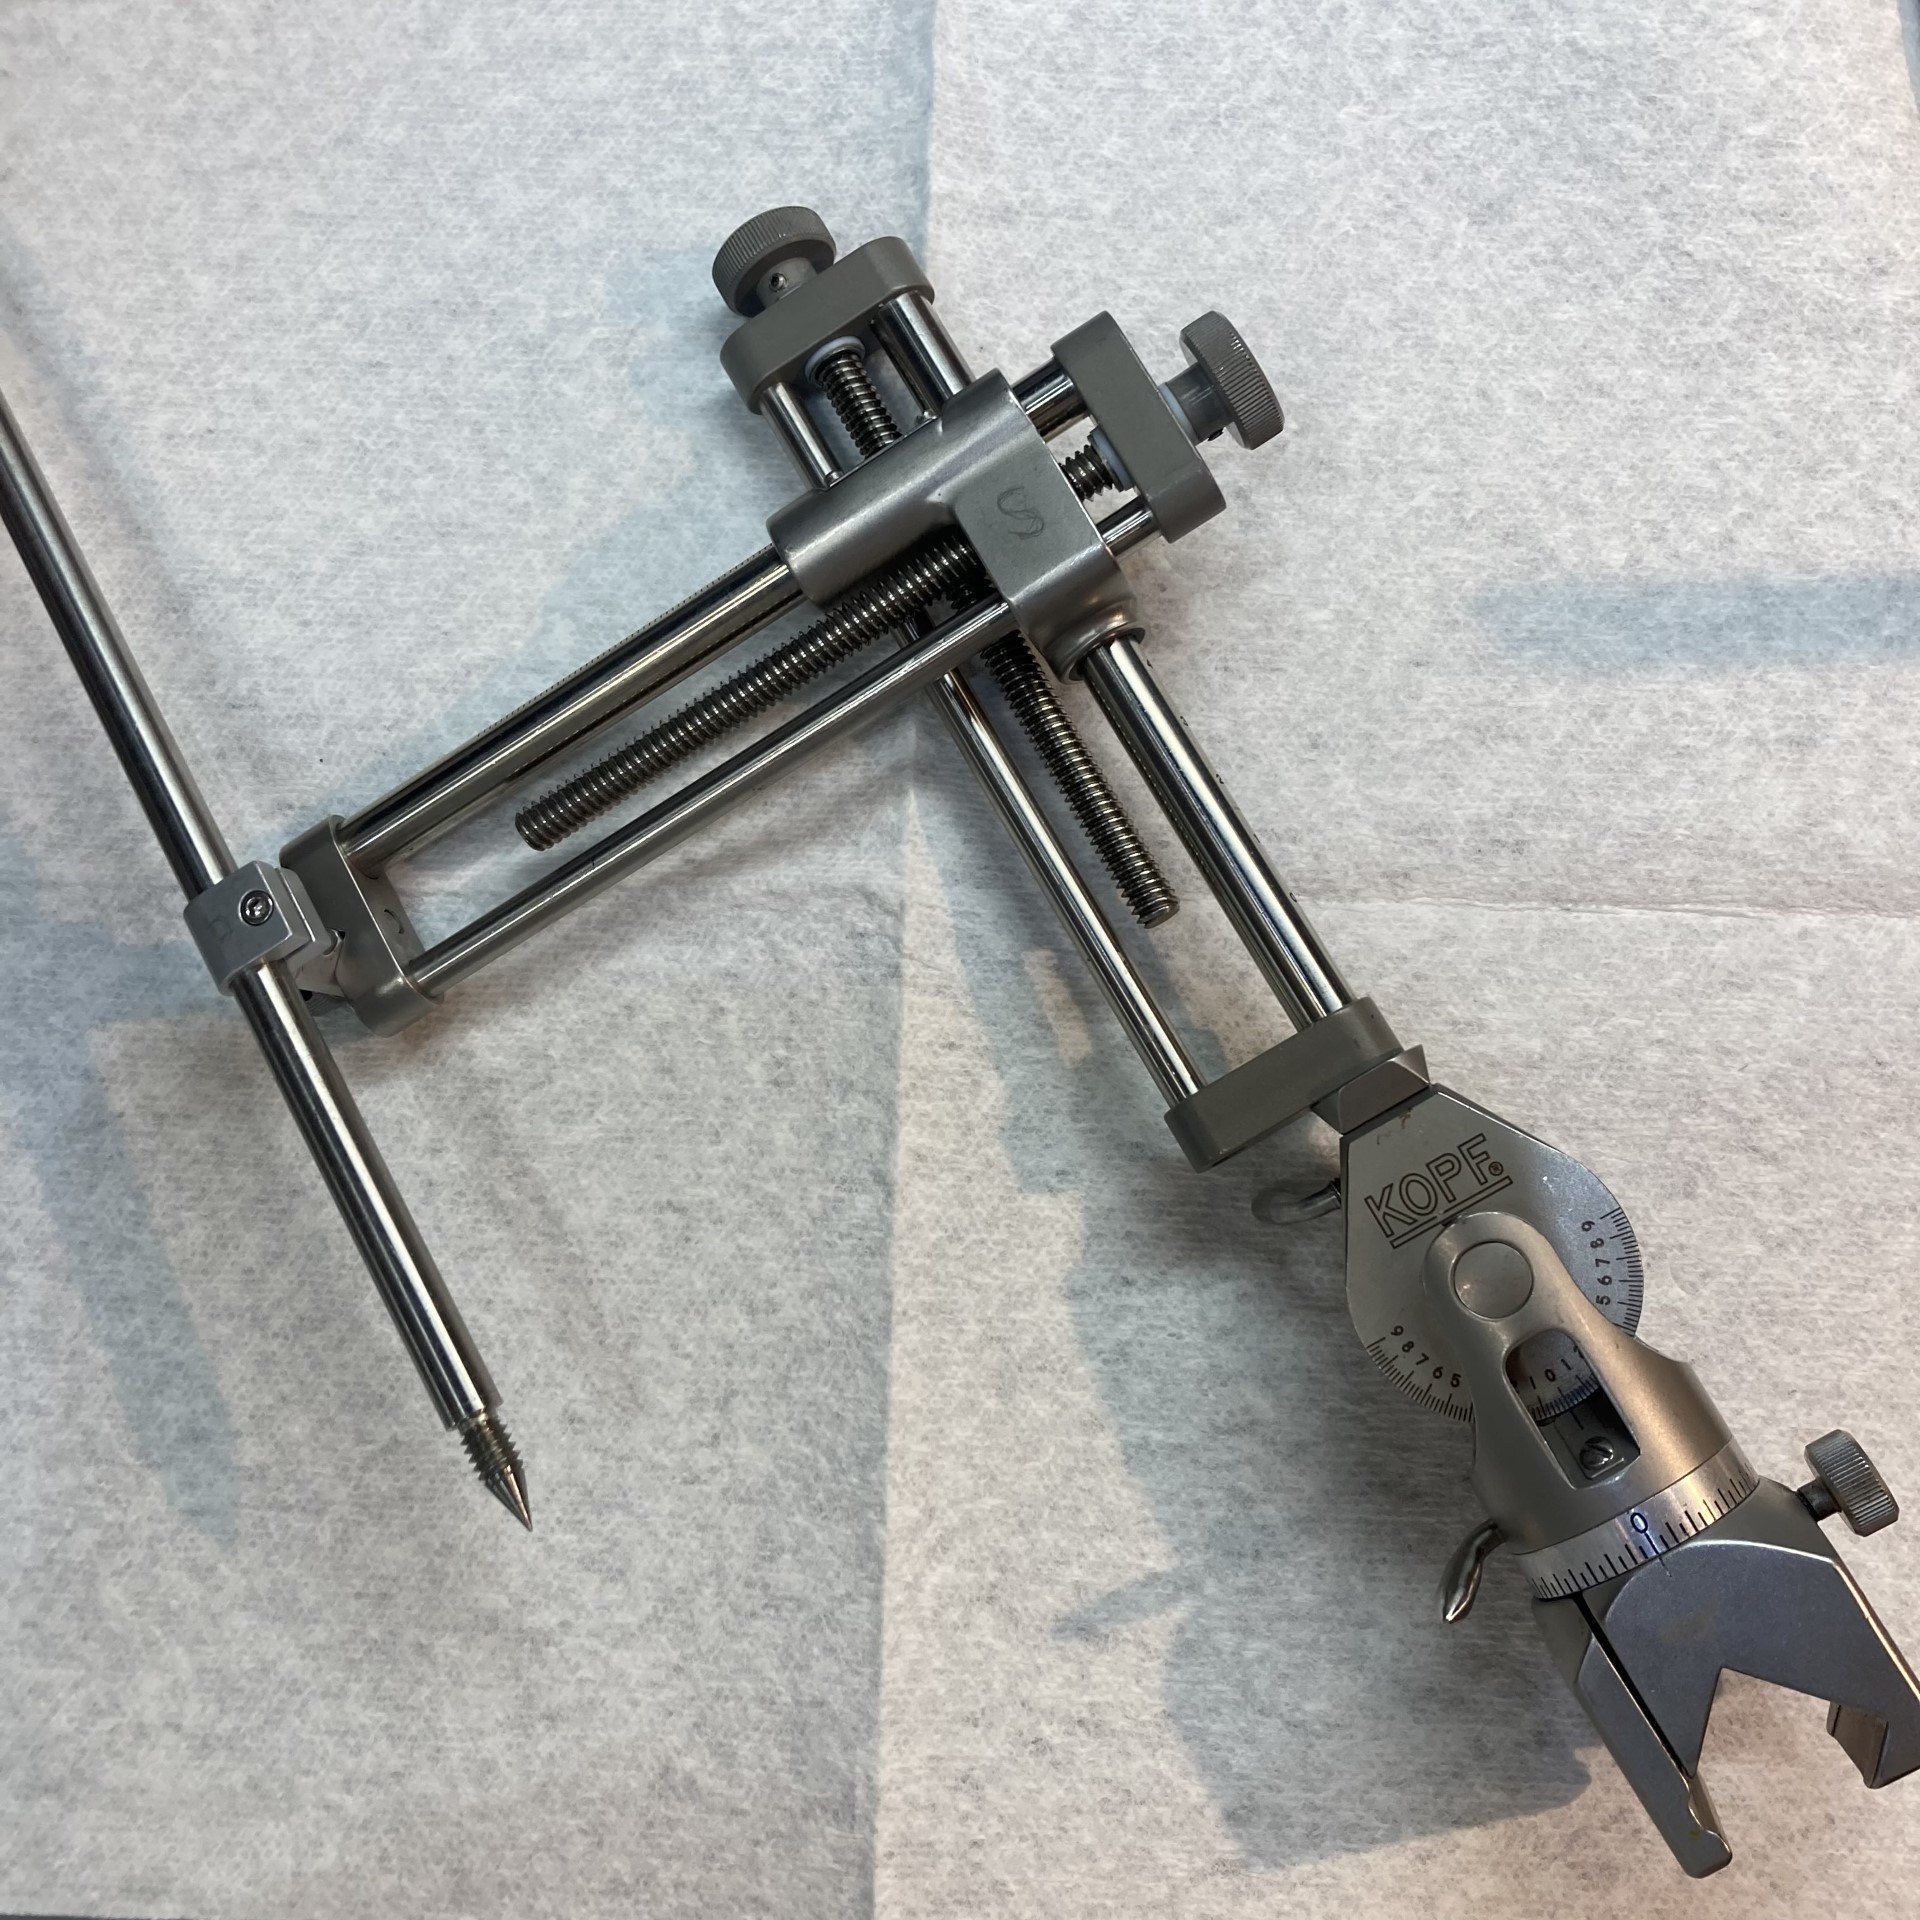
Mount the stereotaxic arm onto the stereotaxic calibration frame.
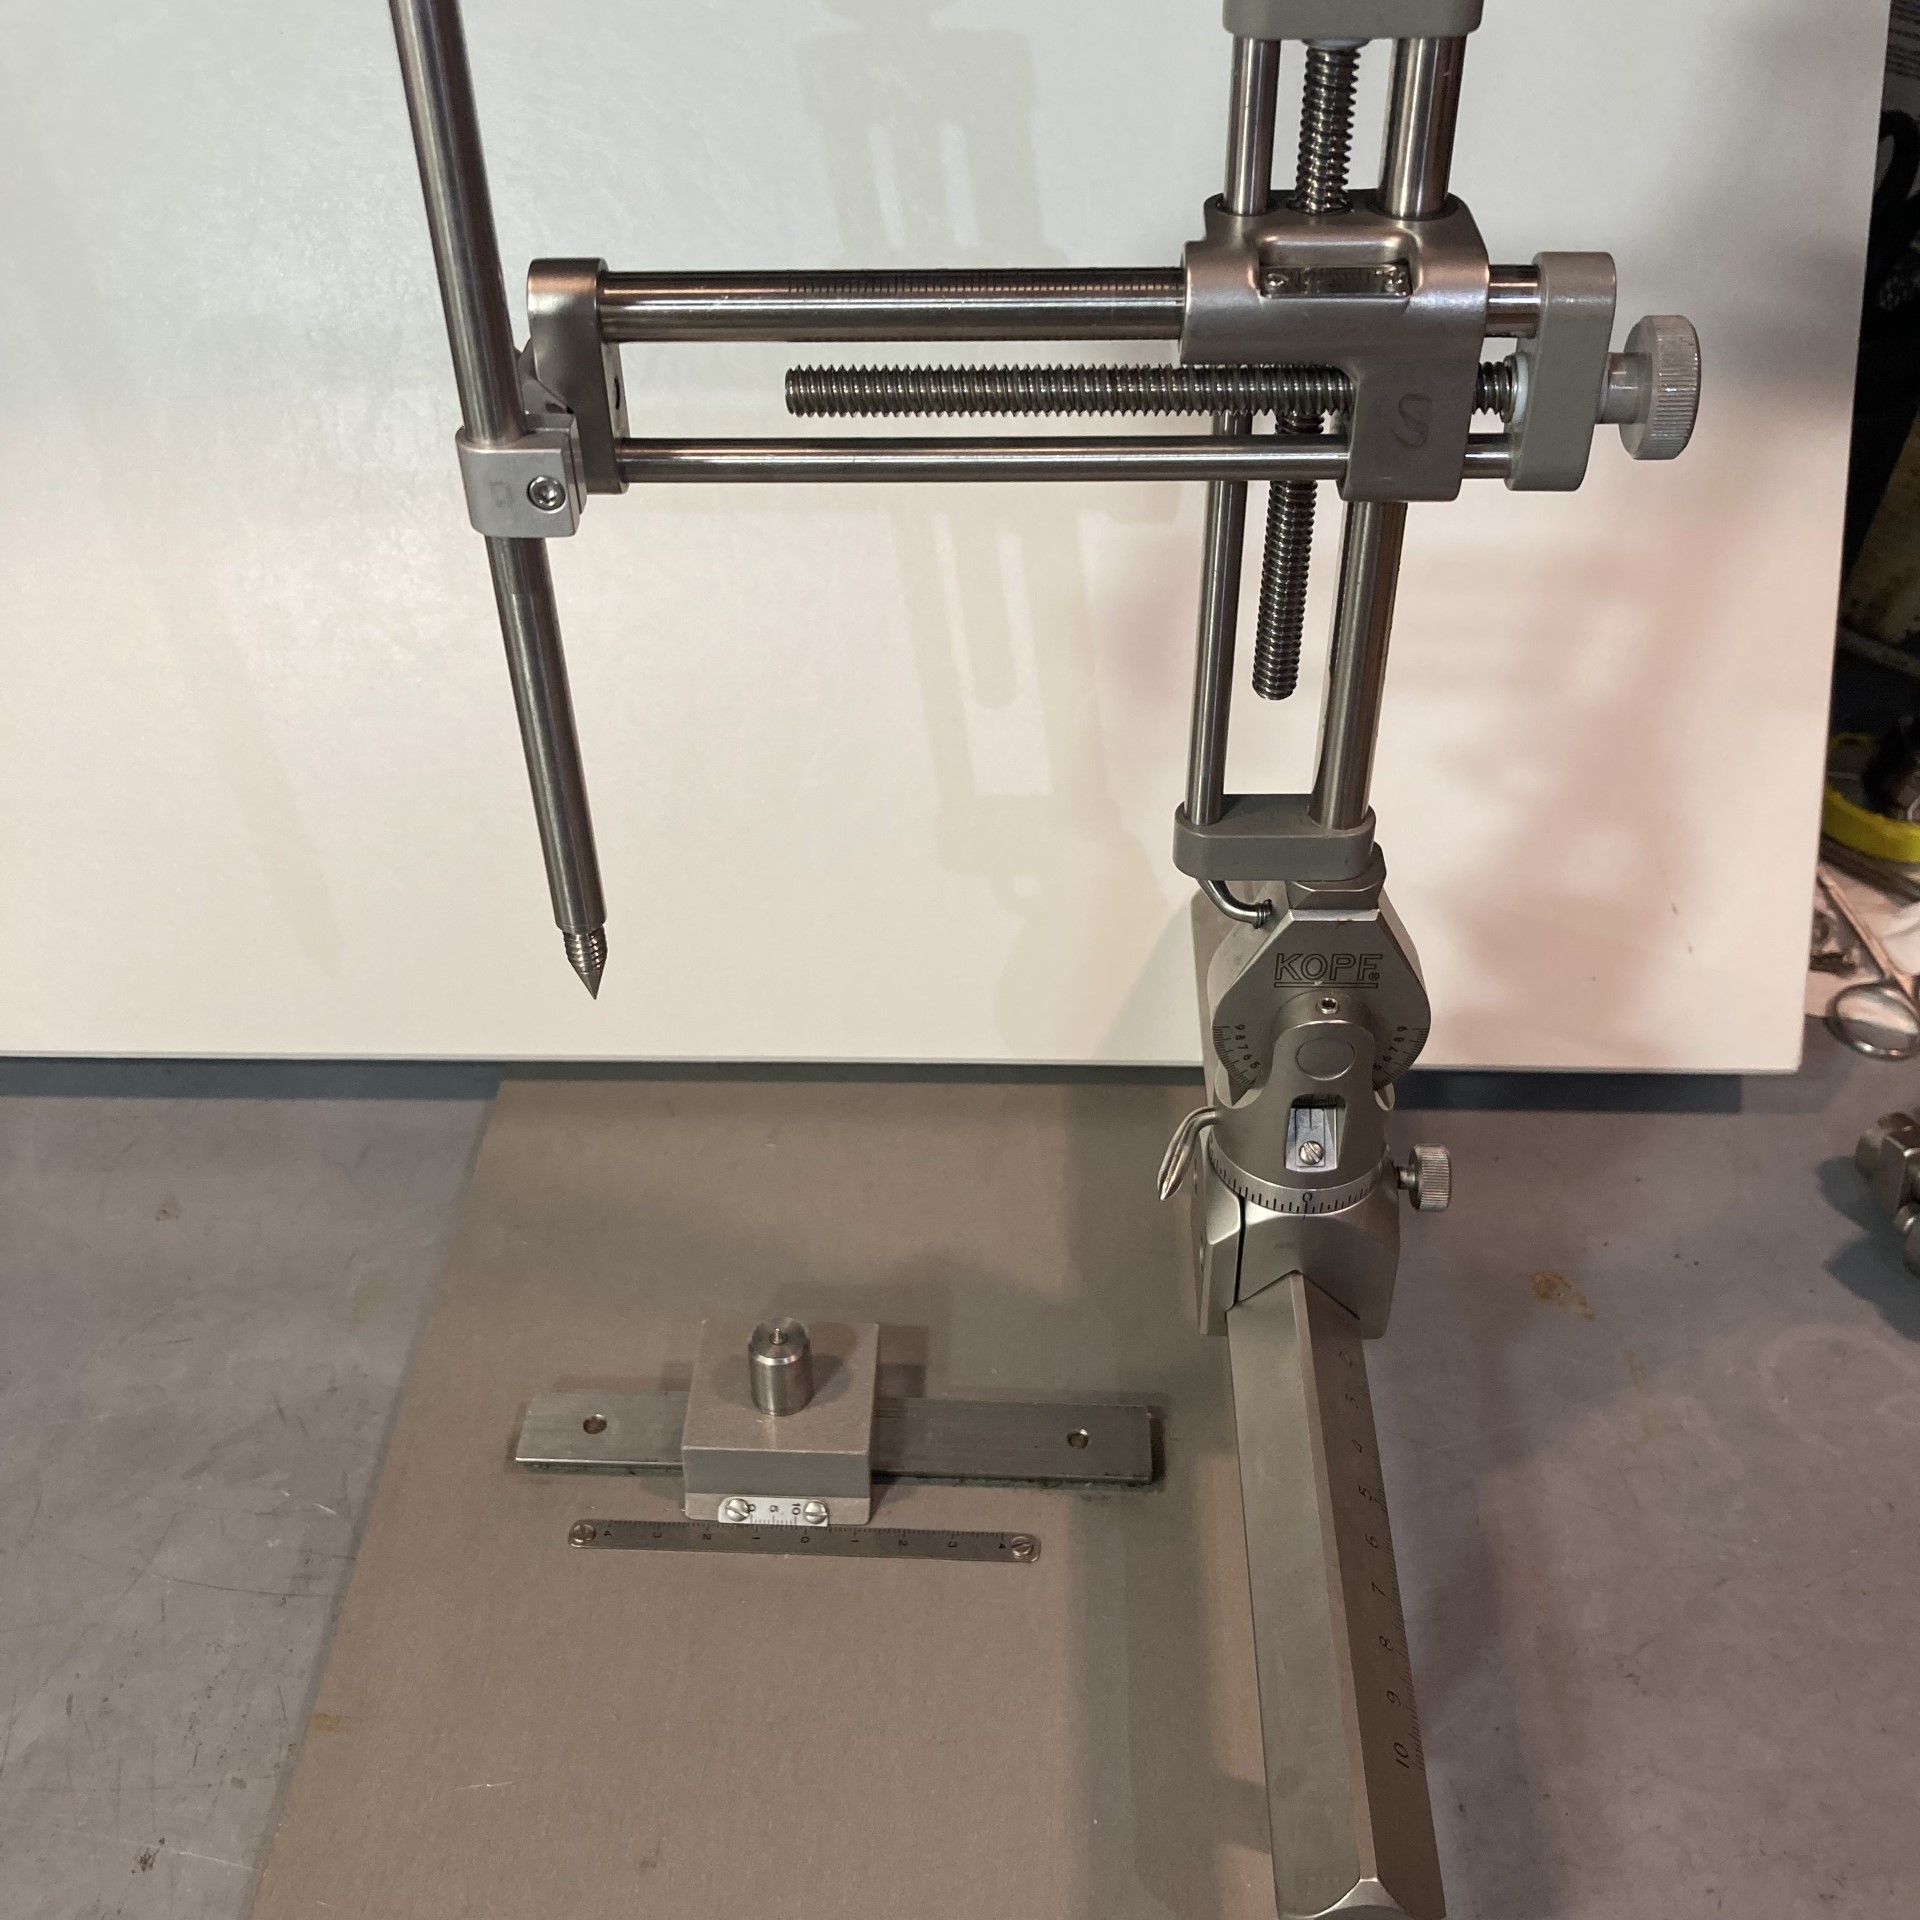
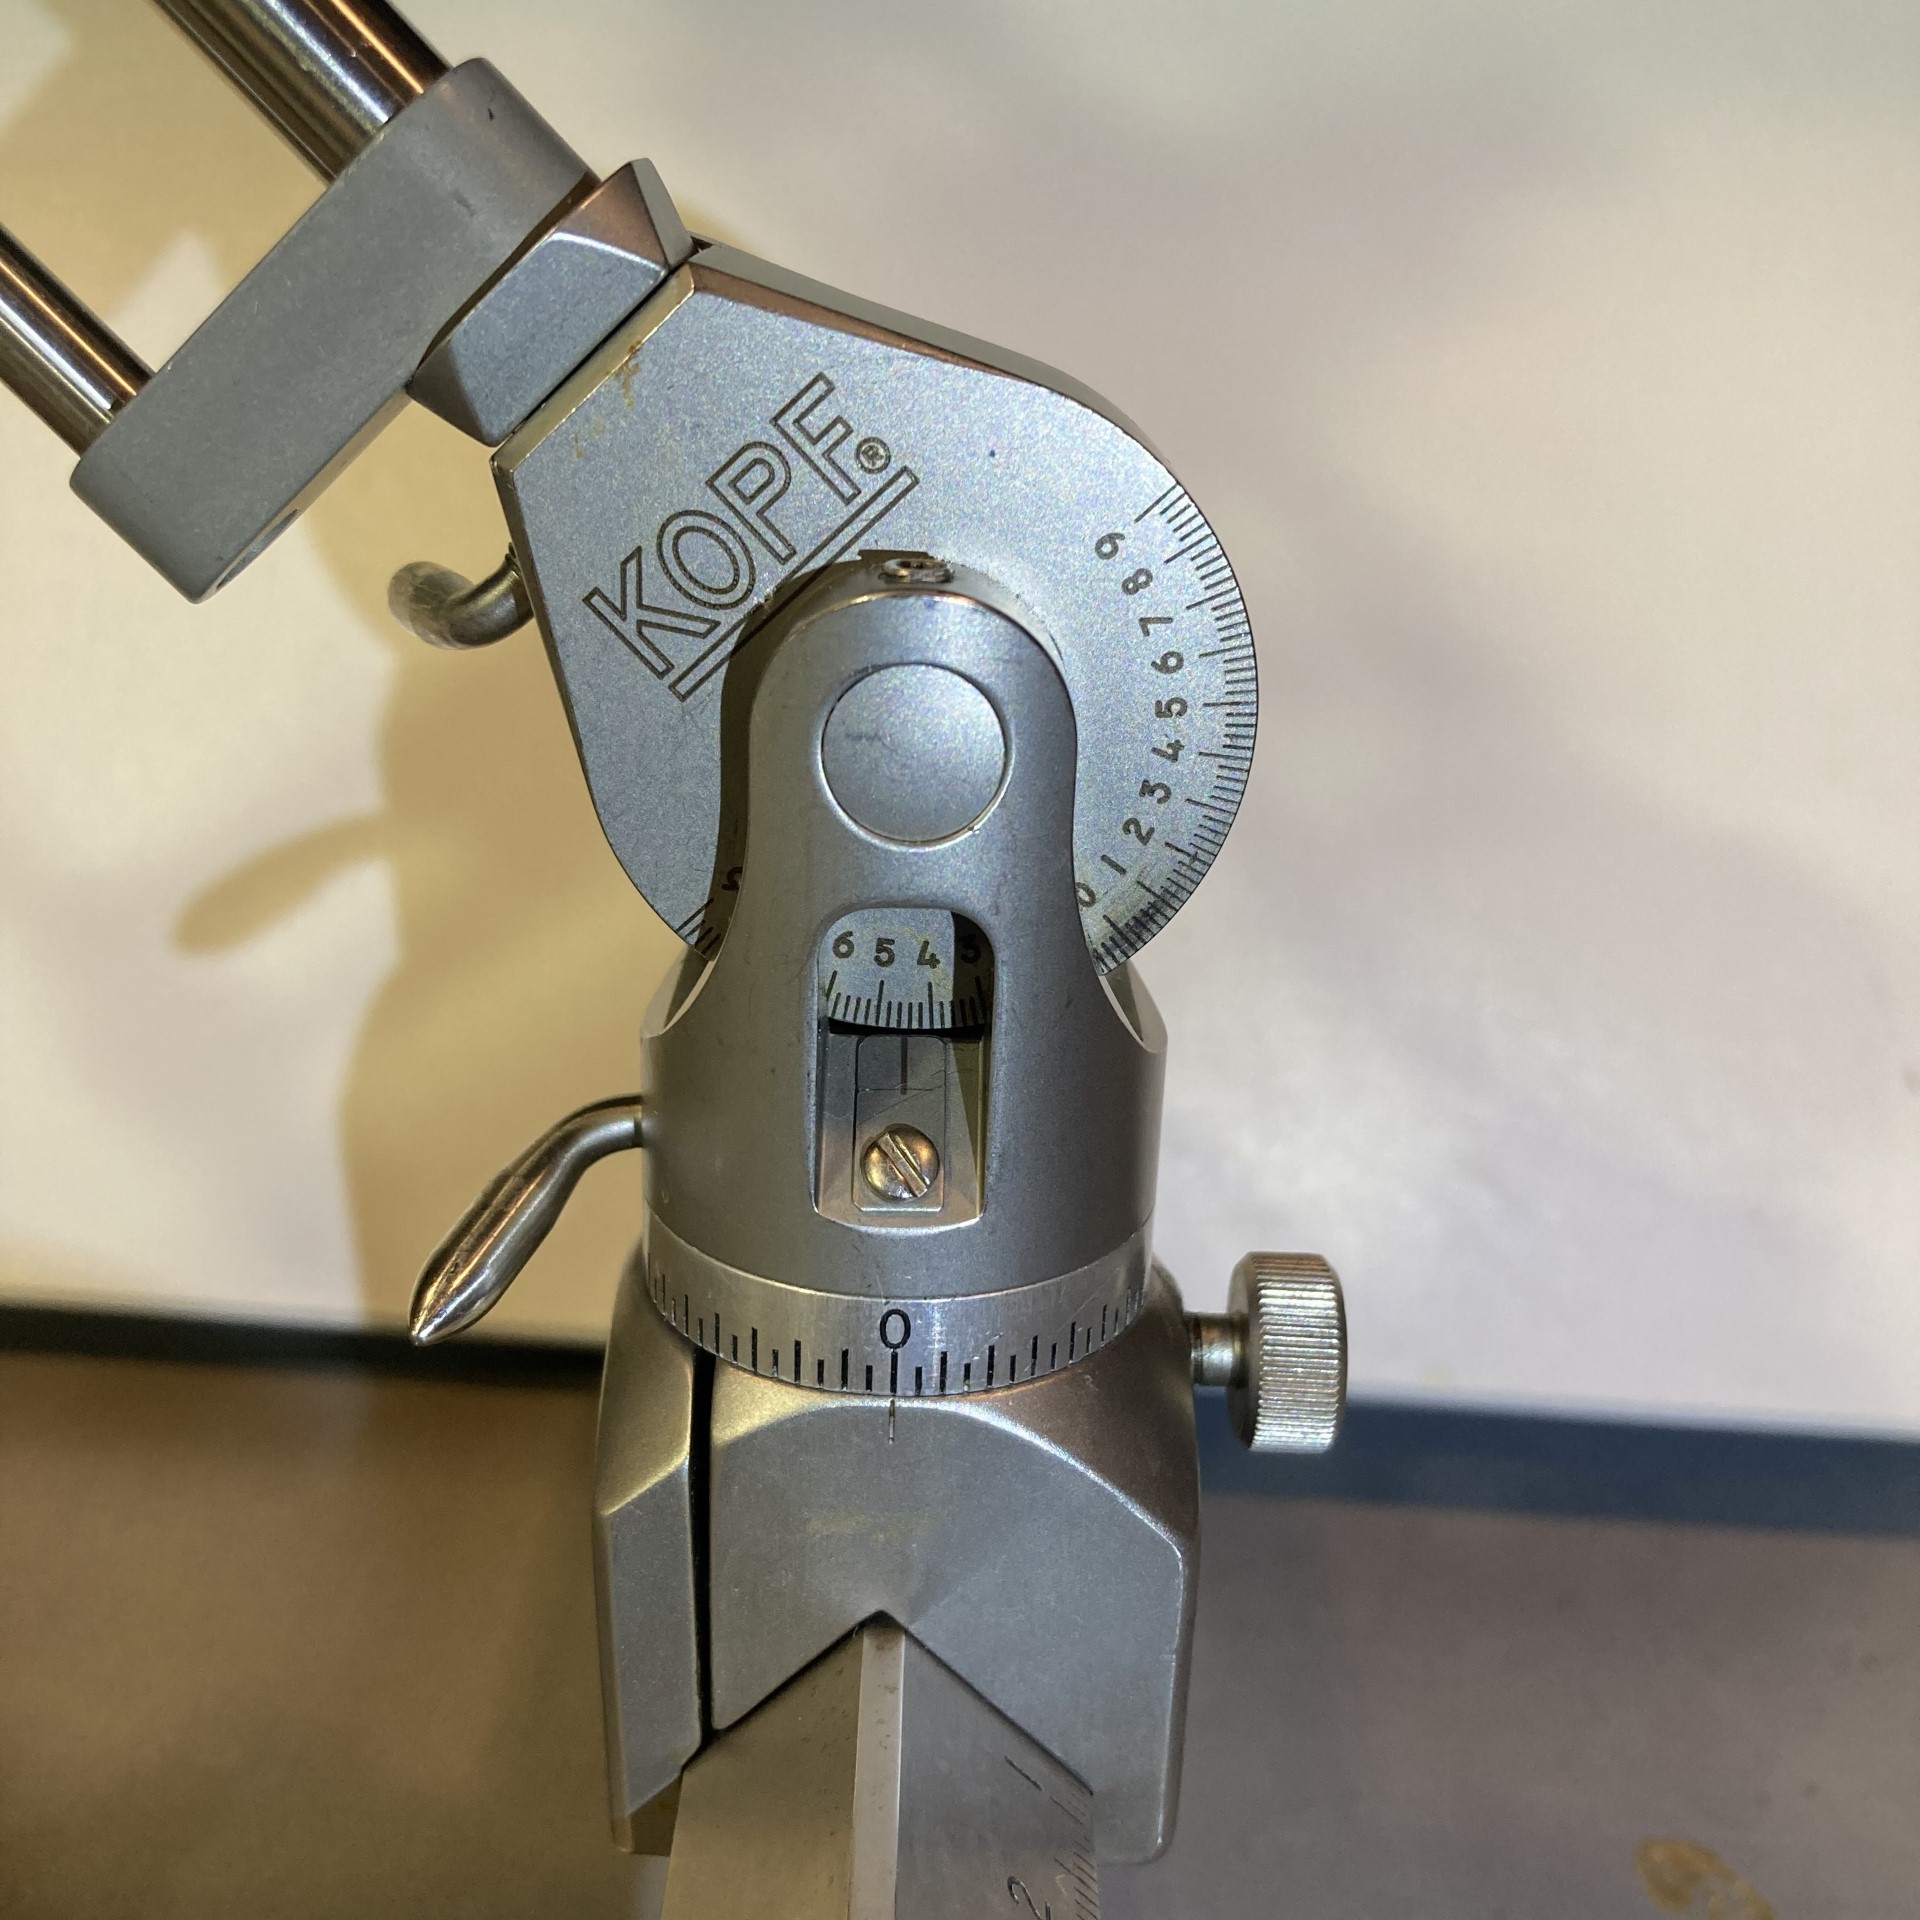
Adjust the angle of the stereotaxic arm if necessary.
Move the stereotaxic arm so that the tip of the chamber holder points at the target coordinates (except for the AP) calculated in Step 1.
Note the positions of the stereotaxic frame and arm (AP coordinate on the rail of the frame, ML coordinate on the stereotaxic arm, and angle of the stereotaxic arm).
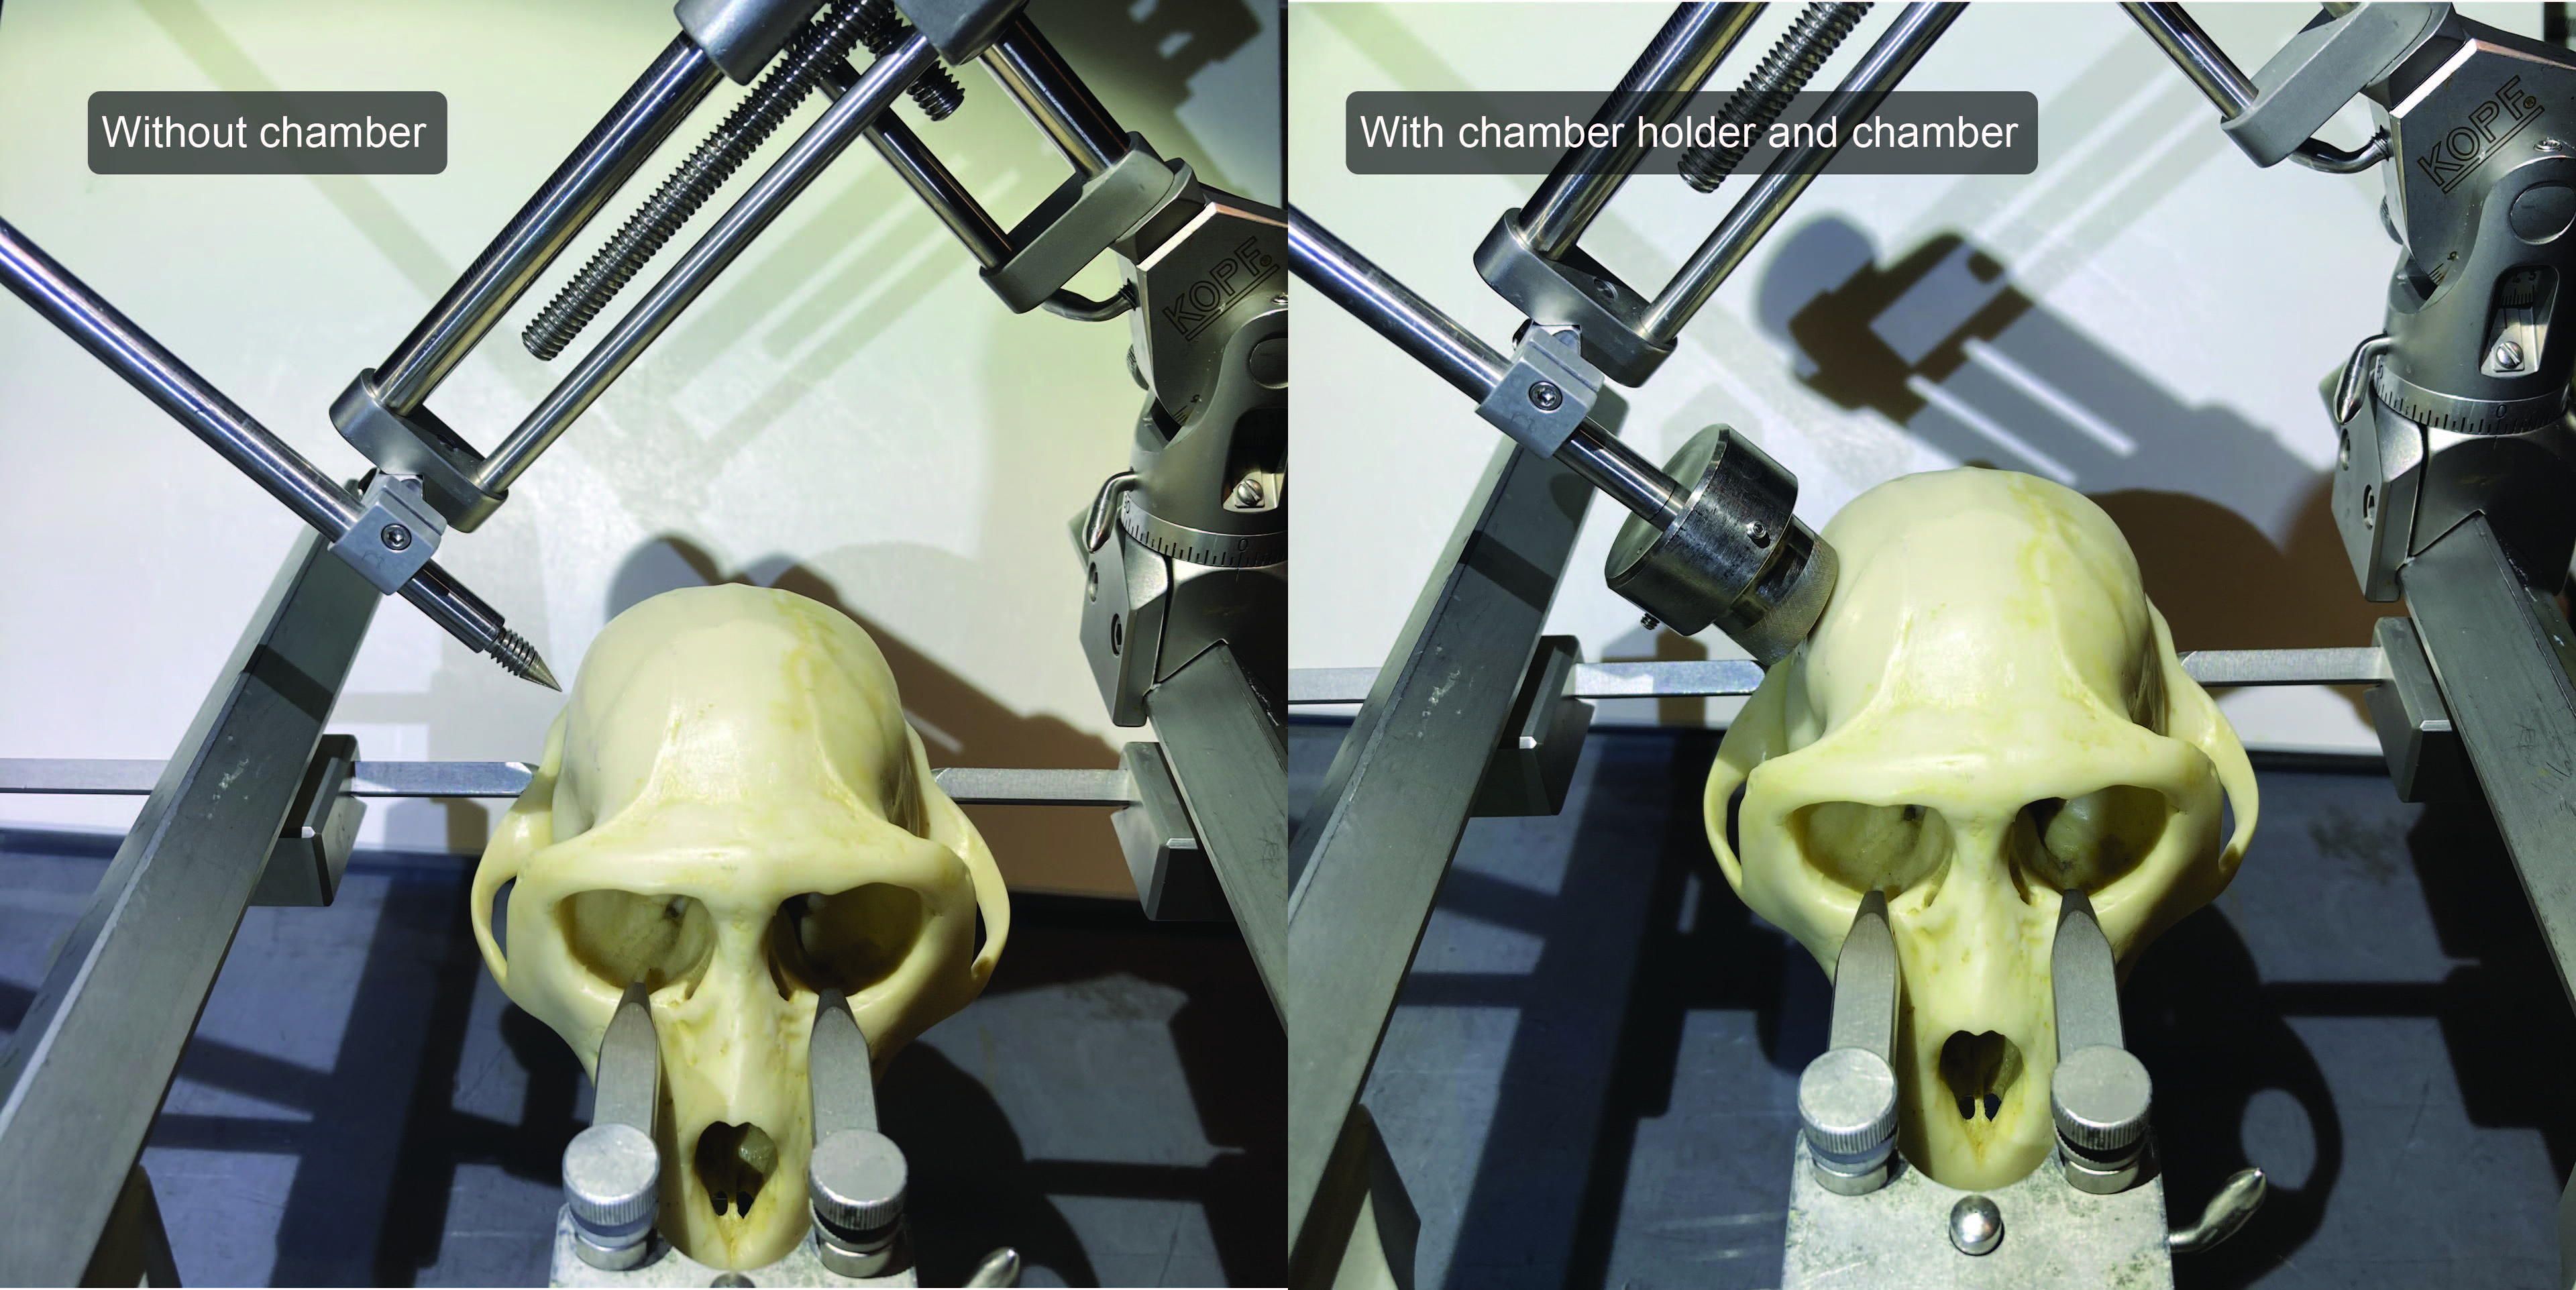
Secure a dummy skull on the stereotaxic frame, and transfer the stereotaxic arm to the stereotaxic frame to check the position of the chamber on the skull.
Preparation on the day before the surgery
Bring all sterile tools to the surgical suite and check to ensure nothing is missing.
Check if the animal is on NPO.
Preparation in the prep room on the day of surgery
Sedate the animal.
Shave the animal’s hair.
Start the gas anesthesia.
Transfer the animal to the surgical suite.
Surgical procedure in the surgical suite
Fix the animal’s head on the stereotaxic frame.
Wipe the surface of the animal’s head with Betadine and Ethanol.
Scrub both arms (5 min per arm).
Put on a sterile surgical gown.
Put on sterile gloves.
Put sterile surgical drapes onto all of the animal's body, except for the head (expose the clean surface prepared in Step 14).
Cut and remove the skin (usually in a round shape), and expose the skull.
Remove all soft tissue from the surface of the skull.
Cut the drape on the animal’s body around the rail of the stereotaxic frame to mount the base part of the stereotaxic arm.
Mount the base unit of the stereotaxic arm at the preliminary chosen coordinate.
Since the rail is still exposed, we want to cover the rail of the stereotaxic frame with a new sterile drape, so that no unsterile surface is exposed. Again, please ensure to not touch the unsterile rail.
Mount the main unit of the stereotaxic arm onto its base unit.
Mount the chamber on the stereotaxic arm and move the chamber as close to the skull as possible.
Draw a line on the skull around the chamber.
Unmount the main unit of the stereotaxic arm and store it on a sterile surface.
Now, surgeons can check if the incision of skin is large enough. Make sure there is enough exposure of the skull to build a dental acrylic implant.
Detach the connections between the muscle and skin and between the muscle and skull.
Remove the muscle with electrocautery if the muscle is too close to the implants.
Put a drill bit in the pin vise, and expose the drill bit about 3-4 mm from the pin vise to prevent the surgeon from making too deep of a hole and damaging the dura and brain.
Make a hole in the skull by slowly turning the pin vise.
If the drill bit does not pierce the skull and the researchers cannot confirm the surface of the dura, expose the drill bit a little more from the pin vise and continue drilling the same hole until the drill bit pierces the skull.
Check the thickness of the skull from the length of the exposed drill bit.
Put a bone screw into the drilled hole and screw it in.
Repeat steps 32-35 until enough bone screws are implanted.
Remount the stereotaxic arm (and chamber) onto the base unit.
Make sure there is no blood or tissue on the skull, only a dry surface (and screws).
Move the chamber close to the surface of the skull.
Put the dental acrylic to cover the bone screws and the wall of the chamber.
Check to ensure all dental acrylic around the chamber is hard and that the chamber is secured in the dental acrylic.
Loosen the screw on the chamber holder, and unmount the stereotaxic arm.
Mount the head fixation post on the stereotaxic arm through the head fixation post holder, and mount the arm onto the base unit.
Move the head fixation post close to the dental acrylic.
Put dental acrylic around the head fixation post to bridge the existing dental acrylic and the head fixation post.
Optional procedure – if the researchers will use a chamber adapter for the recording, this is the best timing to align the mediolateral and anteroposterior axes with the stereotaxic coordinates.
Unmount the stereotaxic arm.
If the skull is exposed, researchers need to tighten the edge of the skin.
Make a V-shape incision on the edge of the skin, and suture the sides of V.
Put the chamber cap onto the chamber.
Stop the gas anesthesia and wait for the animal’s recovery.
