Enhancing the growth of coral microfragments using the 'Green Film' Husbandry Method
Mary Hagedorn, Christopher Page, Riley Perry, Claire Lager, E. Michael Henley
Abstract
The purpose of this method is to produce a repeatable husbandry protocol that increases coral microfragment growth, by selecting for benign and ubiquitous green microalgae (green film) to colonize culture vessel surfaces prior to the addition and grow out of new microfragments.
Before start
Tank System Setup:
Microfragments were grown outdoors in 100 L tanks measuring 92x62x43 cm made from 0.65 cm epoxy coated fiberglass (Red Ewald Karnes City, TX) supplied with 2-3 cm air stones for circulation (Pentair Aquatic Eco-Systems Inc. Apopka, Fl) and fed by filtered seawater with a salinity of \~35 PPT and pH of \~8.0, at a rate of \~6-10 L/min. Seawater was filtered to 25 µm through micron mesh bag filters (www.waterco.us) prior to passing through a 24” sand filter (Hayward Industries Inc, Newport News, VA) to remove excess detritus, algae, and pest invertebrates, such as  _Phestilla sp._ Seawater temperature varied from 25-27.5°C by season, but was managed by adjusting the seawater supply to keep daily fluctuations infrequent and within 1°C in a 24-h period.


Each tank was covered by a clear polycarbonate lid (Palram Americas Ltd. Kutztown, PA) to prevent freshwater intrusion from heavy rains and half draped with 70% shade cloth (www.greenhousemegastore.com) to attenuate sunlight. To further attenuate sunlight the entire tank system was housed under a shade structure draped with 30% shade cloth (www.greenhousemegastore.com).Three hours or more after sunrise, tank lids were propped open perpendicular to the sun’s path, to receive full spectrum sunlight for \~4 h each weekday and \~2 h each weekend day. Photosynthetically Active Radiation values, measured using an electronic PAR meter (Apogee Instruments, North Logan, UT) ranged from 100-1000 µmols/m<sup>2</sup>/sec, peaking during midday when tank lids were propped.  A schematic of the tank system design can be seen in Figure 1.

Steps
Establishing 'Green Film' on tank surfaces
Scrub, acid wash, and rinse clean the intended vessel prior to startup
Equip the tank with two cleaned and sanitized air stones, an overflow strainer, and PVC seawater outfall
Fill the tank with filtered seawater
Attach an aquarium pump to one side of the tank and direct the water flow towards the opposite wall. Add two heaters connected to a controller and set the thermostat to 28°C. Finally add a blue-tooth temperature logger and 2-3 pieces of healthy CCA to the tank
Secure a tank lid to the vessel using polypropylene rope
Prop the tank lid daily as described in the Tank Maintenance section (see below) for 1 week or until diatoms cover 15–25% of the tank surface
Once noticeable algae appear, remediate the tank as described in the Tank Remediation section (see below), scrubbing it clean, draining it, scouring it with fresh water, and quickly refilling it with filtered seawater
Replace the air stones, aquarium pump, and heaters to continue the selection process
Allow diatoms to repopulate the tank for one week or until 25% of the tank surface is covered with diatoms
Perform a second remediation. After all other algae is scrubbed away, the ideal outcome from this process is the beginnings of CCA settlement and a light green hue on tank surfaces
Remove the heaters, controller, and aquarium pump. Attach three magnetic grazer cages to the tank walls. Build cages as described in the Constructing Cages section (see below). Add to the tank a total of 40 total trochus snails that do not have macroalgae or cyanobacteria fouling their shells. Include five snails under each grazer cage.
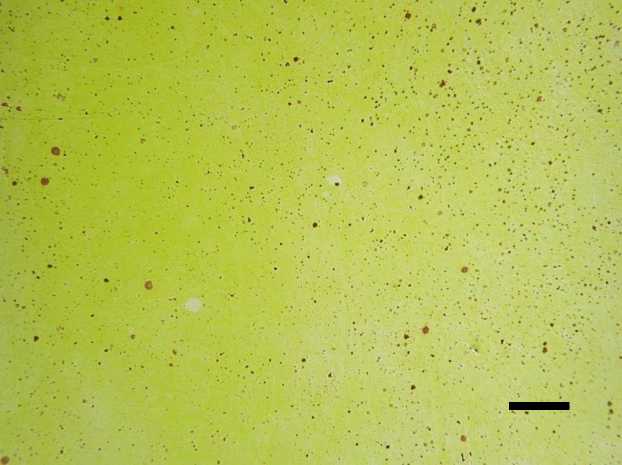
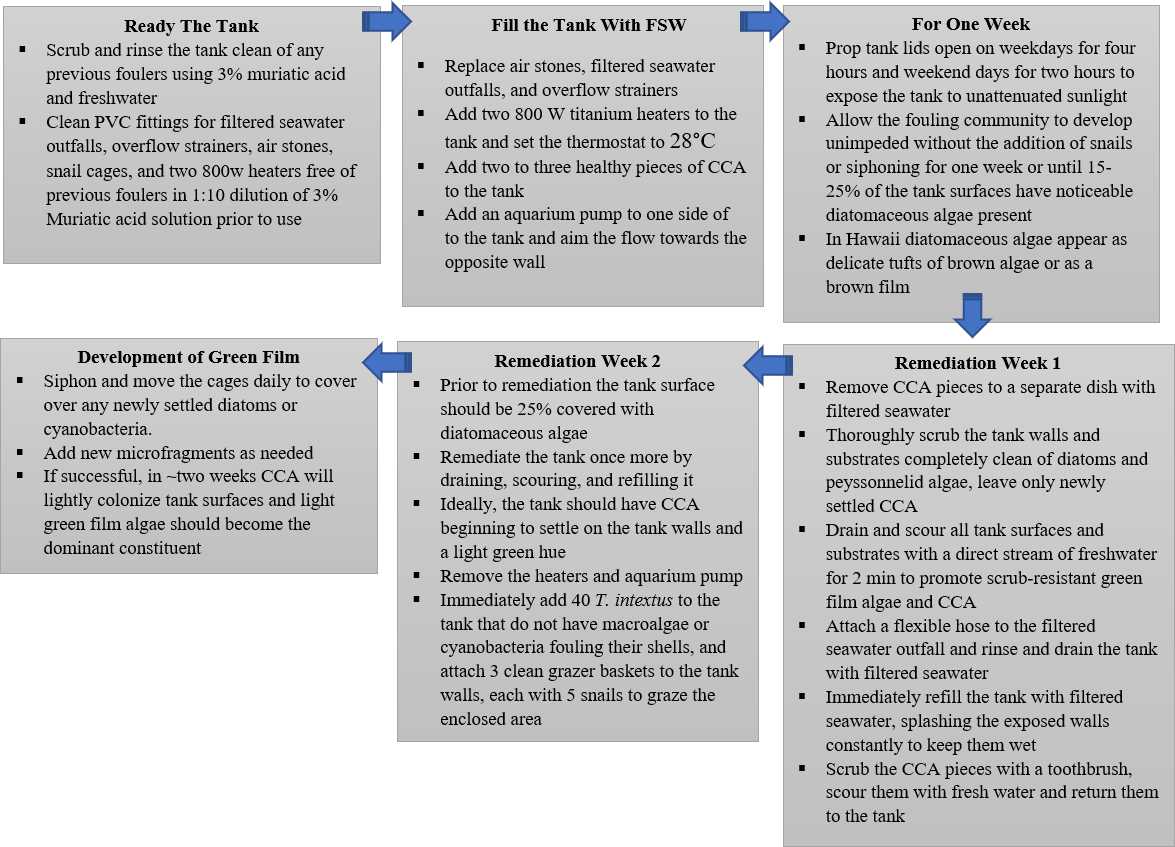
Add new microfragments to the tank as needed, see Tank Maintenance section for proper husbandry (see below). If nuisance algae are successfully controlled through this procedure the tank walls will develop a pronounced coating of green film algae and light CCA roughly two weeks post remediation ( Figure 2 ). This entire process takes about 10–14 days to accomplish. See Figure 3 for a flow chart of the entire procedure
Tank Remediation
Place CCA pieces in a separate dish filled with filtered seawater and set aside
To remediate a tank scrub the tank clean of all loose adhering and peyssonnelid algae while the tank is still filled with seawater, leave behind only newly settled CCA. Scrub all surfaces thoroughly, including heaters, air stones, aquarium pumps, and temperature probes
Empty the tank. Make sure to keep all surfaces soaking wet throughout the remediation process to preserve live CCA
While all tank drains are open thoroughly scour all surfaces with freshwater using a high-pressure garden nozzle for 2 minutes to deter the recolonization of tank surfaces by fast growing algae and biofilm
Attach a flexible hose to the seawater outfall and scour, rinse, and continuously drain the tank with filtered seawater to flush away residual fresh water
Rapidly refill the tank with filtered seawater while splashing the tank walls.
Scrub the CCA pieces with a toothbrush and scour them with the freshwater hose prior to replacing them


Constructing Cages
Cut to size and cover the exterior surfaces of the storage tray with vexar mesh to block snails from escaping the cage
Drill 4mm holes in the storage tray at necessary attachment points and secure the vexar to the sidewalls of the tray using cable ties
Mix the 2-part epoxy and completely cover each of the 4-N52 magnets so that no surface is exposed to seawater. Smooth out ridges and fingerprints left in the epoxy to minimize surface area for algal colonization.
While still malleable take two epoxy covered magnets and add enough epoxy to 1 side of the magnet to make an eyelet for a cable tie to attach
Once dry, drill each eyelet with a 4mm hole to allow attachment with a cable tie
Drill a 4mm hole on the rim of each tray in the middle of each of the shortest walls to allow cable tie attachment
Attach one magnet with attached eyelet to each short wall of the storage tray to allow for attachment of the cage to the walls of the tank
Attach the cage to the side of the tank by sandwiching the fiberglass tank wall between the 2 magnets attached to the cage and the 2 remaining magnets
Daily Maintenance
About 3 h after sunrise, prop open and secure tank lids with polypropylene line for ~4 h per weekday and ~2 h per weekend day. Keep lids closed during heavy rains or when the wind direction blows rain directly into each tank
Monitor and record tank temperatures using a blue-tooth temperature logger, salinity using a salinity pen, pH using a pH pen at a standard time during the day and whenever fluctuations in condition are suspected. Temperature should range from 25-27.5°C, Salinity ~35 ppt, and pH ~8.0 for proper coral growth
Blow off any accumulated detritus on growing microfragments using a turkey baster.
Use a small diameter flexible hose to thoroughly siphon out any visible detritus build up, moving tank materials as needed to clean in, around, and under typical accumulation points
Move magnetic grazer cages, housing 5 snails each along the tank surfaces to selectively graze problematic film algae before it can bloom. Any dark colored algae should be targeted and removed with extreme prejudice.
Periodic Maintenance
Weekly or after every use replace air stones, bulkhead strainers, seawater outfalls, cages, pumps, and heaters that have become fouled with nuisance algae. Soak dirty materials in 1:10 muriatic acid solution until fouling organisms are easily scrubbed away (~48 h). Rinse items and let them sun dry before reuse.
As needed replace dirty filter socks to prevent the seawater system from clogging. Power wash clean, and sun-dry dirty socks in preparation for the next use
Continuously monitor tank temperatures using blue-tooth temperature loggers and adjust waterflow to keep tank temperatures within 25-27.5°C. Temperatures should swing no more than 1°C per day to prevent suboptimal growth.

