Detection of avian Influenza Virus H5N1 with a Real time PCR kit
Sudhir Bhatia, Gudrun Baersch
Avian influenza Virus H5N1
Real time Polymerase chain reaction
cow milk
poultry
zoonosis
wild life
livestock
duck
Virology
Disclaimer
Genekam Biotechnolgy AG
Duissernstrasse 65a
47058 Duisburg
Germany
Abstract
Avian Influenza virus H5N1 has caused a number of outbreaks in human beings in recent years. Recently it has caused outbreak in human and cows in USA. Therefore it is essential to detect the presence of this virus as early as possible in order to monitor the presence of this virus, hence we have developed a number of ready to use PCR kits to detect this virus. Highly pathogenic strains are reponsible for such outbreak. It spreads also in poultry with very fatal consequences. The kit double- and triple-checks the presence of this virus, therefore it makes possible to detect the H5N1 strains circulating in different countries worldwide, moreover mutated versions are likely to be detected with double and triple check method. The cross reaction panel has done with related and non related pathogens like Influenza virus strains: H3N2, H1N1, H7N3, HIN1 (California strain); RSV, Enterovirus, CMV, Influenza B, Mycoplasma etc.
Before start
- User must read the manual before use.
2. Important Hint: t:
Real time PCR is based on fluorogenic dyes. There are 2 probes with 2 different dyes in this kit hence you have to program them in your machine:
-
First the probe, namely Carboxy-fluorescein (reporter) and 6-Carboxy tetramethyl rhodamine (quencher). The results will be shown as Ct -Values. Up to 40 Ct should be taken positive. Value between 40-45 Ct should be taken as marginal positive (doubtful).
-
Second the probe, namely HEX (reporter, it is available as VIC in some machines) and 6-Carboxy tetramethyl rhodamine (quencher). The results will be shown as Ct -Values. Up to 40 Ct should be taken positive. Value between 40-45 Ct should be taken as marginal positive (doubtful).
If any of the both channels or both are positive, it is to be considered positive.
Steps
Thaw one tube each : A, B, Y, D1 and D2. After thaw, put the tubes at 4°C (as it is better). If the kit is not in use, store them at -20 ° C.
Mark your microtubes with a sample number, +ve Control and –ve Control. Otherwise use a 96 well microwell plate instead of tubes.
Add 7µl of Tube A to each tube.
Add 10µl of B to each micro tube. Avoid touching the wall of the microtubes.
Add 1µl of Y to each tube (Avoid touching the wall of the microtubes).
TIP: User can calculate the total requirement of chemicals needed. User can mix 7µl of A + 10µl of B + 1µl Y together in one tube for one reaction, but to have 10 reactions, there will be total volume of 180µl (70µl Tube A, 100µl B and 10µl Y). From this, 18µl can be distributed into each tube. This step saves time and hardware.
Add 2µl of your RNA with sterile pipette-tip with filter to each micro tube according to your label except +Ve and -Ve (Avoid touching the wall). Use a new pipette tip for each sample!
Use new pipette tip with filter. Add 2µl of Tube D1. This is the positive control supplied with our kit.
Use a new pipette tip. Add 2µl of –Ve (tube D2) to –Ve Control (Do not touch the wall).
Centrifuge all tubes at 8000 rpm for 5 sec. (This is not necessary, but it is better).
Run the program of your thermocycler as follows: Check if everything is added correctly, as the volume of each microtube must be almost the same.
Now enter quencher and reporter dye to setup your software (see FAQ) and run the following program (2h30min):
- 60 minutes at 42°C
10 minutes at 70°C
2. 15 seconds at 95°C x 45 cycles
60 seconds at 60°C
Example of setting up a real time machine: Instrument Setup Instructions for real time PCR (RT-PCR System: ABI 7500) Open SDS Software - File New -Select: Absolute Quantification assay -Insert name -Click: Next 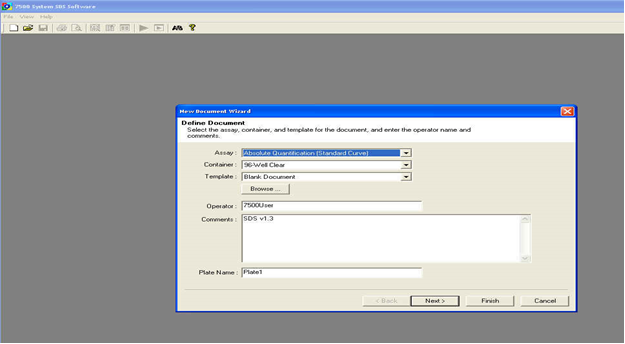
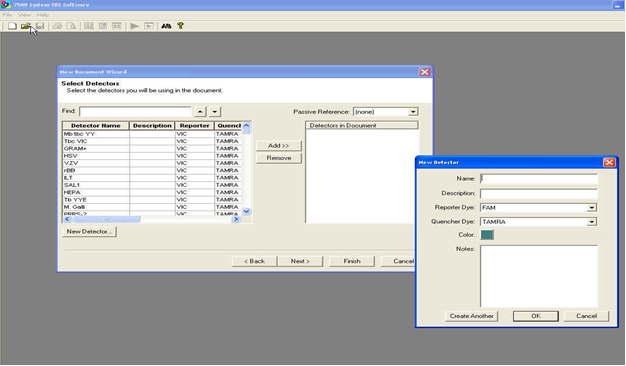
Create a New Detector 1 : Select Reporter and Quencher -Dye: (FAM-TAMRA) -Click: Add -Select: Passive Reference-none -Click: Next
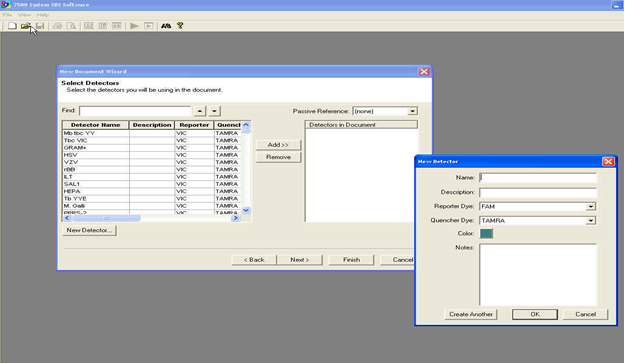
Create a New Detector 2 (VIC-TAMRA) -Click: Add -Select: Passive Reference-none -Click: Next
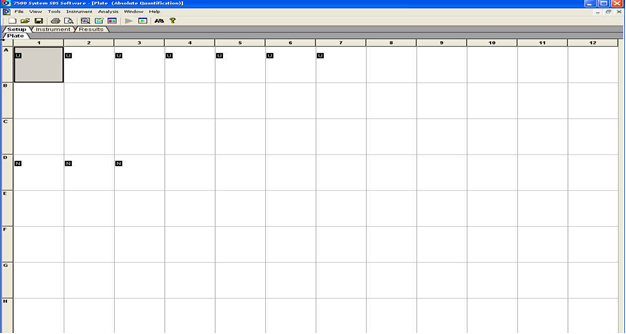
Insert Well positions: U nknown – or - NTC (No Template Control) - or– Standard -Click: Finish: The Plate Document will open.
Write your Array: Name of Samples for each well or tube.
Select Instrument Tab – Insert the Program into the Thermal Profile as mentioned in point 11 - Change Sample Volume (20µl) -Click: File - “Save as” to save the Setup -Click: “Start” to begin the PCR run: Shortly the run time will appear on the screen.
Before starting the PCR program, check that the plate or tubes are properly sealed The wells of the well plate or microtubes must be in contact with metal block k (important!). There should be no air or lose contact with metal block of thermocycler. In case of 96-well plate, it should be sealed with adhesive cover. Now run your PCR.
Once the PCR is finished, a small dialog box will appear: “The run has been completed successfully”
Click: OK. Now you can take out the microtubes or well plate.
STEP B
Click the Result -Tab and the Amplification -Tab: Place the Threshold line above the background, then select: “Analyse” (see Figure below). Calculate the threshold cycle (Ct) Value for each well. There should be no signal in the negative control. Successful positive controls or positive samples must give a curve in the software graphics.
The Report page will give you the Ct-values and Standard deviation for each well.

