Coastal Environmental DNA Sampling & Gravity Filtration Protocol

Alexandria B Boehm, Meghan M. Shea

Published: 2023-07-28 DOI: 10.17504/protocols.io.bp2l69y7klqe/v2

Abstract

This is a protocol for collecting coastal environmental DNA (eDNA) samples and gravity filtering them on site, using a set-up with single-use enteral feeding pouches first described in Curd et al. 2019 (see Appendix S6) and further elaborated in Gold et al. 2021.

Steps

Pre-Sampling Preparation

1.

Clean 1000 mL Nalgene bottles (as many as field blanks needed) with a 10% bleach rinse (leave for 10 minutes), then three rinses of DI water

2.

Fill cleaned Nalgene bottles with 1000 mL of MilliQ water to use as field blanks

3.

Sterilize luer lock to hose barb adapters, male-female luer lock caps, and silicone rubber cap

3.1.

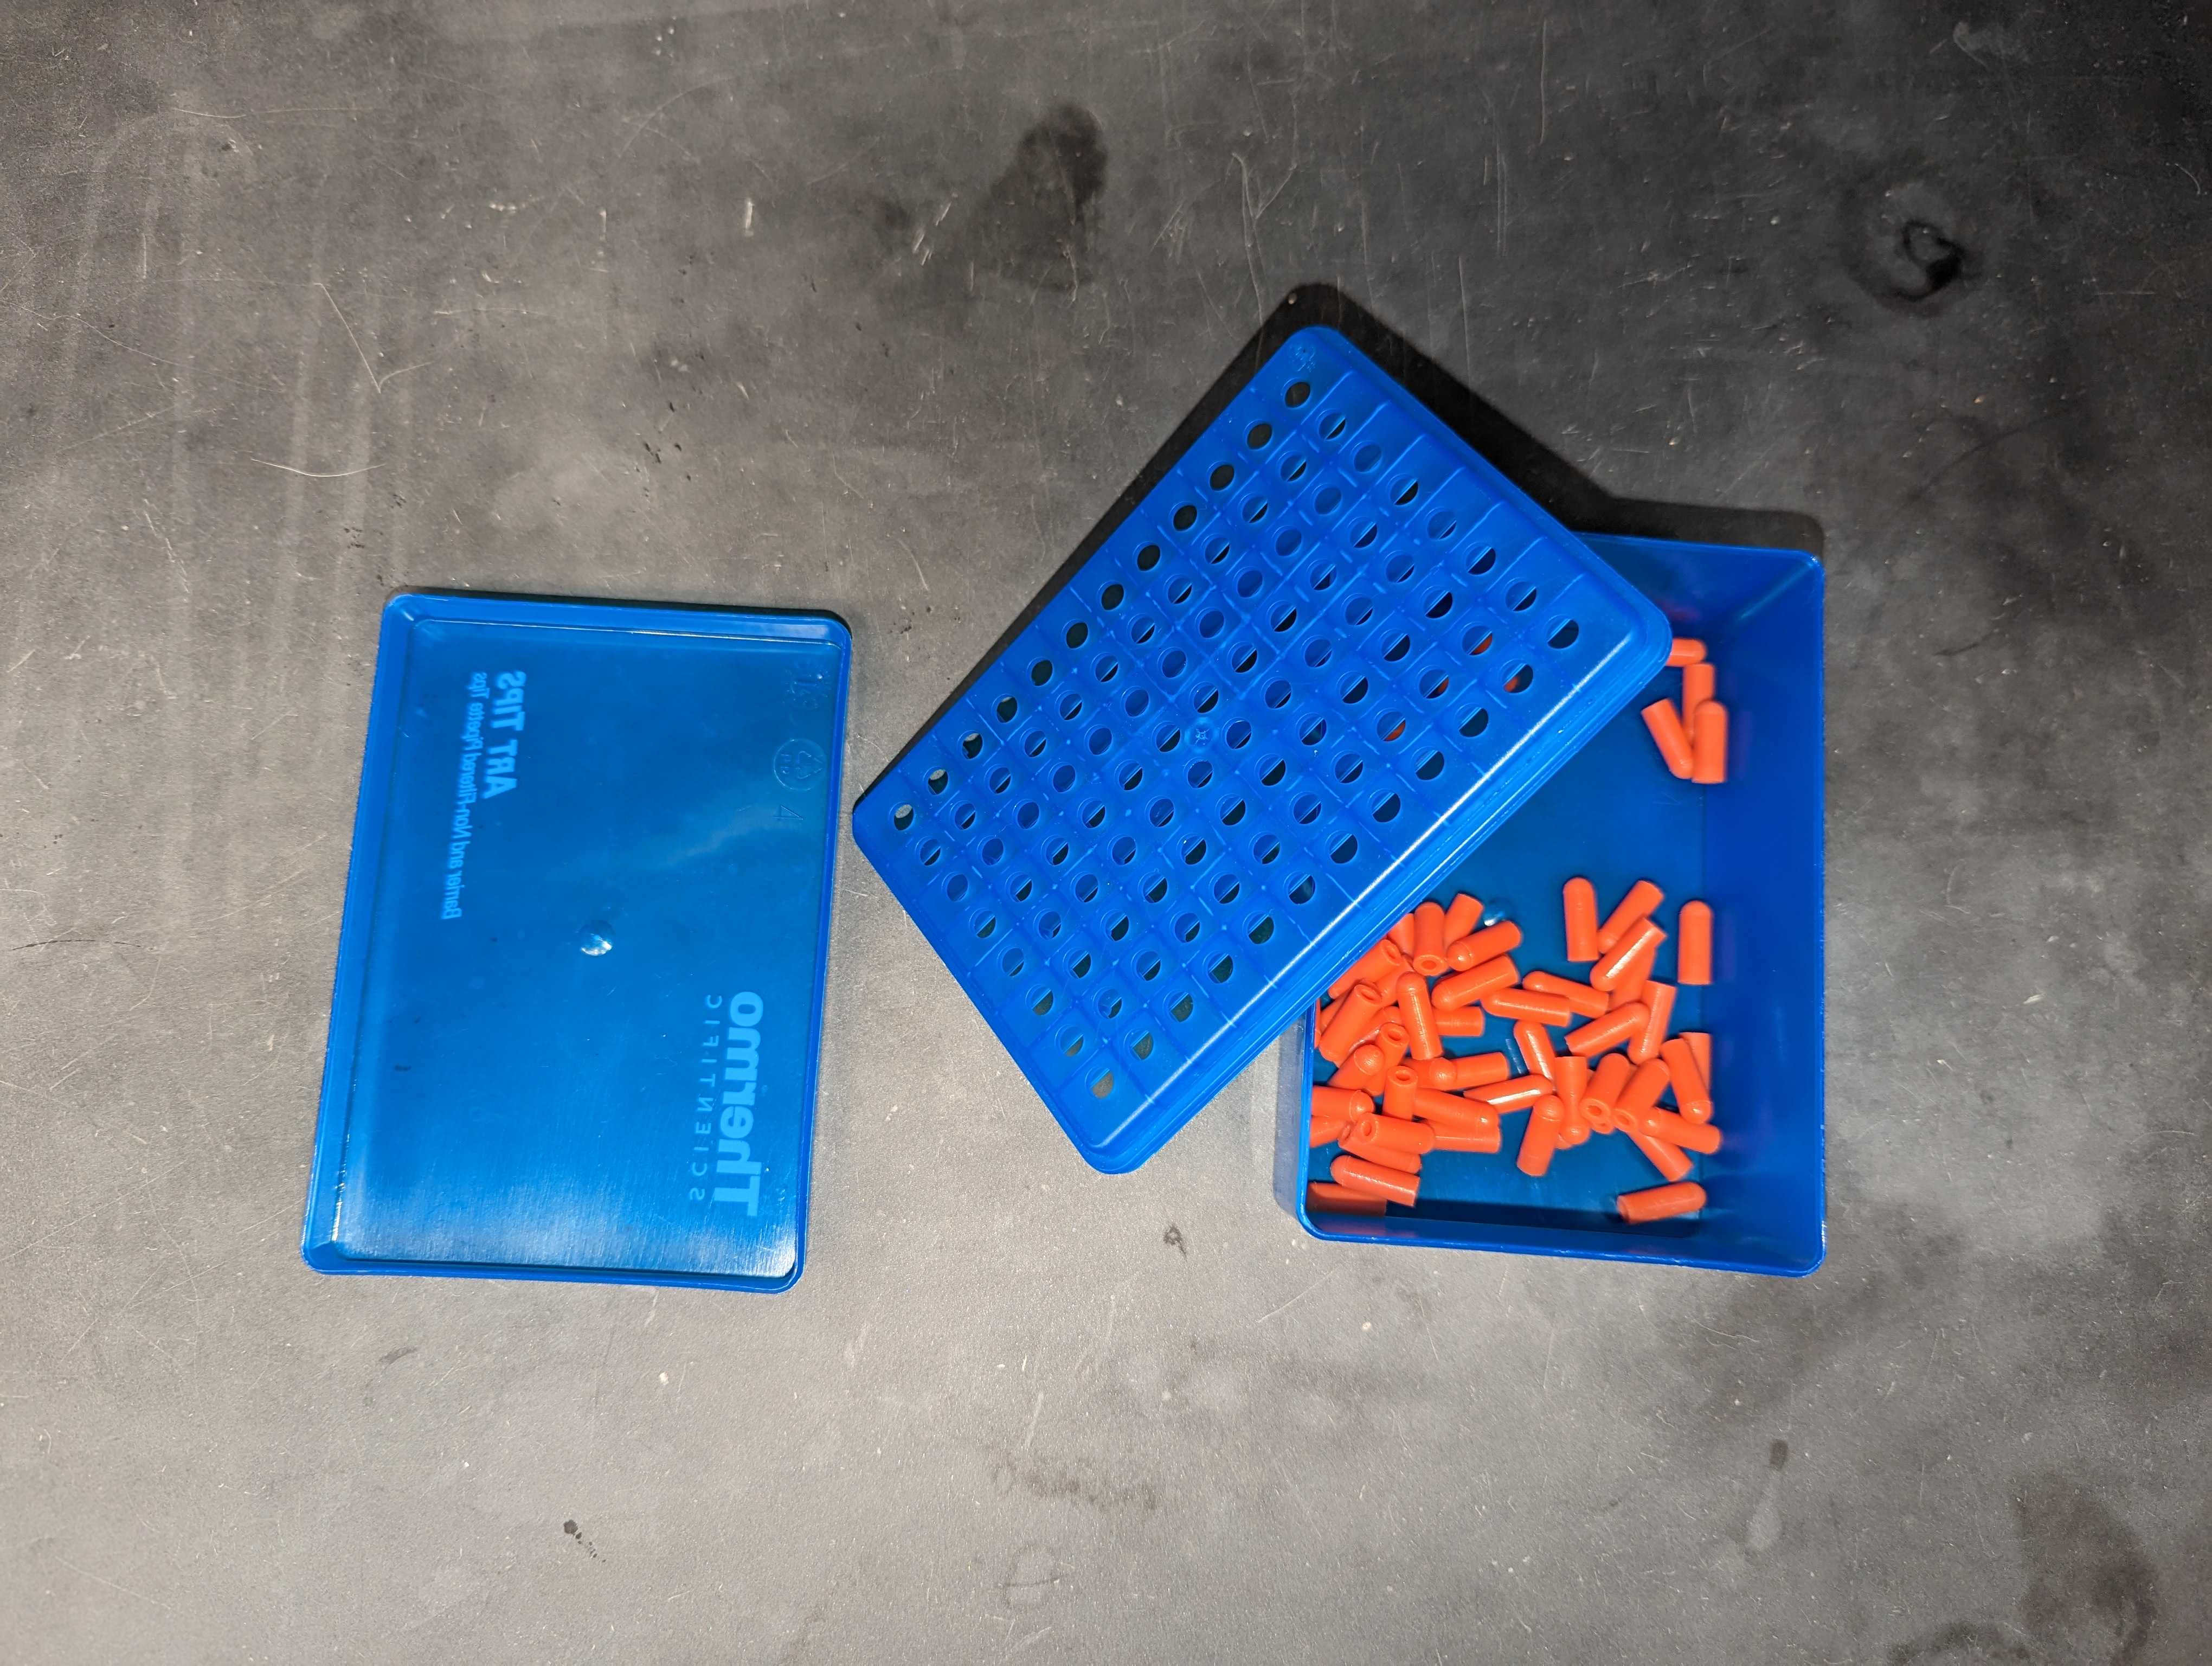
Fill a container (e.g. old pipette tip boxes, so you can easily drain the water with the lid) with 10% bleach solution, add adapters and caps, and let sit for 10 minutes

Example of cleaning set-up using a pipette tip box (Photo Credit: Meghan Shea)
3.2.

Rinse adapters and caps 3 times with DI water

Diagram of rinsing procedure using a pipette tip box (Photo Credit: Meghan Shea)
3.3.

Place adapters and caps in a single layer in UV Crosslinker for 15 minutes

3.4.

Store sterilized caps and adapters in sterile containers

4.

Wipe down plastic storage bins with RNase Away, and organize needed field supplies (wiping individual items with RNase Away when possible as well).

  • Sampling Infrastructure & Transport: clothes rack, bricks for stability, shade structure, beach cart
  • Tools: tube cutter, flathead screwdriver, lab marker, temperature and salinity probe (e.g. Orion Model 1230 meter), prepared field blanks
  • Sampling Materials (1/sample) : zip ties, 1000 mL Covidien single-use enteral feeding pouches, sterile 0.22 μm Sterivex filters, male luer lock to hose barb adapters, dual male-female luer lock caps, round silicone rubber caps, sterile 3 mL luer lock syringes, small bungees, whirl-pak bags
  • Preservation Materials: insulated cooler, ice packs

Note
See MATERIALS list for more details on specific field supplies

Sampling Set-Up

5.

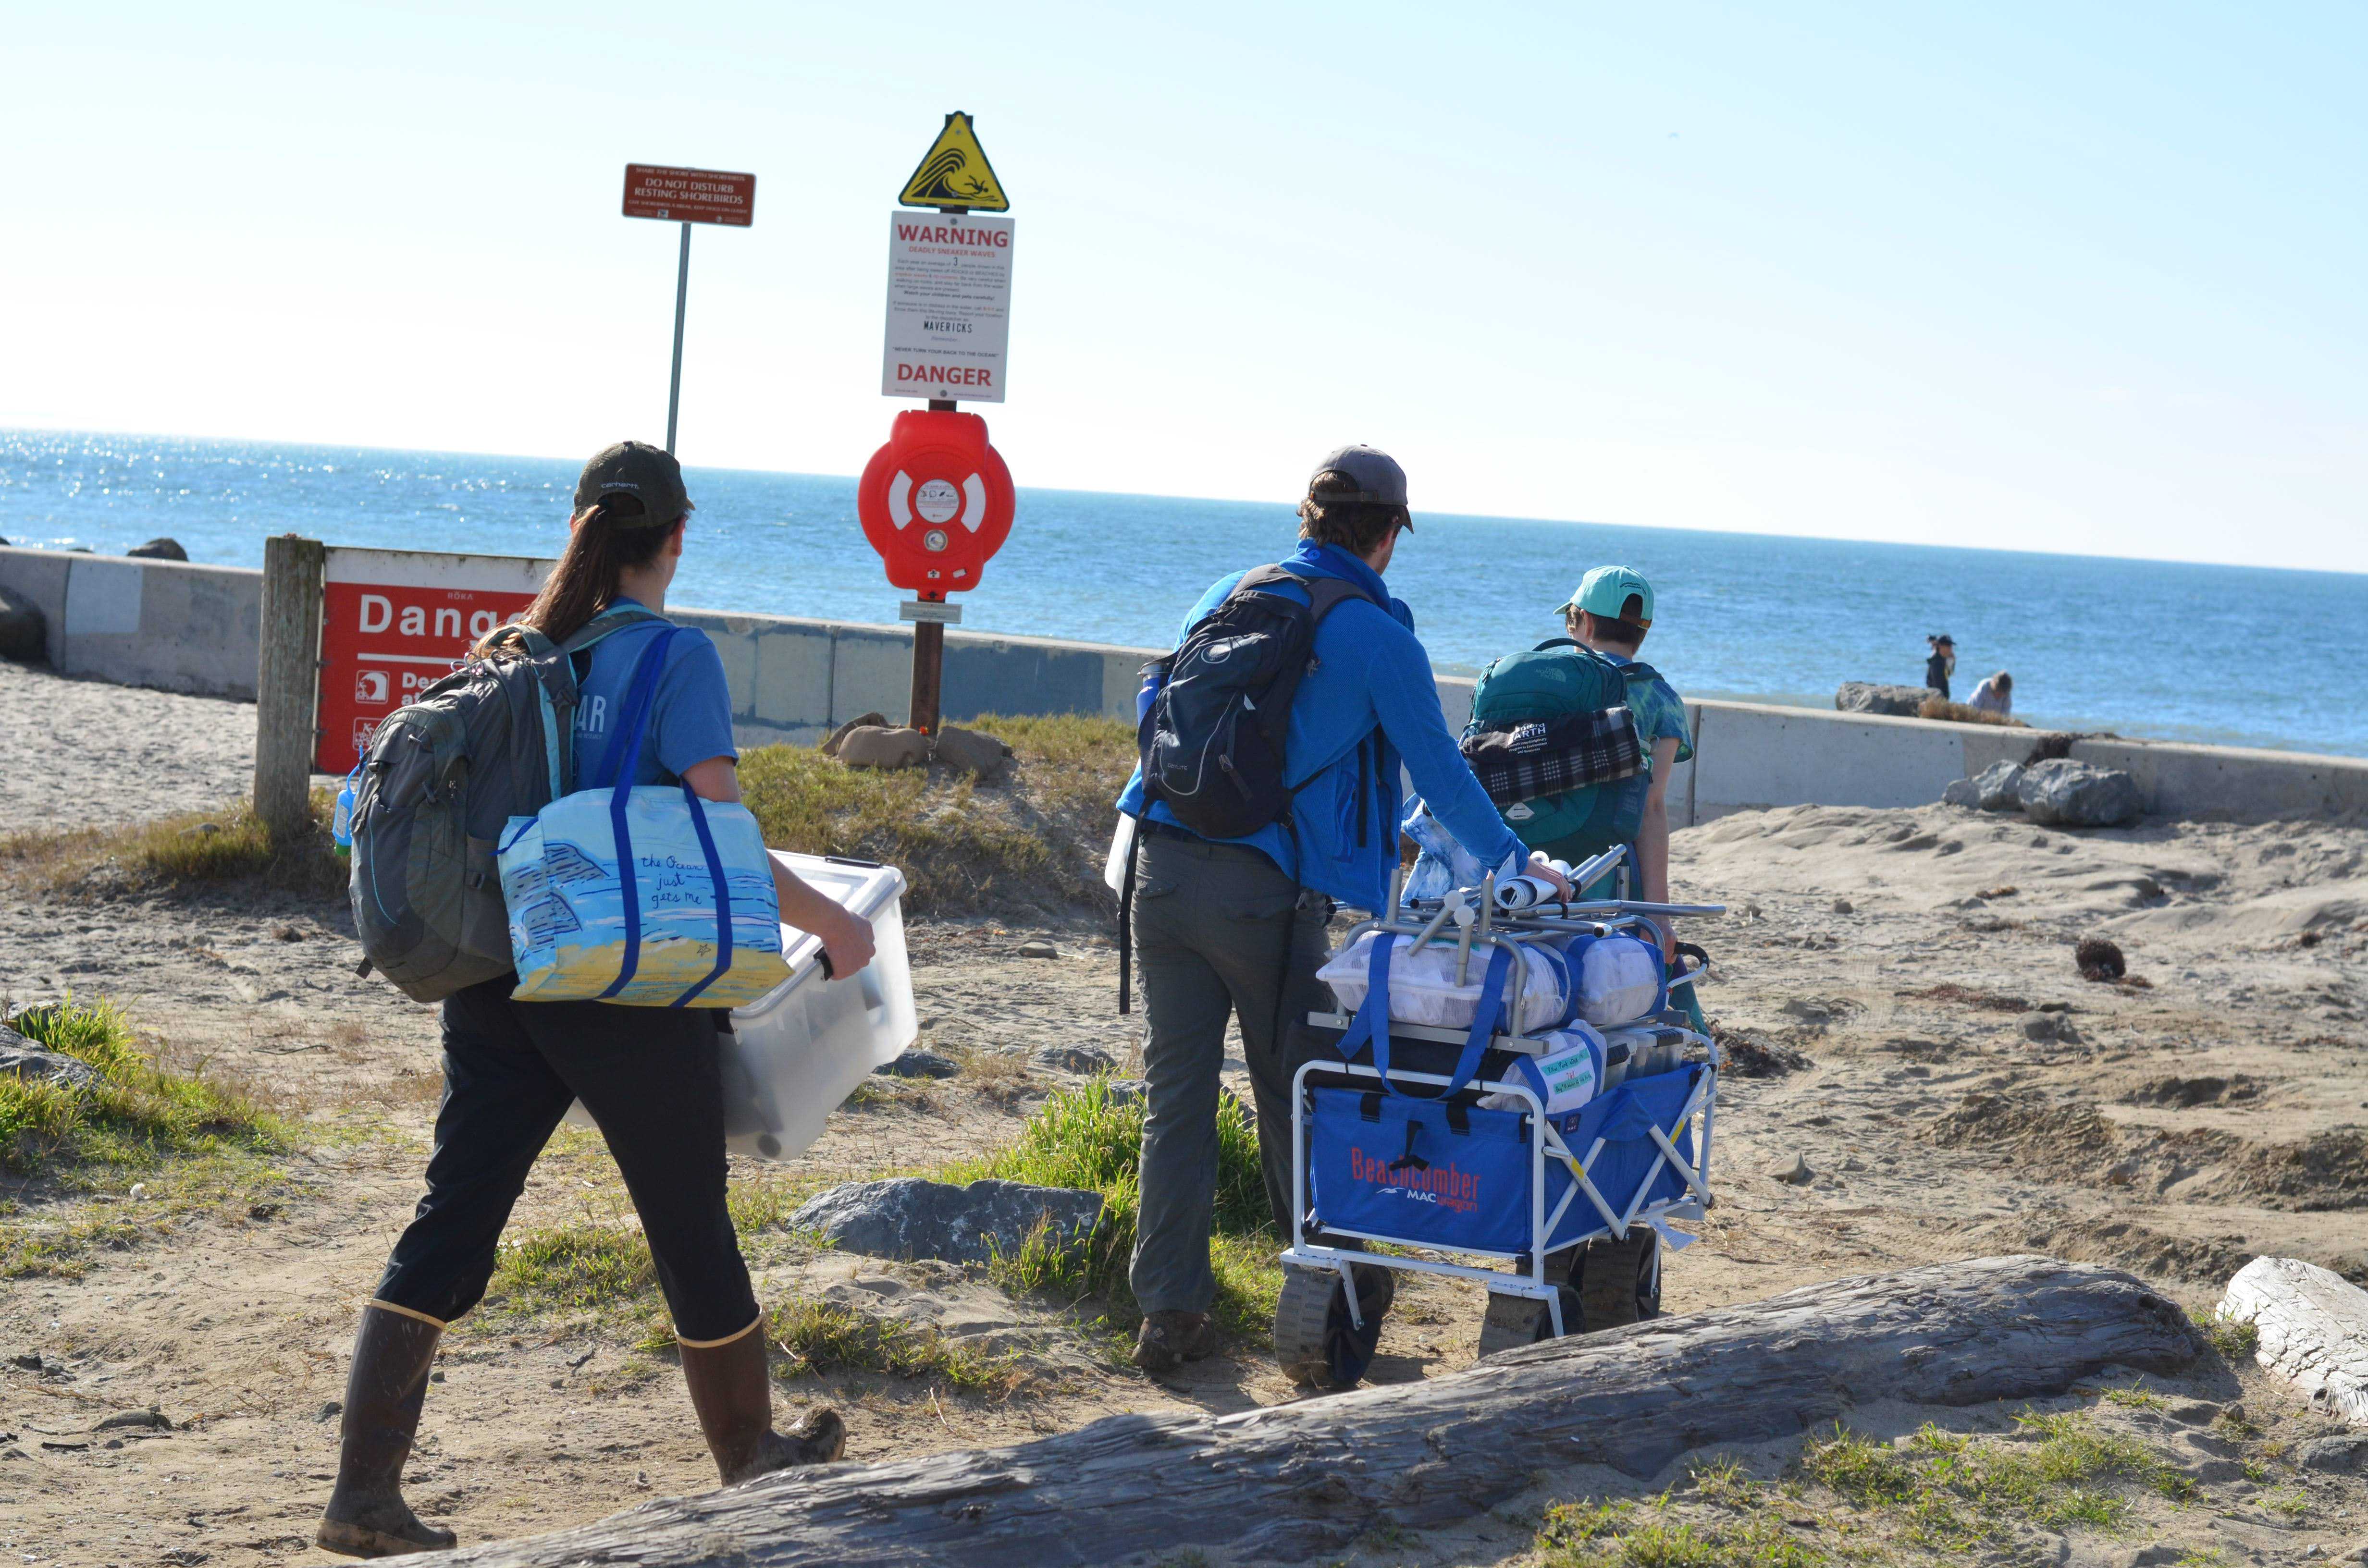
Wheel cart with supplies to sampling location

Example of beach cart used to transport sampling supplies (Photo Credit: Callie Chappell)
6.

Put together clothes rack for hanging enteral feeding pouches for gravity filtration and weigh down with bricks. Set up shade structure to cover clothes rack.
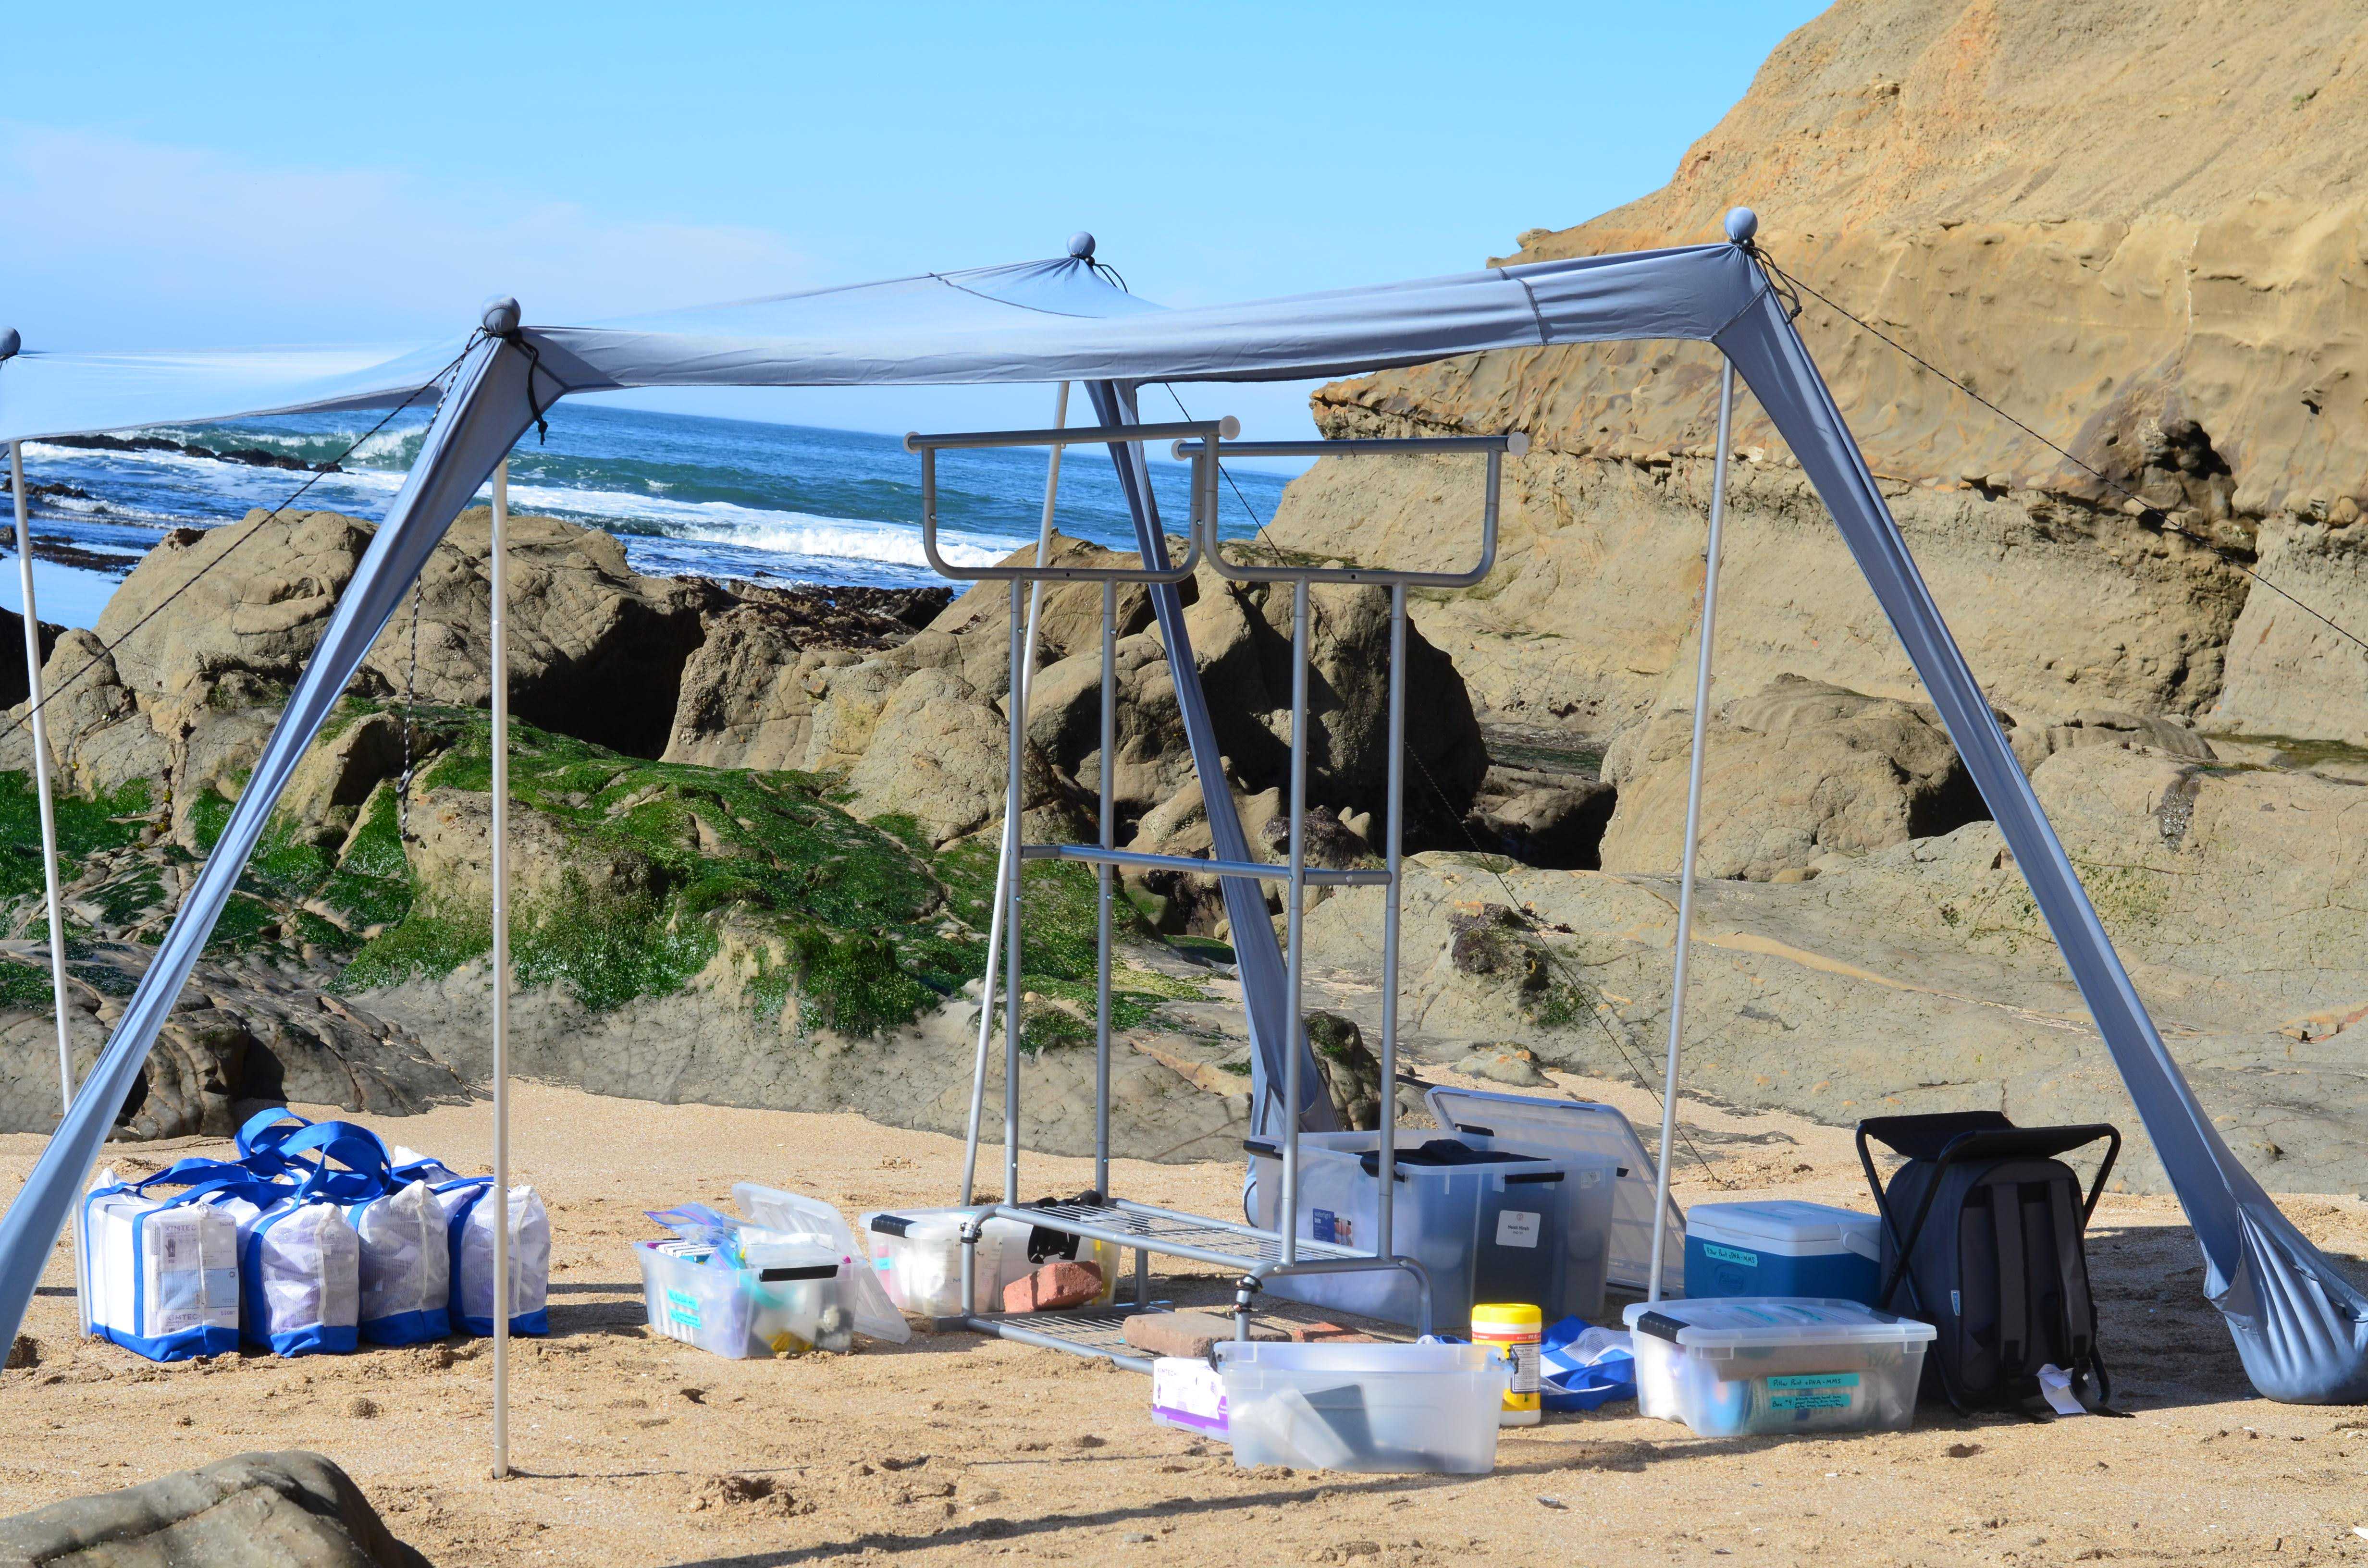
Example field set-up with clothes rack and shade structure (Photo Credit: Callie Chappell)

Note
Keeping samples in the shade was prioritized to avoid potential DNA degradation by sunlight (Keeping samples in the shade was prioritized to avoid potential DNA degradation by sunlight (Andruszkiewicz et al., 2017).).

Sampling

7.

Put on fresh gloves

8.

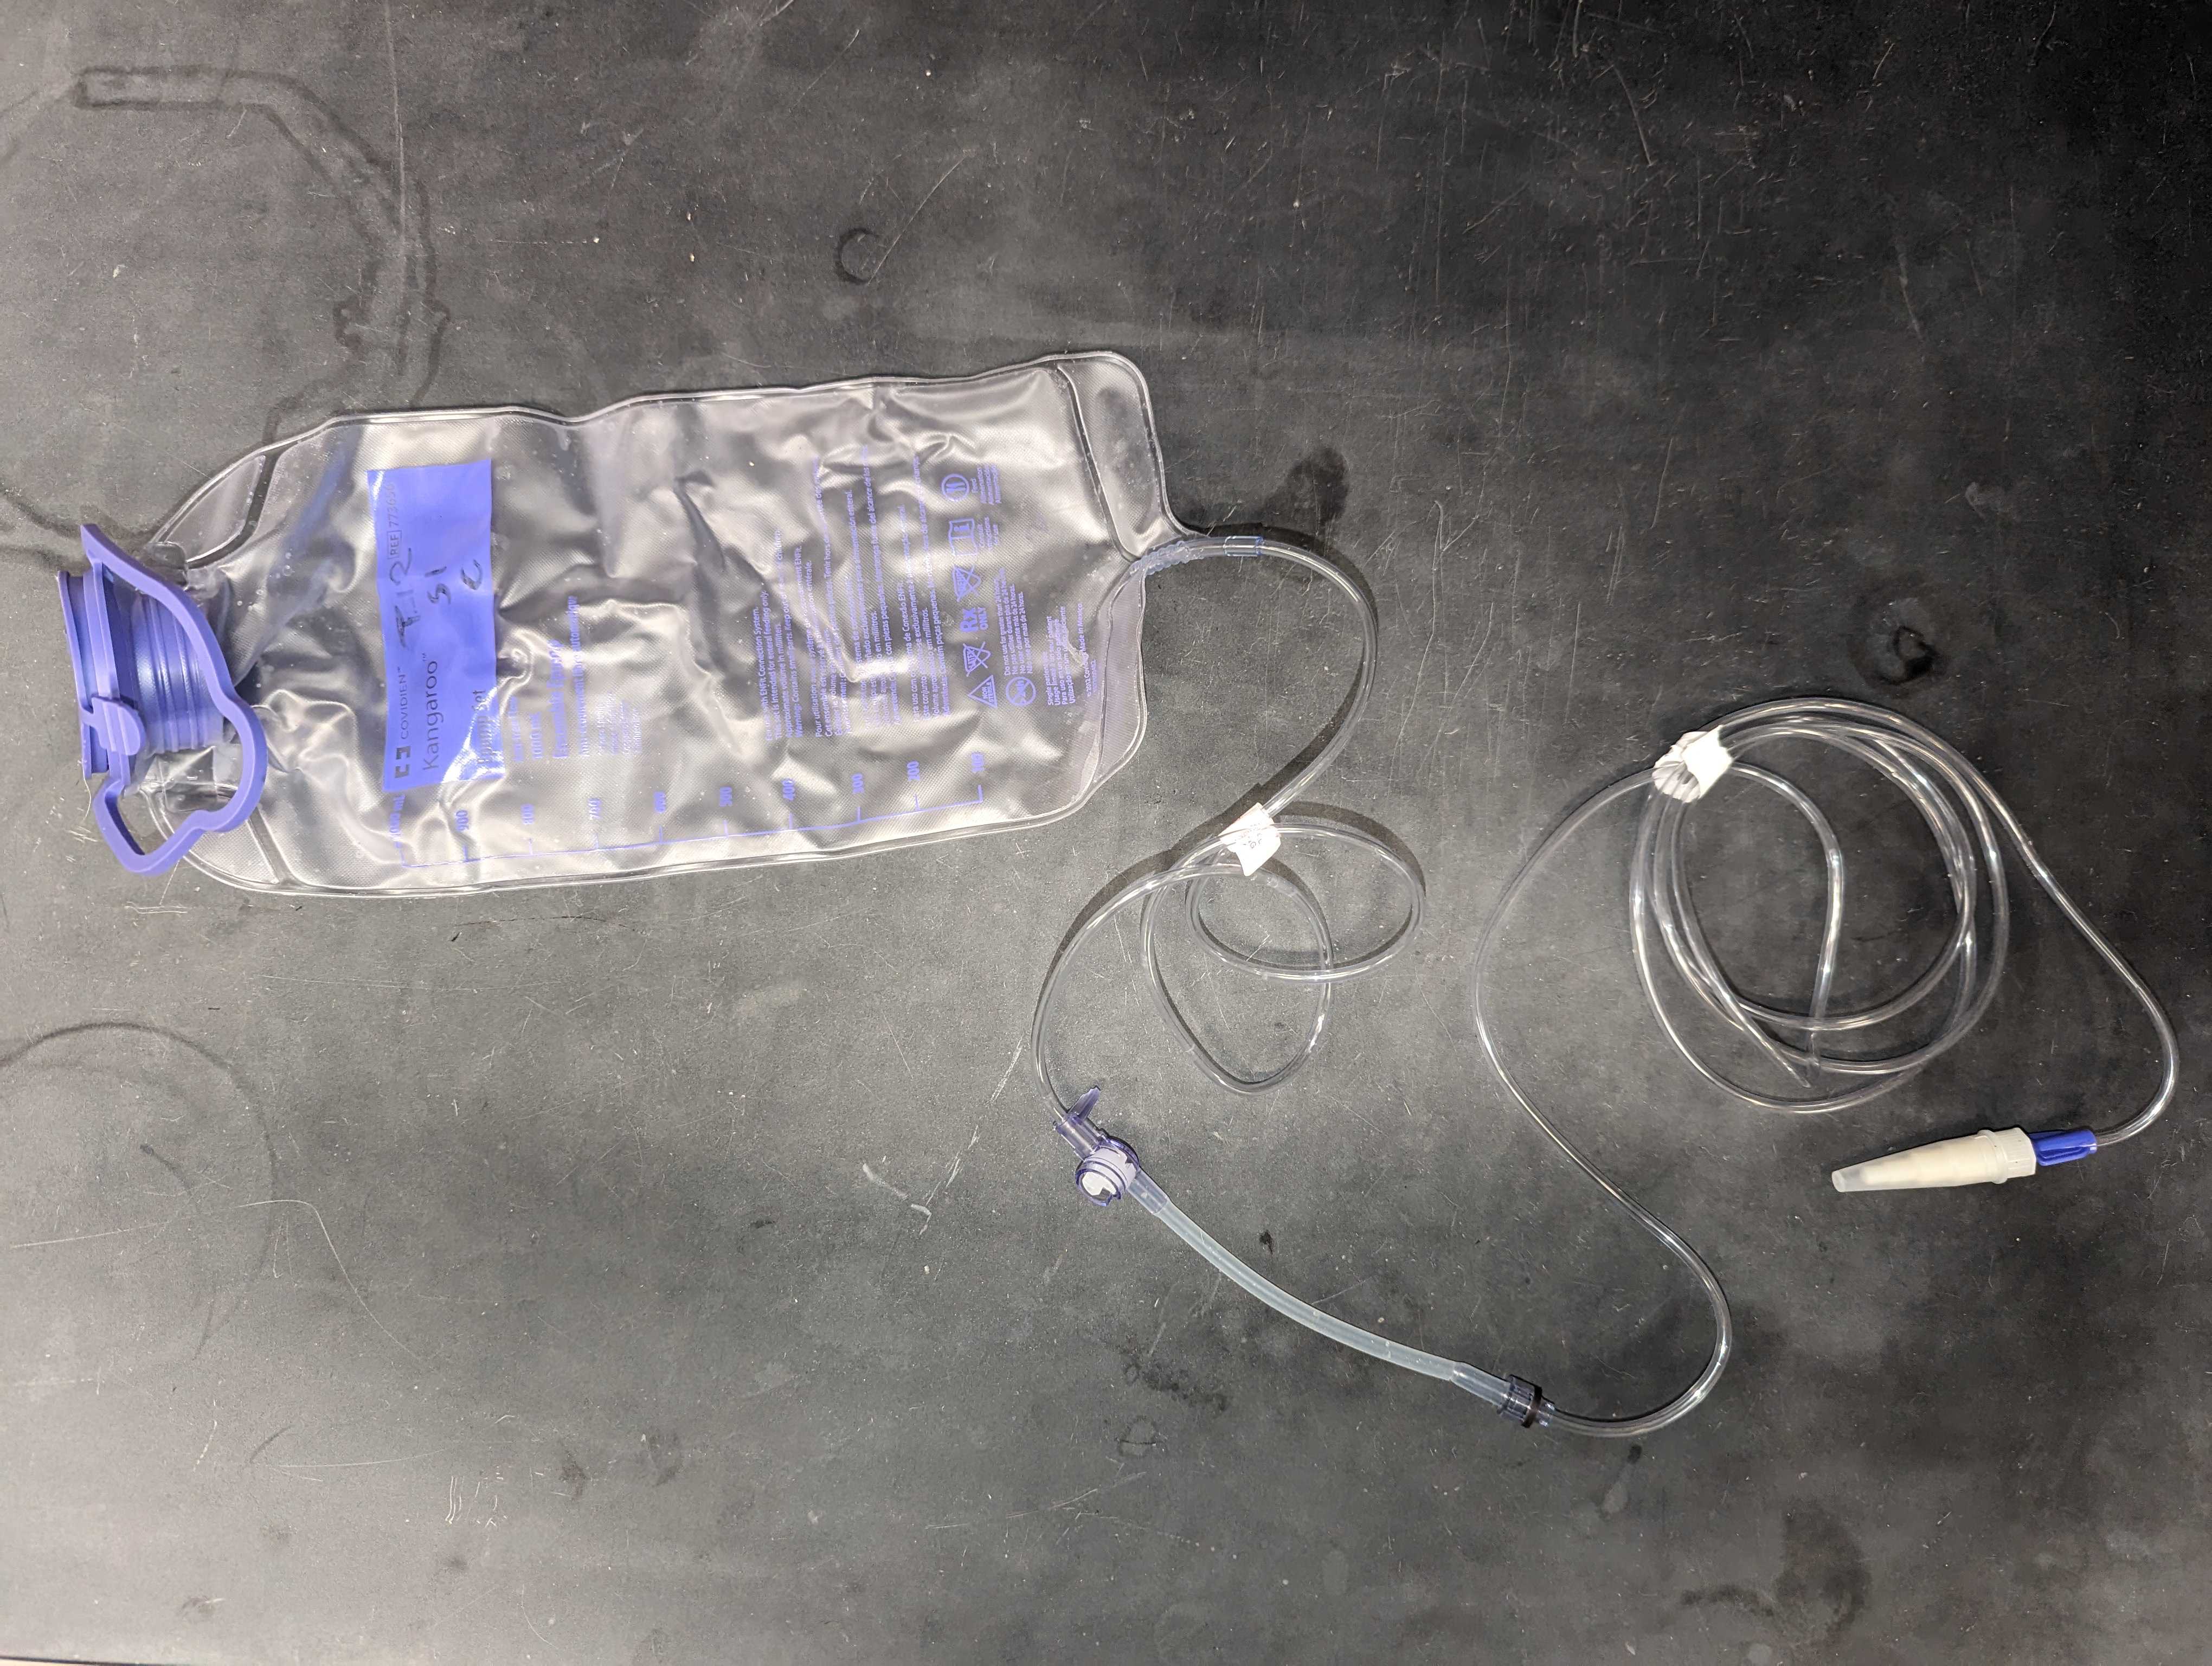
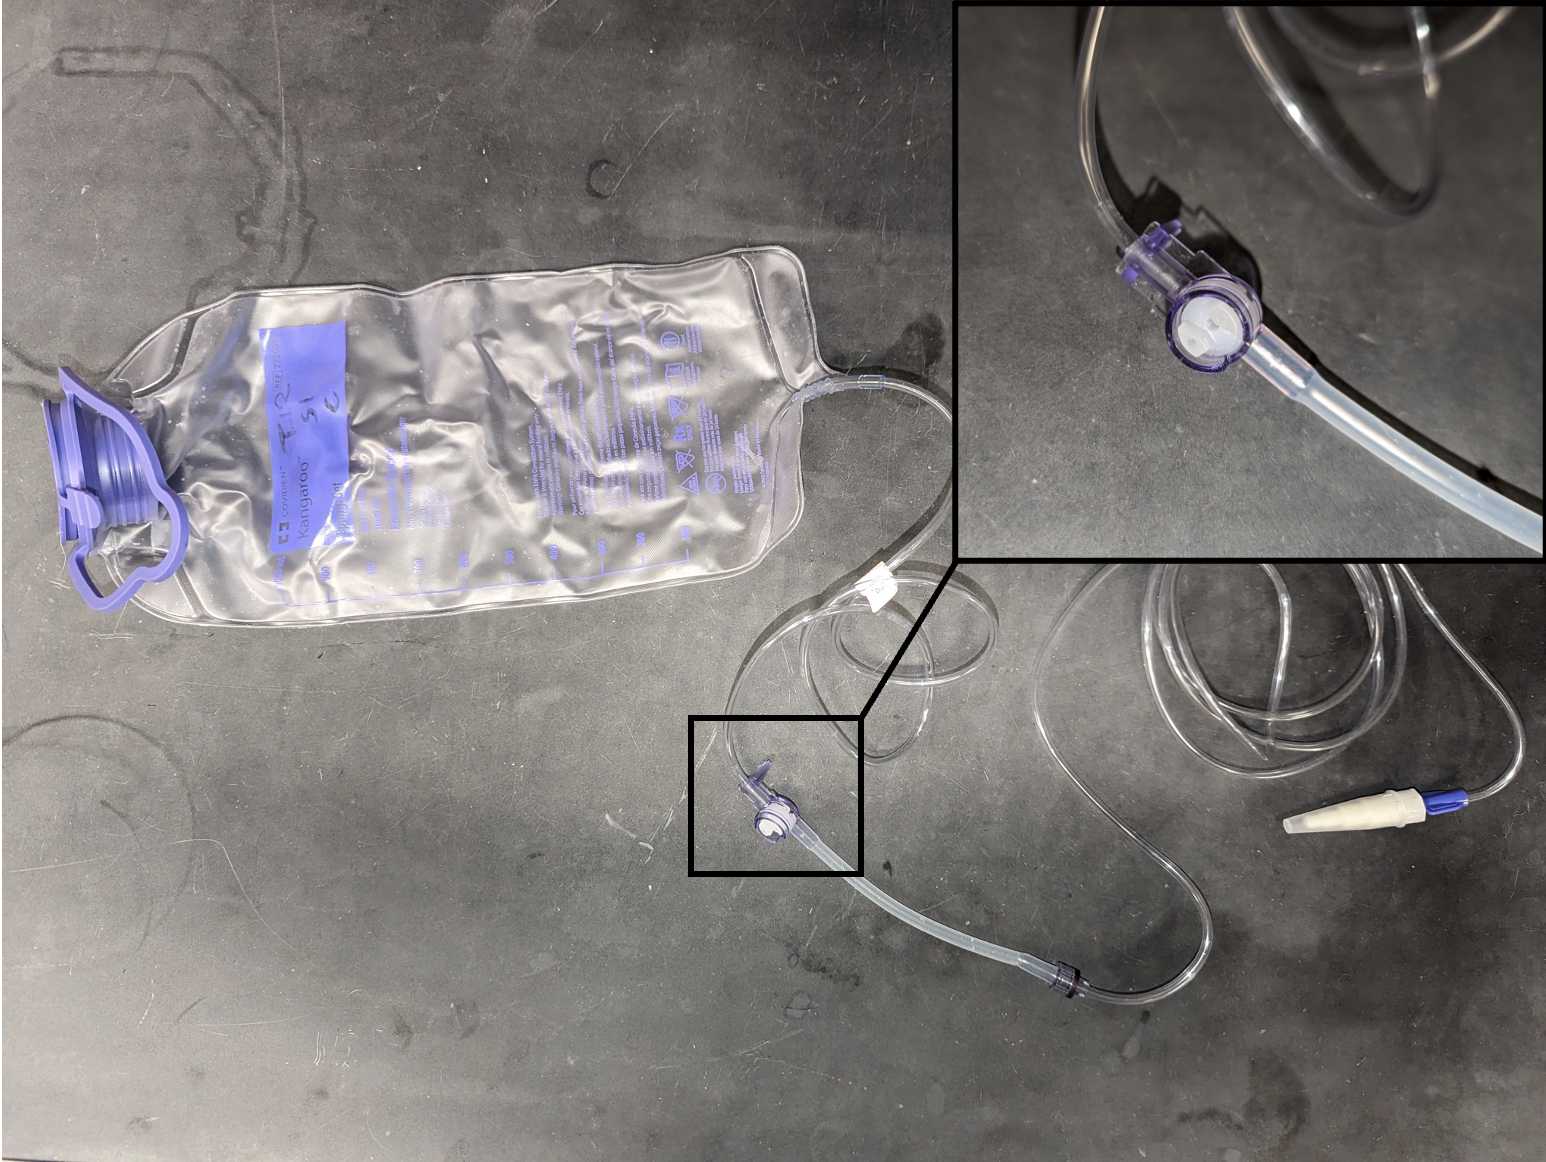
Remove enteral feeding pouch from plastic wrapper

Image of enteral feeding pouch (Photo Credit: Meghan Shea)
9.

Label pouch with unique sample site/time identifier

10.

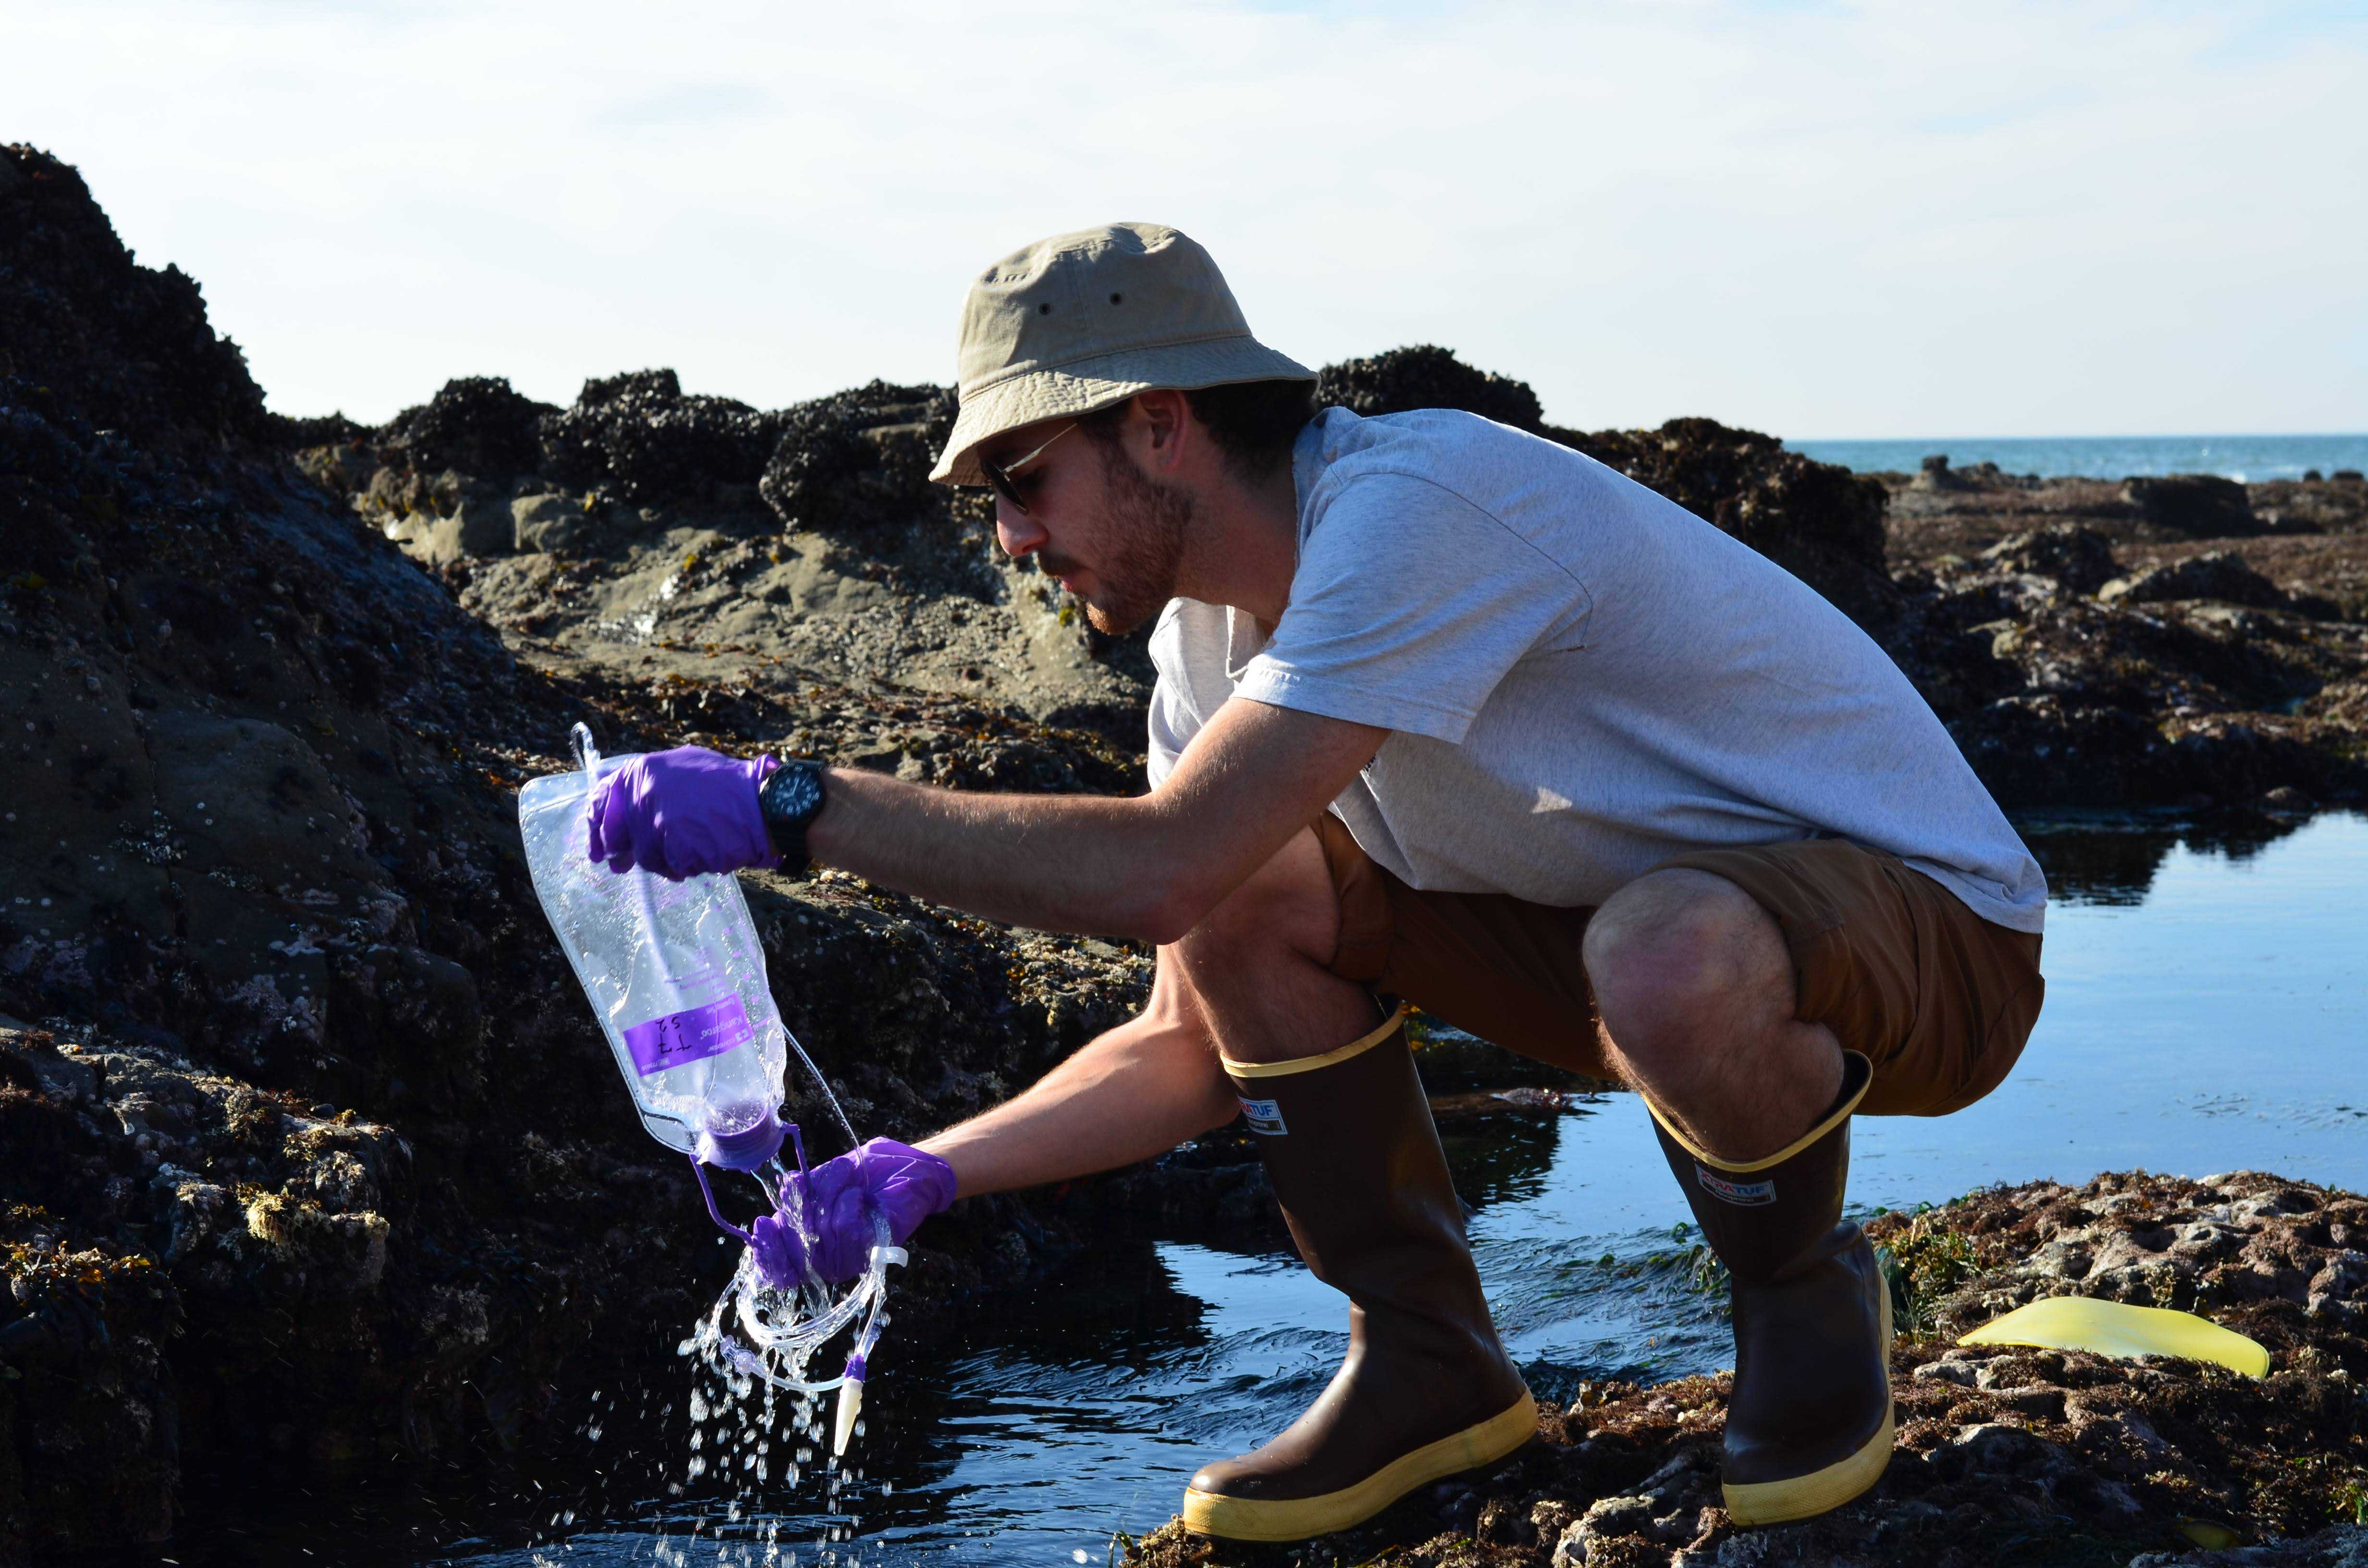
Walk pouch to designated sampling site, rinse pouch three times with sampling water, and directly fill pouch with water to 1000 mL mark while keeping the tubing out of the water

Researcher rinsing pouch before collecting water sample (Photo Credit: Callie Chappell)
11.

Using temperature/salinity probe, record the temperature and salinity at the site the sample was collected

12.

Secure the top of the pouch and return to clothes rack

13.

Using a zip tie, secure the pouch to the top of the clothes rack
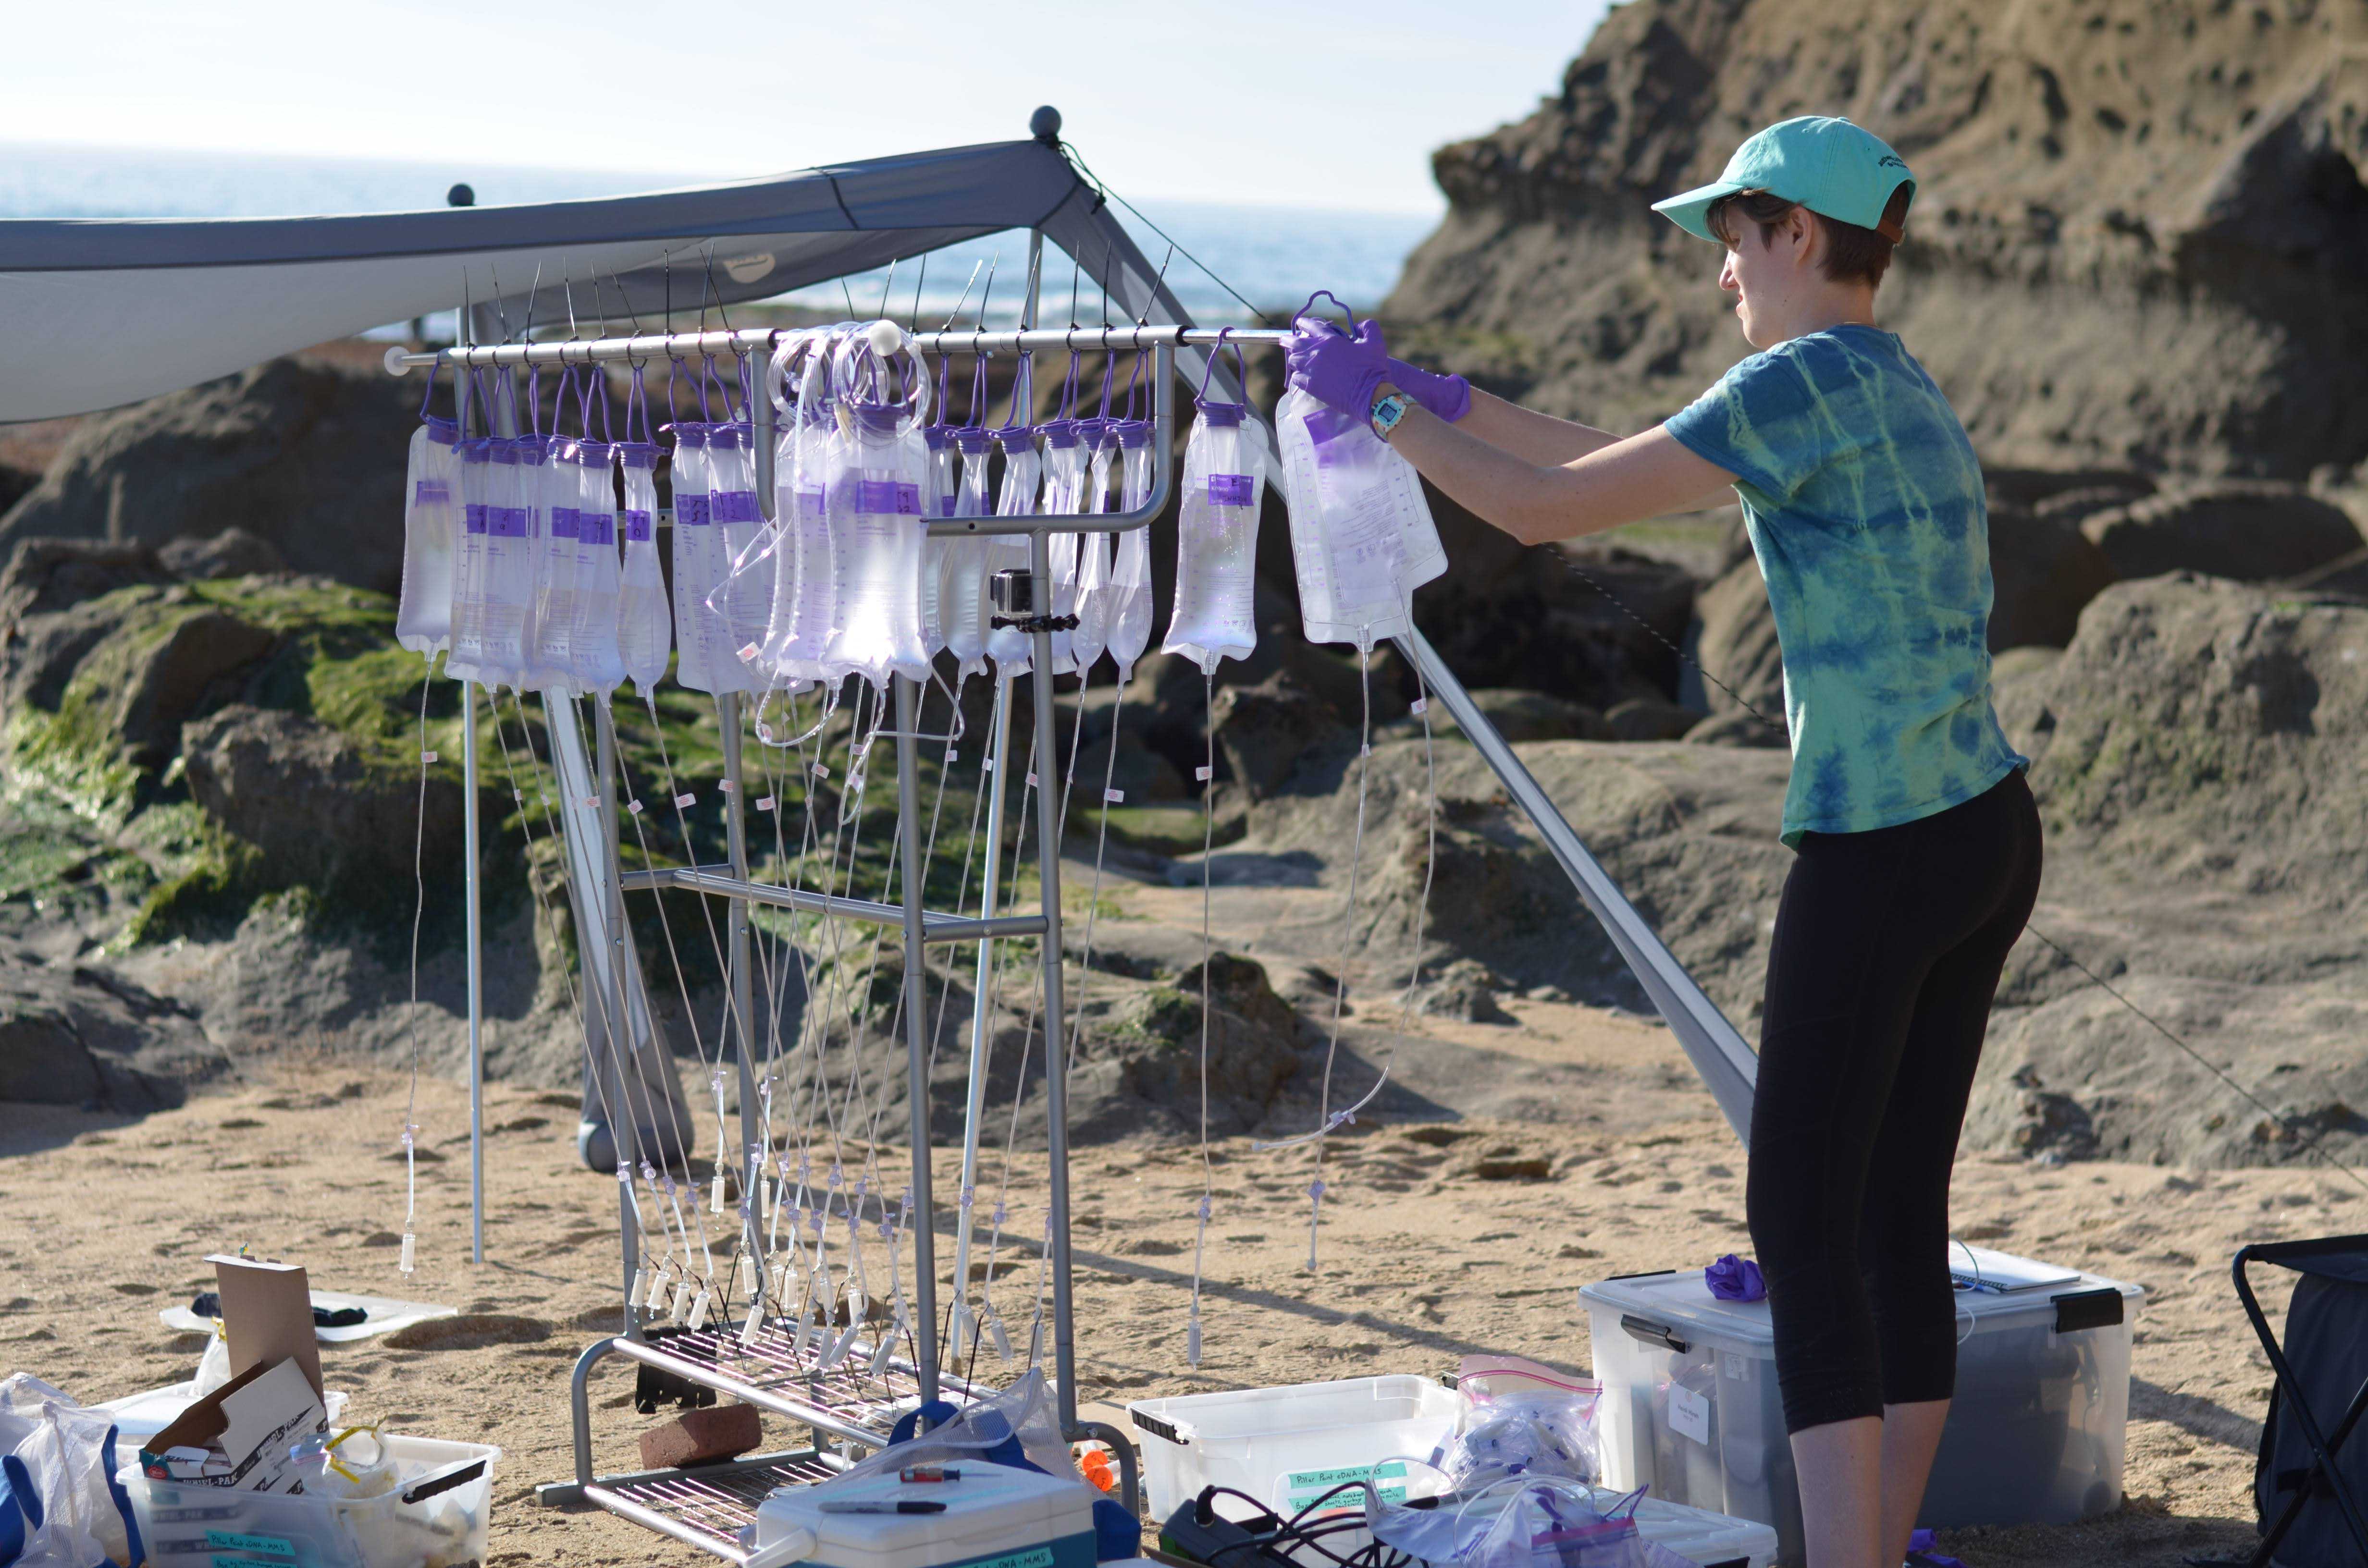
Researcher attaching pouches to clothes rack (Photo Credit: Callie Chappell)

Note
We found that reusable zip ties could not support the weight of the pouches after their first use. We also trialled shower curtain rings as another possibility for reusable pouch holders, but could not find a style that we were confident could consistently support the pouch weight.

14.

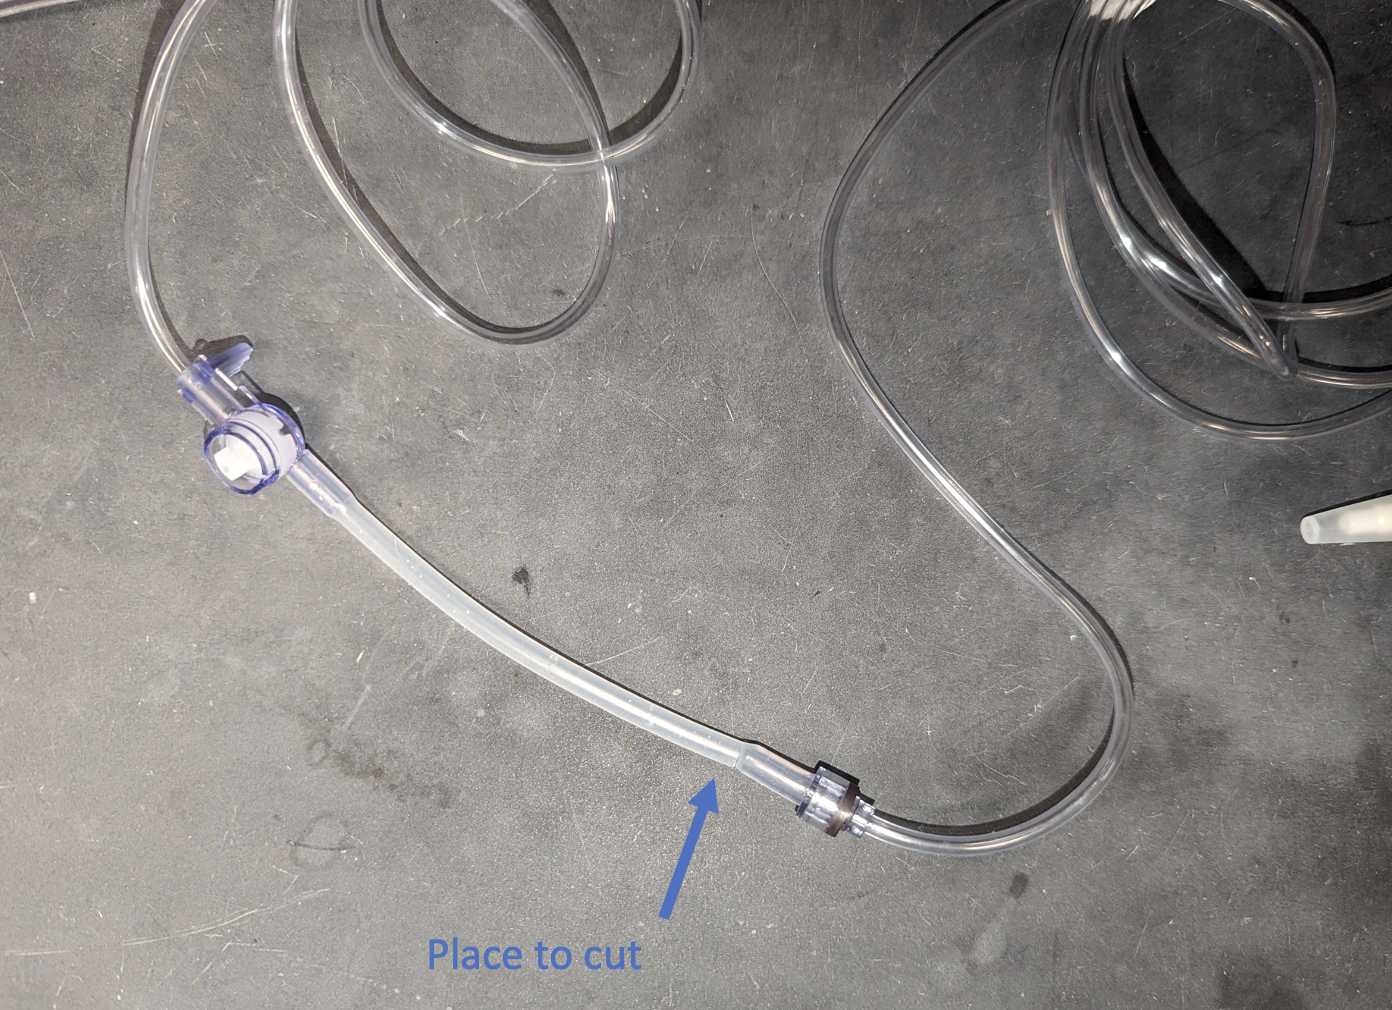
Using a small tube cutter, cut the tubing attached to the pouch at the end of the less-rigid opaque section beneath the first purple joint

Image of enteral feeding pouch tubing annotated with an arrow to show where to cut the tubing (Photo Credit: Meghan Shea)
15.

Put on fresh gloves, and grab one luer lock adapter and a Sterivex filter

16.

Place the barb end of the luer lock adapter into the cut end of the tubing, remove the Sterivex filter, and lock the filter to the tubing

17.

Label the filter with an ethanol-proof lab marker with a unique sample site/time identifier

18.

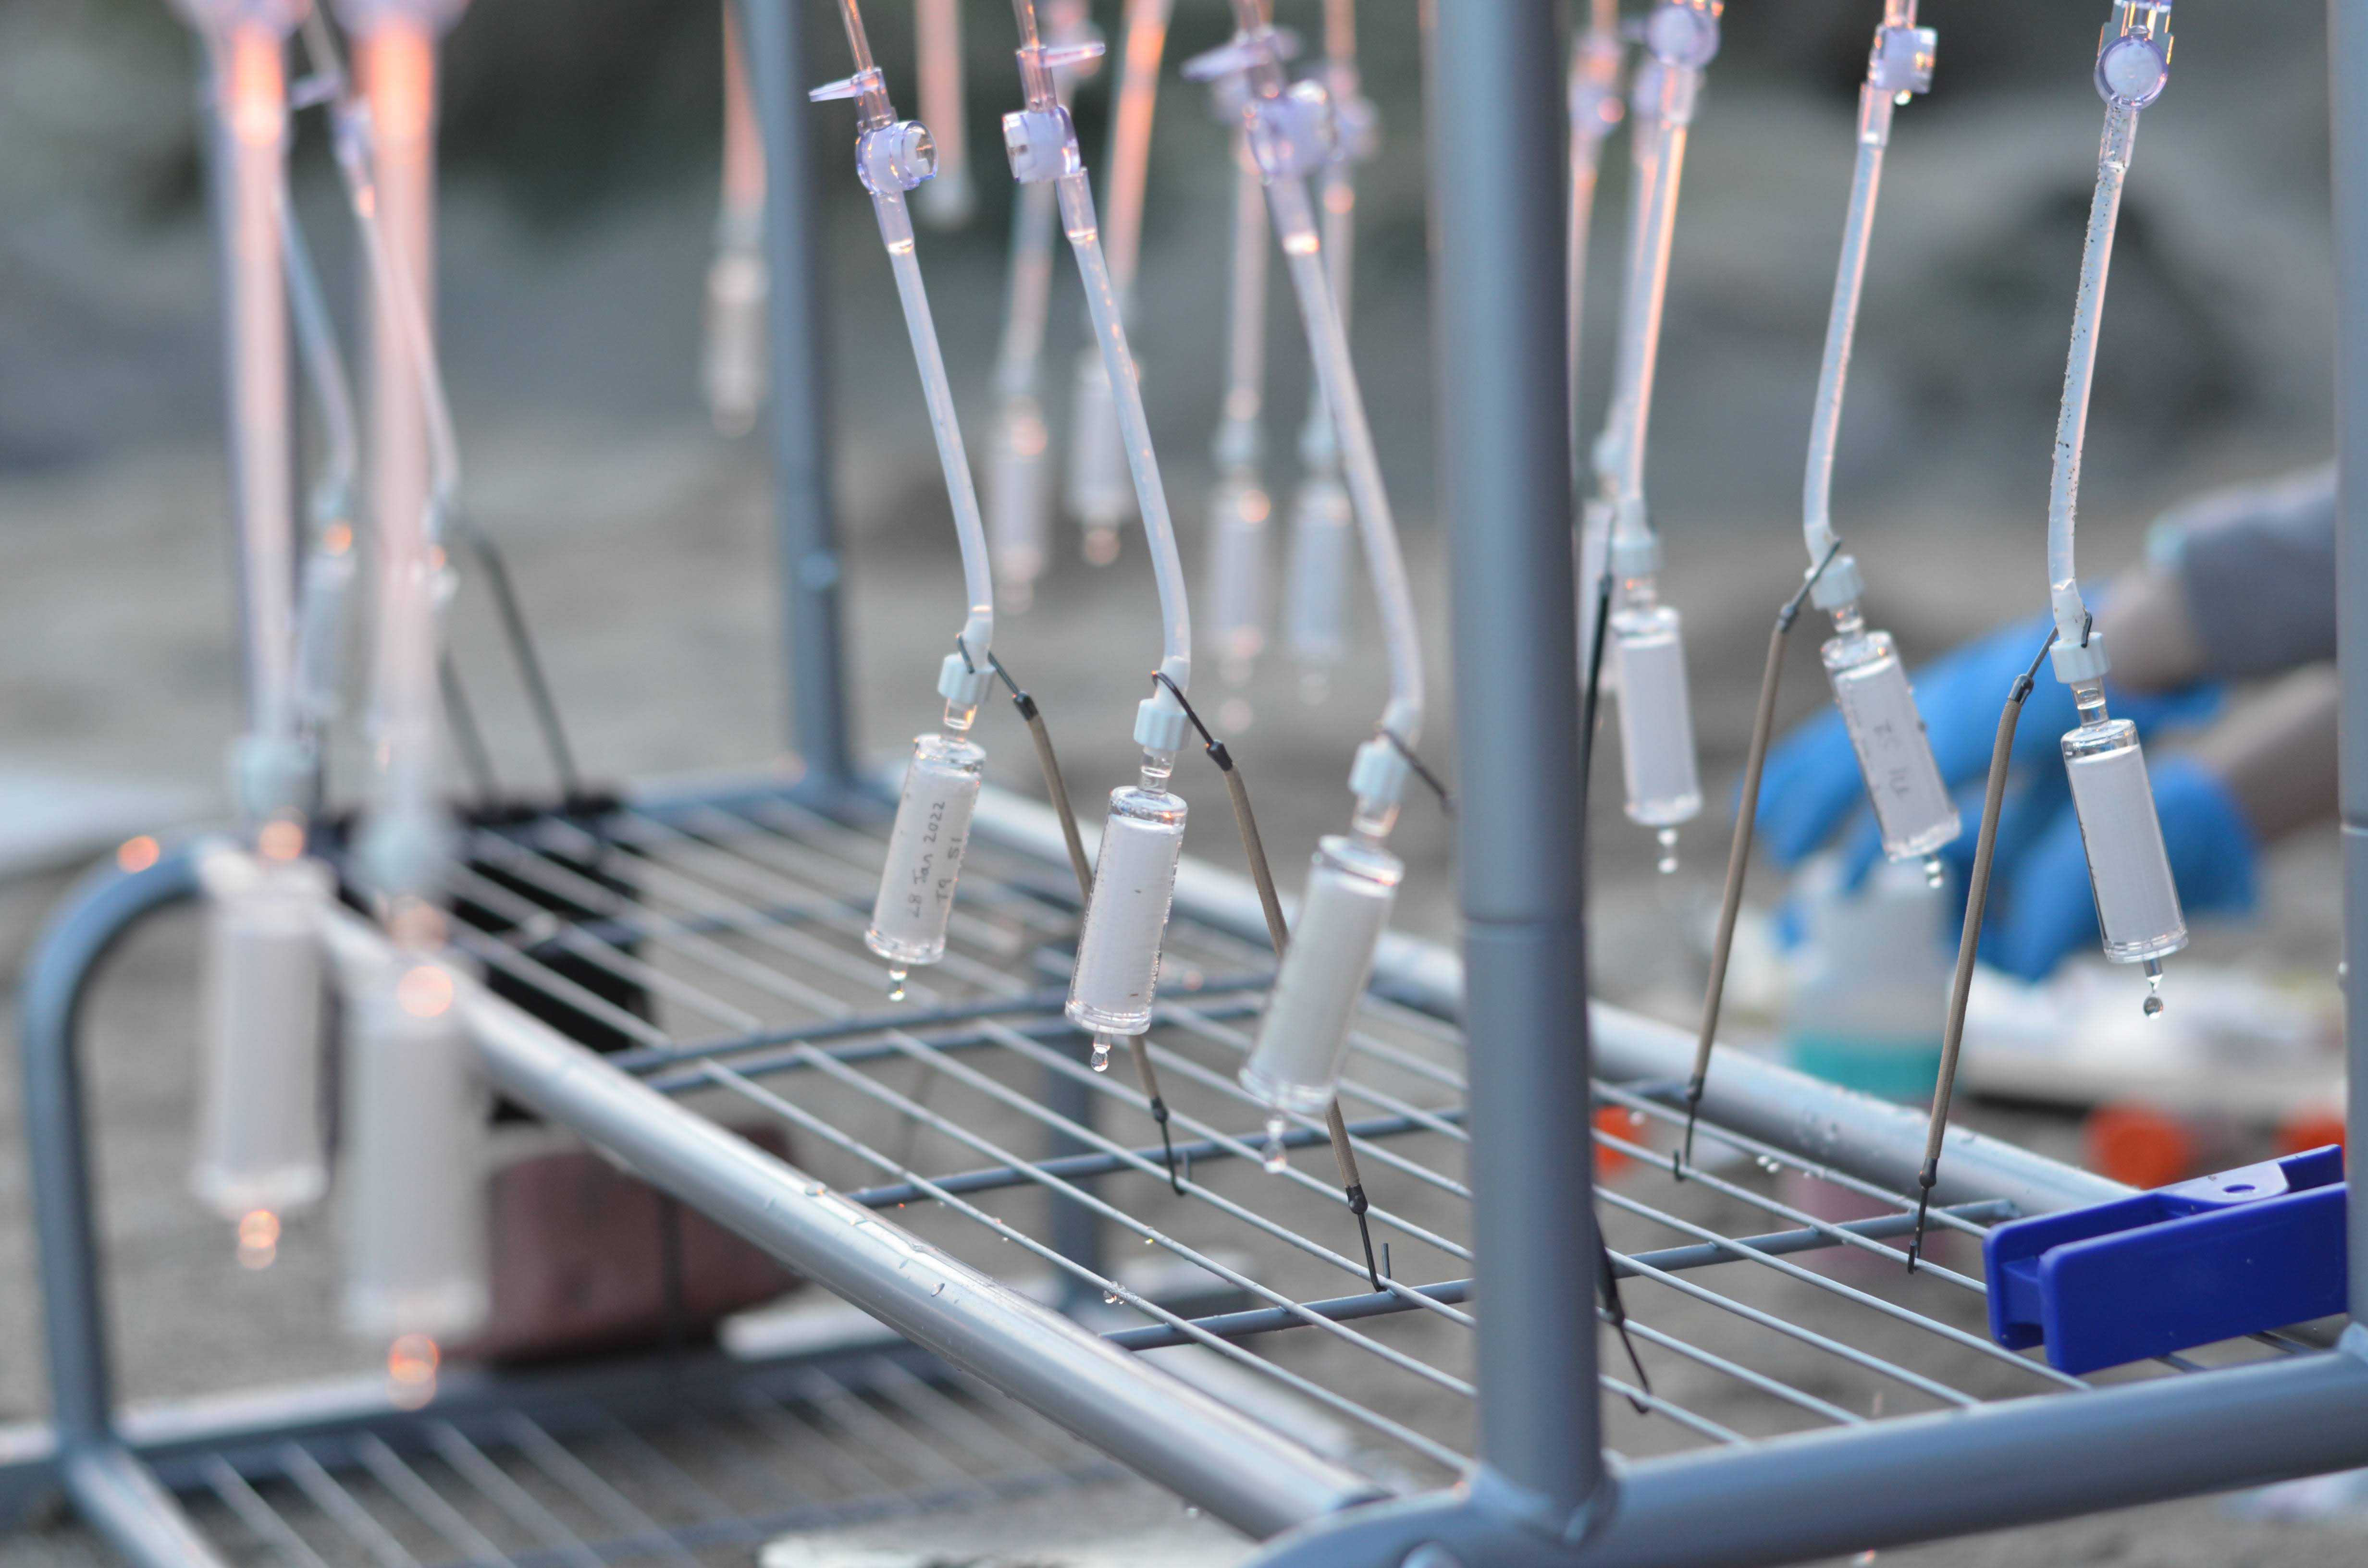
Using a small bungee cord, secure the filter to the bottom of the clothes rack so that it does not blow in the wind or brush against other filters

Close-up view of the Sterivex filters secured with small bungee cords (Photo Credit: Callie Chappell)
19.

Using a flathead screwdriver, twist the inside of the purple connector on the pouch tubing to start the flow of water

Diagram showing the location of the purple connector that controls the flow of water (Photo Credit: Meghan Shea)
20.

Allow water to filter until all water has passed through (1-2 hours), or until drips slow to less than one/minute (clog); if the latter, record the amount of water that has passed through the filter

21.

Remove the filter, and using a sterile 3 mL syringe, pass air through the filter until excess water has been removed

22.

Cap the inlet end of the Sterivex filter with a male-female luer lock cap and the outlet end with a silicone rubber cap

23.

Label a small Whirl-Pak bag with the unique sample site/time and place the filter inside

24.

Place bag on ice until transporting to -15°C freezer at the conclusion of field sampling

Wrap-Up

25.

If pouches need to be transported while still filtering:

25.1.

Using a flathead screwdriver, twist the inside of the purple connector to stop the flow of water on any still-filtering bags

25.2.

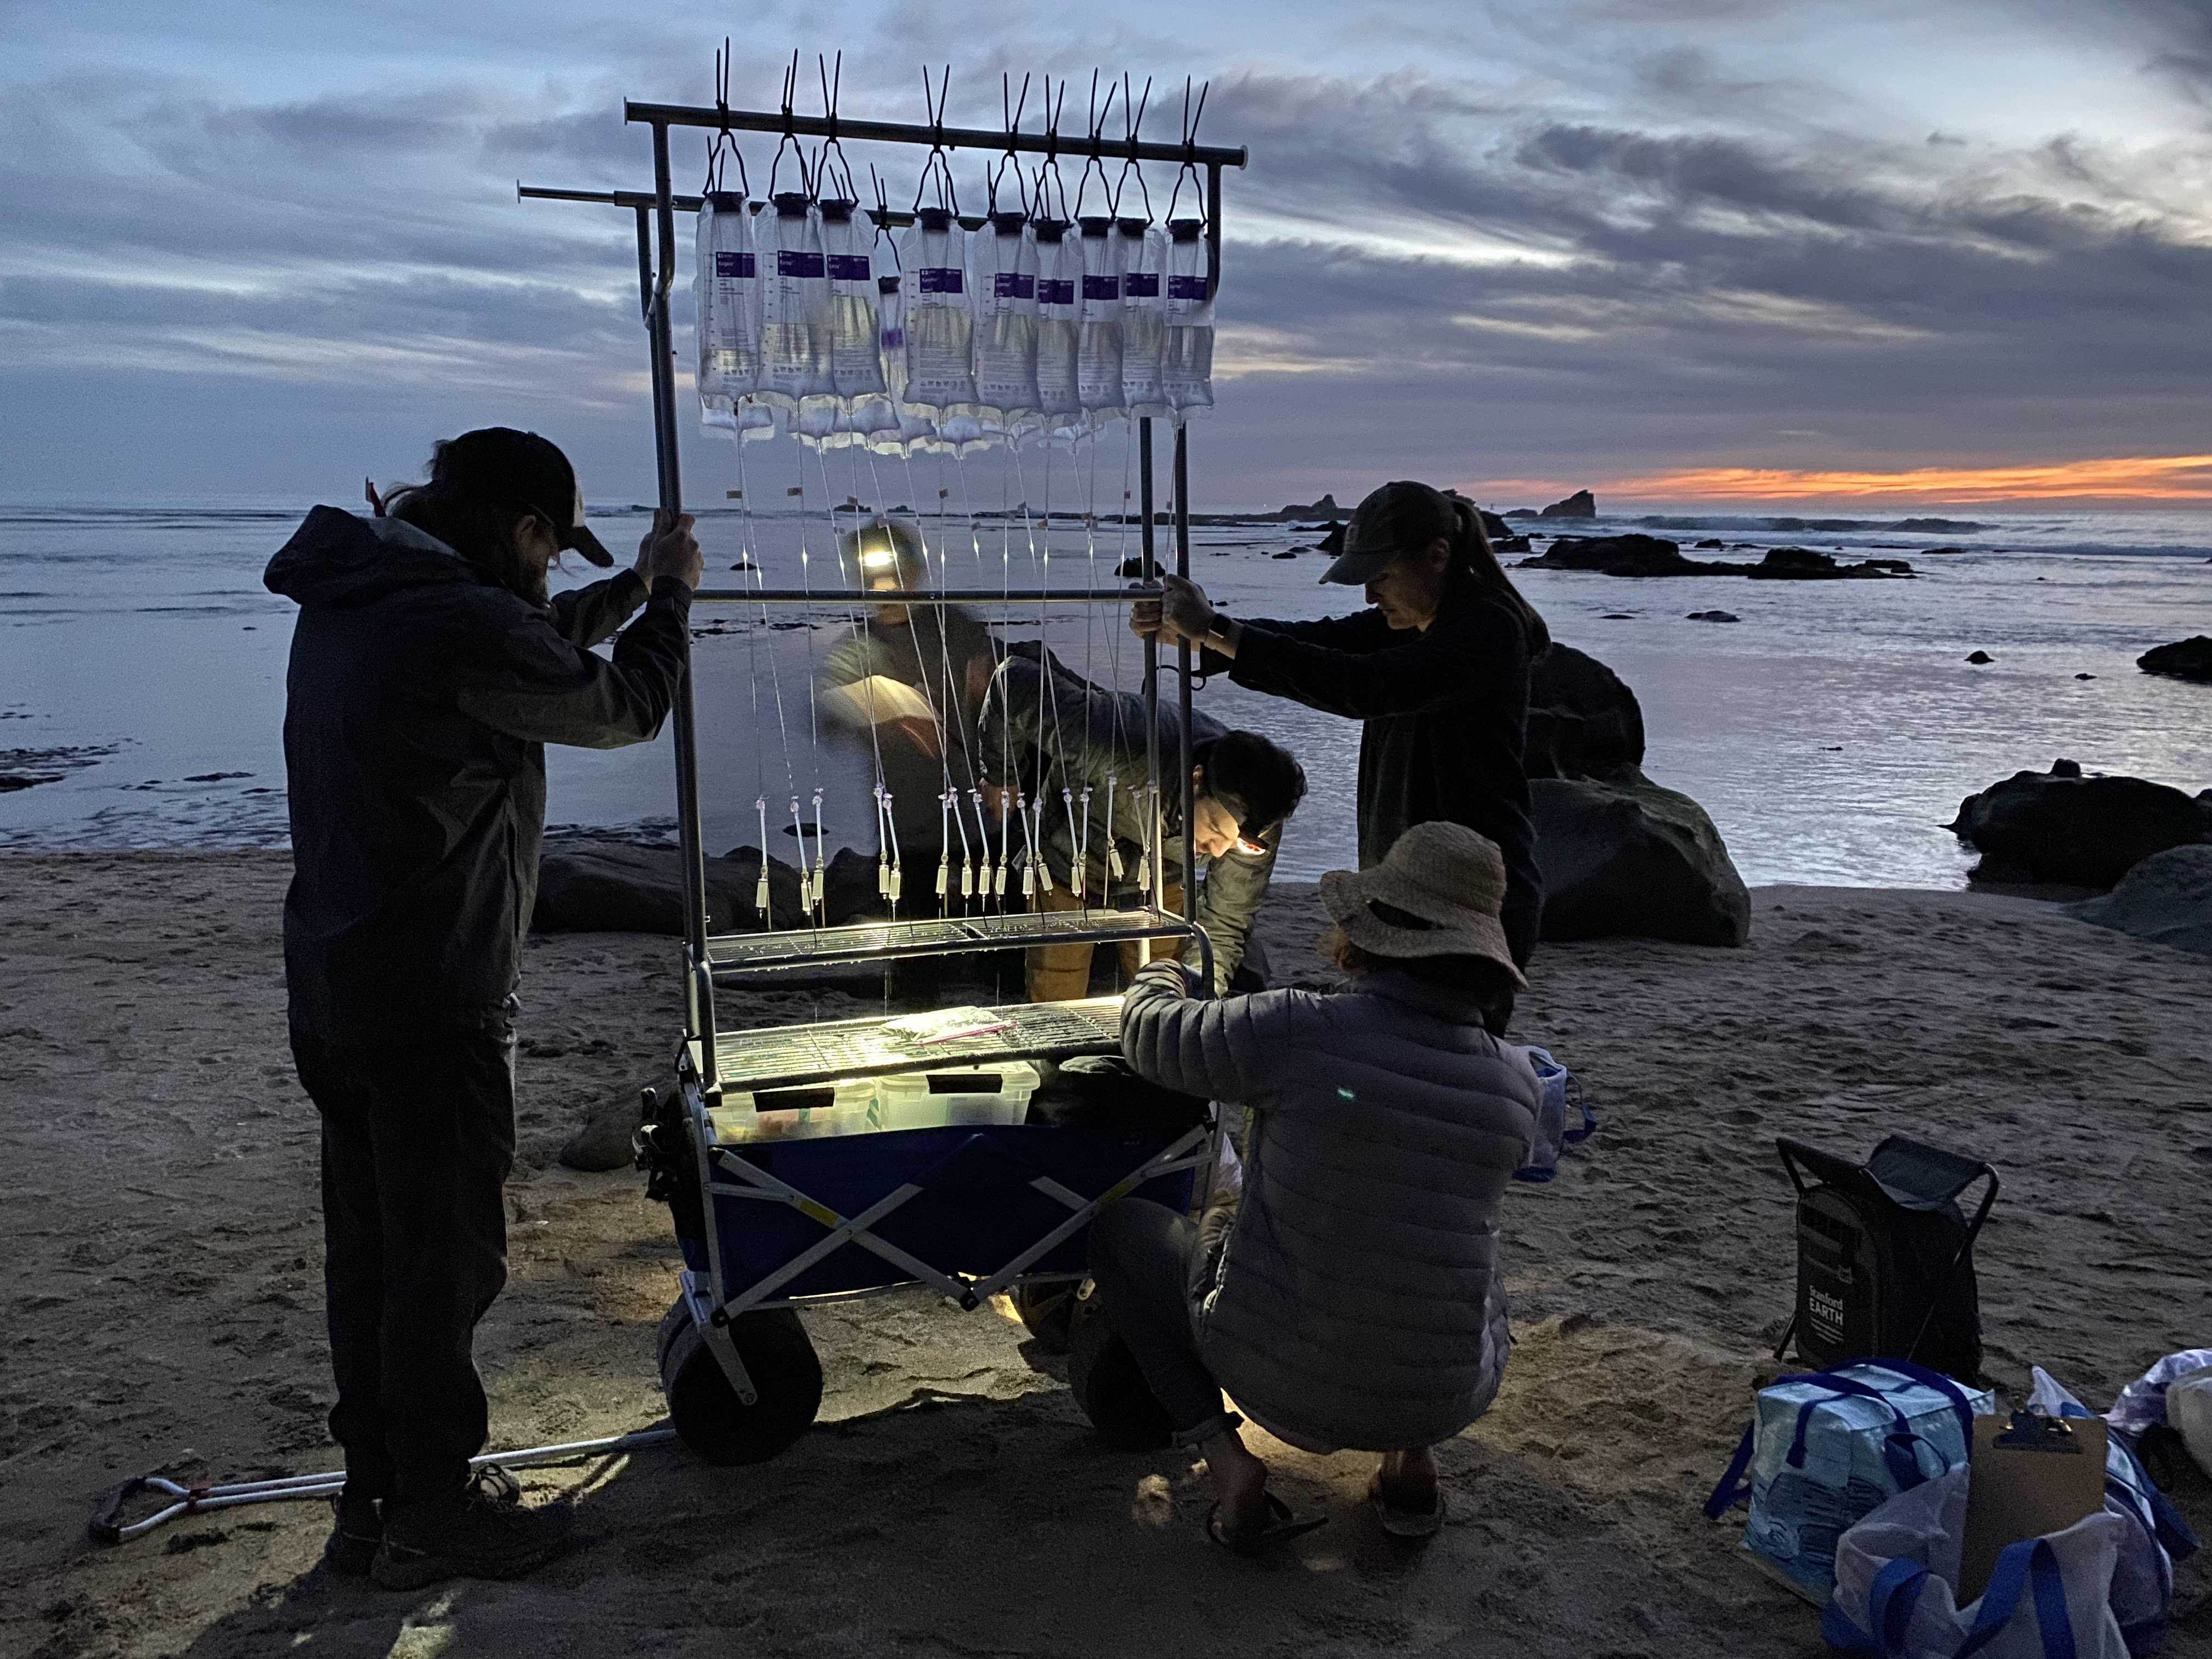
Carefully lift the clothes rack on top of the cart; secure with zip ties

Example of mobile filtration set-up (Photo Credit: Callie Chappell)
25.3.

Using a flathead screwdriver, twist the inside of the purple connector to start the flow of water on any still-filtering bags. The cart can now be transported as pouches are still filtering.

26.

Transport filters to -15°C freezer to await extraction

推荐阅读

Nature Protocols
Protocols IO
Current Protocols
扫码咨询