Closed-chamber hydroponics for whole-plant phenotyping
Daniel Ginzburg, Jack Cox, Seung Yon Rhee
noninvasive whole-plant phenotyping
modular phenotyping
water use efficiency
osmotic stress
hydroponics
Abstract
Noninvasive phenotyping can quantify dynamic plant growth processes at higher temporal resolution than destructive phenotyping and can reveal phenomena that would be missed by end-point analysis alone. Additionally, whole-plant phenotyping can identify growth conditions that are optimal for both above- and below-ground tissues. However, noninvasive, whole-plant phenotyping approaches available today are generally expensive, complex, and non-modular. We developed a low-cost and versatile approach to non-invasively measure whole-plant physiology over time by growing plants in isolated hydroponic chambers. We demonstrate the versatility of our approach by measuring whole-plant biomass accumulation, water consumption, and water use efficiency every two days on unstressed and osmotically-stressed sorghum cultivars. Our system can be implemented using cheap, basic components and requires no specific technical expertise. It can, in theory, be used for any non-aquatic vascular plant species.
Steps
Construction and operation of ebb & flow system for "open" hydroponic cultivation
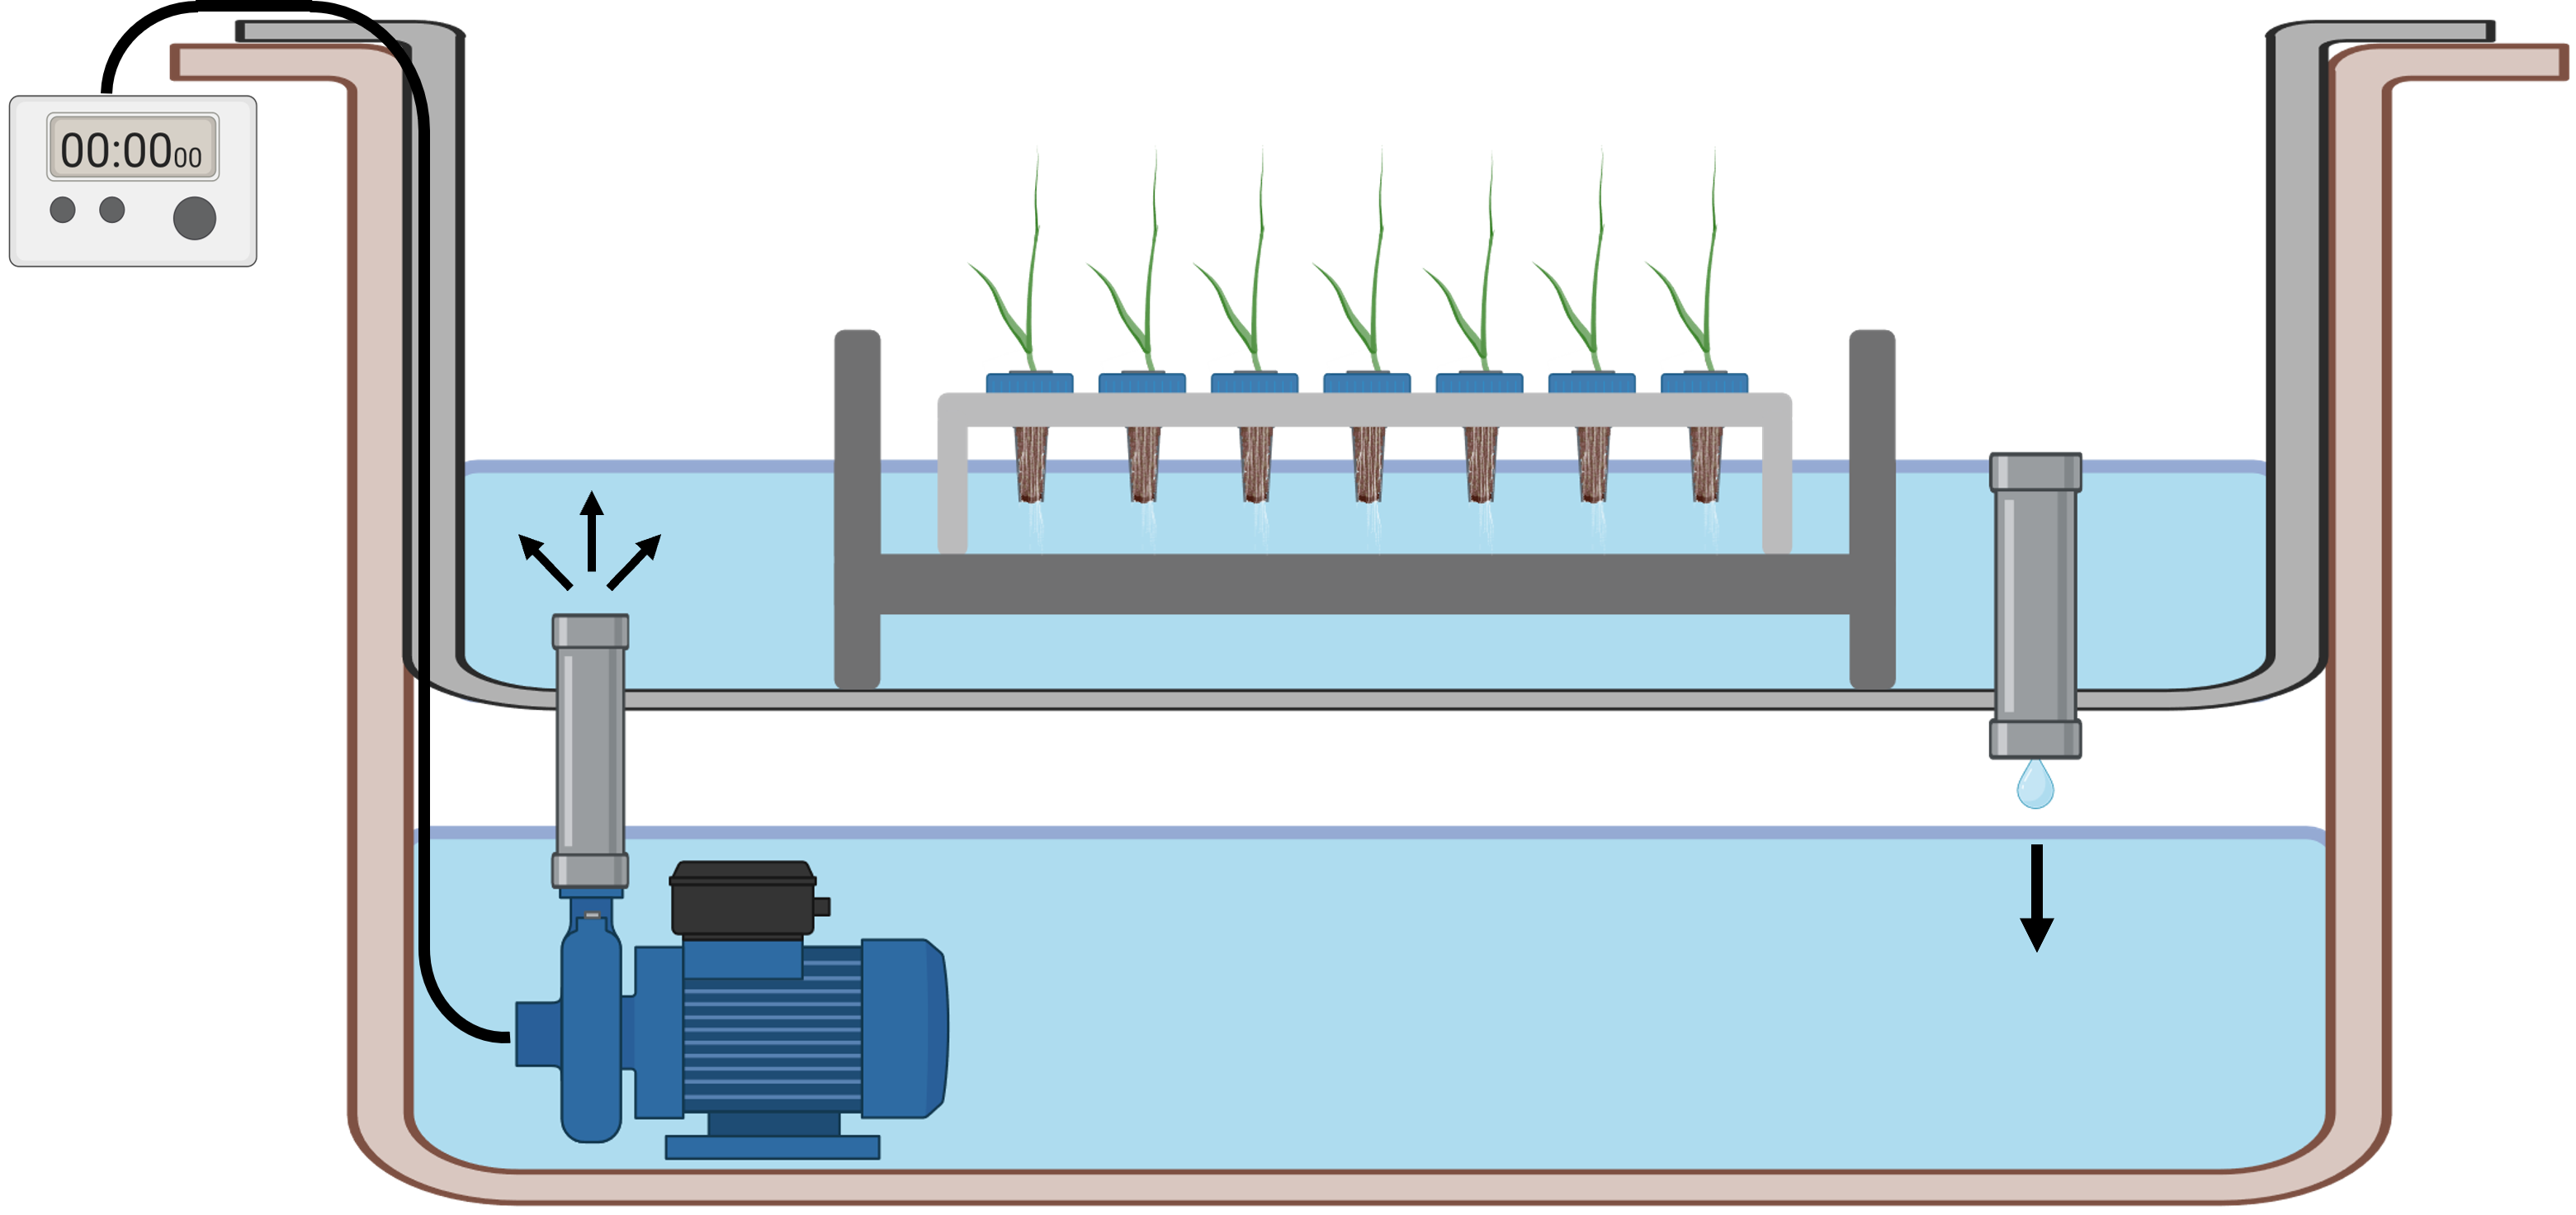
Drill a ¾ inch diameter hole into opposite corners of an 18 gallon plastic tote (reservoir).
Place the reservoir with holes drilled onto a second, 18 gallon reservoir without holes.
Insert a ¾ inch threaded and barbed bulkhead fitting (Botanicare, Vancouver, WA, USA) from above into one of the drilled holes and fasten from below with a rubber washer.
Water in an ebb and flow system needs to reach, but not submerge, the seedlings in the upper reservoir. Thus, to increase the irrigation height the water reaches in the upper reservoir before draining back down, screw a threaded height extender (Botanicare, Vancouver, WA, USA) into this first hole from above.
Fit a threaded, plastic debris screen (Botanicare, Vancouver, WA, USA) into the second hole which was drilled into the upper reservoir to allow water to gently pump up into the top reservoir from below.
Place an 8W, 800 liter/hour submersible pump in the bottom reservoir and connect the pump to the barbed end of the bulkhead fitting with PVC plastic tubing.

In order for water to constantly recirculate during irrigation, sufficient water must be added to the ebb & flow system to allow for filling the top reservoir up to the drainage height and to ensure enough water is in the bottom reservoir to be pumped back up.
To control the duration and number of irrigation events each day, connect the pump to a digital programmable timer.
Closed-system hydroponic growth apparatus construction
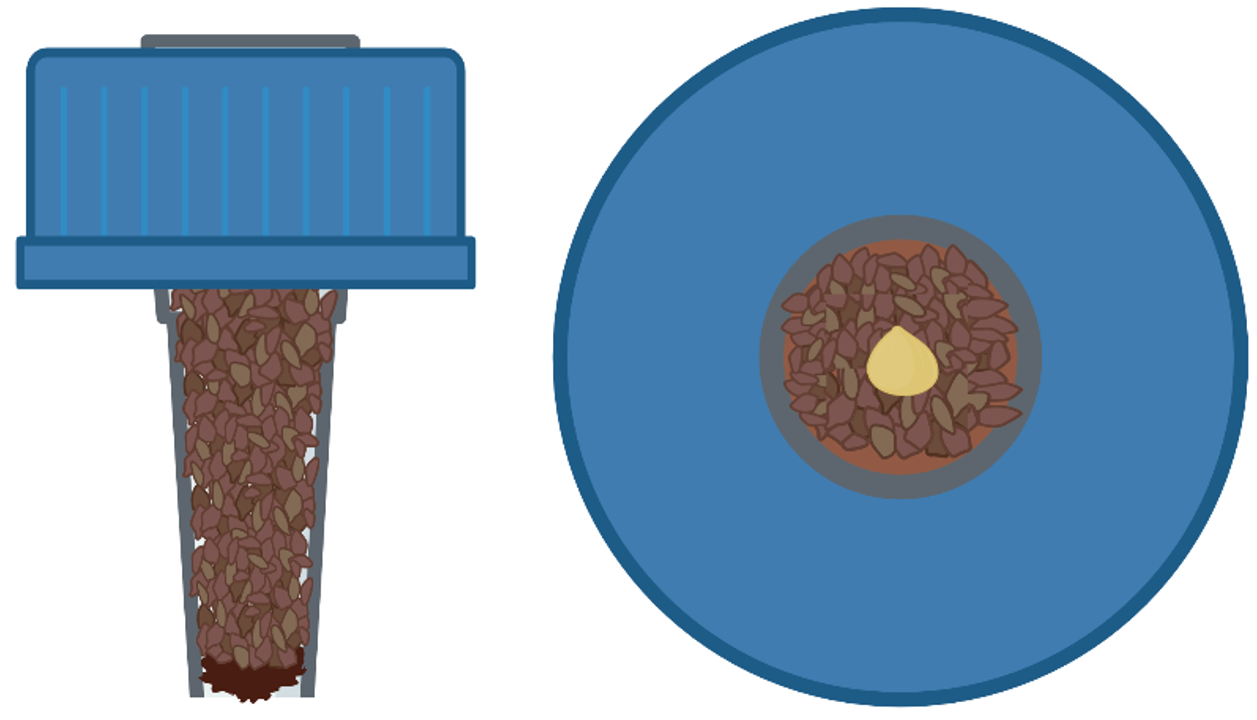
Using a 21/64 inch drill bit, drill holes into the centers of 50mL Falcon tube caps.
Using scissors, cut 1250 uL pipette tips ~3 cm from the tip (narrower) end and insert cut tips into the pre-drilled Falcon tube caps so that the tips fit snugly into the holes in the caps and rest almost flush with the top of the cap.
To prevent unnatural water retention and pressure buildup in the filled tips, create pinholes with a needle or small pair of scissors into the tips ~25% from the bottom.
Using scissors, cut Rapid-Rooter starter plugs (General Hydroponics, Santa Rosa, CA, USA) into rectangular slices of ~0.5cm length and ~0.9cm width and insert 1 slice into the top of each tip and then gently push slices to the bottom of the pipette tip.
Fill caps with tips with potting soil. Ensure the soil is not overly compact as this will inhibit seedling growth. Additionally, ensure that there are no clumps in the soil which would prevent water from reaching the soil from below due to capillarity.

Place soil-filled caps with tips into tube racks, and leave to soak overnight in tap water which reaches the bottom of the tips but does not submerse the caps.
The next day, plant individual sorghum seeds into soil-filled tips and then put all samples into the ebb & flow system.
Pre-phenotyping hydroponic growth conditions
Ensure that the drainage height of the ebb & flow system reaches the bottom ~2-3cm of the cut pipette tips during irrigation.
Before seedling emergence, program the timer to irrigate samples three times daily with tap water for 0h 5m 0s every 8h 0m 0s.
Upon root emergence (root tips growing below the bottom of the pipette tip) of 50% of the samples, adjust the programmable time to irrigate seedlings every hour with a single, 0h 15m 0s irrigation event. Once roots emerge from below the soil-filled pipette tips, the primary source of water for the roots will no longer be water held within the soil but rather the recirculating water of the ebb & flow system. It is therefore important to ensure exposed roots are irrigated frequently to prevent desiccation, but not constantly to encourage downward root growth and to increase root oxygenation.
At this point, add soluble, all-purpose fertilizer to the lower water reservoir using a plastic scoop up to an electrical conductivity (EC) of 1200 mS/cm while the water is being circulated. Measure EC with a waterproof electrical conductivity meter.
Upon root emergence of all samples, increase the duration of irrigation events to be 0h 45m 0s every hour followed by 0h 15m 0sof no irrigation to increase root zone oxygenation.
Empty the reservoir every 3-4 days and refill it with fresh nutrient solution.
Transitioning samples from open- to closed-hydroponic conditions
Once 50% of samples reach a pre-determined stage of development (i.e. the third true-leaf stage), prepare a bulk nutrient solution (EC of 1200 mS/cm ) such that 40mL of solution can be allocated for each sample in 50mL Falcon tubes.
If evaluating the effects of osmotic stress on plant growth, split the bulk nutrient solution into two and add an osmolyte (i.e. mannitol) into one of the solutions up to a pre-determined concentration (i.e. 10mM ).
Record the pH of both control and osmolyte-supplemented solutions after fertilizer and osmolytes have been added.
Fill 50 mL tubes with 40mL of either control or osmolyte-supplemented nutrient solution and then wrap tubes in aluminum foil to prevent algal growth.
Without caps on, weigh foil-wrapped tubes with solution.
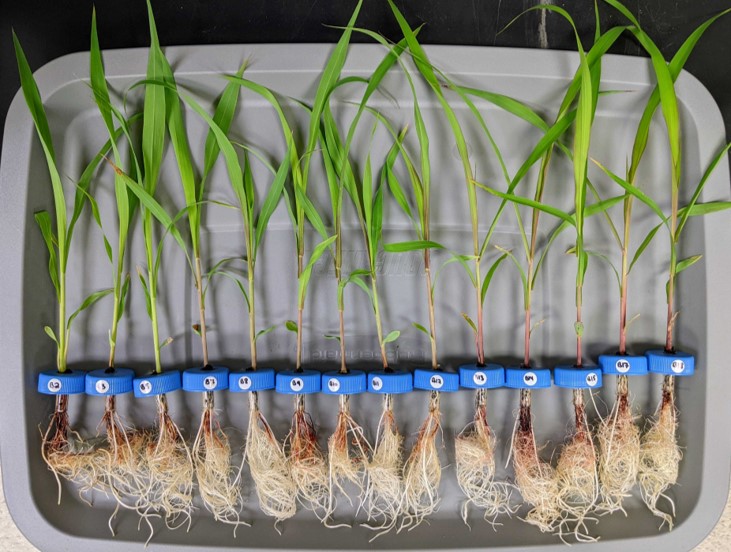
Firmly screw caps containing seedlings onto individual tubes.
Weigh tubes with seedlings screwed on to determine initial seedling weight. If the roots of any sample do not reach the nutrient solution when fully closed onto the cap, add additional solution to the tube and reweigh with and without caps. If roots do not reach the water level in the tube, plants will desiccate.
Evenly space out samples into 50mL tube racks and place them in their designated growing environment (i.e. a greenhouse).
Quantifying biomass accumulation, water use, and change in media pH
Every two days , prepare fresh nutrient solution and measure pH as described above for both control and osmolyte-supplemented solution.
Unscrew seedlings and caps from their tubes and place seedlings back into the ebb & flow system (operating with constant irrigation) to keep the roots hydrated while tubes are weighed. Be very gentle when removing plants from tubes and putting them into racks in the ebb & flow system as roots will be exposed and thus vulnerable to mechanical damage.
Screw 50mL tube caps without holes onto each tube to prevent evaporation. One sample at a time, remove the cap and weigh the tube. Before screwing the cap back onto the tube, measure pH of the solution in the tube. Then screw the cap back onto the tube and repeat for all tubes.
Empty nutrient solution from each tube and then refill each with either fresh control or osmolyte-supplemented solution up to 40mL as described above.
Without caps, weigh tubes again and then screw caps back on to prevent evaporation while seedlings are weighed.
Biomass accumulation is calculated as the seedling weight at the current time of measurement minus the seedling weight at the previous time of measurement.
Water consumption is calculated as the tube weight at the previous time of measurement minus the tube weight at the current time of measurement.
Change in media pH is calculated as the pH of fresh media minus the pH of media in tubes after plant growth.
Determination of evaporative loss in closed-hydroponic system:
Grow plants hydroponically in soil-filled pipette tips as described above.
When plants reach the stage at which they are transferred from the ebb & flow system to closed tubes, cut off the roots and shoots from the bottom of the tips and the base of the cap, respectively to prevent plant water uptake and transpiration.
Fill an equal number of tubes as there are cut-off samples with 1200 mS/cm nutrient solution and weigh the tubes as described above.
Screw caps from which roots and shoots were cut off onto nutrient-filled tubes.
Place these samples in the same growing environment as all other samples.
Each day (for the duration of the growth experiment), remove caps from tubes weigh tubes to determine average daily and cumulative water loss due to evaporation.


