Bacterial genome annotation script using BLASTN
Ana Mariya Anhel, Lorea Alejaldre, Ángel Goñi-Moreno
Abstract
This protocol uses a python based script and command-line BLASTn to annotate in a final table single-read sequencing results from genome amplifications, within other output files.
Its main use in our lab (https://biocomputationlab.com) is to identify the location and gene locus of transposon inserts in microbial bacterial genomes of Pseudomonas putida KT2440 . However, this script can be used for other bacterial genomes for which its genome sequence and annotation are available.
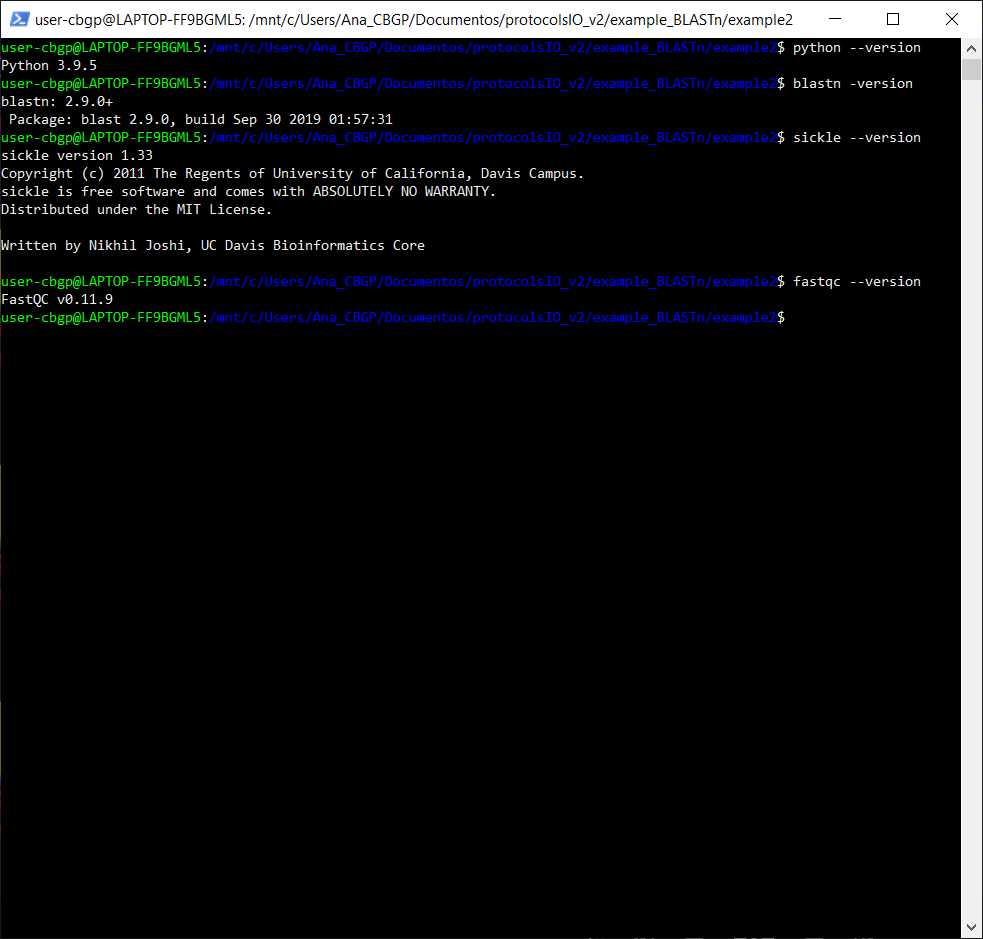
Script was developed and tested in python 3.9.5 with blastn version 2.9.0, sickle version 1.33 and fastqc version 0.11.9
This is a description of the LAP entry LAPu-InsertsGenAnnotation-1.0.0 located in the LAP repository
Before start
To run this script command-line blastn and python 3 with packages pandas (v2.0.0), os, subprocess, argpase, re and biopython (v1.81)
Steps
Adquisition of files
Download reference genome file
You can download the genome of the organism that you want to compare to the reading sequences from different sources such as NCBI, GSA or even pages dedicated to the organism (i.e pseudomonas.com).
For this script to work, genome files need to be in FASTA format (.fasta, .fna, .ffn, .faa, .frn). Sequence alignment is based in BLASTn which requires FASTA format as input.
Download annotation file
You can download the annotation of the genome from different sources, such as NCBI, KEGG or pages dedicated to the organism.
For this script to work, the annotation file needs to be in CSV format and need to have at least the following columns with the exact names (names in bold letter ):
- Start - Nucleotide number that sets the beginning of the annotated region
- End - Nucleotide number that sets the ending of the annotated region
- Locus Tag - Identifiers that are systematically applied to every gene in a genome. It has to be a unique name
Download sequencing files
Sequencing files should be contained in a folder. Depending on the sequencing company, sequencing files will be in .txt, .seq, .ab1 or other format. This should be specified within the script.
Optional: Acquisition of map of reads for annotation of variants
The identity of each variant can be annotated by using this script if a map of the 96-well plate is provided. It can be created by hand or can be an output file of other scripts, such as LAP-PCR-OT2-1.0.0.
This map should be a CSV file that will contain the names or identities of the plate that corresponds to the reads, for instance, the identities of the plate sent to sequence in the corresponding well. It needs to have the name of the rows and columns of the plate and can only be used if the reads and map fulfil the following requirements:
- There is only 1 map
- All the reads of the directory can be tracked in that map , i.e., the directory of reads should only include the ones in the map. An example, if the map has 12 columns and 8 rows and it is half full (48 identities), the directory of the reads cannot be more than 48 sequences.
- All sequences need to have an identity in the map , i..e, the cell correspondent to a well in the map of a sequence cannot be left empty.
- The names of the sequence files need to have the name of the cell between underscores if the extension of the reads is txt (for example, readSequence_A10_example.txt ) or between a plus and an underscore if the extension is seq (for example, readSequence+A10_example.seq ). Other types of extensions are not available with this function.
An example of this script with the map provided will be given at the end of this page (section Example 2)
Script
The last script version can be found at https://github.com/BiocomputationLab/LAPrepository/tree/main/LAPuEntries (the name of this file is the user's choice). The name of the directory should be LAPu-InsertsGenAnnotation followed by the version.
You can also find the latest version of the script in https://www.laprepo.cbgp.upm.es/repository/ with the same name as in GitHub.
Software
| Value | Label |
|---|---|
| LAP Repository | NAME |
| www.laprepo.com | REPOSITORY |
| https://biocomputationlab.com/ | DEVELOPER |
Preparing System
If you are using a Windows system and the LAPu-InsertsGenAnnotation-1.0.0 you can install a Windows Subsystem for Linux (WSL) and run the script in that subsystem the same way a Linux user would do, but be aware of the nomenclature and path of the files
There are other ways to run a Unix system in Windows, like a virtual machine (https://www.virtualbox.org/)
You can find instructions to install a WSL on the following Windows page: https://learn.microsoft.com/en-us/windows/wsl/install
In the WSL, you can install the different requirements needed for the script to run
I will provide an example of how to install a WSL in the following sub-steps
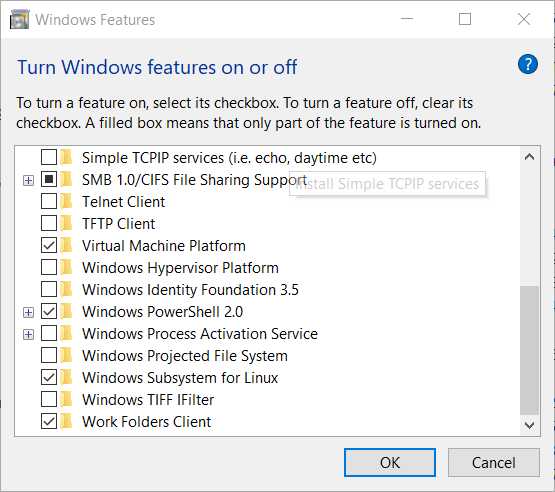
Make sure the Windows Subsystem in Linux Feature is activated
Windows search bar -> Apps & Features -> (Scroll Down) Programs and Features -> Turn Windows features on or off
In that window, you will need to have a tick in the option "Windows Subsystem for Linux" you may need to restart the computer after ticking that box so changes are made in your computer
Install a Linux system
Open a window with Windows Powershell, and you can check which distributions of Linux can be installed
#Check WSL Linux Distributions (Windows 10)
wsl --list --online
```To install one of the distributions, you can perform the following command by changing  _Ubuntu-20.04_  for the desired Linux system.
#Install Ubuntu-20.04 WSL (Windows 10) wsl --install Ubuntu-20.04
<Note title="Citation" type="success" ><img src="https://static.yanyin.tech/literature_test/protocol_io_true/protocols.io.dm6gpjrb1gzp/pb3jbxsu712.jpg" alt="PowerShell screen of the installation of an Ubuntu system with wsl" loading="lazy" title="PowerShell screen of the installation of an Ubuntu system with wsl"/></Note>
Make the distribution run as default
You can make the system installed in step 6.2 the one that is going to run when you type the command wsl in the PowerShell by running the following command
#Set default distribution WSL (Windows 10)
wsl --set-default Ubuntu-20.04
```You can check which distribution is running as a default with the following command, will be the one designed or marked by an asterisk
#Check distributions installed WSL (Windows 10) wsl --list --verbose
<Note title="Citation" type="success" ><img src="https://static.yanyin.tech/literature_test/protocol_io_true/protocols.io.dm6gpjrb1gzp/pb3pbxsu77.jpg" alt="Result of setting the Ubuntu-20.04 system as a default when running the wsl program" loading="lazy" title="Result of setting the Ubuntu-20.04 system as a default when running the wsl program"/></Note>
Run Linux System
To run the Linux system, in this example Ubuntu 20.04, you can type in the Windows PowerShell wsl and you will directly access the directory where you have typed this command, but in the Ubuntu system
Now you can perform the script and install the needed packages and programs in this system
Install Python
In most Unix systems, a default Python is installed, but you can always install more than 1 Python version on your computer
This script was developed and tested with Python 3.9.5, so it cannot be guaranteed that it works as expected in previous or later ones
In the following substeps, I will show how to install Python and set it as the default one to use in case more than 1 python version is installed on the computer.
Linux systems
You can install a specific version of this language with the following command. If you do not provide a version, the latest one accessible to sudo will be installed
#Install Specific Version Python (Linux)
sudo apt install python<version>
```You can use this python-specific version by using the command python<version>

If you want a specific version to be the default python that will be used, you will need to change the aliases of the system.
#Add aliases to Linux system (Linux) nano ~/.bashrc
Go to the last line, add the following line:  **alias python='python'** , and then use  _Ctrl+x_  to get out. Do not forget to save before leaving.


After that, you should reload the .bashrc file by running the following command
#Update .bashrc file (Linux) source ~/.bashrc
macOS systems
#Install Homebrew (macOS)/bin/bash -c "$(curl -fsSL https://raw.githubusercontent.com/Homebrew/install/HEAD/install.sh)"For more information about how to install this software, you can check the homebrew page (https://docs.brew.sh/Installation)or more information about how to install this software, you can check the homebrew page (https://docs.brew.sh/Installation)You can install a specific version of Python by typing in the command line and the following instructions. If a version is not provided, the latest python accessible in brew will be installed.
#Install Specific Version Python with Homebrew (macOS)
brew install python@<version>
```You can use this python-specific version by using the command python<version>

If you want a specific python version to be used by default, you will need to change the aliases of the shell that you are using.
#Add aliases to macOS system in BASH (macOS) nano ~/.bashrc_profile
After that, you should reload the .bashrc_profile file by running the following command.
#Update .bashrc_profile file (macOS) source ~/.bashrc_profile
<Note title="Note" type="warning" ><b>If you are using Bash, you have to change the file ~/.bashrc_profile or ~/.bashrc</b> <b>In case you are using Zsh, you need to change the file ~/.zshrc</b> <span></span><span>Knowing which file you need to change follow the previous commands changing the file name to the correct one.</span></Note>
Install needed Python packages
This script needs the following packages: sys , os , argparse , re , subprocess , pandas and BioPython .
The first 5 packages are installed by default in Python but the latter 2 need to be installed
To install these packages you can perform the following command
#Install package Python
python<version> -m pip install <name_package>
#Install pip for Python 3 (Linux)sudo apt install python3-pip #Install pip for Python 3 (macOS)sudo easy_install pipInstall BLAST+
There are different ways to install BLAST, here we provide 3 ways in the substeps
Download the executable from NCBI
You can download and install the BLAST from the NCBI web (https://www.ncbi.nlm.nih.gov/)
Download -> FTP -> blast -> executables -> blast+ -> [wanted version] -> ncbi-blast-[version]-[system].tar.gz ncbi-blast-[version]-[system].tar.gz
Unzip it with the following command
#Unzip tar.gz file
tar -xf [name_file].tar.gz
```In the unzip folder, you have a bin folder that contains blastn

If you decide to install it this way, you need to run the Python script in this directory so it can be accessed by the Python file or added to the path of the system directory
Use Anaconda
You can install the needed commands with Anaconda if you perform the following command
#Install blast with Anaconda
conda install -c bioconda blast
Use apt or brew install
If you are in a Linux system, you can perform the following command to install blast+
#Install BLAST+ (Linux)
sudo apt install ncbi-blast+
```In case you are in a macOS system, you can install it with the following instruction
#Install BLAST+ (macOS) brew install blast
To make sure it has been installed in your system, you can go to the command line and type the following command
#Check Version of BLASTn Command Line
blastn -version
```If this command does not raise an error, it means that BLASTn can be used from the command line
Install FastQC
FastQC is a tool used for quality control of high-throughput sequence data. It provides a way to assess the quality of raw sequencing data
If you will not use the quality assessment of the script, there is no need to install this software
In the following sub-steps, the installation in different OS is provided
Linux
In Linux, you can install with apt the command line executable of fastqc. Just type in Bash the following command
#Install FastQC from command line (Linux)
sudo apt install fastqc
```You can check if the installation has been successful if you type  **fastqc --version** and you don't receive an error message
MacOS
In macOS you can install with homebrew the command line executable of fastqc, just type in Bash the following command
#Install FastQC from command line (macOS)
brew install fastqc
```If you do not have Homebrew in your system


You can check if the installation has been successful if you type  **fastqc --version** and you don't receive an error message
Install Sickle
Sickle is a software tool designed for quality control of high-throughput sequence data, especially for data generated by Next-Generation Sequencing (NGS) platforms. Its primary use case is trimming low-quality bases and adapter sequences from the ends of sequencing reads
If you will not use the quality assessment of the script, there is no need to install this software
In the following sub-steps, the installation in different OS is provided
Linux
In Linux you can install with apt the command line executable of sickle, just type in Bash the following command
#Install Sickle from command line (Linux)
sudo apt install sickle
```You can check if the installation has been successful if you type  **sickle --version** and you don't receive an error message
MacOS
In macOS you can install with homebrew the command line executable of sickle just type in Bash or Zhr the following command
#Install Sickle from command line (macOS)
brew install sickle
```If you do not have Homebrew in your system


You can check if the installation has been successful if you type  **sickle --version**  and you don't receive an error message
Running Script
Choose which arguments to run the script
This script needs to be performed in a command line window using Python.
Depending on the provided arguments, the program will perform more or less actions such as a quality trimming or variant name annotation.
The script requires a minimum of 4 arguments, which we will call from now on the positional arguments . In addition, the program's behaviour can be changed by providing optional arguments . Finally, there is another type of argument that the script can accept, which is for information usage .
In the following sub-steps, we will define the behaviour, needs and different kinds of arguments.
Positional arguments
These arguments should be provided in this specific order
directoryReads
Absolute or relative path to the folder that will have the file(s) of the different sequences with a FASTA format and, optionally, the quality files of those reads.
Both files, sequence and quality, should have the same name but with a different extension.
More files can be in that folder but will be ignored.
extensionReads
Extension of the files (without the dot, i.e txt or seq) in the path provided in directoryReads that correspond to the sequences in FASTA format that you want to be aligned to the genome provided in genomeSequence.
Ensure they are the only files with this extension in that directory.
genomeSequence
Absolute or relative path to the file that will contain the genome sequence or DNA material that will be aligned with the files inside of directoryReads.
genomeAnnotation
Absolute or relative path to the file that contains the genome provided in genomeSequence annotated and needs to be in a CSV format with the characteristics noted in Step 2.
Optional arguments
These arguments do not need to be provided in this order, but some of them need to be provided together.
-out
Absolute or relative path to where the final files will be stored. If not provided, the output files will be stored in a directory called results_annotation in the place where the script has been run.
If the directory already exists, the program will display a warning message allowing you to stop the program from running. If you choose the program to continue, this directory will be overwritten.
-f, -filesOut
Depending on the arguments provided, you will obtain different types and numbers of files in the -out directory.
With this argument, you can control whether you obtain a SAM file coming from the alignment or not.
This argument only can take 2 values:
- all - you will obtain the SAM file and the table provided from annotating the alignments. This is the value as the default
- table - you will only obtain the table. No SAM file will be provided in the results directory
-t, --thresholdRange
This script takes into account the bitscore to give you the best hit.
An additional column will provide other hits in case there is a multiple alignment of the query sequence with your genome. These will be provided only if the hits are in the range of this argument, i.e, if the hit has a value minor than (1-thresholdValue)*Bit Score of the best hit , this value will not be included in the multiple hit column. If more than 1 alignment has the same best score and turns out that this score is the best one, the hit provided as the best one will be randomly assigned between these top hits.
By default, this value is 0.01
-identity
The absolute or relative path of the file that has the names that want to be associated with the final rows that indicate the alignments.
This file should be a CSV file and needs to have the requirements or characteristics described in Step 4.
-cb, --columnsBLAST
This variable will be the absolute or relative path of the file with the names of the columns that will be reflected in the final table that are taken from the BLASTn output alignment. There should be 1 name of column per row in the file, and the name should be the same as will be named in the BLAST software, for example, nident .
The final table combines columns that are in the annotation file and columns that we obtain from the BLASTn alignment. With this variable, you can control which columns will be taken from the final alignment result file and will be written on the end table.
The default columns that are going to be taken have the following names: qaccver , saccver , pident , length , mismatch , gapopen , qstart , qend , sstart , send , evalue , bitscore and sstrand
The meaning of these names can be found at https://www.metagenomics.wiki/tools/blast/blastn-output-format-6
-ca, --columnsAnnotation
This variable will be the absolute or relative path of the file with the names of the columns that will be reflected in the final table that are taken from the file statted in the argument genomeAnnotation . There should be 1 name of column per row in the file.
The final table combines columns that are in the annotation file and columns that we obtain from the BLASTn alignment. With this variable, you can control which columns will be taken from the annotation file and written on the end table.
The default columns will be taken with the following names: Locus Tag , Feature Type , Start , End , Strand , Gene Name , Product Name and Subcellular Localization [Confidence Class] .
If your file does not contain 1 of these columns, you need to provide which columns you want to have in the end file with this argument, always considering the considerations provided in Step 2.
-quality
Extension (without dot i.e ab1) of the quality files attached to the sequence files in the directory given in directoryReads . By providing this argument, a quality check and consequent trimming of the sequences will take place before doing the alignment between reads and genome.
Only sequences that come from Sanger, Solexa or Illumina sequencing can be provided to the program. In addition, only single-end reads with fastqc , ab1 , abi , or qual formats can be analyzed.
If we provide this argument, we must also provide the -seq argument.
Providing this argument will allow you to trim the sequences to only align with high-quality nucleotides with the genome in BLASTn. For that, a FastQC analytic HTML will be provided, and the user will decide the Q (quality) and length for trimming. To provide these 2 variables, you can type the numbers directly in the command window.
By default, both values would be 20 (if nothing is typed in the window and only enter is pressed)
-seq
Method of sequencing with which the sequences in the directory directoryReads have been sequenced.
The following arguments are accepted: illumina , sanger or solexa
Information usage
These arguments give you information but do not change the behaviour of the program.
-h, --help
This argument should be provided alone, without any other arguments.
If you provide this argument information about the program will be displayed, including how to use it and what arguemnts are available.
-q, --quiet
If this argument is given, minimum information will be displayed in the window while running the script.
This argument is incompatible with -v
-v, --verbose
If this argument is given, more information will be displayed in the window while performing the script than in a run where this argument is not given.
This argument is incompatible with -q
Running script
The final command should look like the following one
#Command to run blastn annotation script
python alignment_and_annotation_blastn.py [directory of sequencing reads] [type of file] [genome file in fasta format] [annotation file in csv format]
Interact with the script
Depending on the input and the state of the folder where the program has been executed, the program can ask for different kinds of interactions:
- Ask if you want to replace the final result folder
- Ask for the quality of trimming
- Ask for the length of trimming
See results
Depending on the input, context of the run and arguments, the program can give different outputs:
- genomeSequence DB files (.nhr, .nin and .nsq) - In case the organism database needed to perform a BLAST is not in the path where the genomeSequence file is, these files will be created in the same directory as the genome sequence provided is located
- -out directory (by default results_script_blast) - folder where the results will be stored, and it can contain the following folders and files:
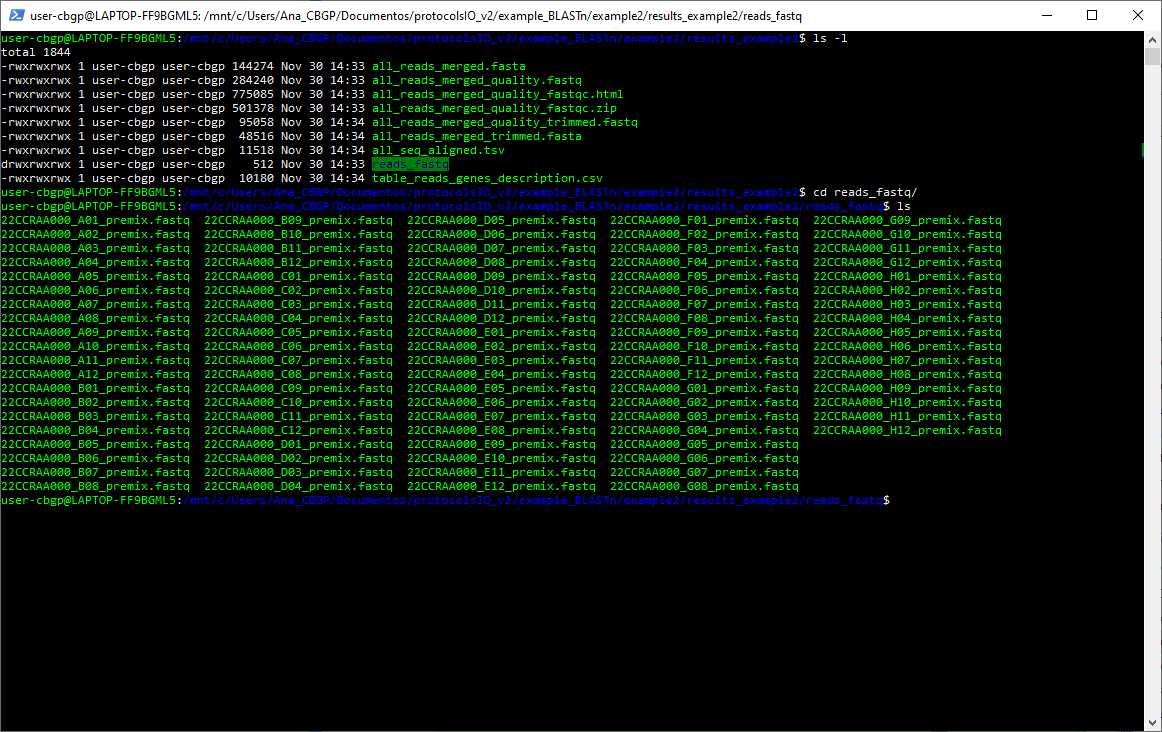
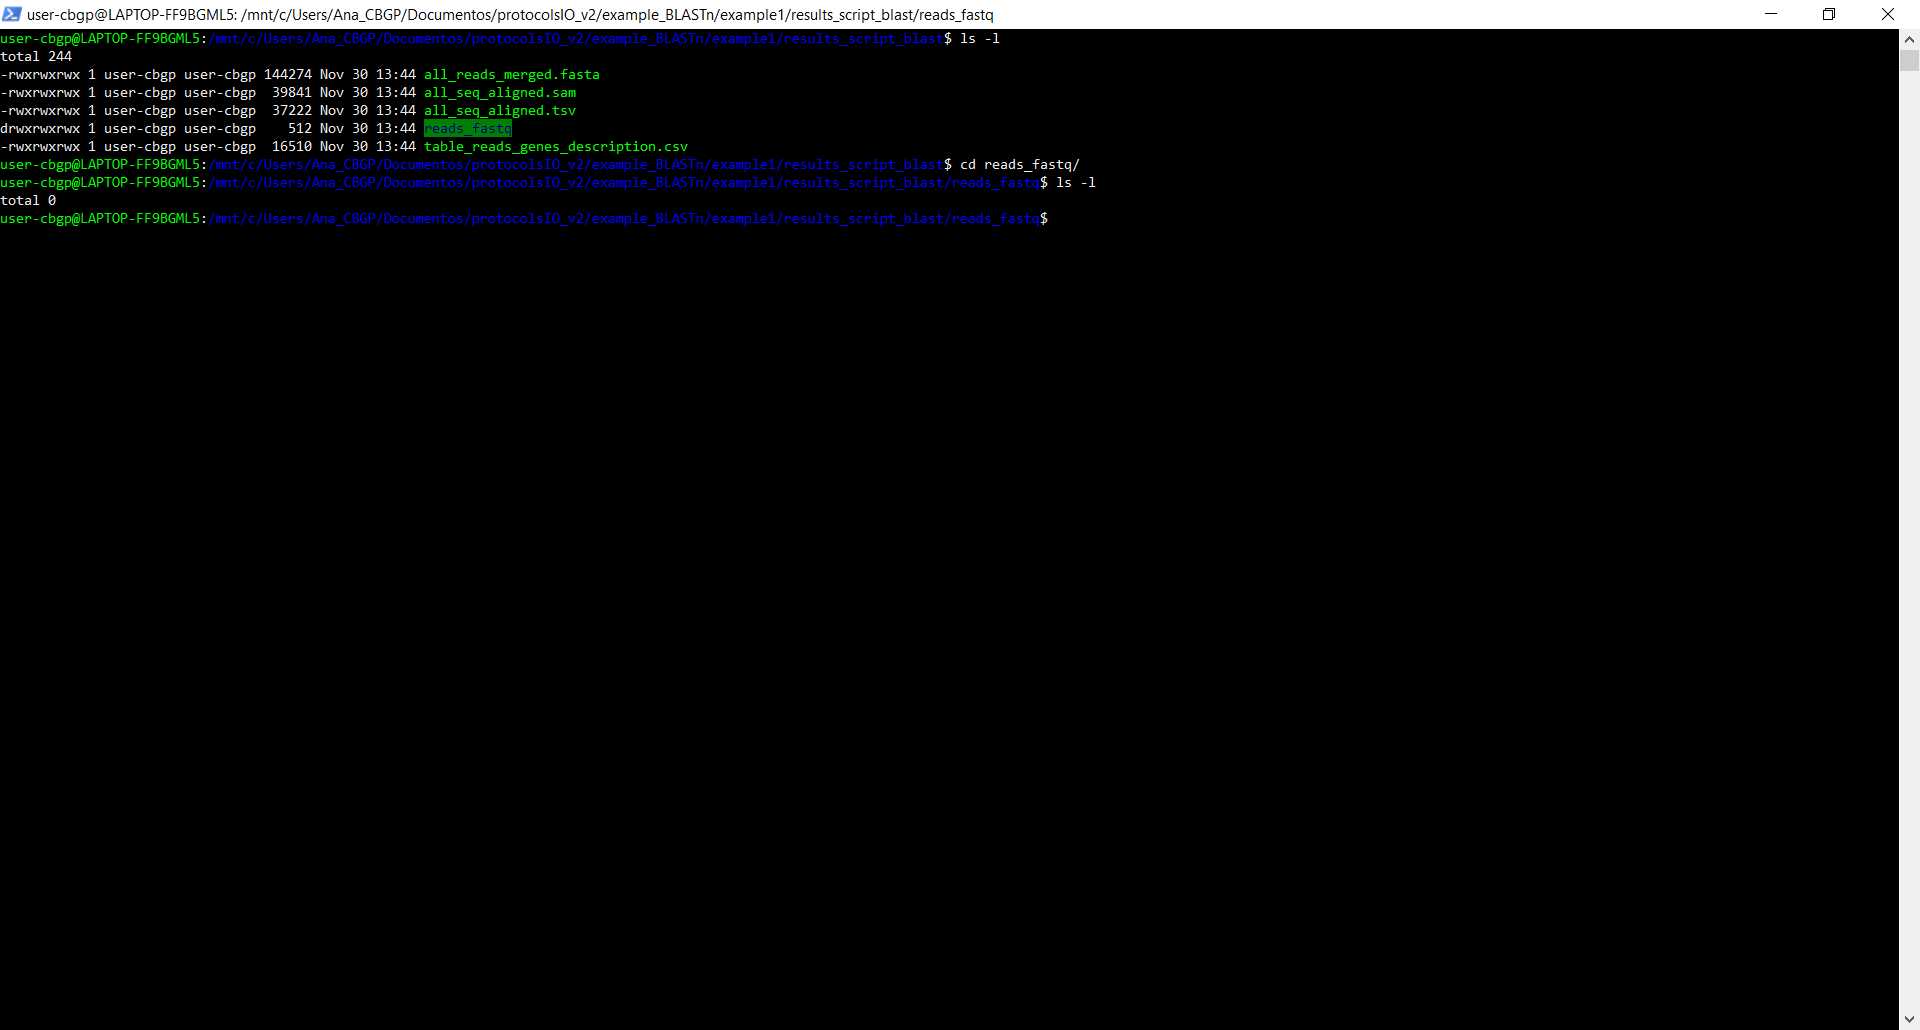
- reads_fastq - if the -quality argument is provided, this folder will have the fastq files of the sequences provided in the directoryReads. If it is not provided, this folder will be empty.
- all_reads_merged.fasta - All the sequences provided in directoryReads merged in a FASTA format.
- all_reads_merged_quality.fastq - All the sequences provided in directoryReads with their respective quality merged in a FASTQ format. For more information on the FASTQ format, you can start reading the dedicated entry in wikipedia which provides a good starting explanation of the file.
- all_reads_merged_quality_fastqc.html and all_reads_merged_quality_fastqc.zip - Quality analysis report of the sequences provided in directoryReads done with the software FastQC and should be checked before assigning the Q and length of trimming that will guide the dynamic trimming of the sequences done by Sickle. Both files have the same information.
- all_reads_merged_quality_trimmed.fastq - Sequences contained in all_reads_merged_quality.fastq trimmed based on the Q and length trimming variables provided by the user with their respective quality.
- all_reads_merged_trimmed.fasta - Sequences contained in all_reads_merged_quality.fastq trimmed based on the Q and length trimming variables provided by the user.
- all_seq_aligned.sam - SAM format output file of the BLAST done with the sequences provided. For more information about the SAM output, you can check the following page https://www.metagenomics.wiki/tools/samtools/bam-sam-file-format
- all_seq_aligned.tsv - Tabular output file of the BLAST done with the sequences provided with the name of each column and an alignment for each row.
- table_reads_gene_description.csv - Final table that will combine the columns selected from the annotation file and the columns selected in the BLAST output file in addition to columns providing info if there is a multiple alignment of that sequence to the genome and the hits (considering the value in the rangeThreshold argument). If the -map argument is provided, another 2 columns will be added with the position that the sequence holds in the map and the Identity that this has. In other words, it will hold the value that is in the cell on the file provided in the argument -map.
Example 1
Annotation of sequencing results from P. putida KT2440 with only positional arguments P. putida KT2440 with only positional arguments
This has been done in a Windows 10 with a WSL Ubuntu 20.04
Acquisition of files
Script
Downloaded the script from the entry LAPu-InsertsGenAnnotation-1.0.0 from LAP repository and re-named annotation_DNAinserts.py
Genome and Annotation Files
Both files have been obtained from Pseudomonas Genome DB, specifically from one fo the entries of the Pseudomonas putida KT2440 organism
Reads
Files return from the Sanger sequencing in the company Stab Vida of a plate coming from another protocol from this page "High-throughput workflow for the genotypic characterization of transposon library variants"
Choose arguments to give
We are going to leave all the optional arguments with the default values and just give the positional ones, in other words, the minimal amount of inputs
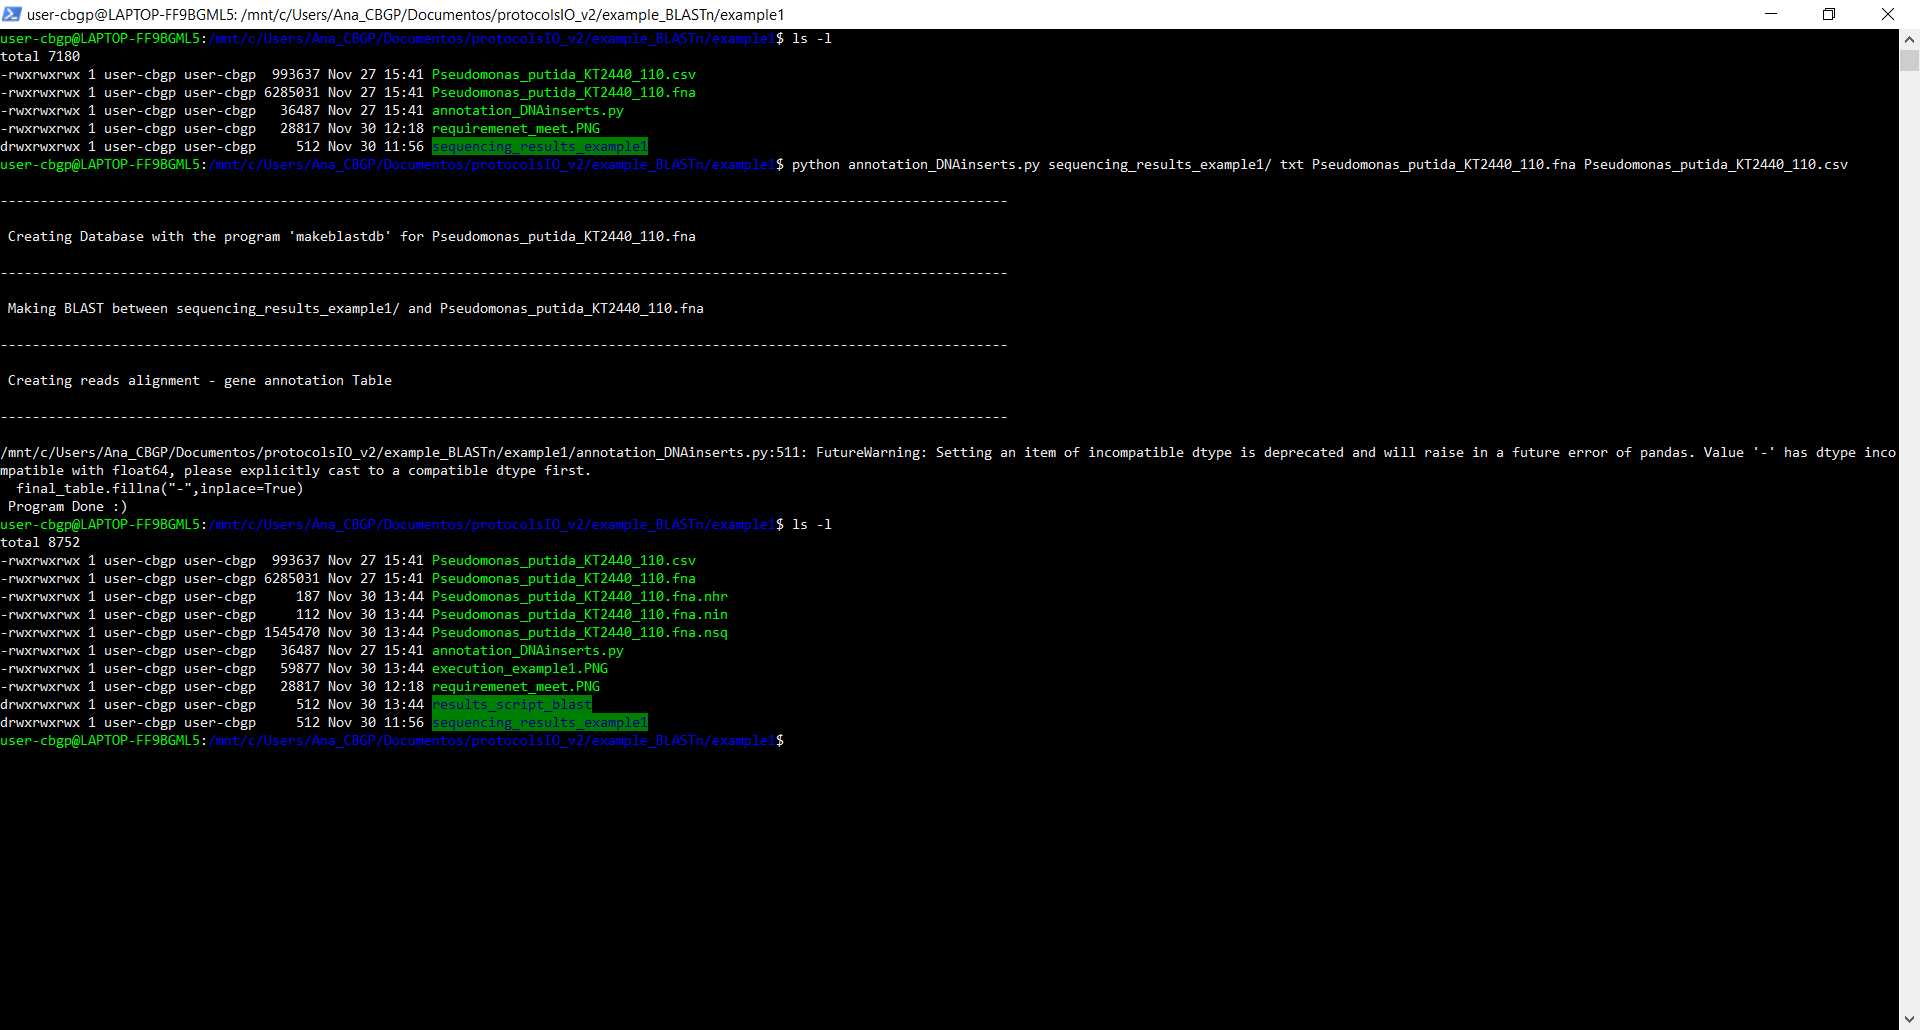
Run script
We are going to run the script in the same folder as every file that we are going to give to the script, so we are going to give relative paths as we can see in the image as we can see the files that the folder contained before and after executing the script
Example 2
Annotation of sequencing results from P. putida KT2440 with positional and optional arguments P. putida KT2440 with positional and optional arguments
This has been done in a Windows 10 with a WSL Ubuntu 20.04
Acquisition of files
Script
Downloaded the script from the entry LAPu-InsertsGenAnnotation-1.0.0 from LAP repository and re-named annotation_DNAinserts.py
Genome and Annotation Files
Both files have been obtained from Pseudomonas Genome DB, specifically from one of the entries of the Pseudomonas putida KT2440 organism
Reads
Files return from the Sanger sequencing in the company Stab Vida of a plate coming from another protocol from this page "High-throughput workflow for the genotypic characterization of transposon library variants"
Map
A file returned from the running of another protocol from this page, "OT-2 PCR sample preparation protocol"
This map corresponds to the same plate sent to the sequencing company and the files obtained from it.
Files with columns selected
In the final table, we want to have the following columns
- From annotation file: Locus Tag, Start, End, Strand, Gene Name, Molecular Weight (predicted)
- From BLAST output file: qaccver, evalue, bitscore
Check requirements are meant in the system the script is going to be run
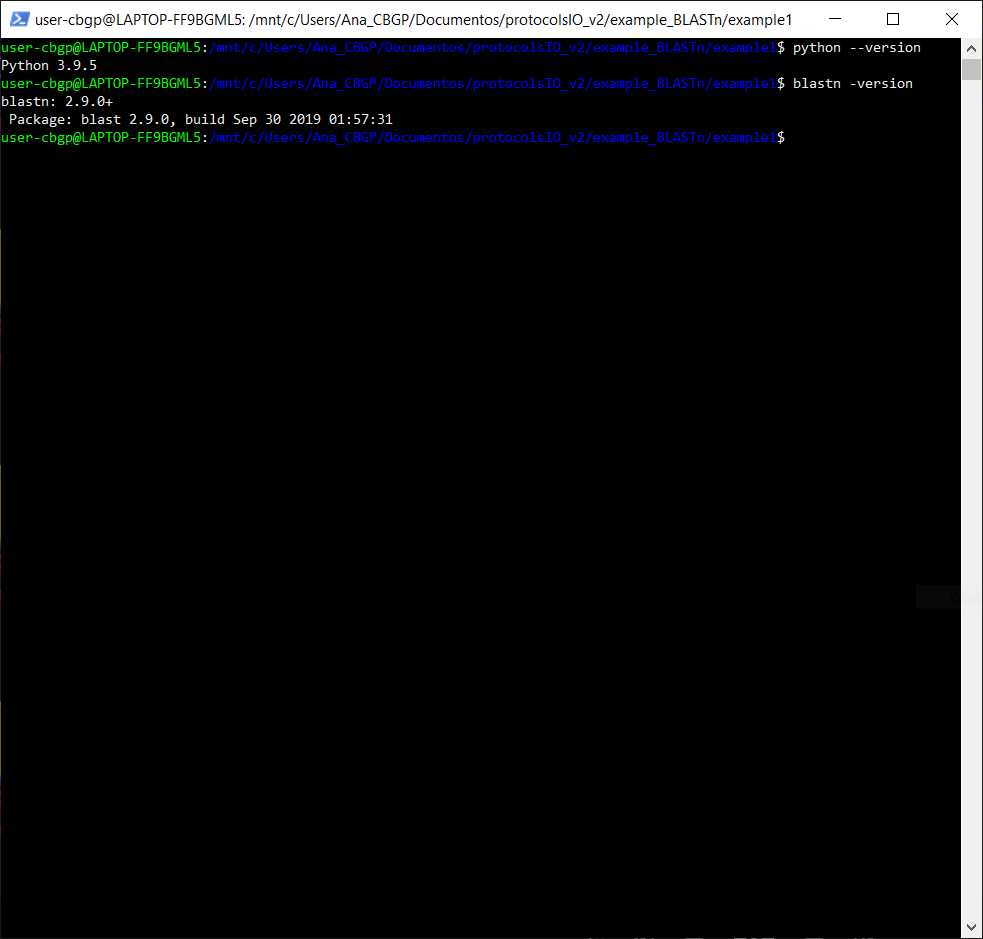
Check if we have Python, BLAST, sickle and FastQC installed
Checking if asking in the command line for the version of python, blastn, sickle, and fastqc gives me an error or not
Choose arguments to give
We want to have a verbose screen output ( -v ), we want the result directory to be called results_example2 ( -out results_example2 ), we want only the table, not the SAM file ( -f table ), we want customized columns in the final table ( -ca columns_selected_annotation.txt -cb columns_selected_blast.txt ), we want that the range threshold on the bit score is 0.2 ( -t 0.2 ), that we have a quality trimming ( -quality ab1 -seq sanger ) and the alignments to be tracked to the map of samples ( -identity map_identity_plate.csv )
Run script
We are going to run the script in the same folder as every file that we are going to give to the script, so we are going to give relative paths as we can see in the image as we can see the files that the folder contained before and after executing the script
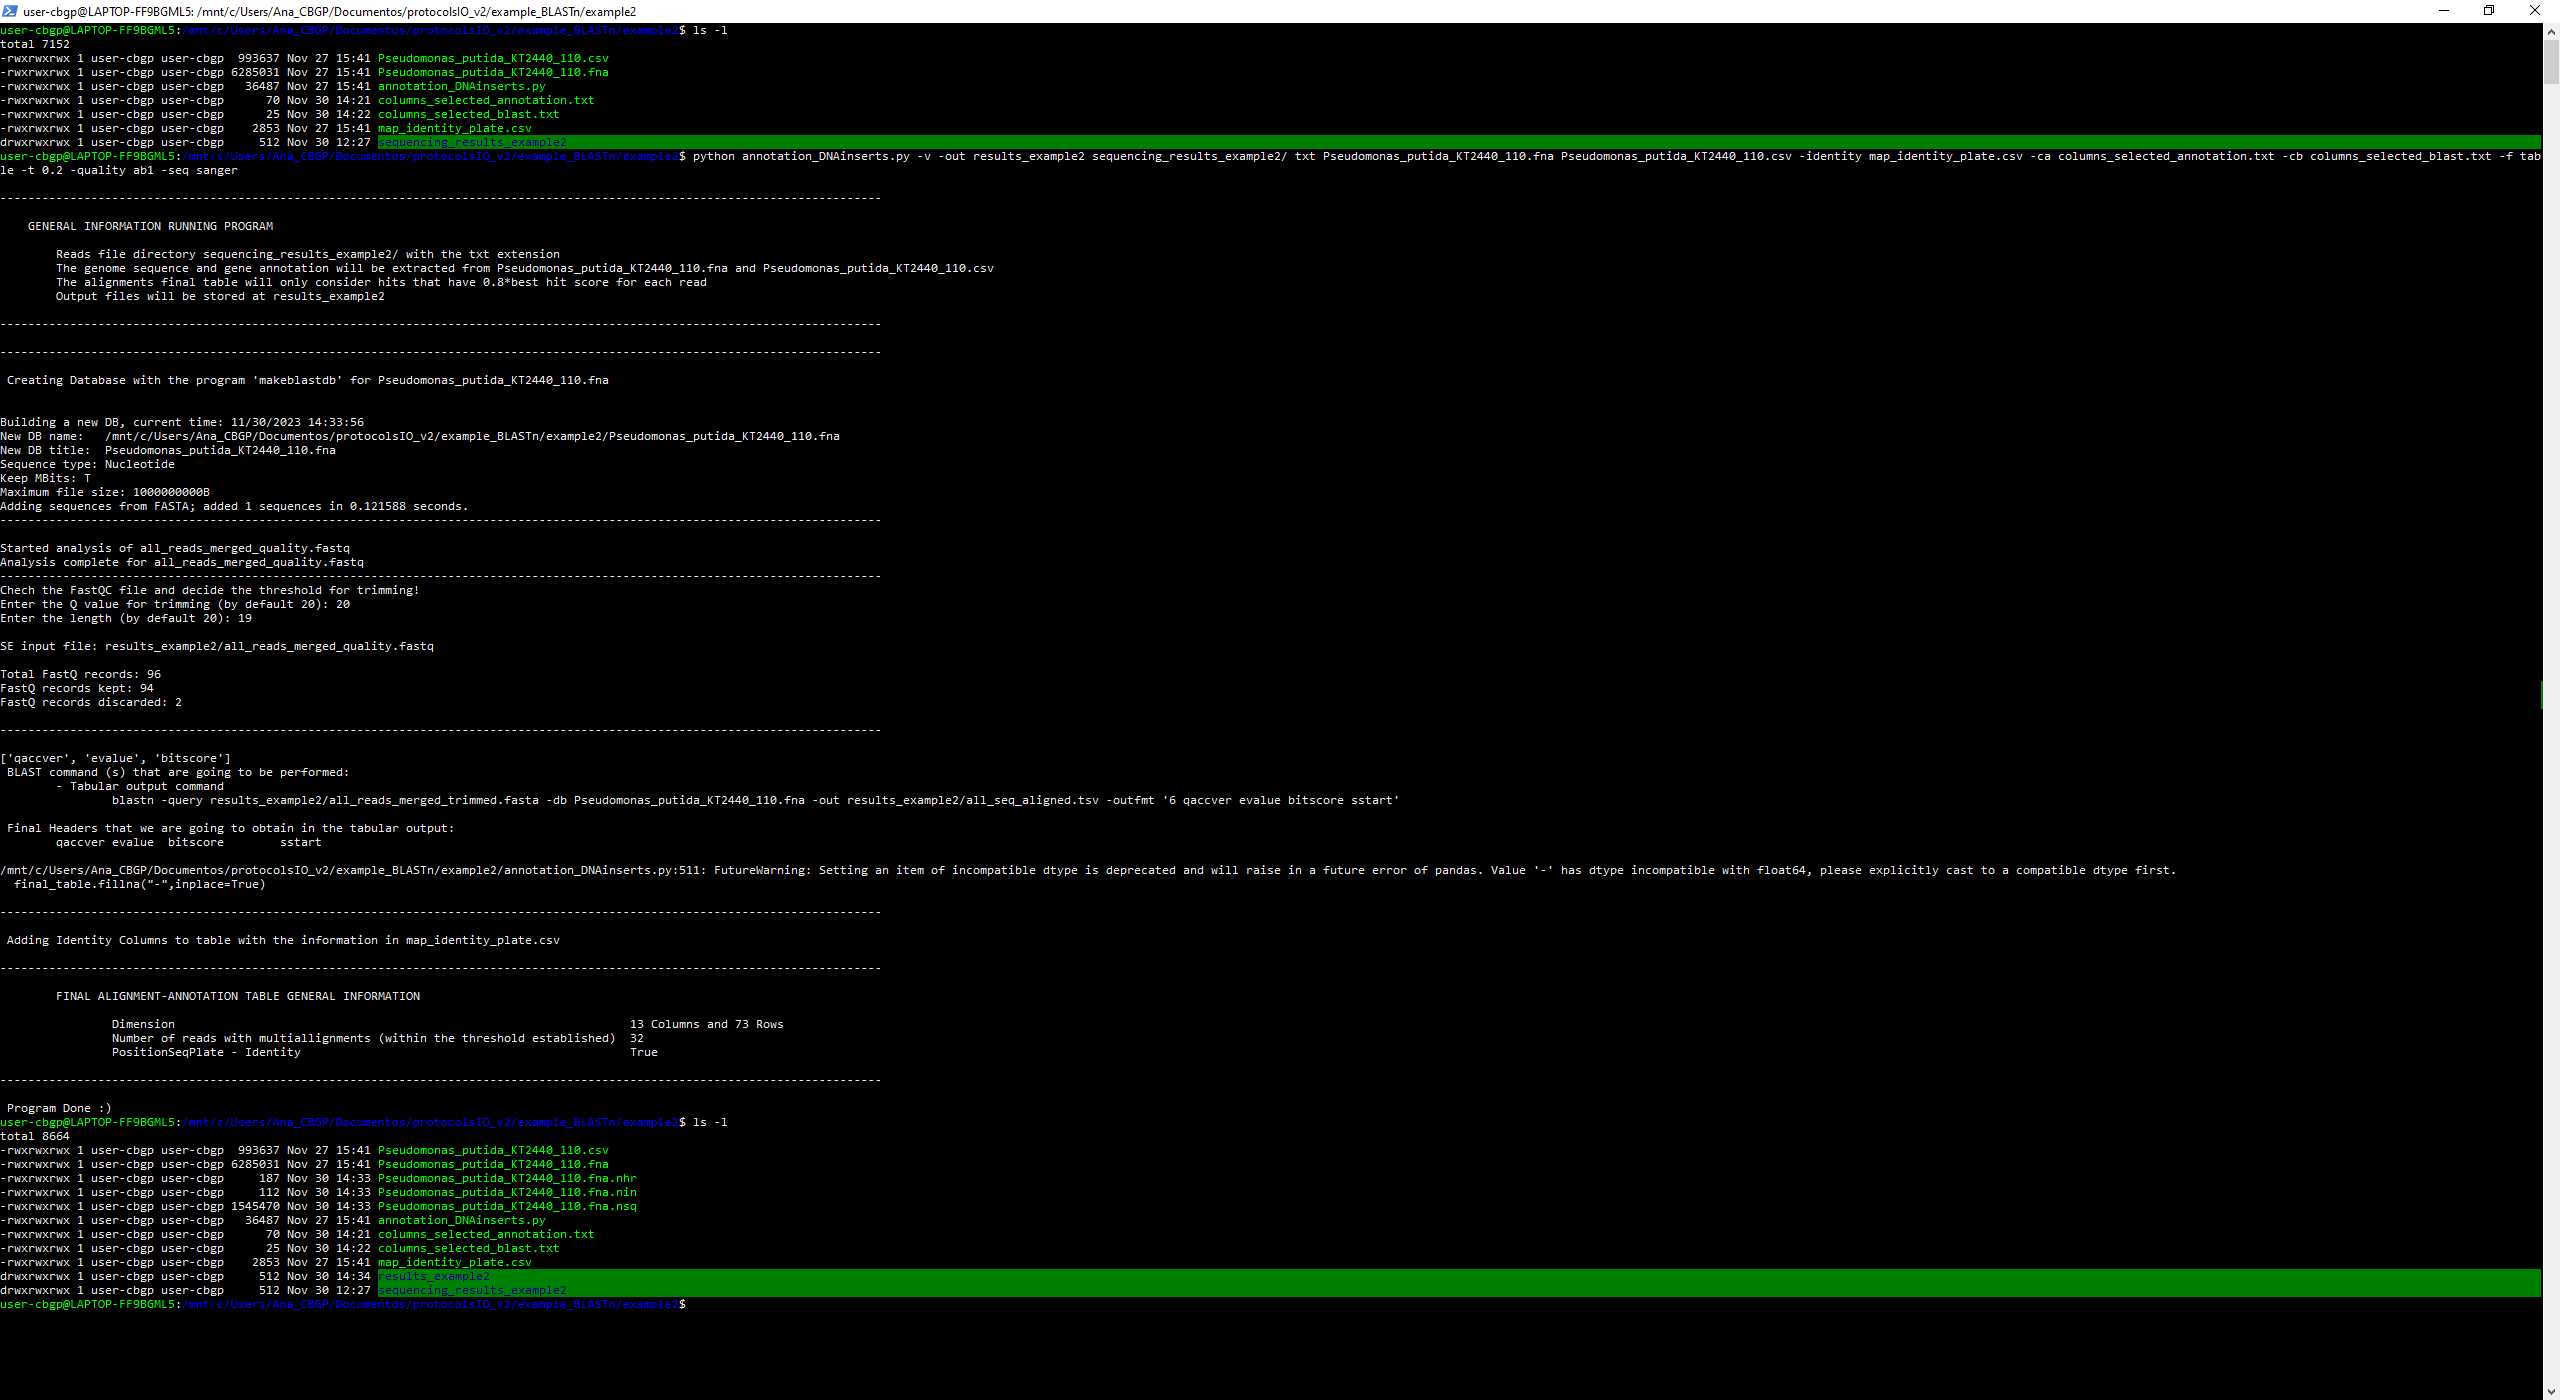
As we can see, because we have given the argument -quality so we need to interact with it. After opening the file all_reads_merged_quality_fastqc.html it is decided to put as a threshold Q = 20 and length = 19, so 2 reads have been discarded from the sequencing.
