A FAIR protocol of the Best-RAD sequencing approach
Laure Benoit, Sabine Nidelet, Emeline Charbonnel, Marie-Pierre Chapuis
RAD sequencing
BestRAD
Sequence-Based Genotyping
PCR duplicate
multiplexing
adapters
biotinylated tag
SNP
Abstract
The protocol is based on the Best-RAD sequencing approach developed in Ali et al. (2016) that allows two main improvements of the RAD-sequencing approach developed by Baird et al. (2008) : (1) a lower rate of PCR duplicates generated during the final enrichment and (2) an increase of the multiplexing capacity by a factor equal to the number of well barcode available (for a brief description, see Figure 1). We developed this protocol on individual wild samples of the Oriental fruit fly, Bactrocera dorsalis . We evaluated the library quality not only on a high amount of target DNA fragments but also on low amounts of PCR duplicates, chimeric fragments, and adaptor residues. To this aim, we tested and validated the following critical parameters : the quality and quantity of the DNA input, the ratio of the AMpure purifications and the number of PCR cycles of the final amplification. Consecutive recommendations and expectations (e.g., DNA concentration or fragment size) are indicated in notes throughout the protocol. Furthermore, special care has been taken to ensure the precision of each step (i.e. volumes, quantities, duration, materials with supplier references). Consequently, this protocol follows the FAIR principle and could be useful for an easy implementation of the Best-RAD sequencing approach in other laboratories and biological models.

Before start
DNA quality control Beforehand, DNA quality should be checked with an electrophoresis on an agarose gel. Measurement of DNA quantity Beforehand, the amount of genomic DNA should be determined with a fluorescent method (as Qubit assay) in order to be normalized. Sample metadata Prepare a metadata file containing for each sample, a unique ID and the combination of the three barcodes used. This allows to avoid switching barcodes during the sample pooling and is required for sequence read demultiplexing.
Steps
Part I - Genomic DNA restriction, well barcode ligation, pooling and shearing
Genomic DNA enzymatic restriction
In a 96-well microplate, normalize the DNA concentration of each DNA sample in a final volume of 10µL using EB buffer.
Into a 1.5 ml low bind tube on a cold block, prepare the master mix of enzymatic restriction (vols for 1 rxn) :
0.55µL
1.2µL
0.25µL
- Gently vortex and centrifuge the mix.
- Using a new plate on a cold block, a Multipette and a 0.5mL Combitip, distribute
2µLof mix into each well. - Using P10 multichannel pipet, add
10µLof normalized DNA. - Close the plate with self-adhesive film.
- Vortex and centrifuge.
Apply the following restriction program using a thermocycler (heated lid on):
37°C
80°C
10°C
Ligation of well barcodes
Into a 1.5 ml low bind tube, prepare the ligation master mix (vols for 1 rxn) :
1.19µL
0.4µL
0.16µL
0.25µL
- Gently vortex the mix and centrifuge.
- Using a new plate on a cold block, a Multipette and a 0.5mL Combitip, distribute
2µLof mix into each well. - Using P10 multichannel pipet, add
12µLof digested DNA - Using P10 multichannel pipet, add
2µLof well barcodes (0.05µM if SbfI digestion or 1µM if PstI) according to the plate plan. - Close the plate with self-adhesive film
- Gently vortex and centrifuge
Apply the following ligation program using a thermocycler (heated lid on):
22°C
65°C (decrease the temperature slowly to 65 at 25°C, e.g. 2.7°C/min during 15min using the minimum ramp speed)
25°C
Pooling, purification and concentration
Sample pooling
- Transfer all the samples of a batch, i.e. all the volume of the 8-tubes PCR strip, in a 1.5mL low-bind tube.
Purification and concentration on AMpure beads (ratio 1X)
Incubate AMpure beads at room temperature at least 0h 30m 0s.
Prepare 70% ethanol :
For one pool: `954µL` +`2000µL`.
- Measure the exact volume of the pool
- Add an equivalent volume of AMpure beads and vortex
- Incubate
0h 5m 0sat room temperature - Place on a magnetic holder for
0h 5m 0s. - Without removing the tube from the magnetic holder, remove supernatant, add
1000µL, incubate0h 0m 30sand discard the supernatant. - Repeat step 5 one time
- Let dry on the magnetic holder for
0h 8m 0s. - Re-suspend in
100µL(or in 102µL to do the optional 4.2 step) - Remove from the magnetic holder and vortex gently
- Incubate
0h 2m 0sat room temperature - Centrifuge briefly and place on a magnetic holder for
0h 5m 0s. - Transfer
100µL( or 102µL for the optional 4.2 step) to Diagenode tubes for shearing Vortex and centrifuge.
Shearing
Maintain tubes at 4°C if shearing is planned within 24 hours or freeze.
- Briefly vortex and centrifuge the tubes (maximum 12 tubes in parallel, i.e. 12 batches of 96 samples)
- Check that there are no bubbles and place the tubes in the rotor (12 tubes of 0.5mL).
- Place the rotor in the bath.
- Run the following shearing program: Four cycles of :
0h 0m 30s
0h 1m 30s
Repeat the four previous steps one more time (for a total of 8 shearing cycles or a different total number of cycles, see note 4.2).
Quality and quantity control (optional)
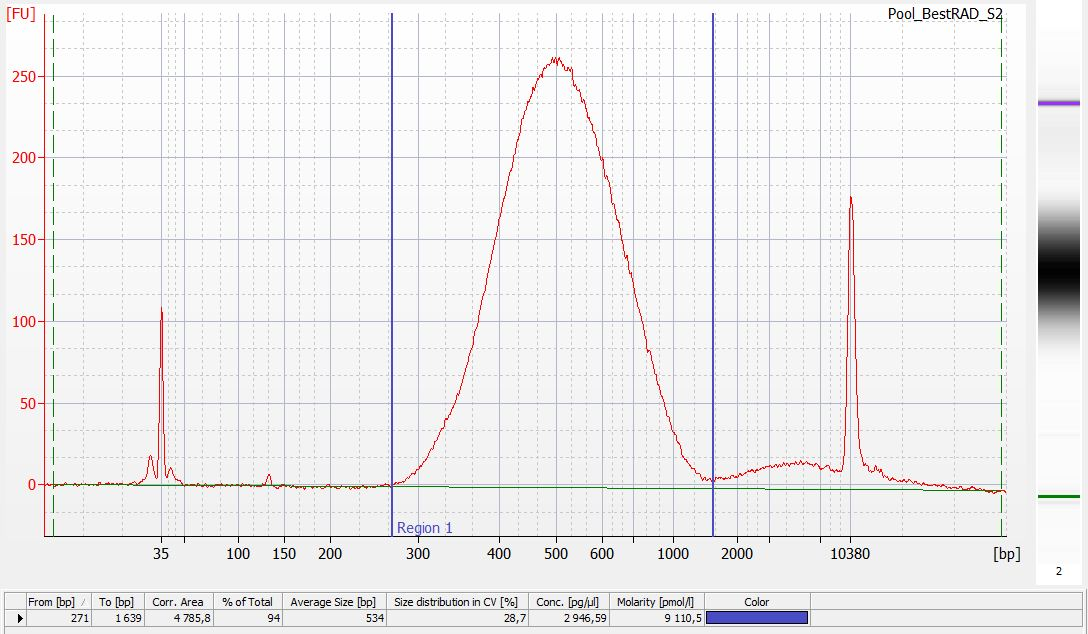
Run 1µL of each pool on an Agilent High Sensitivity (HS) chip (following manufacturer protocol).
Run 1µL of each pool on a Qubit High Sensitivity (HS) assay (following manufacturer protocol).
Part II - Selection of fragments carrying the restriction site
Preparation of Dynabead M-280 magnetic streptavidin beads
Since streptavidin beads adhere to tips, re-suspend by vortexing and not by pipetting.
Incubate the streptavidin beads at room temperature for at least 0h 30m 0s before using it.
- For each pool, prepare
1mL2X Binding and Wash buffer (B&W 2X):10millimolar (mM)
1millimolar (mM)
2Molarity (M)
- For each pool, transfer
30µLof Dynabeads into a new 1.5mL low bind tube. - Place the tube on a magnetic holder and discard the supernatant.
- Without removing the tube from the magnetic holder, add
100µL - Remove the tube from the magnetic holder, vortex
0h 0m 30s, centrifuge briefly. - Place the tube on the magnetic holder for
0h 1m 0sand discard the supernatant. - Repeat steps 3 to 5 twice for a total of 3 washes.
- Re-suspend beads in
100µL.
Binding DNA to beads
Add shared DNA (~100µL) to the prepared beads.1. Briefly vortex and centrifuge the tubes.
- Apply the following binding program in a thermomixer:
22°C
900rpm
For each pool:
- Prepare B&W 1X:
250µL+250µL. Incubate atRoom temperature - Pepare B&W 1X:
175µL+175µL. Incubate at56°Cin a thermomixer. - Prepare NEB buffer 4 1X:
30µL+270µL. Incubate atRoom temperature.
Centrifuge briefly and transfer each pool in a 1.5mL low bind tube. 1. Place tubes on a magnetic holder for 0h 1m 0s and discard the supernatant.
- Re-suspend the beads with
150µLatRoom temperature. - Vortex gently and centrifuge briefly.
- Place the tube on the magnetic holder for
0h 1m 0sand discard the supernatant. - Repeat steps 3 to 5 twice with B&W 1X buffer at
Room temperaturefor a total of 3 washes. - Repeat steps 3 to 5 twice more with buffer B&W 1X at
56°Cfor a total of 5 washes.
Release DNA from streptavidin beads
- Re-suspend the beads in
100µL. - Remove the tube from the magnetic holder, vortex gently and centrifuge briefly
- Place the tube on the magnetic holder for
0h 1m 0sand discard the supernatant. - Repeat step 1 to 3 for a total of 2 washes.
- Re-suspend the beads in
40µL. - Remove the tube from the magnetic holder, vortex gently and centrifuge briefly.
- Add
2µL. - Vortex gently.
- Run the following release program in a thermomixer:
37°C
600rpm
- Vortex gently and centrifuge briefly.
- Place the tube on the magnetic rack for
0h 1m 0s. - Transfer
40µLsupernatant in a 1.5mL low bind tube.
Purification on AMpure beads (1X)
Incubate AMpure beads at room temperature at least 0h 30m 0s.
Prepare 70% ethanol :
For one pool: `133µL` +`467µL`.
- Add
40µLof AMpure beads to each pool. - Incubate
0h 5m 0sat room temperature - Place on a magnetic holder for
0h 5m 0s. - Without removing the tube from the magnetic holder, remove supernatant, add
200µL, incubate0h 0m 30sand discard the supernatant. - Repeat step 5 one time
- Let dry on the magnetic support for
0h 8m 0s. - Re-suspend in
51µL(or 52µL for the optional step 9) - Remove from the magnetic holder and vortex gently
- Incubate
0h 2m 0sat room temperature - Centrifuge briefly and place on magnetic holder for
0h 5m 0s. - Transfer
50µL(or 51µL for the optional step 9) to a 0.2mL PCR tube. - Vortex and centrifuge.
Quantity control (optional)
Run 1µL of each pool on a Qubit HS assay (following manufacturer protocol).
Part III - Library construction with NEBNext Ultra II kit
Directly into the 50µL from step 8, add :
3µL
7µL
- Vortex gently and centrifuge briefly (It is important to mix well. The presence of a small amount of bubbles will not interfere with performance)
- Place in a thermocycler, with the heated lid set to ≥ 75°C
- Run the following program:
20°C
65°C
4°C
Warning: move to the next step immediately.
Plate barcode adapter Ligation
Directly into the 60µL from step 10, on a cold block, add in order:
30µL
1µL
1.25µL 1.5micromolar (µM)
1.25µL 1.5micromolar (µM)
- Vortex gently and centrifuge briefly (It is important to mix well. The presence of a small amount of bubbles will not interfere with performance)
- Place in a thermocycler, with the heated lid off
- Run the following program:
20°C
10°C
Samples can be stored overnight at –20°C.
Cleanup of Adaptor-ligated DNA (ratio 0.65X)
Incubate AMpure beads at room temperature at least 0h 30m 0s.
Prepare 70% ethanol :
For one pool: `133µL` +`467µL`.
- Transfer
93.5µLfrom step 11 in a 1.5mL low-bind tube. - Add
61µL - Incubate
0h 5m 0sat room temperature - Place on magnetic holder for
0h 5m 0s. - Without removing the tube from the magnetic holder, remove supernatant, add
200µL, incubate0h 0m 30sand discard the supernatant. - Repeat step 5 one time.
- Let dry on the magnetic support for
0h 8m 0s. - Re-suspend in
51µL(52µL for the optional step 13). - Remove from the magnetic holder and vortex gently.
- Incubate
0h 2m 0sat room temperature. - Centrifuge briefly and place on magnetic holder for
0h 5m 0s. - Transfer
17µL(18µL for the optional step 13) to a 0.2mL PCR tube. - Vortex and centrifuge.
Quantity control (optional)
Run 1µL of each pool on a Qubit HS assay (following manufacturer protocol).
Final PCR enrichment
Into a PCR tube, prepare PCR master mix (vols for 1 rxn) :
25µL
5µL 10micromolar (µM)
5µL 10micromolar (µM)
15µL
- Vortex gently and centrifuge briefly
- Place in a thermocycler, with the heated lid on, and run the following program:
98°C
6-12 cycles of :
98°C
65°C
65°C
10°C
Cleanup of amplified library (ratio 0.65X)
0h 30m 0s.
Prepare 70% ethanol :
For one pool: `133µL` +`467µL`.
- Verify the
50µLfrom step 13 and transfert in a new low bind tube. - Add
32.5µL - Place on a magnetic holder for
0h 5m 0s. - Without removing the tube from the magnetic holder, remove supernatant, add
200µL, incubate0h 0m 30sand discard the supernatant. - Repeat step 4 one time
- Let dry on the magnetic support for
0h 8m 0s. - Re-suspend in
22µL - Remove from the magnetic holder and vortex gently
- Incubate
0h 2m 0sat room temperature - Centrifuge briefly and place on magnetic holder for
0h 5m 0s. - Transfer
21µLto a 0.2mL PCR tube. - Vortex and centrifuge.
Final quality controls
Run 1µL of each library on a Qubit HS assay (following manufacturer protocol).
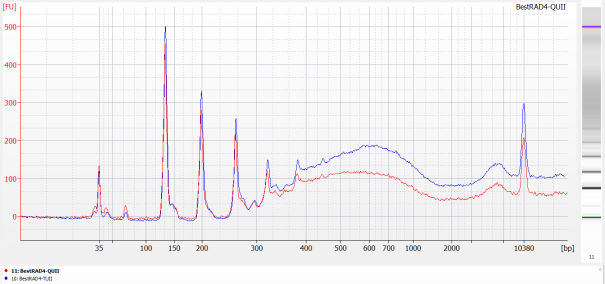
Run 1µL of each library on an Agilent HS chip (following manufacturer protocol).


Run 2µL of each library on a Kapa assay (following manufacturer protocol).

