Protocol (A): Zebrafish infections into the otic vesicle (2 dpf)
Désirée A. Schmitz, Tobias Wechsler, Hongwei Bran Li, Bjoern H. Menze, Rolf Kümmerli
Danio rerio
multispecies bacterial infections
Pseudomonas aeruginosa
Klebsiella pneumoniae
Acinetobacter baumannii
Abstract
This protocol details the zebrafish infections into the otic vesicle.
Steps
Part 0: Material preparation
Media: prepare all required media according to Table SP1 (E3 zebrafish water, PTU to avoid pigmentation, pronase for dechorionation, tricaine for anesthetizing).
Heat 1.5% agarose in 100 mL ddH2O in a beaker in a microwave in 0h 0m 30s bursts until the liquid is completely clear (no turbidity visible)
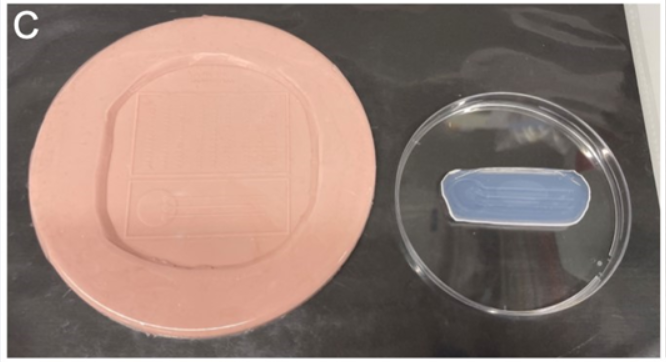
Carefully pour the heated agarose onto the rubber mold with channels from Ellett & Irimia (2017, Zebrafish) avoiding the formation of any bubbles.
Once it has solidified, peel the agarose mold off the rubber mold.
Store at 4°C in a petri dish wrapped in parafilm until use.
Part 1: Zebrafish pre-experiment preparation (1 day post fertilization (dpf))
In the morning, move the zebrafish to a petri dish (LGG Labware, 90x16 mm, sterile) filled with about 20 mL E3 zebrafish water plus N-Phenylthiourea (PTU) (final PTU concentration: 0.003%) to avoid their pigmentation (see Table 1 on how to prepare E3 water and PTU).
In the evening, add 20µL pronase (30 mg/mL) to the zebrafish (final pronase concentration: 0.03 mg/mL) and mix well to ensure that they will dechorionate (hatch from the chorion, which is the protective membrane around the zebrafish embryo) until the next morning.
Part 2: Preparation of bacterial suspensions (2 dpf)
Take fluorescently tagged bacterial species from 25% glycerol stocks that were stored at -80°C and either streak them on an agar plate to pick a single colony (after overnight growth at 37°C) for the following inoculation or directly inoculate them into 10mL fresh LB medium.
Grow at 37°C and 170rpm,0h 0m 0s with aeration until they reach the stationary phase.
- Depending on the biological question being asked, exponentially growing cells could also be used.
The next day, wash cells by centrifuging them at 7500rcf . Discard the supernatant and replace it with 0.8% NaCl to resuspend the cell pellet.
Repeat step 9.
Measure the optical density at a wavelength of 600 nm and adjust it to reach the desired cell numbers per bacterial species (to be determined in a pre-experiment).
Mix 9µL per bacterial culture or 0.8% NaCl solution (as control) with 1µL of 0.5% phenol red (final concentration: 0.05%) to visualize whether an infection is successful and remains local in the inner ear structure, the otic vesicle, of the zebrafish.
Part 3: Zebrafish infections into the otic vesicle (2 dpf)
Add approximately 9mL of E3 zebrafish water with PTU (final PTU concentration: 0.003%) and 10 drops of the thawed anesthetic tricaine (ethyl 3-aminobenzoate methanesulfonate salt analytical standard, 4000 mg/L) using a Pasteur pipette (LLG Labware, 3 mL, unsterile) into a small petri dish (Greiner, 60x15mm, sterile).
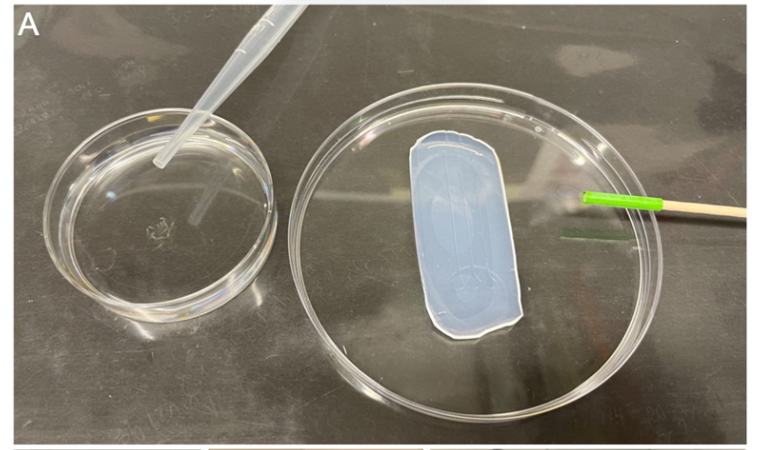
Add 10-20 2 dpf zebrafish into this dish to anesthetize them (Fig. SP2A).
For the first treatment, fill a glass needle (pulled borosilicate glass microcapillary injection needle (Science Products, 0.58mm diameter, GB100F-10)) with 10µL of the 0.05% phenol red and 0.8% NaCl (control) or bacterial solution using a microloader tip (Eppendorf).
Put the filled glass needle into the micromanipulator, screwing it tight but not too tight to avoid breaking.
Position the needle in the field of view of the stereomicroscope using the micromanipulator.
Going from the lowest to the highest magnification, focus on the tip of the glass needle.
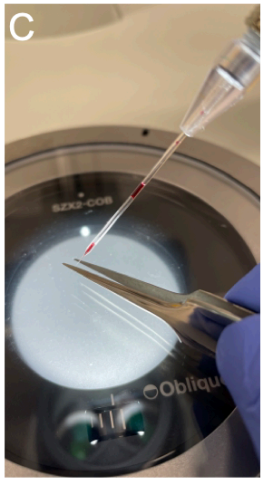
Once it is possible to distinguish the two walls of the needle at a final magnification of 56X, break off the tip of the glass needle using high-precision tweezers (e.g., RubisTech Switzerland, model 5-SA)(Fig. SP2C).
Connect the injection pump with the micromanipulator (and thus the glass needle) via the tubing of the pump.
Put a drop of oil (VWR Chemicals, 10S) on a microscopy slide with a cavity (76x26 mm) that sits on an inverted lid of a petri dish (LGG Labware, 90x16 mm, sterile) and place it under the stereomicroscope.
Move the needle into the drop of oil using the micromanipulator and press ‘Clean’ on the injection pump to move the liquid into the tip of the needle.
Determine the desired drop size by injecting drops into the oil and adjusting either the injection time (to between 0h 0m 1s-0h 0m 5s) or injection pressure (to between 200-400 hPa). In case the solution in the needle gets aspirated back in or leaks, adjust the injection back pressure (to between 20-30 hPa). At a magnification of 56X, a drop that has the diameter of five stripes on the ruler corresponds to a volume of 1 nL. This can be determined because the liquid to inject will be a perfect sphere within the oil.
Whenever the needle is loaded and not in use, leave it in the oil to prevent evaporation of the liquid and the clogging of the needle.
Put a few drops of the E3-PTU-tricaine solution from the petri dish onto the agarose mold.
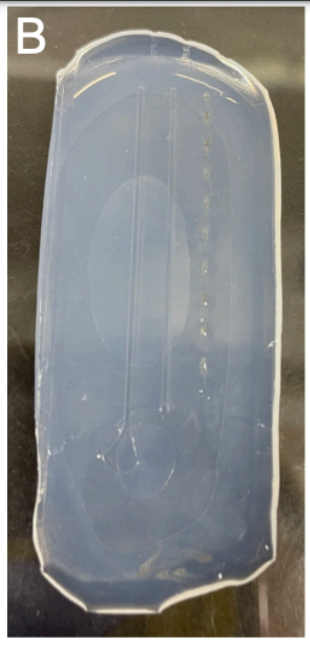
Make sure to wet the channels that will be used for the injection (lateral for the otic vesicle) using a hair loop manipulator.
Move the 2 dpf zebrafish from the small petri dish onto the large circle of the agarose mold for loading using a Pasteur pipette.
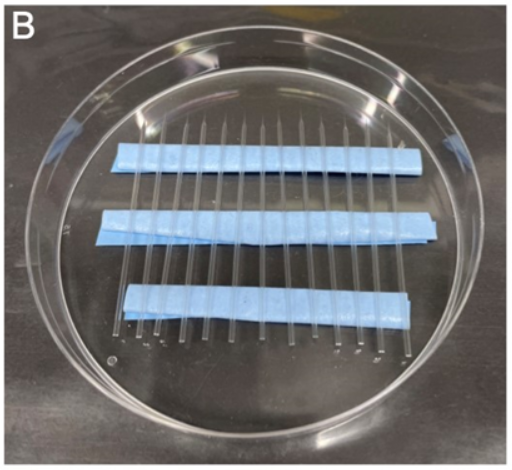
Load the zebrafish into the channels using a hair loop manipulator, turning all zebrafish onto the same side so that the same otic vesicle can be injected and imaged later on (left or right otic vesicle)(Fig. SP2B).
Repeat step 14 to anesthetize the next batch of zebrafish for the same treatment. If it is a different treatment, this step is not necessary yet.
To determine the number of bacterial cells injected at the beginning of the injections, add a drop from the needle into 1mL of 0.8% NaCl within a 1.5 mL Eppendorf tube.
Repeat step 30 to have at least duplicates for plating.
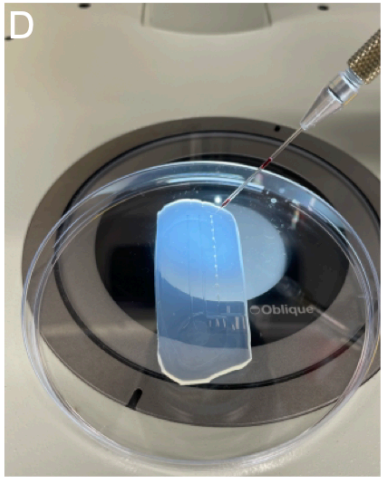
Place the mold under the objective of the stereomicroscope.
Using a magnification of 56X, position the needle into the otic vesicle and inject (Fig. SP2D).
Using a Pasteur pipette, aspirate the injected zebrafish and place them either individually into wells of a 48-well plate or five zebrafish individuals per well in a 24-well plate that is filled with E3 zebrafish water.
Repeat steps 27-34 if more zebrafish receiving the same treatment need to be injected.
To determine the number of bacterial cells injected at the end of the injections, add a drop from the needle into 1mL of 0.8% NaCl within a 1.5 mL Eppendorf tube.
Repeat step 36 to have at least duplicates for plating.
Repeat steps 14-37 for each treatment.
Once all zebrafish from all treatments have been injected, check whether any zebrafish in the well-plate(s) have been damaged and remove them.
Incubate the well plate(s) at 28°C either in the dark or with a 14h 0m 0s light and 10h 0m 0s dark cycle.
If necessary, further dilute and then plate 100 µL of the bacterial solution added to the 1mL of 0.8% NaCl for all treatments in duplicates on 1.5% LB-agar plates to enumerate and confirm the infectious dose for each experiment.
Incubate plates at 37°C (or the temperature required for your bacteria’s growth) 0h 0m 5s.
Count CFU from agar plates.


