OT-2 Protocol to transfer volume from several plates to a single plate
Ana Mariya Anhel, Lorea Alejaldre, Ángel Goñi-Moreno
Abstract
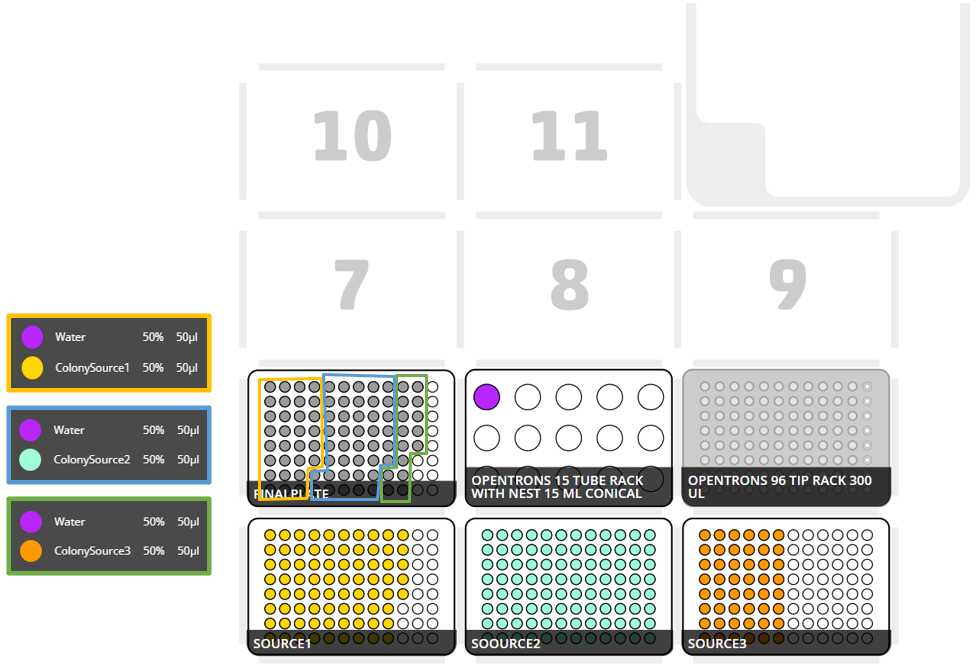
This protocol is meant to transfer samples from different plates to a single plate. The output of running this script will be the final plate(s) and the corresponding map(s) with the original identities of the samples.
This protocol uses a python script for an Opentrons 2 robot and a .csv file containing the required variables to set the number of samples, volumes of transfer, type of plates, etc...
In our laboratory, this protocol has been used as part of the "High-throughput workflow for the genotypic characterization of transposon library variants" also available in protocols.io
Before start
It is important to annotate the location of the source plate in the OT-2 slots, the identity of the samples in each well is going to be a combination of the position of the source well and the identity given in the map of that position.
Steps
Files Preparation
Preparing Customized Template
Preparing the template (.csv file) with the specific variables for each experiment.
Here we attach one excel with the following sheets:
- Template to use in protocol
- Explanation of each variable
- An Example
Fill the template with the corresponding values
Store it as .csv file with the name Variables-SamplesMerging-OT.csv
Transferring csv to Robot
Transfer the Variables-SamplesMerging-OT.csv to the directory /data/user_storage of the OT system that we are going to use to perform the protocol.
Here we present a summary of how to transfer the files in 3 OS: Windows, Mac and Ubuntu (applicable to most Linux)
Mac/Linux
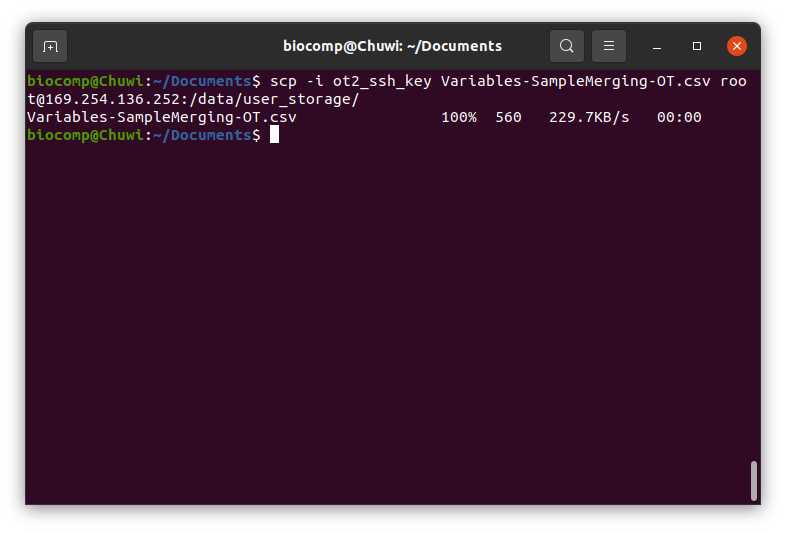
We will use the command line with scp to transfer the file Variables-SamplesMerging-OT.csv to the OT system.
We need to perform the following line:
#Passing Files to OT (Ubuntu)
scp -i [ot_key] [file] root@[IP_OT]:/data/user_storage
Windows
There are several ways to pass files from a windows to a linux (for example with a virtual machine).
Here we will use FileZilla (https://filezilla-project.org/download.php?type=client).
Go to File > Site Manager > New Site > Change Protocol to SFTP . Then introduce in Host the OT IP, change the Logon Type to key file, change the user name to root and give the directory were the ot key is. Should look something like this

Then press connect and we will have a conection between our computer and the robot.
After this connection, we should be able to move out Variables-SamplesMerging-OT.csv (in our computer) to the directory /data/user_storage in the robot.
Adding the custom labware
Creation of .json file
The description file can be obtained by describing the labware dimensions in https://labware.opentrons.com/create/
Creating description folder
We need to create for our custom labware a folder with the API name containing the description file (.json) called 1.json
Transfer the description folder to the OT robot
We need to transfer the directory or directories created in Step 3.2
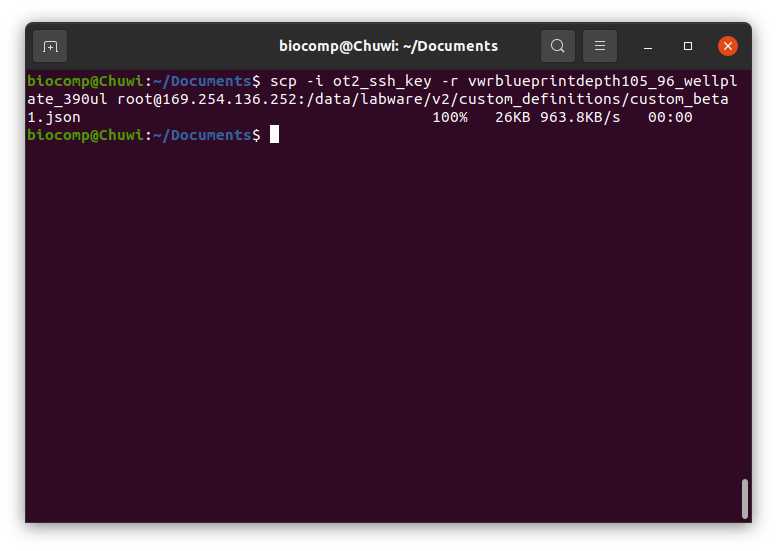
For that we need to introduce the following command (in Linux), for Windows process
#Transfering directory to OT (Linux)
scp -i [ot_key] -r [directory_custom_labware] root@[IP_OT]:/data/labware/v2/custom_definitions/custom_beta
Simulating and getting the output (user instructions)
For more information in how to setup the ssh visit the official OT support blog (https://support.opentrons.com/s/article/Setting-up-SSH-access-to-your-OT-2)
Transferring python script
To make sure that the protocol will work with the variables we have introduced we need to run the python script in the robot with the OT simulator.
The last script version can be found at https://github.com/Biocomputation-CBGP/OT2/tree/main/MergingSamplesSourcePlates (name of this file is user's choice)
For that we can but instead of passing the variables file, we pass the python script. In this case we can transfer it to the directory /data/user_storage or we can directly pass it to the directory /root (recommended)
Simulating
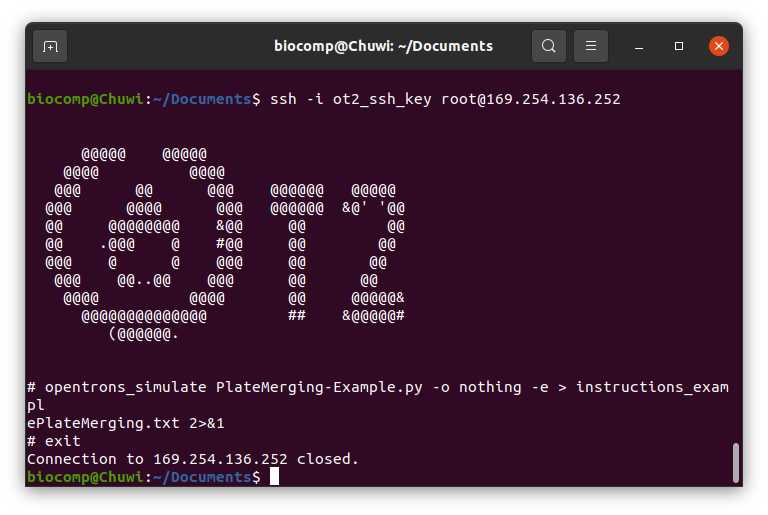
We should connect to the robot via ssh
#Connect to Linux based OT via ssh (Linux)
ssh -i [ot_key] root@[Robot_IP]
Then we would move to the directory where the python script is with the cd command
Finally we are going to perform the simulation of the opentrons
#Simulate OT protocol (Linux)
opentrons_simulate -o nothing -e [name_script].py > [name_instruction_file].txt 2>&1
In case that you want to see the instruction file before the next step, you can see the instruction file with cat
#Show content file cmd (Linux)
cat [name_instruction_file].txt
Retrieving output file (user instructions)
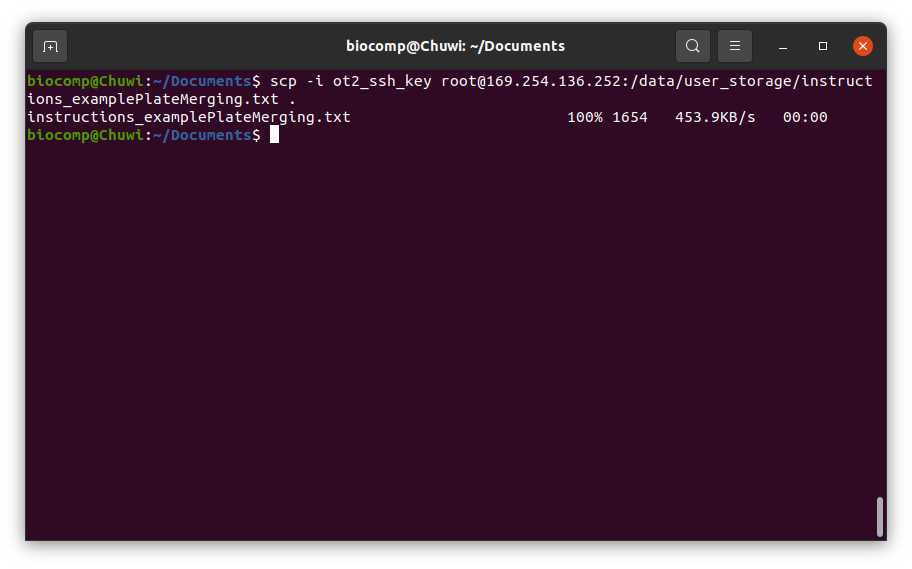
To retrieve the output from the OT system you can , replicate it but transfering the file from the OT to your computer
In this file we have 2 or more sections:
- (Optional) Warnings
- General Information: General Information: pieces of information that are extracted from variables in the variables file and are only remainders
- Deck Labware Position: this information will be provided by the OT as well
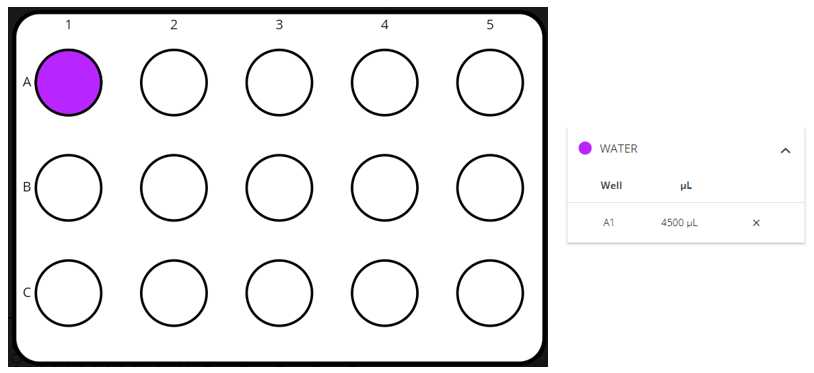
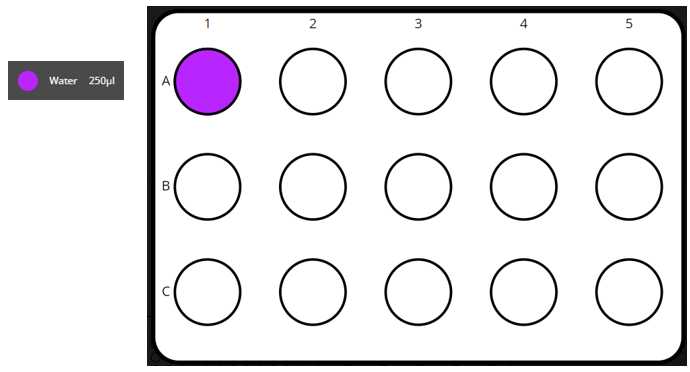
- (Optional) Falcon Reactive Positions: for each falcon tuberack that is needed (with 15 positions) we have a table with the reactives and their respective volumes
In the case that something went wrong, the variables are not consistent or there is not enough deck place to perform the experiments the instruction file will be sorter and will have a single section, Errors .
Running Protocol
Setting Labware
Wipe the surface of the deck with 70% ethanol to clean and desinfect the surfaces
Set the respective labwares in the slots as the OT App and the instruction file set
Set the different reactives in their respective coldblock positions, as stated in the instructions file
Load script in OT-App
Now that we have made sure that the protocol is going to work we import the python script in the OT-App.
Load the script
Protocols > Import > Drag the python script
Select Robot to Perform Script
Click in the protocol > Run Protocol > Choose the OT where the file Variables-SamplesMerging-OT.csv Variables-SamplesMerging-OT.csv is > Proceed To Setup
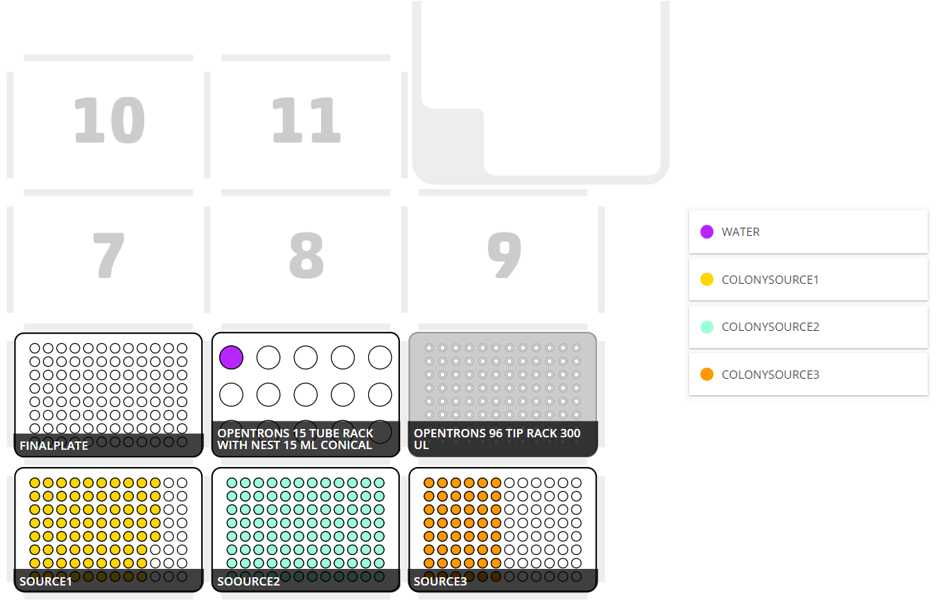
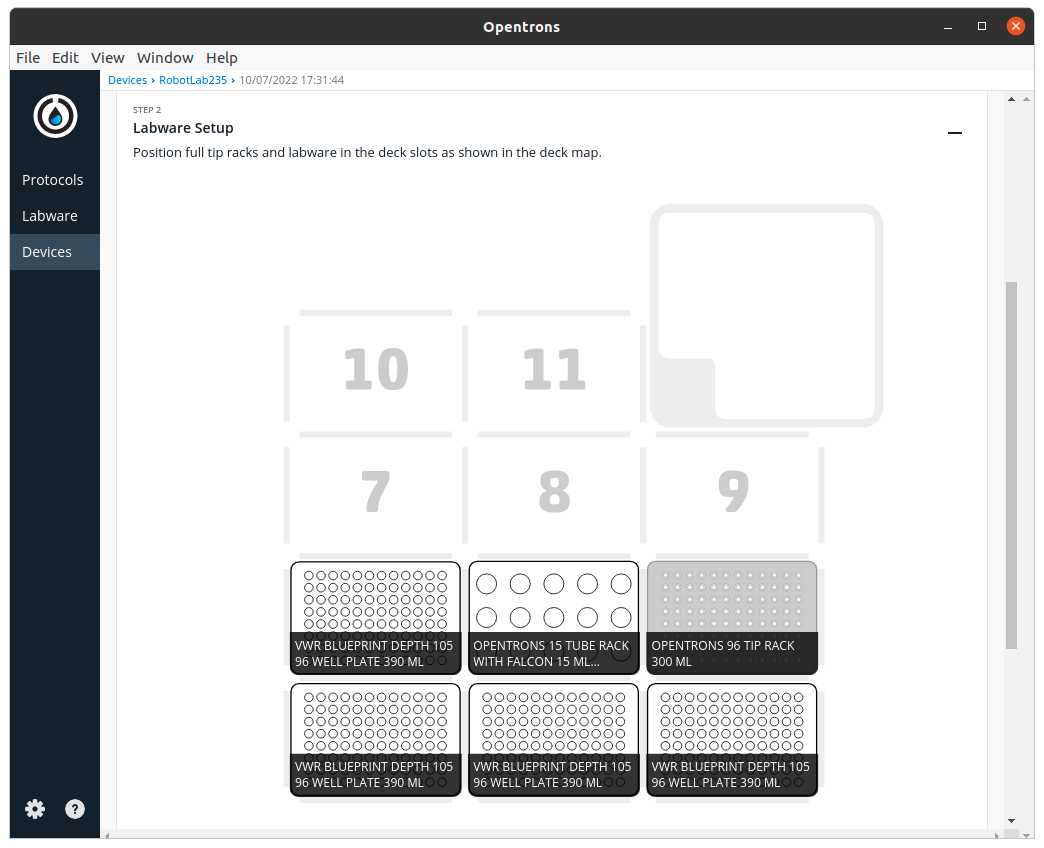
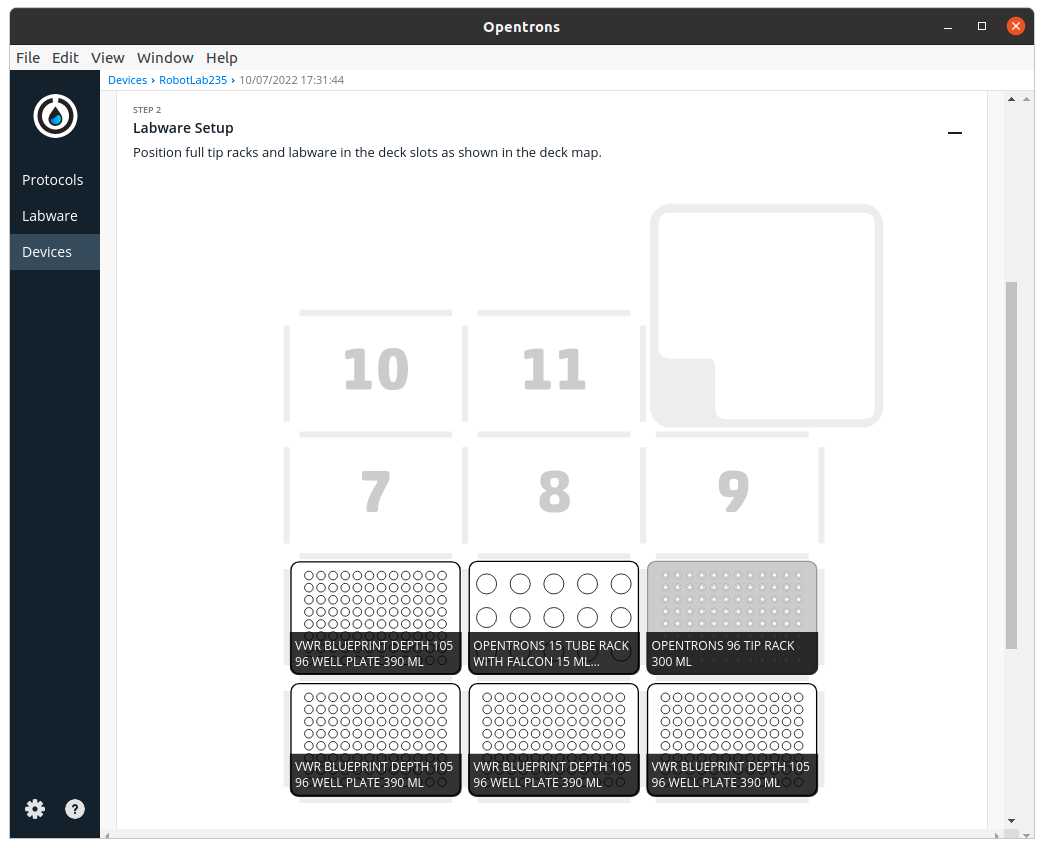
After clicking in Proceed to Setup you should obtain the setup of the labware as instructed in the Deck Labware Positions section of the instructions file.
The Labware Setup tab should look similar to the following image
Run Protocol in OT
Make sure the needed calibrations are done
Labware position check is performed (if needed)
Start Run
The procedure that the robot is going to do is mainly divided in 3 parts:
- Distributing media to all wells that will have a sample (in case that volume of media to transfer is greater than 0)
- Transfering samples to the corresponding wells
- Creating maps with their identifiers, one per final plate
After-running
Retrieve labware from the OT
Importing maps from robot
This can be done if in Step 1 the variable Optional Map was set to True
There will be as many maps as source plates with the following structure of names: VariableNameMap_PositionSlot.csv
To retrieve we can and reproduce it with transfering the files to the computer.
They will be in the directory /data/user_storage
Example
We are going to transfer 30, 45 and 15 samples from 3 different source plates to a single plate with the variables set in the Example of the Template_MergingSamplesPlates.xlsx attached in Step 1.
We will use a computer with an Ubuntu system connected via USB to the robot
Excel template filled and exported to csv with the name Variables-SamplesMerging-OT.csv
Retrieve labwares from the OT
Pass the scipt that I have downloaded from https://github.com/Biocomputation-CBGP/OT2/tree/main/MergingSamplesSourcePlates (I named it PlateMerging-Example.py ), connect to OT computer, simulate, exit OT system, store the output in instructions_examplePlateMerging.txt and import it to the computer
Desinfect OT
Load protocol labware as instructed in Step 10.6


