Arabidopsis thaliana detached leaf assay for the disease assessment of Fusarium graminearum infection
Victoria J Armer, Michael J. Deeks, Kim E. Hammond-Kosack
Abstract
Arabidopsis thaliana (At) , as the plant model organism, has the advantage of a bank of genotypes in stock centres worldwide. This allows for the assessment of genotypes and their contributes to disease resistance and/or susceptibility to a wide range of pathogens. We found that, through utilising the SALK lines (Alonso et al ., 2003) provided by NASC (Nottingham, UK), to ensure reproducible disease phenotypes for disease analysis required additional specific steps not detailed in the current literature. This is likely due to the specificity of Fusarium graminearum (Fg) infection to the floral tissues of small grain cereals and the fact that At is a non-host of Fg. Whilst this protocol has been written and tested for the assessment of detached At leaves infected with Fg, it may be adapted for use for exploring other plant-pathogen interactions.
This protocol is designed for the assessment of disease on Arabidopsis thaliana leaves by the fungal pathogen Fusarium graminearum . The nuances of this protocol that have been troubleshot have encouraged us to publish this as its own entity. The protocol described has been adapted from previous protocols published by Machado-Wood et al . (2021) and Chen et al. (2003), as well as by taking several components from Cuzick et al. (2008). Loosely, this protocol details seed sterilisation and plant growth, inoculations and diseases assessment.
Steps
1.1. Preparation of ½ MS plates for At germination
This step was found necessary to eliminate plate contamination from other fungal and bacterial species during seed germination on ½ MS agar plates. Unlike usual ½ MS preparations, this one does not contain sucrose to limit contamination. .
This can be done ahead of time and stored at room temperature for a matter of weeks after autoclaving.
Prepare ½ MS media using the following recipe (makes 1000ml – scale as required):
a. 1.1g MS
b. Up to 1000mL with dH2O
c. Add stir bar and stir until suspended
d. Adjust to 5.7with 1Molarity (M)KOH
Aliquot into Duran flasks for autoclaving, removing stir bar
Add agar to1% (v/v) in each flask (e.g. 2.5g for 250ml) and autoclave before use
Pour ½ MS media into square plates to a depth of 25mm for seed germination.
1.2. Sterilisation and plating of At seed
This was found to be the most ‘fool proof’ method of thorough seed surface sterilisation whilst ensuring high germination rates. N.B. don’t rush the serial dilution or miss steps – 5 washes ensures that the sterilisation solution is sufficiently diluted to not inhibit seed germination. Seed stratification in a cold room or fridge ensures even germination of At seed.
Create the sterilisation solution by mixing 50:50 dH2O and thin bleach (4.5% (v/v) sodium hypochlorite). This must be made fresh on day of use.
Aliquot required seed into 2ml microcentrifuge tubes and add 500µL of the sterilisation solution. Invert to mix, ensuring all seed are suspended before settling and leave for 10 mins, inverting several times to ensure sufficient coating of seeds.
Conduct a dilution series of the bleach solution, pipetting out 450µL of the sterilisation solution and replacing with 1000µLof dH2O. Invert to suspend all seed and remove solution once seed settles. Repeat 4 times with subsequent additions of 1000µL of dH2O to ensure sufficient dilution of the sterilising solution.
Pour seed onto an absorbent surface (e.g. blue roll) for pricking out onto ½ MS plates, at least 20mm apart, using (autoclaved) toothpicks.
Place ½ MS plates into a plastic bag and place in the dark in a cold room or fridge for 48hrs.
1.3. Plant Growth
Plant growth
Plant growth can occur at neutral (12 hour) or long (16 hour) day length. We found that long day length worked well and sped up the experiment progression, allowing detached leaf inoculations to take place 4 weeks from germination.
Place square plates into a controlled growth room or cabinet with the following settings:
a. 16hr day length
b. 22°C day temperature, 18°C night temperature
c. 70% Humidity
d. 140µmol m-2 s-1 light intensity.
Leave to germinate for 7 days.
Seedling transplantation
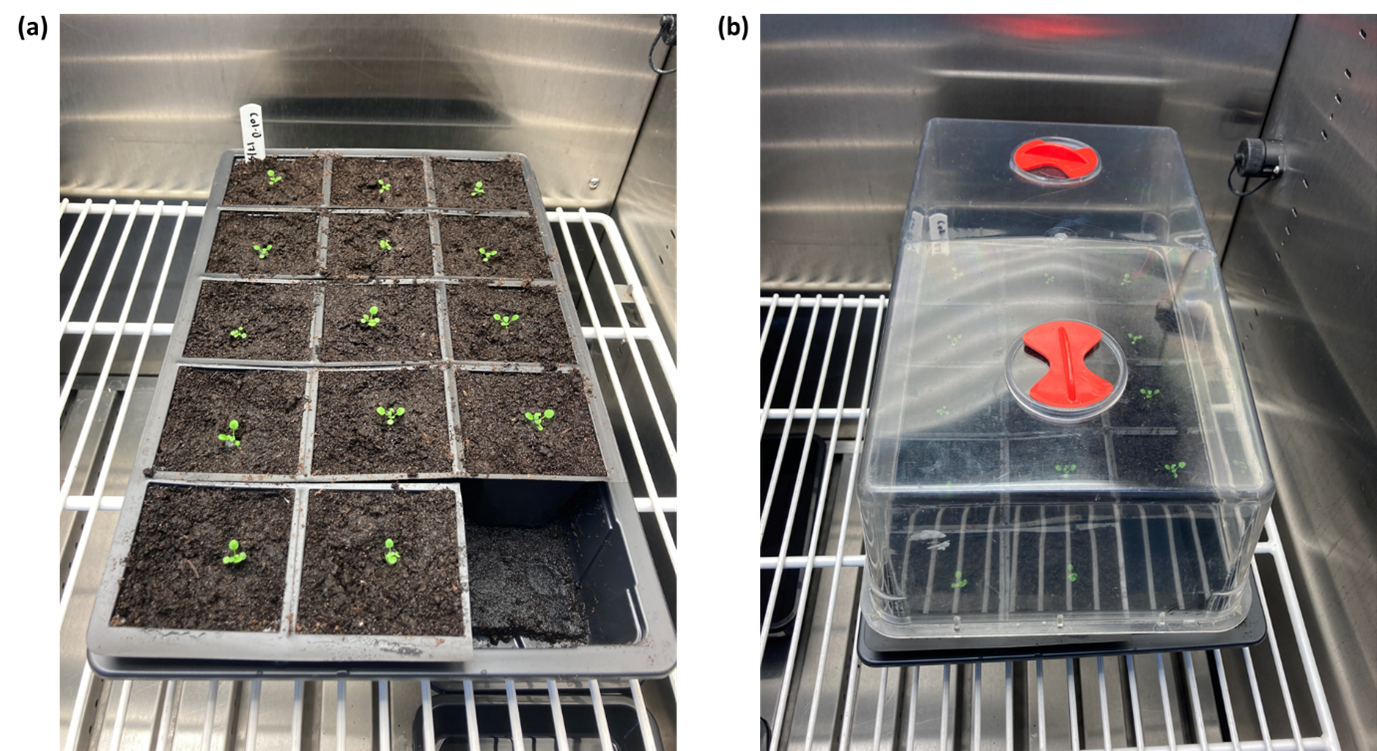
Prepare trays and pots for seed transplantation by lining trays with capillary matting and filling P7 pots with Levington’s F2+S soil. Press until soil is firm and hydrate with dH2O until moist to touch on the surface. Leave space (i.e. cut out one pot from the tray) for easy watering from beneath to avoid disturbing delicate seedlings.
At 7 days, transplant At seedlings from ½ MS plates into F2+S using sterilised tweezers. Ensure roots are carefully tucked into the soil, pressing around the base of the developing rosette.
Spray the surface of the soil with dH2O and place a vent closed humidity lid over the tray, leaving under normal growth conditions for a further 14 days (Fig. 1).

At 21 days old (14 days after transplantation) remove the humidity lid and leave for another 7 days. Ensure soil is well hydrated throughout plant growth, watering from the bottom of the tray. Capillary matting should be moist to the touch and ensures even watering across the tray.
1.4. Detached leaf inoculations
Detached leaf assay plates can be prepared a couple of days before inoculation if stored in a sealed bag in a cold room or fridge. The addition of Tergitol (a detergent and therefore fungal membrane stressor) encourages fungal growth on the At leaves rather than on the 1% water agar plates.
Preparation of 1% (w/v) water agar plates for detached leaf assay:
Pour 1% (w/v) water agar plates to 25mm depth in flow hood and ensure plates are dry before use.
a. Add 4g Agar to a 400ml Duran bottle
b. Top up to 400mLwith dH2O
c. Autoclave
d. Store at RT until use (can be prepared months in advance).
Melt 1% (w/v) water agar in the microwave (800W, 5.5 minutes)
Leave to cool until lukewarm
Add 200µL Tergitol to each 400mL1% (w/v) bottle of water agar solution
Gently swirl flasks to disperse Tergitol without creating bubbles (about 20s of gentle motion)
1.5. Rosette examples and leaf selection
For the detached leaf assay, select leaves that are relatively small and flat for ease of inoculating, imaging and scoring. Leaves must be in active vegetative growth and not close to senescence – for easy identification, do not choose leaves that are particularly rounded indicating they originated in the early growth stages of the plant.
Cut leaves with sterile scissors and stick the petiole into the 1% (w/v) agar plate at a 45° angle. Ideally, leaves should not sit flush on the agar. Square plates can fit 6 leaves, spaced 30mm apart (Fig. 3).
Leaves should be selected and inoculated in quick succession i.e., leaves should be selected, cut and inoculated for each plate before moving onto the next plate.
Each plant is a biological replicate. Unless including technical replicates, only one leaf per plant is taken. The addition of Tergitol to the water agar prevents hyphal growth between replicates. The experiment should be repeated 3 times before conducting statistical analysis.
1.6. Inoculations
The addition of DON is a requirement to make infection of At with Fg occur routinely. Efforts to achieve a reliable and reproducible assay without the application of DON have been unsuccessful.
Selected leaves are gently scored on the agar plates using the end of a sterile 20µl (small) tip, either side of the midrib vein. This needs to be done very carefully to break through the adaxial epidermis layer, but not the palisade mesophyll layer. Several gentle strokes of the pipette tip may be required. This artificial wounding is necessary to allow F. graminearum to cause disease (Fig. 3.)
<img src="https://static.yanyin.tech/literature_test/protocol_io_true/protocols.io.261gedmwov47/Fig.%203.jpg" alt="Fig. 3. Example square plate, filled with 1% water agar amended with Tergitol, laid with Arabidopsis WT Col-0 detached leaves. Wounding must damage the adaxial epidermis so that fungal infection can access the palisade mesophyll, but not penetrate the leaf entirely.
" loading="lazy" title="Fig. 3. Example square plate, filled with 1% water agar amended with Tergitol, laid with Arabidopsis WT Col-0 detached leaves. Wounding must damage the adaxial epidermis so that fungal infection can access the palisade mesophyll, but not penetrate the leaf entirely.
"/>
With gloved hands, drop 2µl of a 5x10⁵ spores/ml water conidial suspension amended with 20micromolar (µM) DON onto each wound. Appropriate controls should be used for each treatment to assess for the impact of scoring (dH2O) and DON only application (20µM DON).
Plates should be placed in the dark for 2 days in otherwise normal growth conditions and subsequently left for a further 5 days under low light (70µmol m-2 s-1 light).
N.B. this can be achieved by moving plates further from light sources and under cover. Use a light meter to ensure that light levels are appropriate. Low light levels prevent senescence of leaves, which interferes with disease assessment.
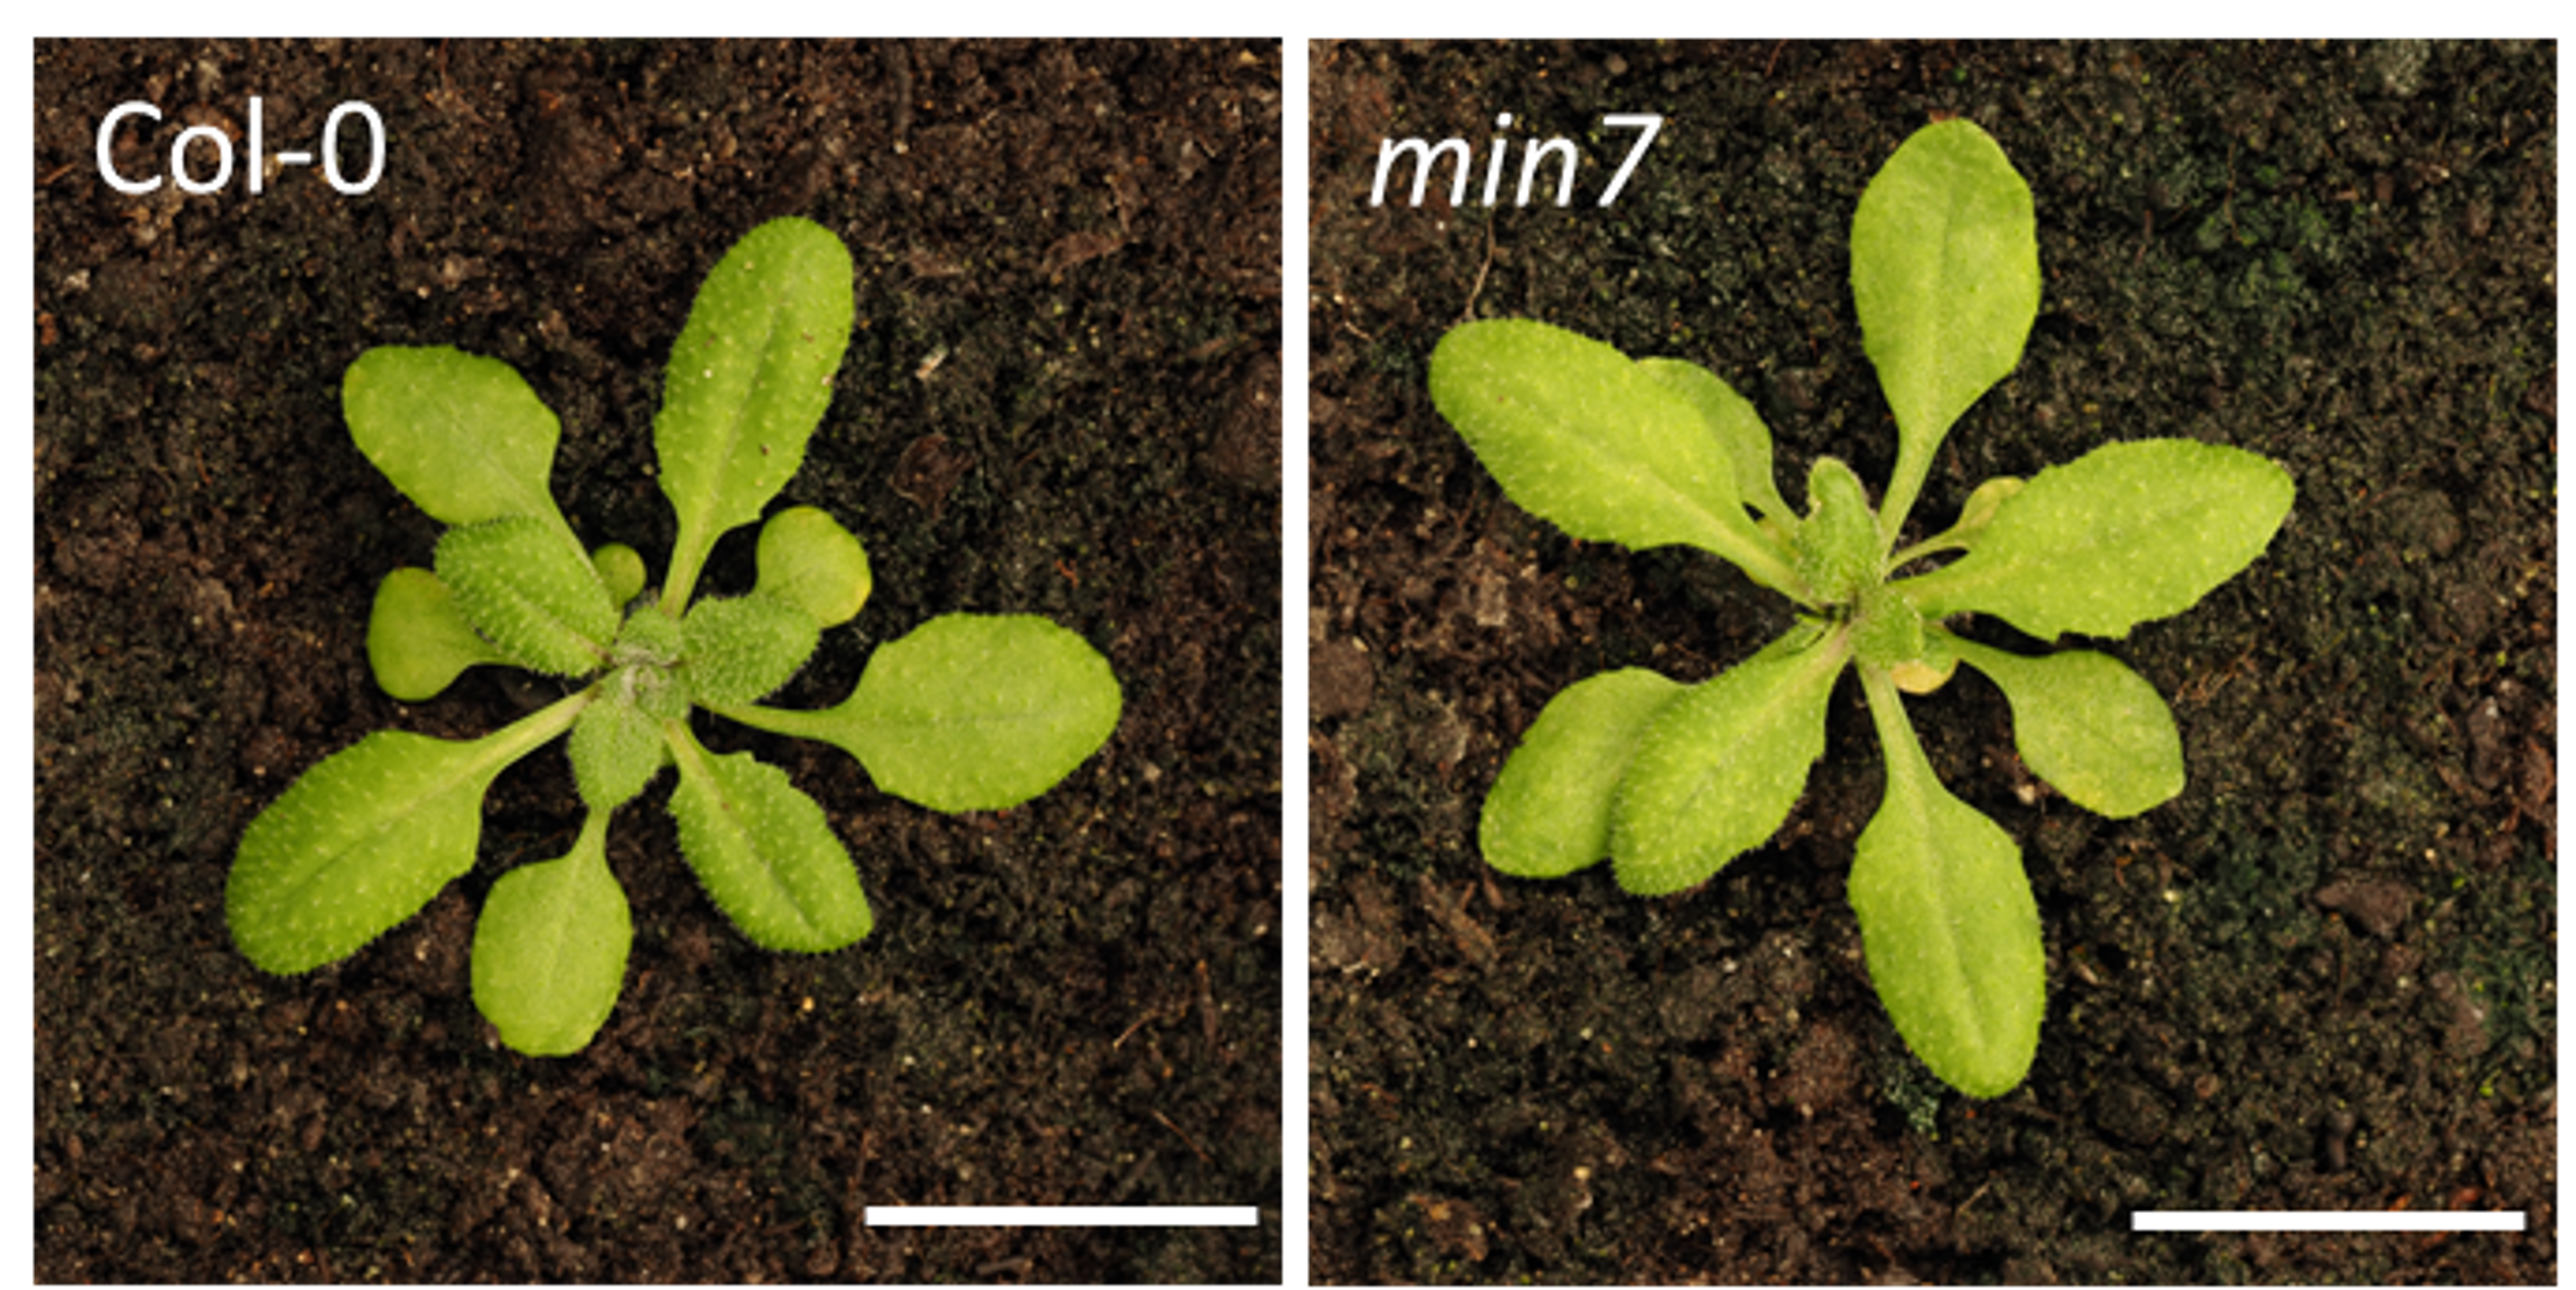
Detached leaves should be assessed at 7 days post infection (dpi), although particularly strong phenotypes may be visible at 4dpi in susceptible genotypes.
<img src="https://static.yanyin.tech/literature_test/protocol_io_true/protocols.io.261gedmwov47/Fig.%204.png" alt="Fig.4. Example images of detached leaf assay at 7dpi for WT Col-0 and susceptible control min7.
" loading="lazy" title="Fig.4. Example images of detached leaf assay at 7dpi for WT Col-0 and susceptible control min7.
"/>
1.7. Disease assessment
Image analysis
Photographs of diseased images should be taken with a high-quality camera for recording purposes using a camera mount on a dark or light background.
Visual scoring
A DS index for visually scoring leaf disease severity is detailed by Chen et al. (2006) and offers a simple, reproducible way of assessing a large number of samples without downstream analysis.
Fungal burden
Fungal burden, the ratio of fungal to host gDNA, can be used to analyse the internal disease burden. A protocol for this is detailed in Machado-Wood et al. (2021), but briefly entails gDNA extraction followed by qPCR, with species-specific primers for quantification of entire gDNA.
DON mycotoxin analysis
The production of the DON mycotoxin by Fusarium graminearum can be measured as described in Cuzick, Urban and Hammond-Kosack (2008) using a commercially available enzyme-linked immunosorbent assay (ELISA). Ensure that the kit purchased matches the designated Fg chemotype of the strain to be used in the experiment; the WT reference strain PH-1 is a 15-ADON producer, an ester of deoxynivalenol (Miller, Taylor and Greenhalgh, 1983).


