An axenic plant culture system for Sporobolus alterniflorus
Elena L. Peredo, Suzanne M Thomas, Zoe Cardon
Abstract
Sporobulus alterniflorus is a native grass that dominates intertidal salt marsh platforms along thousands of miles of the U.S. East and Gulf coasts. This grass exhibits tolerance to a broad range of abiotic stresses, including high salinity, anoxia, and high concentrations of toxic sulfide.
This species plays a critical role as a keystone plant in many salt marsh ecosystems. Its three-dimensional physical structure serves as a resource that fuels food webs both above and below ground, while its presence also modifies the environment for other components of the ecosystem.
The in vitro culturing of S. alterniflorus is often hindered by the difficulty of removing bacterial and fungal contaminants from its surfaces and tissues. Rhizomes, although easy to culture, are hollow structures heavily colonized by bacteria. Similarly, seeds are frequently colonized by fungi. An elegant alternative approach previously described in the literature involves generating somatic embryos from immature inflorescences. However, this protocol is complex and time-consuming.
In this study, we present a protocol for generating axenic S. alterniflorus plants derived from seeds. Our method offers several advantages, including high efficiency and a notable simplification compared to the current protocols used to establish vitroplants from somatic embryos.
Before start
Before completing any of the steps, you consult with your institution about any procedures related to soil processing and disposal.
Steps
Seed storage and germination
The plant material in this protocol is seedlings germinated ex vitro. While optional, we recommend autoclaving the soil and completing surface sterilization of the seeds to minimize the contaminants in the samples. Alternatively, seeds can be germinated in open containers.
Seed Storage
- In the field, separate mature seeds from flower stalks.
- Transfer to a clean zip lock bag.
- Add water to maintain the seeds always wet.
- Store at 4°C, in the dark.
- Properly stored seeds should be viable for 6-12 months.
Preparation of containers for seed germination
- Fill autoclavable containers to 1/4 of their volume with soil.
- Add water until the soil is completely saturated.
- Cover the containers' openings with aluminum foil.
- Autoclave for 1 h.
- After 48h, repeat the autoclaving step.
- Let containers cool down to room temperature before sowing the seeds.
Seed preparation and germination (surface sterilization)
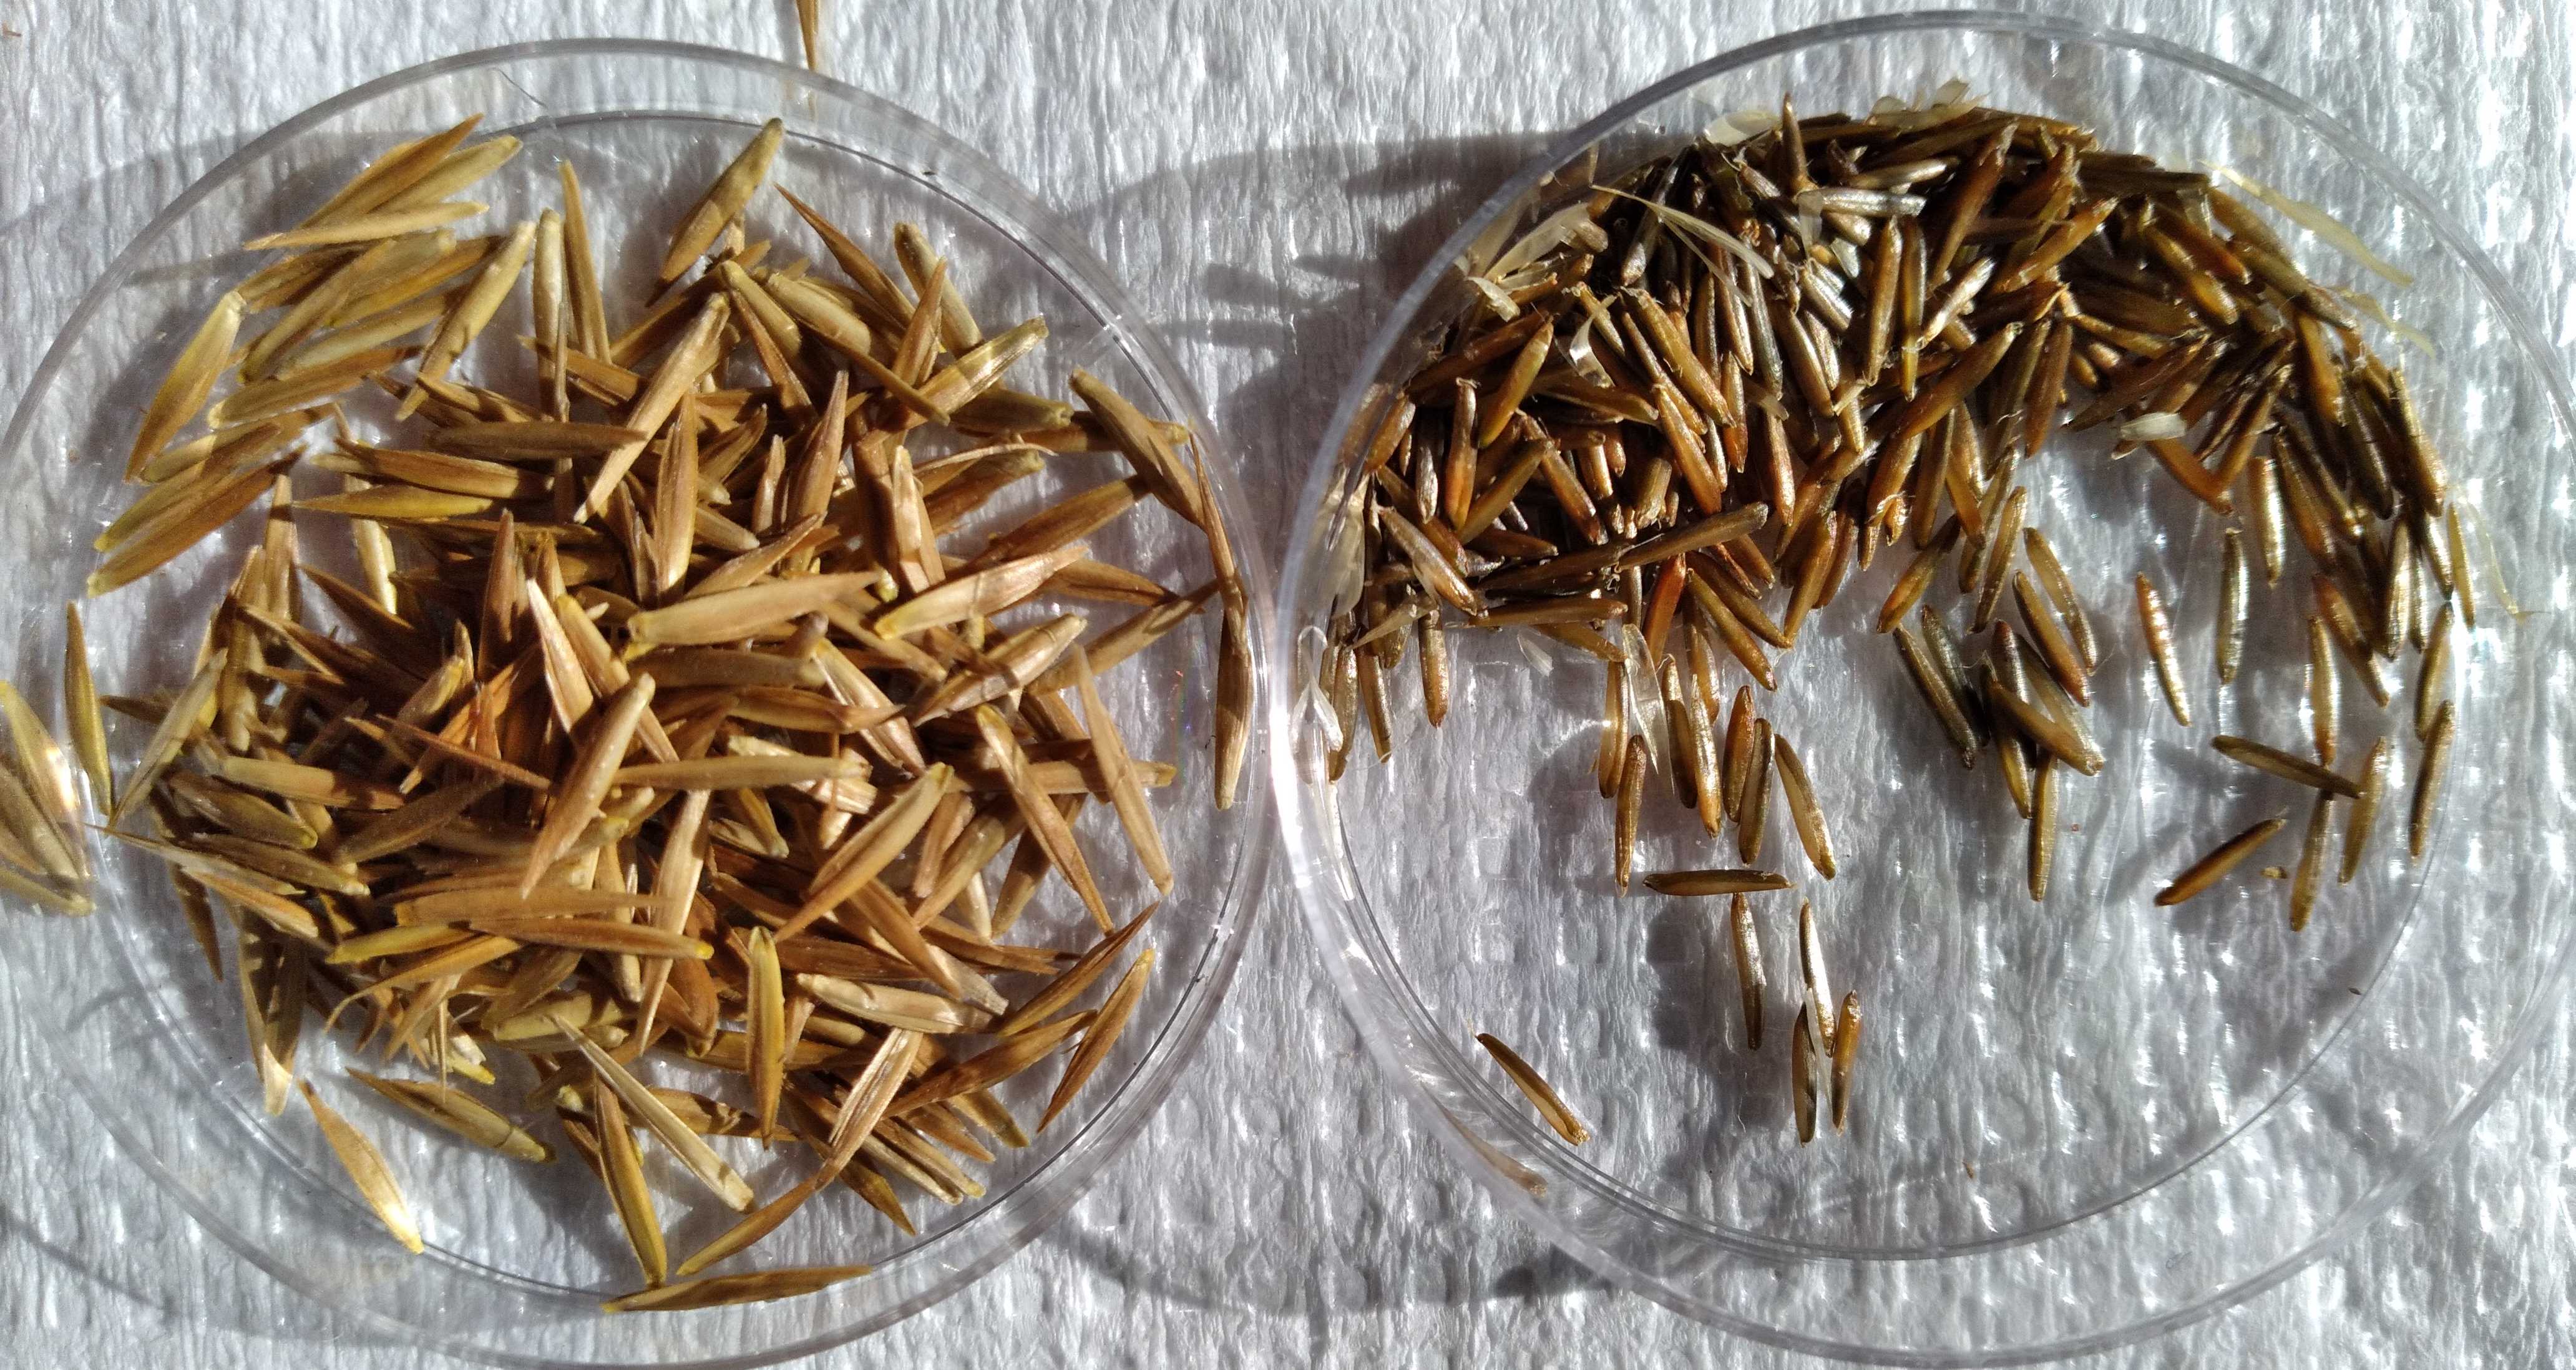
- Place seeds (with the glumes, see Fig.1) in a conical tube (50 mL)
- Add 40 mL of a dilution of commercial bleach to 20%.
- Transfer tubes to a tissue culture hood.
- After 20 minutes, remove the bleach solution.
- Add 40 mL of autoclaved distilled water and incubate 5 minutes.
- Remove the water, and repeat the rinse step two more times.
- Still in the hood, open the autoclaved soil containers and place seeds in the soil.
- Cover.
- Place containers in an illuminated culture chamber with a 16h light: 8h dark regimen, light intensity of ~ 100 µE, and a temperature of 20°C.
- Seedlings will germinate 1-2 weeks later.
DO NOT ALLOW THE SOIL TO DRY. Add autoclaved water as needed.
Removal of root system
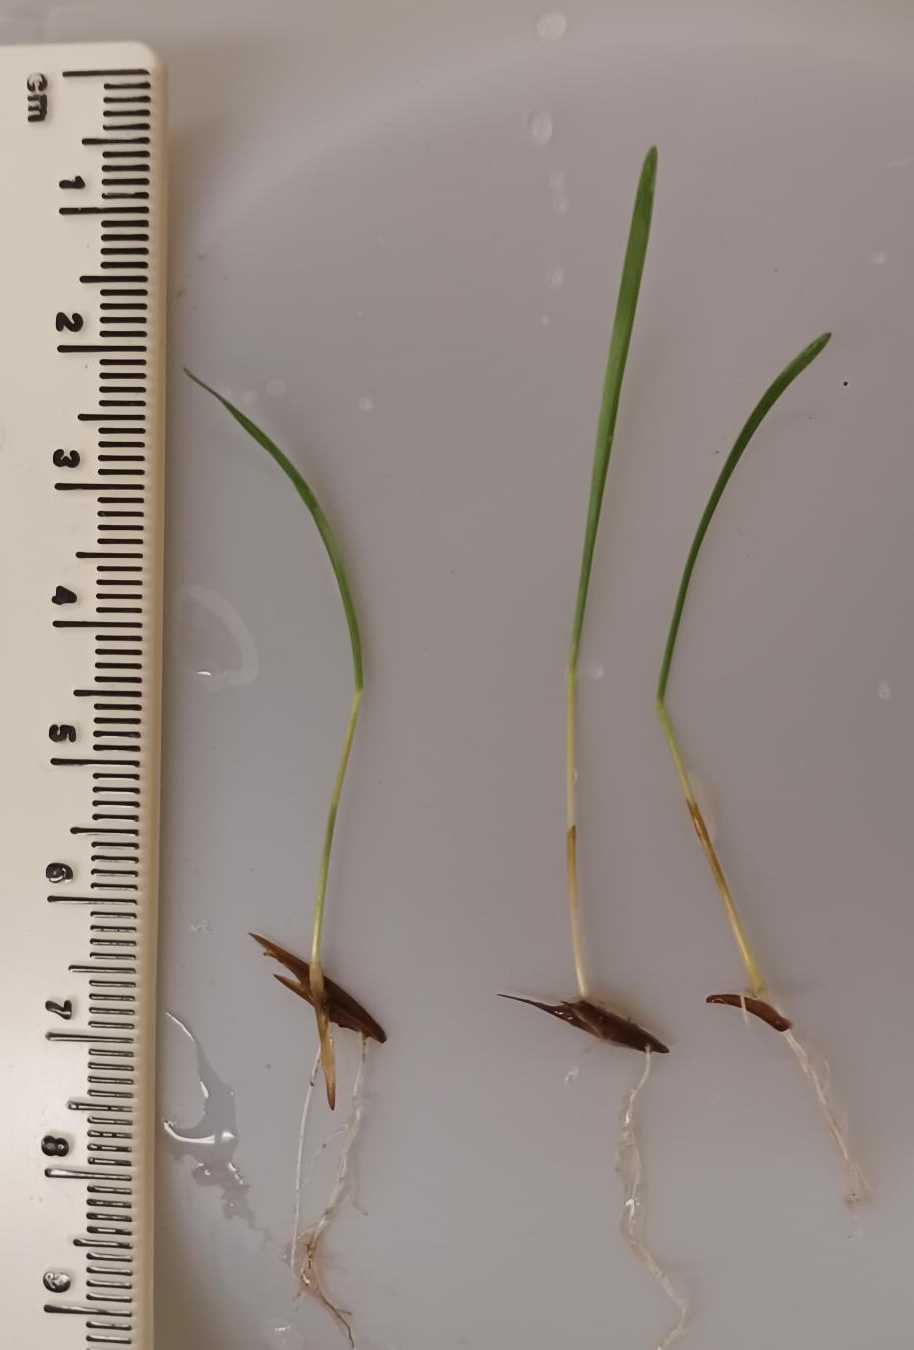
Seven to 10 days after germination, seedlings should have well-developed aerial and root sections. The aerial part should be around 5 cm, robust-looking, and deep green. The radicle should emerge from the opposite end of the seed. Additional roots, developed from the crown area, might or not be present.
Remove seedlings from the soil.
- Gently pull seedlings from the soil.
- Place in autoclaved, room temperature water.
- Remove dirt.
- Place seedlings in a clean working area.
#尊敬的用户,由于网络监管政策的限制,部分内容暂时无法在本网站直接浏览。我们已经为您准备了相关原始数据和链接,感谢您的理解与支持。
<iframe width="560" height="315" src="https://www.youtube.com/embed/WH3_Qu8ydww?controls=0" title="YouTube video player" frameborder="0" allow="accelerometer; autoplay; clipboard-write; encrypted-media; gyroscope; picture-in-picture; web-share" allowfullscreen=""></iframe>
#尊敬的用户,由于网络监管政策的限制,部分内容暂时无法在本网站直接浏览。我们已经为您准备了相关原始数据和链接,感谢您的理解与支持。
<iframe width="560" height="315" src="https://www.youtube.com/embed/WH3_Qu8ydww?controls=0" title="YouTube video player" frameborder="0" allow="accelerometer; autoplay; clipboard-write; encrypted-media; gyroscope; picture-in-picture; web-share" allowfullscreen></iframe>
Remove the radicle from the seedling
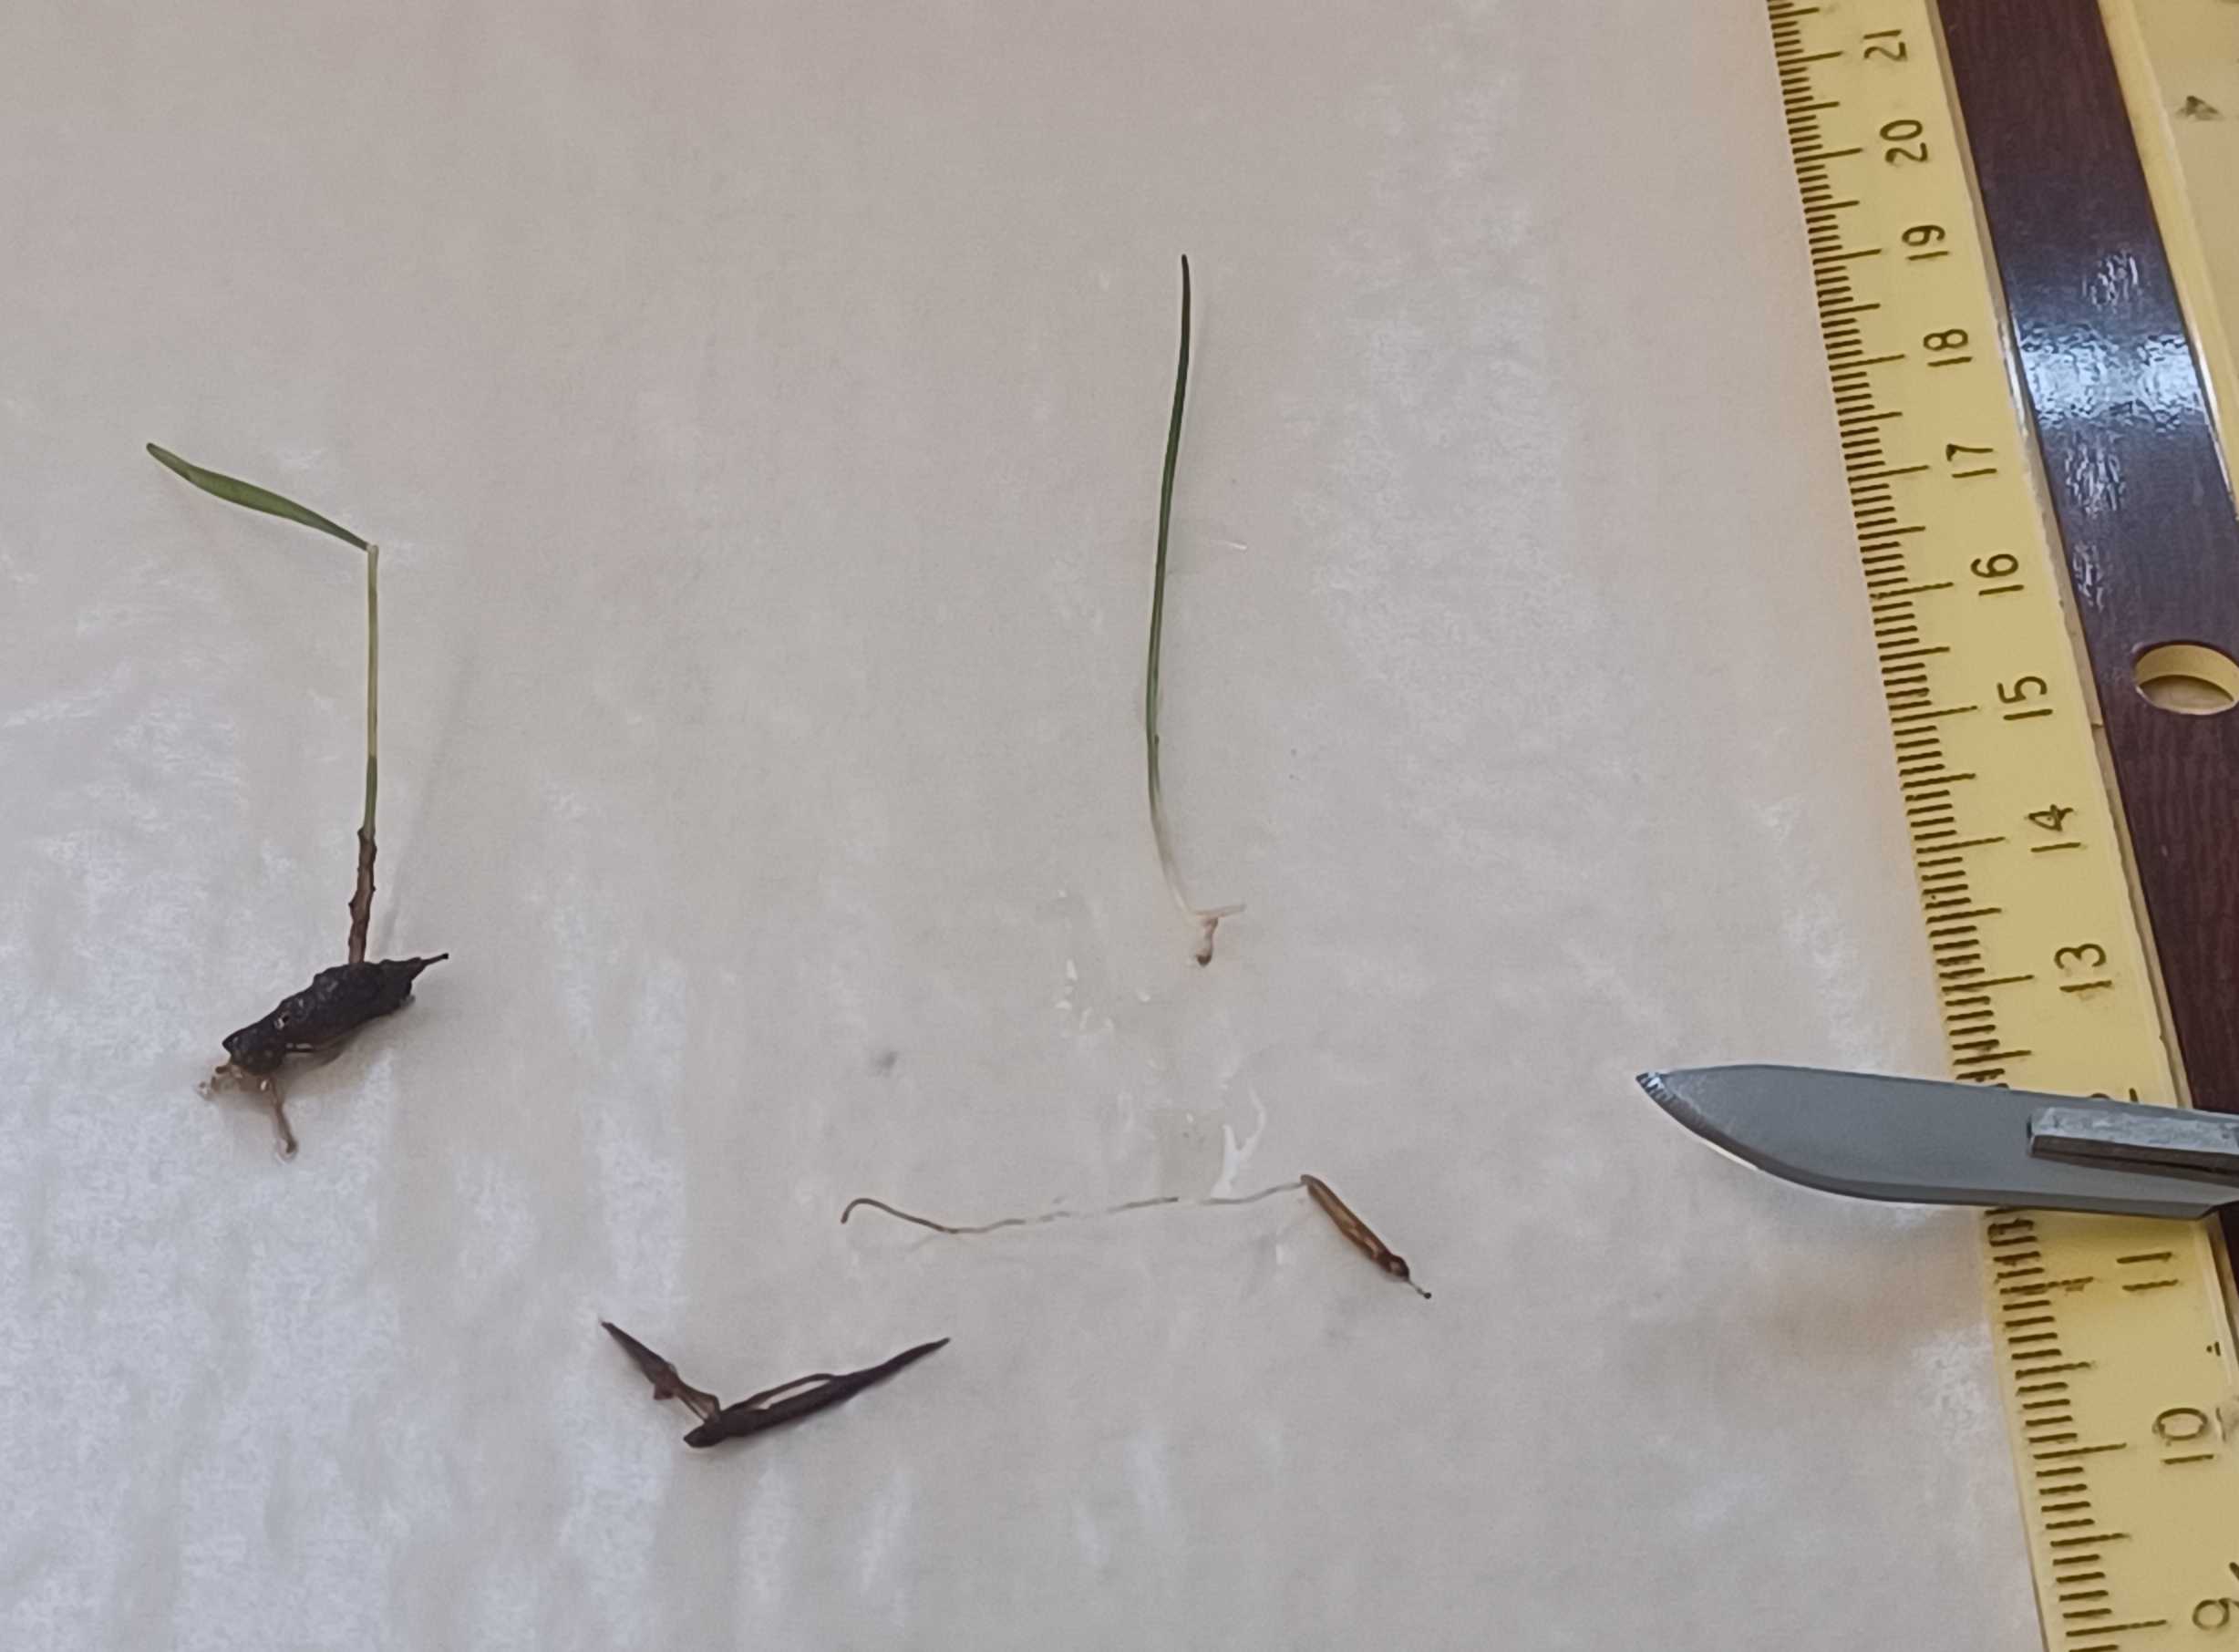
The primary root and endosperm of the seedlings are carriers of endogenous fungal contaminants.
- Use tweezers to remove the external covers of the seed, seed endosperm, and primary root.
- Use a clean blade to remove any root tissue under the crown area.
- Maintain, if present, the secondary roots formed in the crown area.
#尊敬的用户,由于网络监管政策的限制,部分内容暂时无法在本网站直接浏览。我们已经为您准备了相关原始数据和链接,感谢您的理解与支持。
<iframe width="560" height="315" src="https://www.youtube.com/embed/pAjMeHl4AyU" title="YouTube video player" frameborder="0" allow="accelerometer; autoplay; clipboard-write; encrypted-media; gyroscope; picture-in-picture; web-share" allowfullscreen></iframe>
Surface sterilization of trimmed seedlings
Reagents
50 mL conical tubes.
20% solution of commercial bleach.
Autoclaved distilled water.
Surface sterilization
- Place 10-15 trimmed seedlings in a 50 mL conical tube.
- Add 40 mL of a 10% solution of commercial bleach.
- Cap the tubes.
- Mix gently.
- Incubate at room temperature for 20 minutes.
#尊敬的用户,由于网络监管政策的限制,部分内容暂时无法在本网站直接浏览。我们已经为您准备了相关原始数据和链接,感谢您的理解与支持。
<iframe width="560" height="315" src="https://www.youtube.com/embed/b8LWLeOTnTU" title="YouTube video player" frameborder="0" allow="accelerometer; autoplay; clipboard-write; encrypted-media; gyroscope; picture-in-picture; web-share" allowfullscreen></iframe>
Rinsing
- In the hood, pour out the bleach solution.
- Remove any excess bleach solution by rinsing the tube with autoclaved distilled water.
- Add 30-40 mL of autoclaved, room-temperature distilled water.
- Gently mix.
- Incubate for 5 minutes.
- Rinse the trimmed seedlings 2 more times in autoclaved, room-temperature distilled water.
#尊敬的用户,由于网络监管政策的限制,部分内容暂时无法在本网站直接浏览。我们已经为您准备了相关原始数据和链接,感谢您的理解与支持。
<iframe width="560" height="315" src="https://www.youtube.com/embed/bC5T9st1RTc" title="YouTube video player" frameborder="0" allow="accelerometer; autoplay; clipboard-write; encrypted-media; gyroscope; picture-in-picture; web-share" allowfullscreen=""></iframe>
#尊敬的用户,由于网络监管政策的限制,部分内容暂时无法在本网站直接浏览。我们已经为您准备了相关原始数据和链接,感谢您的理解与支持。
<iframe width="560" height="315" src="https://www.youtube.com/embed/bC5T9st1RTc" title="YouTube video player" frameborder="0" allow="accelerometer; autoplay; clipboard-write; encrypted-media; gyroscope; picture-in-picture; web-share" allowfullscreen></iframe>
Inducing new roots in surface sterilized trimmed seedlings
Root induction
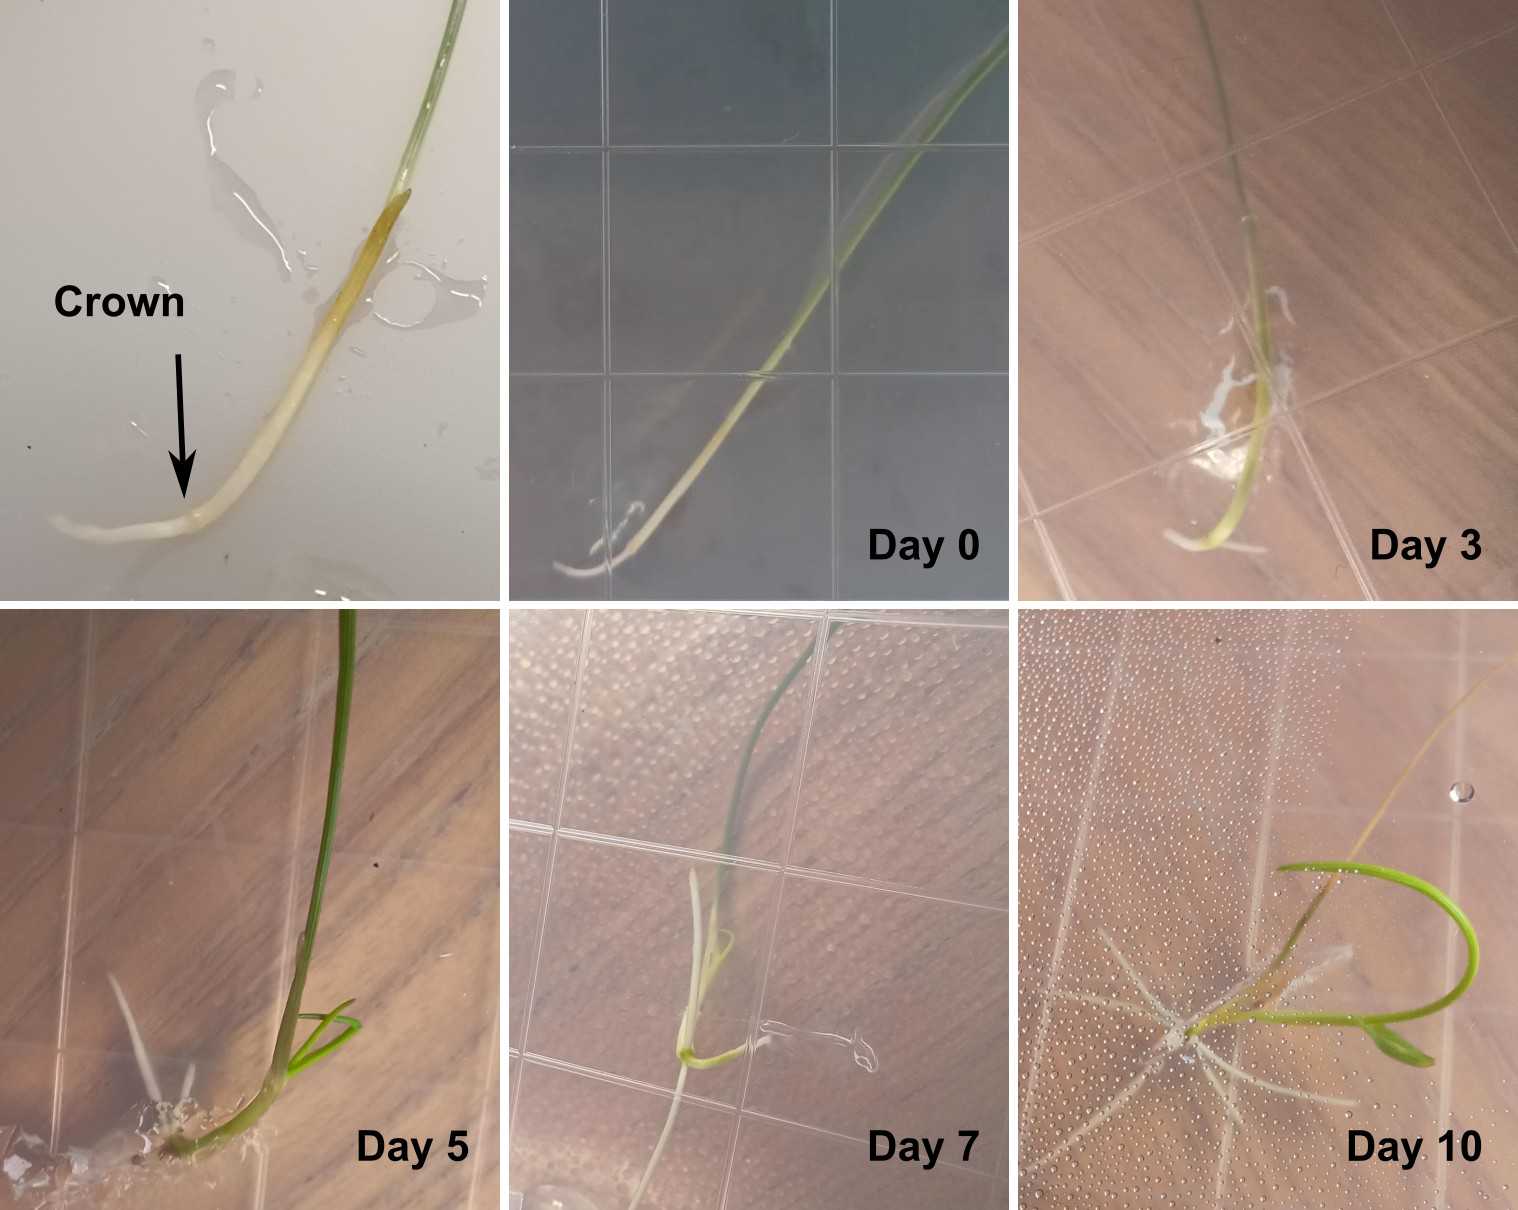
We have removed the radicle of the seedlings to remove the endogenous fungal contaminant. To successfully grow the seedling into mature plantlets we need to induce a new root system. We will induce direct organogenesis in the crown area of the seedling using a combination of hormones.
Root induction medium (prepare in advance)
Plant culture medium (MS)
This culture medium is a modification of the Murashige and Skoog (1962) and can be bought as dry powder from Phytotech Labs (reference M527).
- Add 4.43 g of powder to a 1L autoclave bottle.
- Add 30 g/L of sucrose for a final concentration of 3%.
- Add double distilled water for a final volume of 1L.
- Adjust the pH to 5.8.
- Add 8 g/L of agar.
- Autoclave for 40 minutes. In the hood, add ~25 mL into as many 90 mm sterile Petri dishes as needed.
Transfer surface sterilized seedlings to root induction medium
- Gently remove each seedling from the conical tube (from the rinsing step).
- Place the seedling on the surface of agar plates with root induction medium (see above for the recipe).
- Make sure the seedling, and especially the crown area, is in contact with the root induction medium.
- Seal the petri dish with parafilm.
#尊敬的用户,由于网络监管政策的限制,部分内容暂时无法在本网站直接浏览。我们已经为您准备了相关原始数据和链接,感谢您的理解与支持。
<iframe width="560" height="315" src="https://www.youtube.com/embed/TCper5h1qgg" title="YouTube video player" frameborder="0" allow="accelerometer; autoplay; clipboard-write; encrypted-media; gyroscope; picture-in-picture; web-share" allowfullscreen=""></iframe>
#尊敬的用户,由于网络监管政策的限制,部分内容暂时无法在本网站直接浏览。我们已经为您准备了相关原始数据和链接,感谢您的理解与支持。
<iframe width="560" height="315" src="https://www.youtube.com/embed/TCper5h1qgg" title="YouTube video player" frameborder="0" allow="accelerometer; autoplay; clipboard-write; encrypted-media; gyroscope; picture-in-picture; web-share" allowfullscreen></iframe>
Transfering re-rooted seedlings into culture vessels
The seedlings re-rooted in the Petri dishes are now ready to be grown in the large culture vessels.
Prepare the plant-growing medium
The plant medium is prepared as the root induction medium in step 4.1. The only modification is that instead of autoclaving the medium, we will first dissolve the agar and then add the medium to the culturing vessels for autoclaving.
- Autoclave for 15 minutes to dissolve the agar.
- Place 150 mL of the root induction medium (step 4.1) into 1 L culture vessels.
- Close the culture vessels.
- Autoclave for 30 minutes to sterilize the media.
Transfer the rooted seedlings into the culture vessels.
- Using forceps in the hood, remove the seedling from the petri dish.
- Place the seedling in the 1 L culture vessel.
- Gently push the seeds into the media.
- Grow the plants under a light regime of 16 h light-8 h dark and a light intensity of ~200 µE.
- The seedlings will form new leaves and roots, and the plantlets will develop new lateral shoots and rhizomes that could be used for in vitro multiplication.
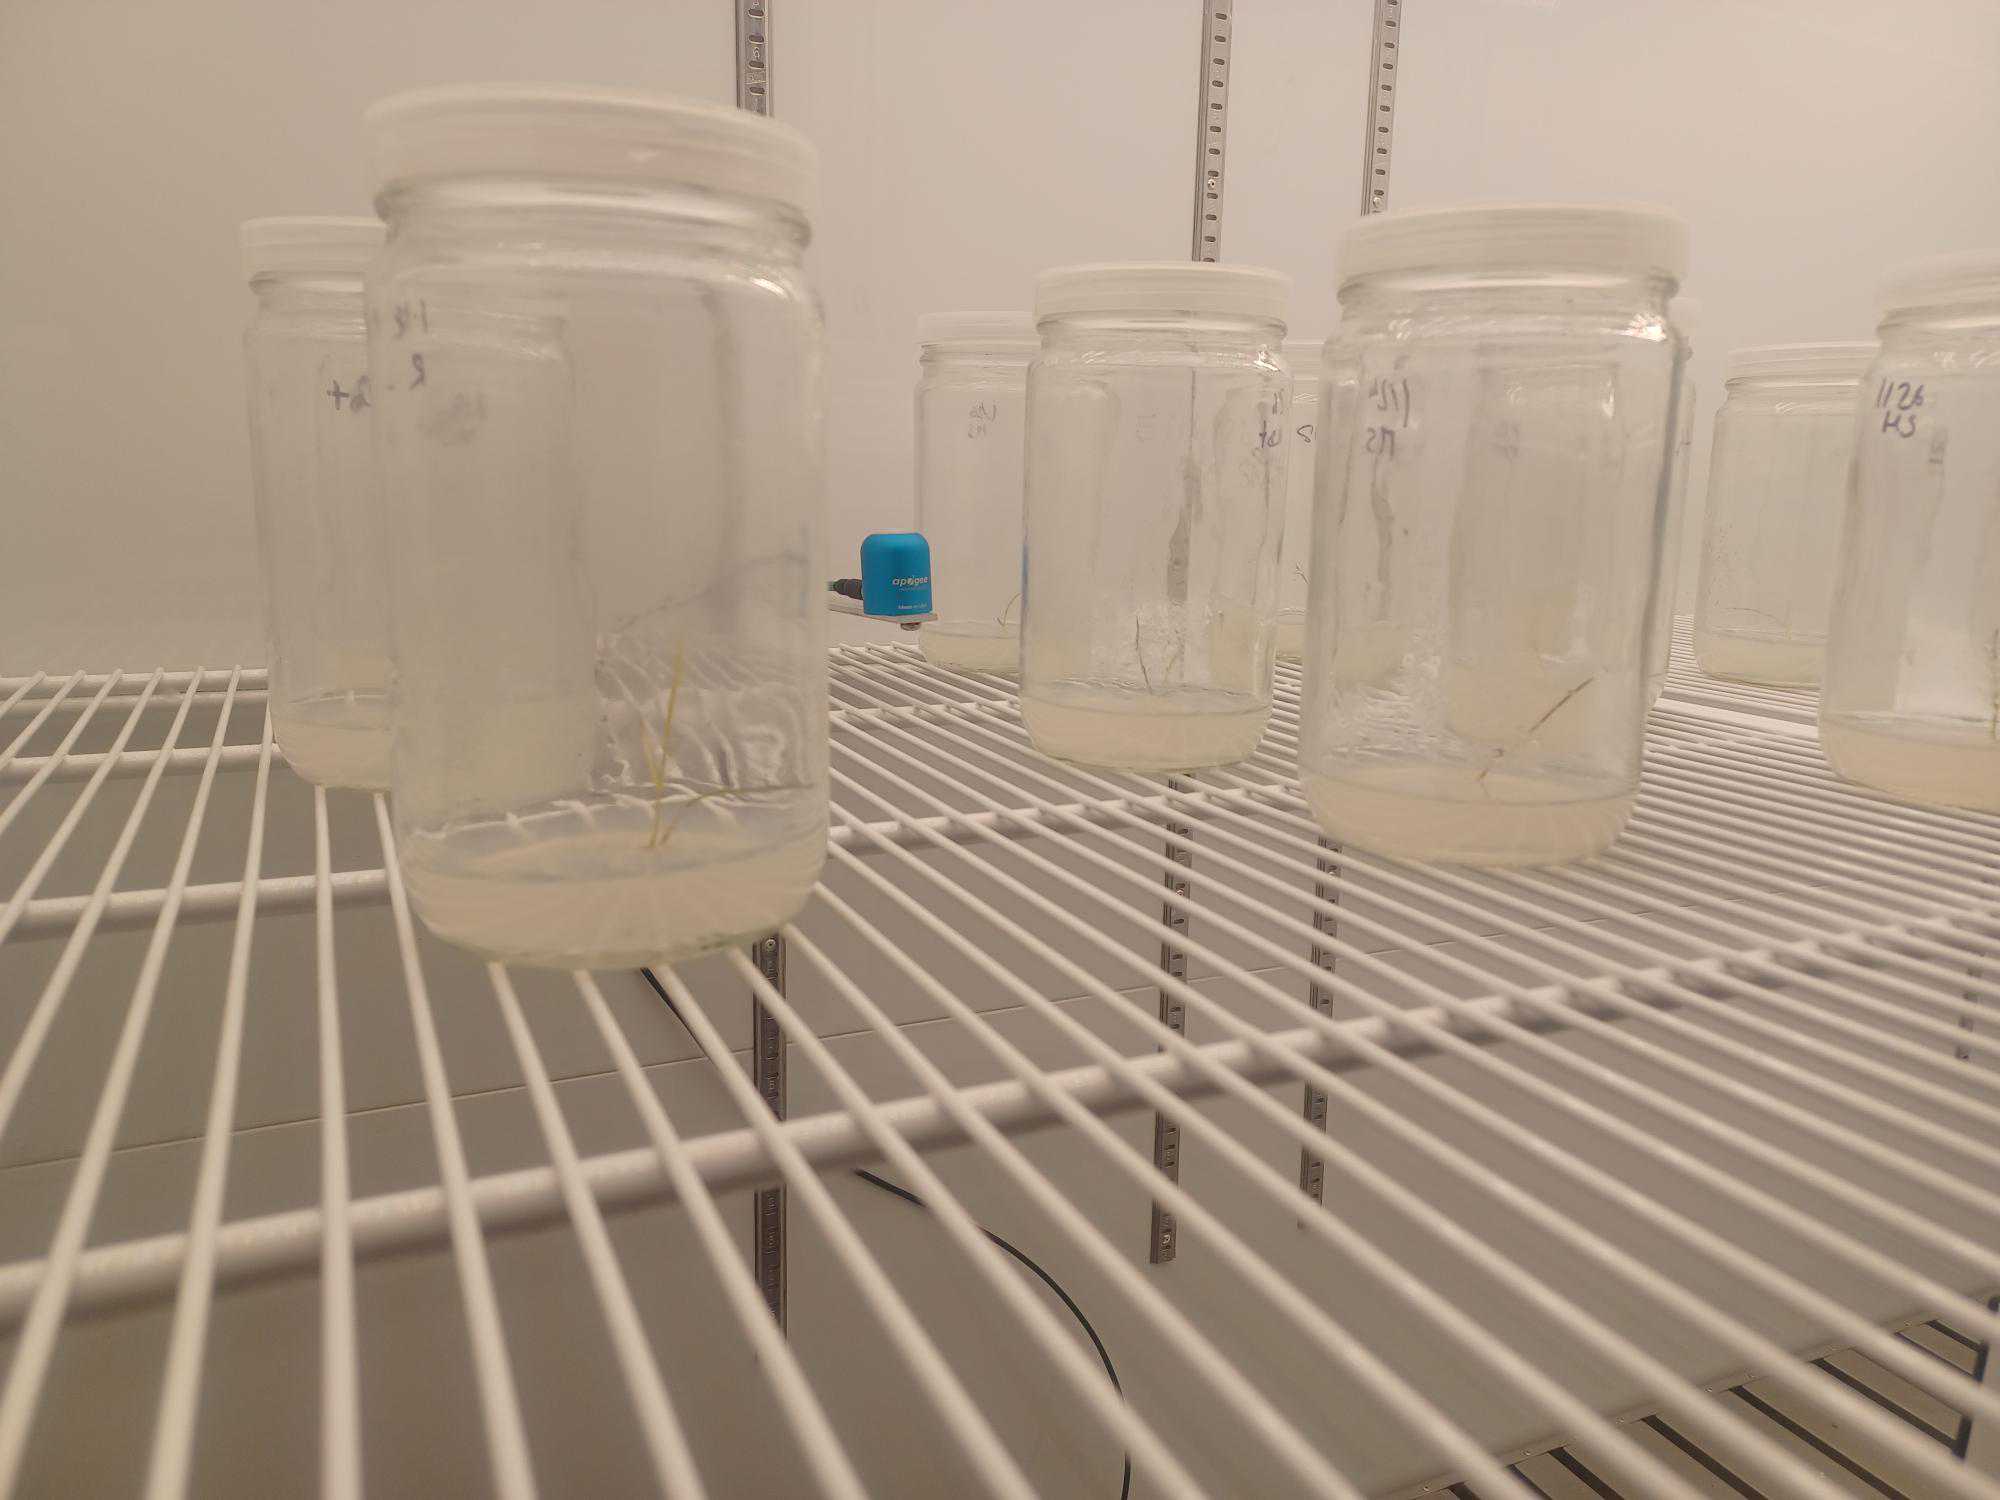
Fig. 5- Re-rooted seedlings growing in the culture chamber.
In vitro propagation of Sporobolus alterniflorus
Once plants have produced new shoots, we can easily separate each of them from the mother plant and place them in new culturing vessels. The new lateral shoots developed from the main shoot also have a root system. Once separated they will develop into full adult vitroplants in 4-6 weeks. Even shoots as small as 1-2 cm can grow into full vitroplants as long as they have roots. Rhizomes can also be used as explants and they will also develop into complete plants.
At this stage, you can continue growing the vitroplants in the modified MS media from step 4.1 or transfer the plants to a hormone-free medium, MS medium (3% sucrose, pH 5.8, agar 0.7%).
#尊敬的用户,由于网络监管政策的限制,部分内容暂时无法在本网站直接浏览。我们已经为您准备了相关原始数据和链接,感谢您的理解与支持。
<iframe width="560" height="315" src="https://www.youtube.com/embed/FFf9bLiZ5Xw" title="YouTube video player" frameborder="0" allow="accelerometer; autoplay; clipboard-write; encrypted-media; gyroscope; picture-in-picture; web-share" allowfullscreen></iframe>

