OT-2 Counter-Selection
Ana Mariya Anhel, Lorea Alejaldre, Ángel Goñi-Moreno
Abstract
This protocol is meant to select the samples from one or more source plate(s) that has 2 different selecting conditions: one condition gives higher values and the other lower values. From these selected samples this protocol create final plates with the samples alone or mixed with different reactive(s).
The instructions for running this protocol are a python script for an Opentrons 2 robot and a excel file with several variables making the protocol modular to reactives, volumes of transfer, type of plates, etc.
In our lab we are selecting samples by their after night OD in 2 different antibiotics and create PCR plates (with water) and 2 stock plates (with glycerol), but it can be used with other selection characteristics such as expression of GFP and with other types of reactives.
This protocol description corresponds to the entry LAP-ColonyCounterSelection-OT2-1.0.0 of the LAP repository
Before start
Note that this protocol needs 2 values to do a selection for each source plate
Steps
Files Preparation
Preparing Customized Template
Preparing the template (a .xlsx) with the specific variables for each experiment.
Here we attach a template of the variable file with several sheets and a PDF file explaining each variable:
- GeneralVariables: variables related mainly to the labware that is going to be used
- PipetteVariables: variables related to the pipettes that are going to be used
- PerPlateVariables: variables related to the specifications of each source plate
- Sheet(s) for comparable values (OD, fluorescence, etc): values that will be compared against the threshold established in the PerPlateVariables sheet -> Not in the template but should be present in the final file
Fill the template with the corresponding values
Store it with the name VariablesCounterSelection.xlsx
Transferring file to Robot
Transfer the VariablesCounterSelection.xlsx to the directory /data/user_storage of the OT robot
that we are going to use to perform the protocol.
Here, we present a summary of how to transfer the files in 3 Operative Systems: Windows, MacOS and Linux
MacOS/Linux
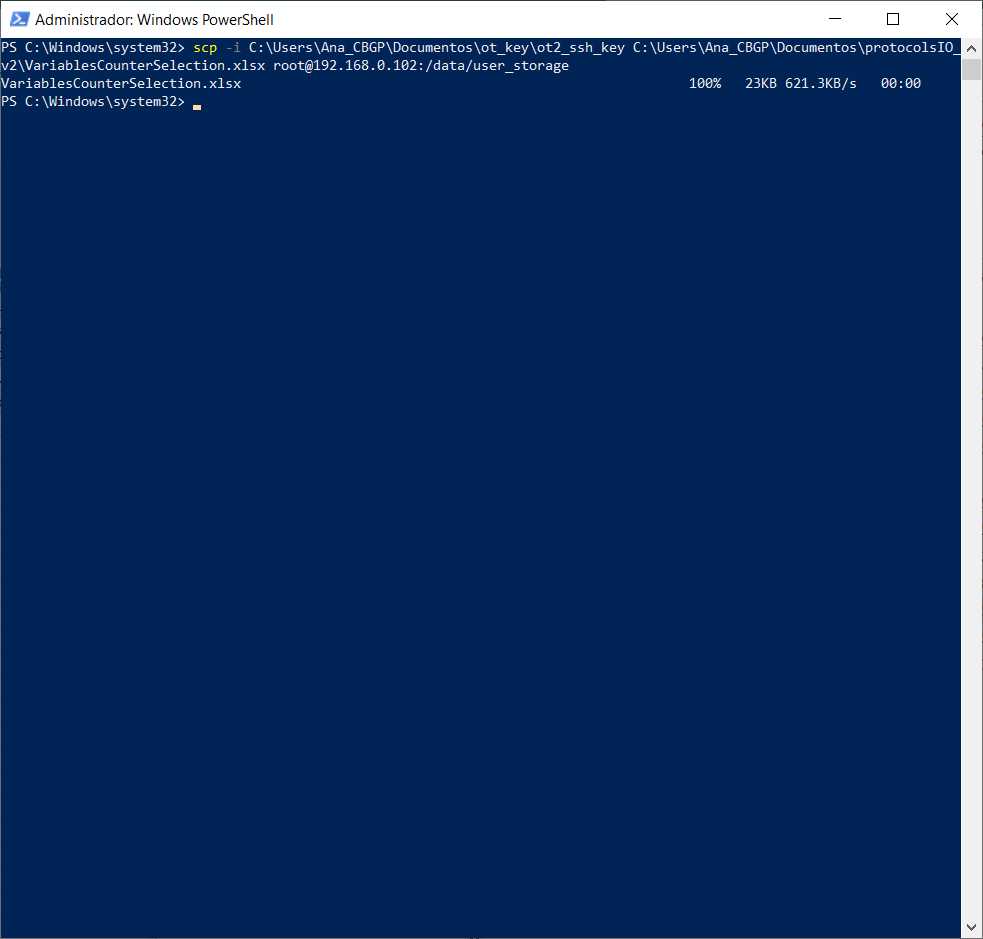
We will use the command line with scp to transfer the file VariablesCounterSelection.xlsx to the OT system.
We need to perform the following command
#Passing Files to OT
scp -i [ot_key] [file] root@[IP_OT]:/data/user_storage
#Transferring files to OT (MacOS 13 and 14)scp -Oi [ot_keypath] [file path] root@[OP_robot]:/data/user_storageWindows
There are several ways to send files from a Windows to a Linux (for example, with a virtual machine or Windows Powershell in the latest versions of Windows).
Here, we will use FileZilla (https://filezilla-project.org/download.php?type=client).
Go to File -> Site Manager -> New Site -> Change Protocol to SFTP . Then, introduce in Host the OT IP, change the Logon Type to key file, change User to root and give the directory where the OT key is. It should look something like this
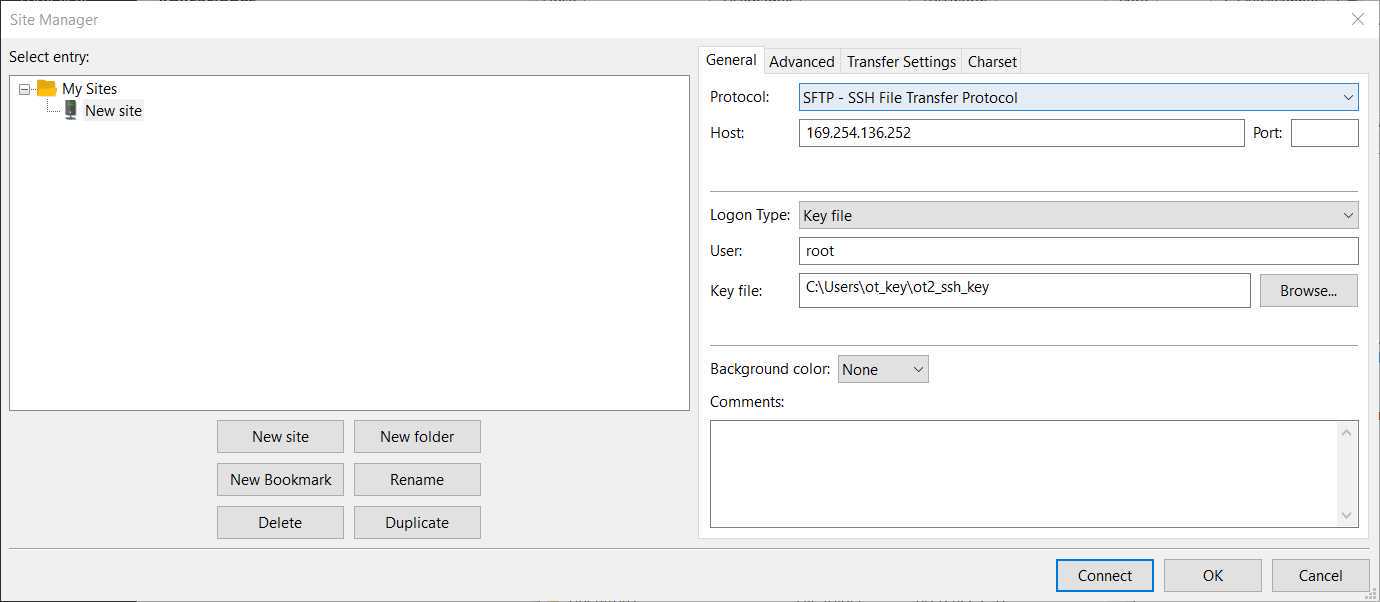
Then press Connect , and we will have a connection between our computer and the robot.
After this connection, we should be able to move the file VariablesCounterSelection.xlsx (in our computer) to the directory /data/user_storage in the robot.
This method can be used as well in some Linux and MacOS
Adding the custom labware
There is only a need to do this step when labware that you are using is not OT official or is not included in the OT app
Creation of .json file
The description file can be obtained by describing the labware dimensions at https://labware.opentrons.com/create/
Uploading file to the OT App
In the OT app, we need to perform the following route: Labware -> Import -> Choose File -> Select file we have created in step 3.1
Transfer labware files to robot
If you are using the entry LAP-ColonyCounterSelection-OT2-1.0.0 or LAP-ColonyCounterSelection-OT2-1.1.0 and custom labware , an additional step is needed, which is transferring a folder with the custom labware.
We need to create for our custom labware a folder with the API name containing the description file (.json) called 1.json and then transfer that folder to the robot's folder /data/labware/v2/custom_definitions/custom_beta in a similar way as in the Step 2 but with the difference that is a directory that needs to be transferred and not a file.
#Transferring the custom labware to OT (Linux)
scp -i [ot_key] -r [directory_custom_labware] root@[IP_OT]:/data/labware/v2/custom_definitions/custom_beta
Prepare Robot OS
Install needed packages
This script needs the package openpyxl , which is not installed by default in the OT-2 robots
Connect to the robot
to find the IP of the robot in which you want to run the script
To connect to the robot, you can do it via ssh with the following command
#Connect to Linux based OT via ssh
ssh -i [path ot_key] root@[Robot_IP]
```In Windows, you can do this command in Windows Powershell


<Note title="Citation" type="success" ><span>If the connection has been successful you should obtain a screen similar to the following image</span><span></span><img src="https://static.yanyin.tech/literature_test/protocol_io_true/protocols.io.5qpvor5xdv4o/pd89bxsu710.jpg" alt="Drawing obtained when entering an OT-2 system" loading="lazy" title="Drawing obtained when entering an OT-2 system"/></Note>
Install the package
Once inside the robot's system, you need to run the following command
#Install openpyxl package (Linux 4.14.74-v7)
pip install openpyxl
Running Protocol
Load script in OT-App
Now that we have transferred the variable files to the robot, we can load the script and run it in the selected robot
Software
| Value | Label |
|---|---|
| Opentrons App | NAME |
| Windows >=10, Mac >=10 | OS_NAME |
| , Ubuntu >=12.04 | OS_VERSION |
| https://opentrons.com/ot-app/ | REPOSITORY |
| Opentrons | DEVELOPER |
Load the script in the OT App
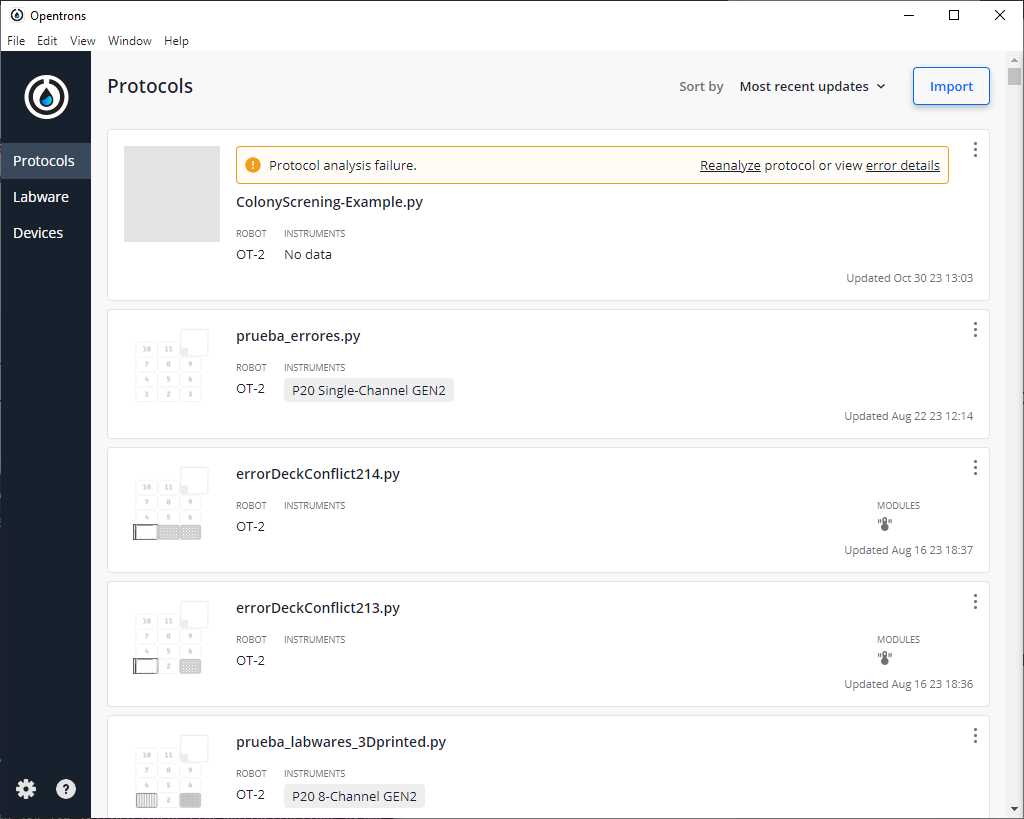
Protocols -> Import -> Drag Python script
Software
| Value | Label |
|---|---|
| LAP Repository | NAME |
| www.laprepo.com | REPOSITORY |
| https://biocomputationlab.com/ | DEVELOPER |
Select Robot to Perform Script
Click in the protocol -> Start setup -> Choose the OT where the file VariablesCounterSelection.xlsx is -> Proceed To Setup
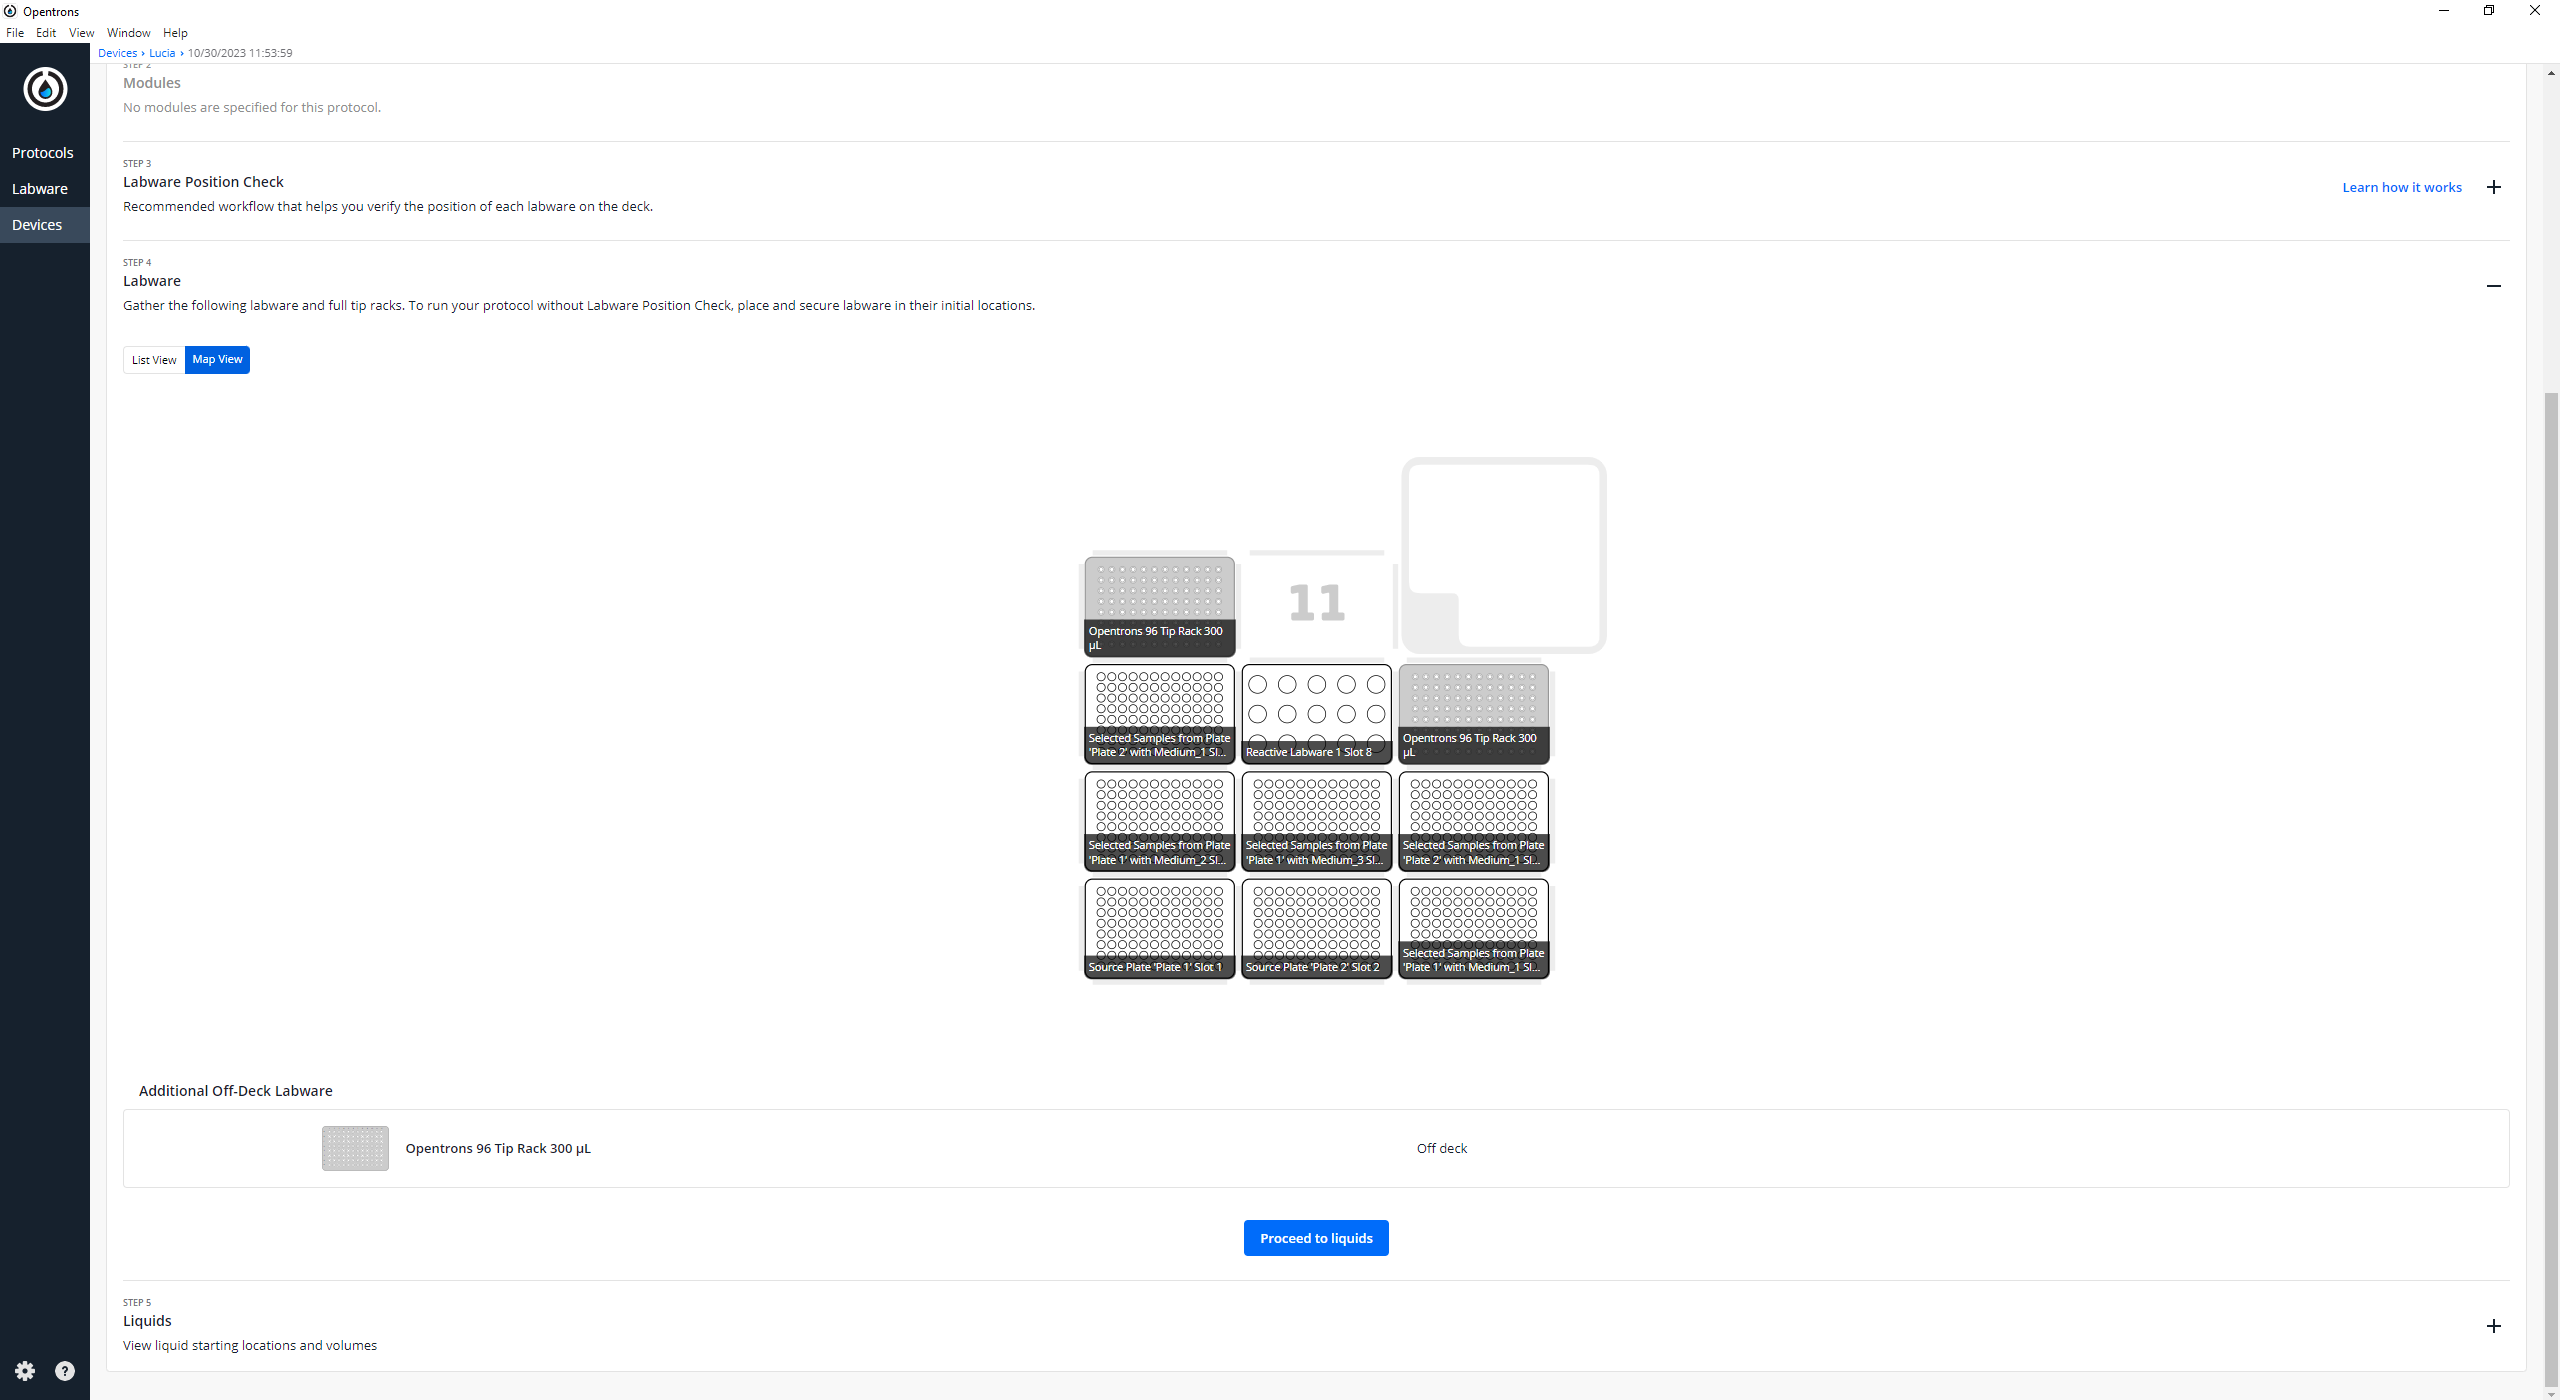
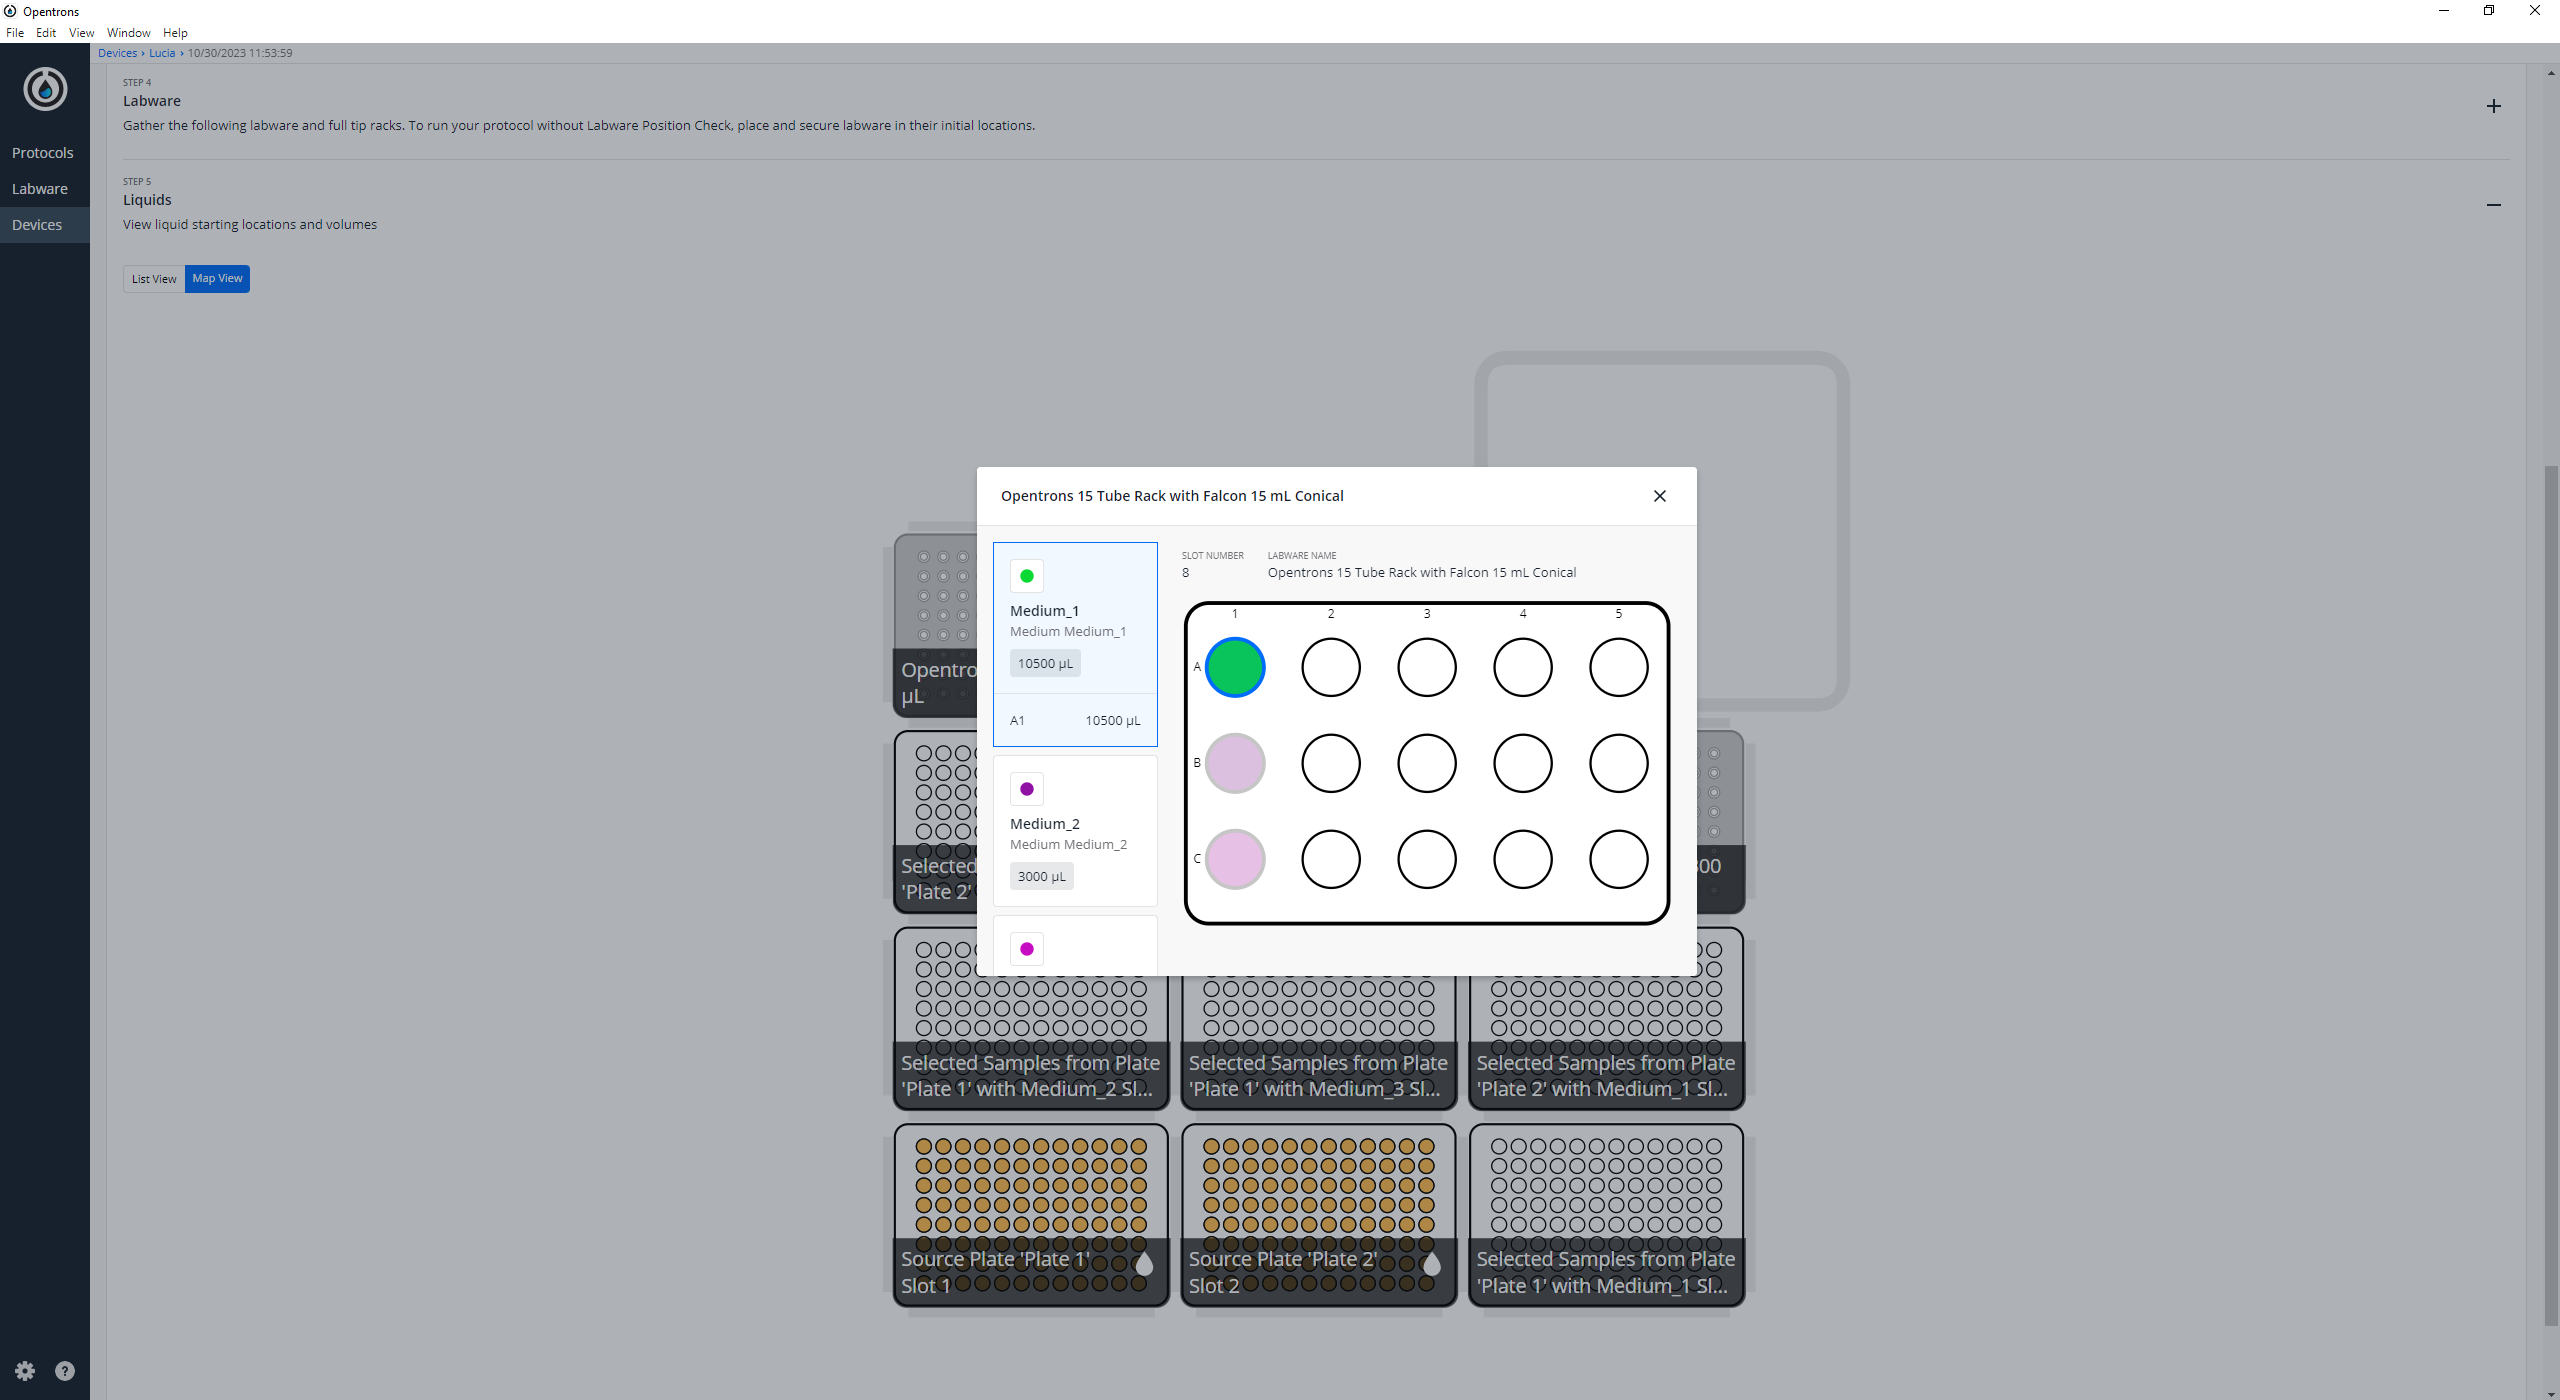
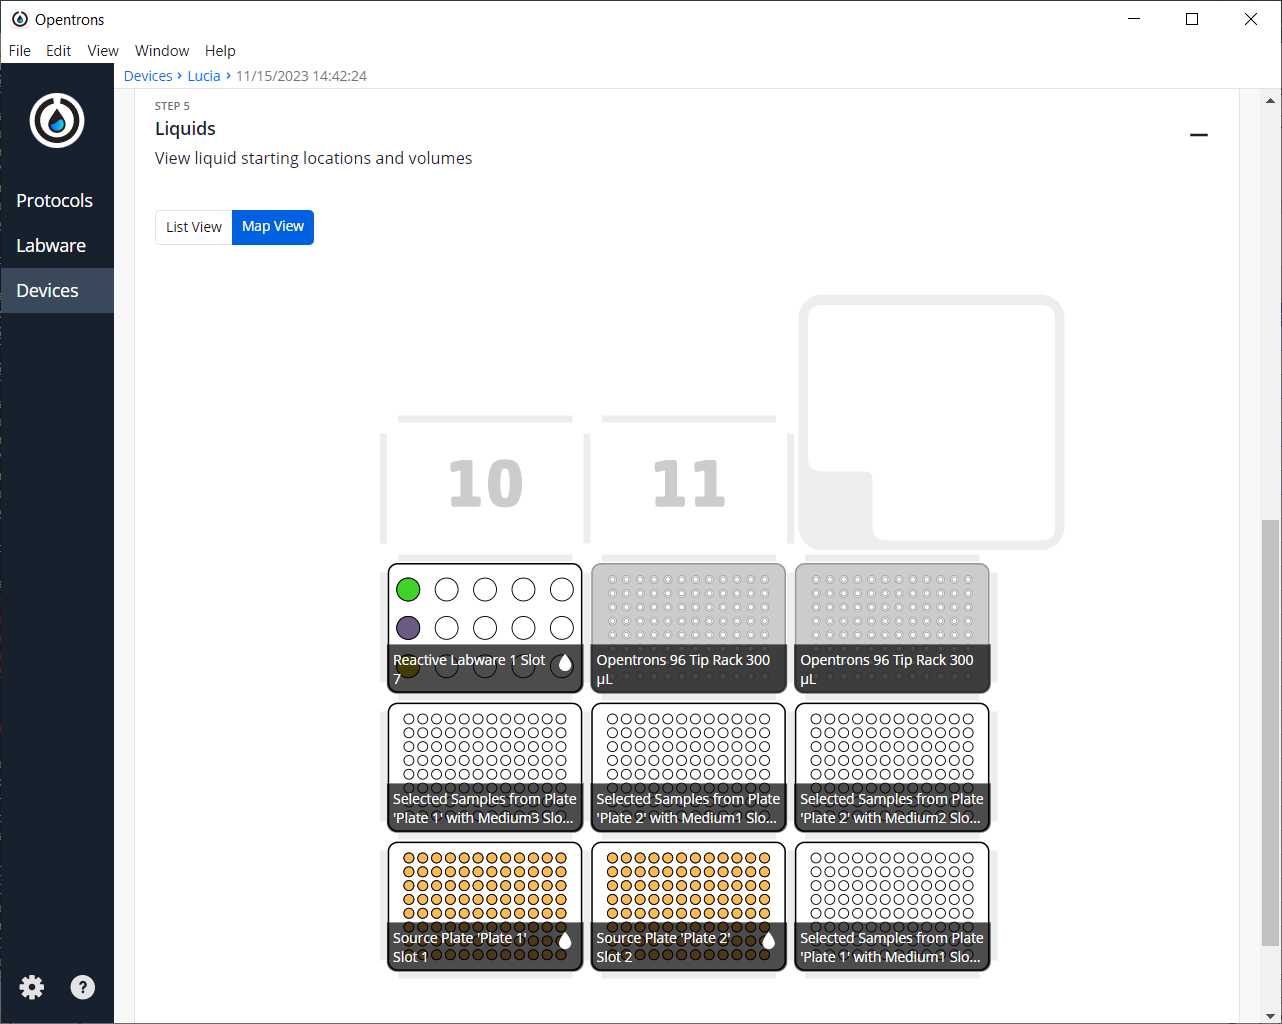
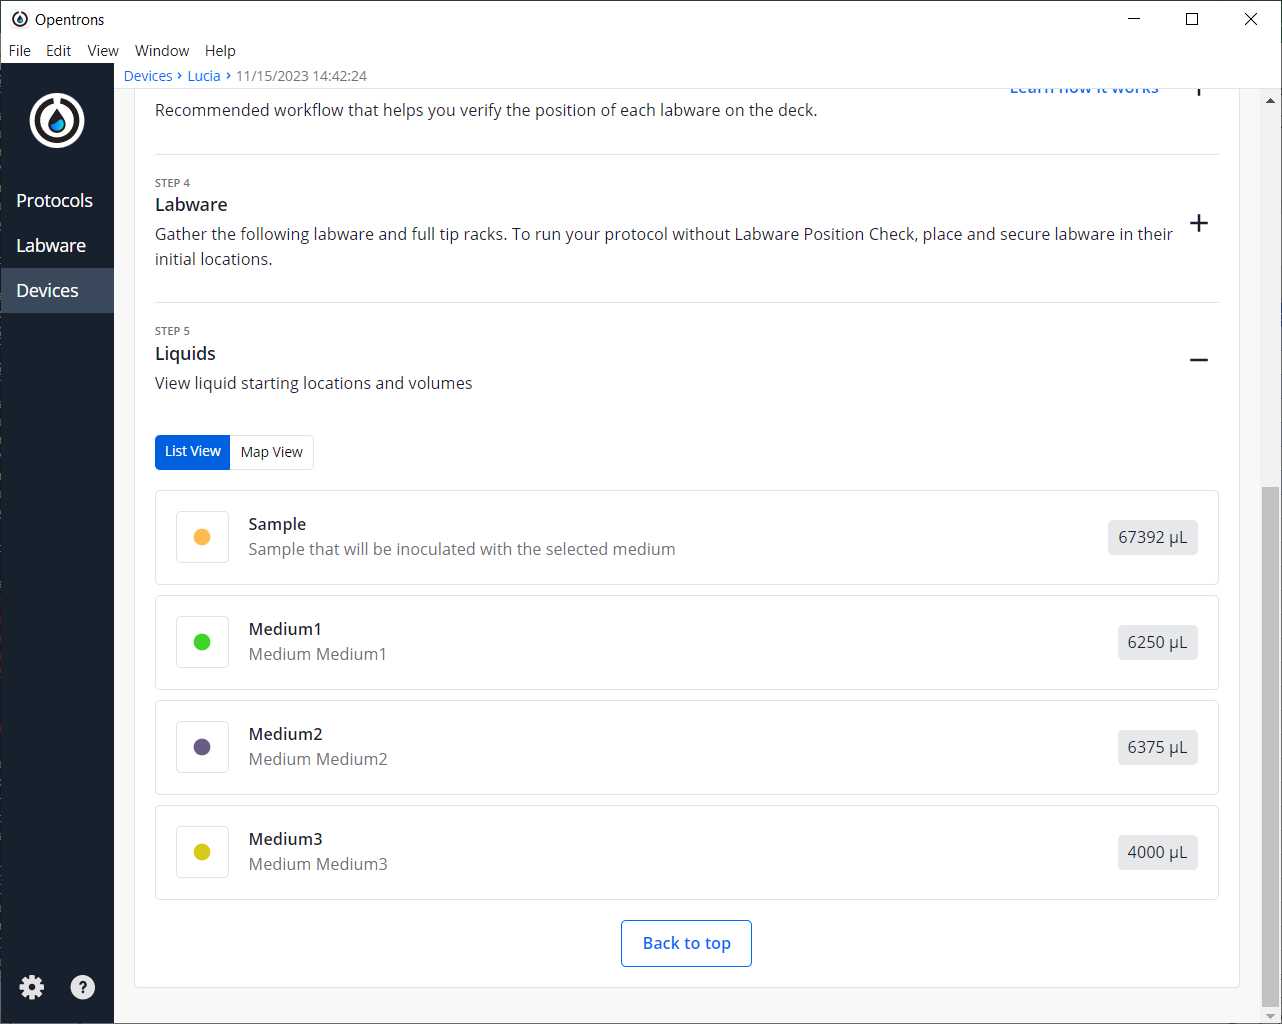
After clicking on Proceed to Setup, you should obtain the labware positions in the Labware tab and the reagents, with their corresponding volume, in the Liquids tab.
In case the protocol with the set variables cannot run, an error will occur during the run. A lot of errors are contemplated already and have a specific message that gives a hint of what could have gone wrong.
Run Protocol in OT
Make sure the needed calibrations are done
Pipettes, tip racks and tip length calibrations need to be done for the items used in this run
Labware position check is performed (if needed)
Clean the surface of the robot with 70% ethanol to clean and disinfect the surfaces
Set the labware and reagents as shown in the OT-App
Start Run
The procedure that the robot is going to do is mainly divided into 4 parts:
- Select colonies that comply with the selected parameters (threshold)
- Distribute reagents to respective plates (if set in the input file)
- Distribute to all plates the selected samples
- Generate identity maps (to be exported in thefollowing steps)
After-Running
Retrieve labware from the OT
Import map(s) from robot
There will be as many maps as source plates with the following structure of names: [ FinalMapName ] .csv
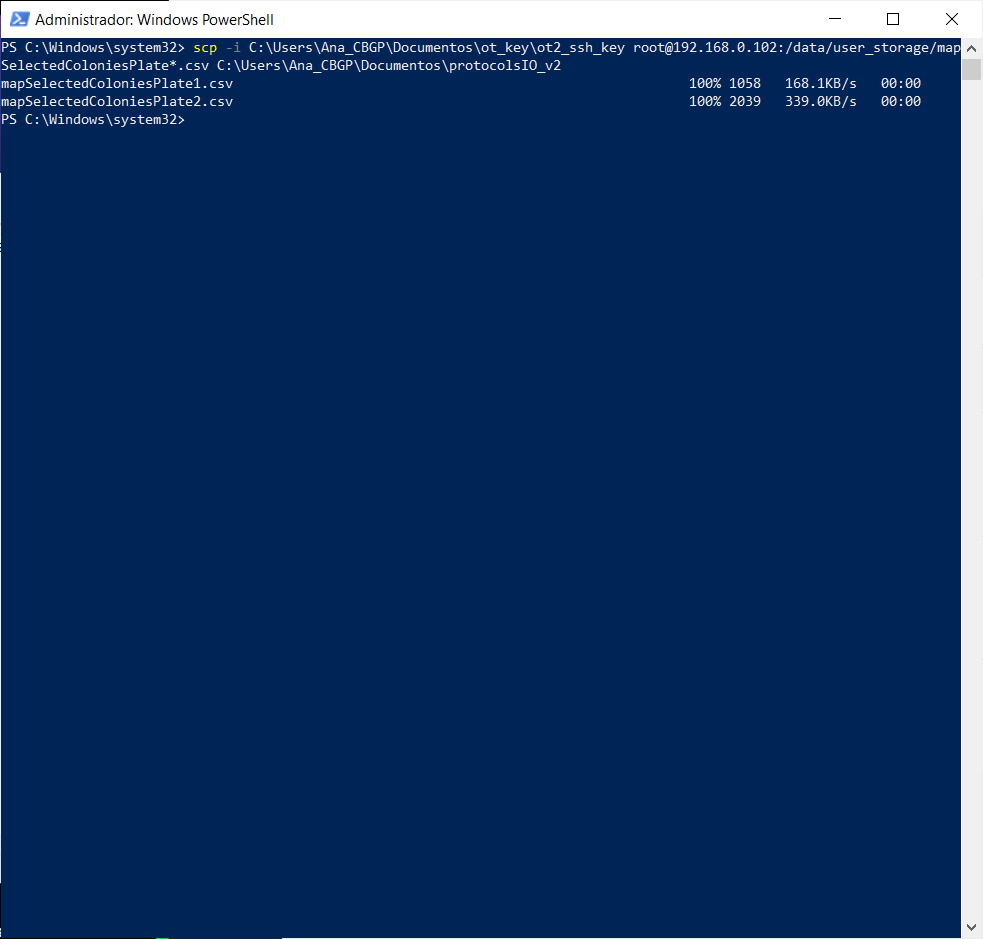
To retrieve them, we can and reproduce it by transferring the files from the robot to the computer.
All of the maps will be in the directory /data/user_storage
Example
We want to select the samples that have an OD600nm higher than 0.5 in the Antibiotic Transposition genome file 600nm higher than 0.5 in the Antibiotic Transposition genome file and have an OD600nm lower than 0.5 in the Antibiotic ampicillin plasmid file in one of the source plates and the same selection in the second one but with the value 0.6 600nm lower than 0.5 in the Antibiotic ampicillin plasmid file in one of the source plates and the same selection in the second one but with the value 0.6
After selecting the samples , we want to transfer those samples to final plates that will have different media
We will use a computer with a Windows 10 system
Excel template that we can find filled and saved with the name VariablesCounterSelection.xlsx
Start run
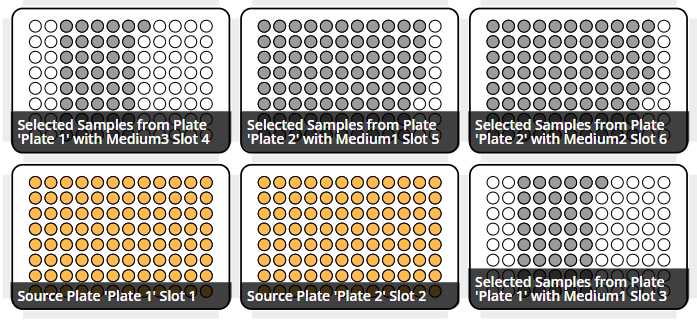

Retrieve labwares from the OT
Retrieve the final maps, in this case, they will be called mapSelectedColoniesPlate1 and mapSelectedColoniesPlate2, of the IDs of the samples that fulfilled the requisites that have the names set in the variable file by us
Upload custom labware to app
We are using a custom labware called vwrblueprintdepth105_96_wellplate_390ul that has been created with the labware creator that opentrons offers (https://labware.opentrons.com/create/)
vwrblueprintdepth105_96_wellplate_390ul.json
Upload it to the labware and make sure it is loaded in the app
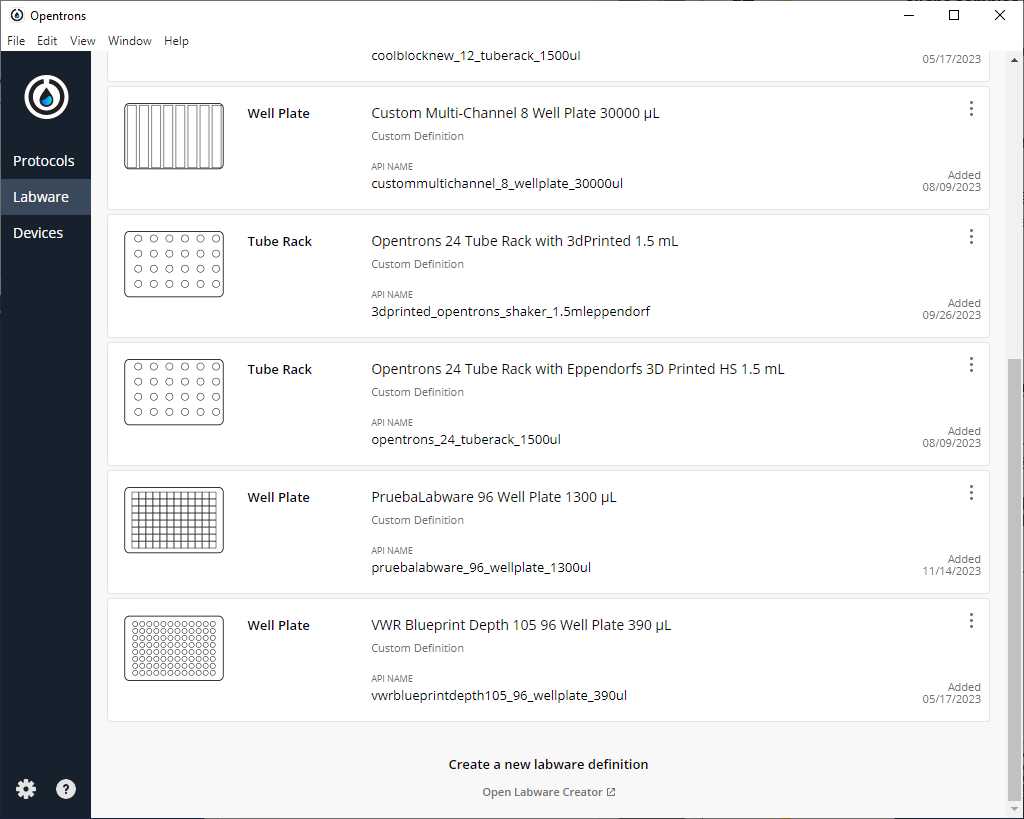
Because we are using version 1.0.0 of the script in this example, we will transfer the directory of the labware as well (here we have attached a zip, but it is the folder that must be transferred, not the zip)
vwrblueprintdepth105_96_wellplate_390ul.zip
#Transferring the used custom labware to OT (Linux)
scp -i [ot_key] -r vwrblueprintdepth105_96_wellplate_390ul root@[IP_OT]:/data/labware/v2/custom_definitions/custom_beta
Run the protocol in the robot that we have transferred the Excel file
ColonyScreening-Example.py ColonyScreening-Example.py -> Start setup -> Select robot in which we are going to run the protocol
If we do not have any errors, the output should look similar to the following pictures
Turn the HEPA filter module
Clean platform of the robot that we are going to perform the protocol
Prepare all reagents and labware in the places the App is showing and taking into account the notes in step
