How to Assign AMBER Parameters to Desmond-generated System with viparr4
Thilo Mast, Dmitry Lupyan
Disclaimer
The converter tool described in this document is not supported by either Schrödinger Inc. or D.E. Shaw Research. For help please consult other Desmond users via Google Desmond Group.
Abstract
This tutorial partially copies steps from How to Assign CHARMM Parameters to Desmond-generated System with viparr4 but differs in the parametrization steps.
You can use the Schrödinger software suite to prepare systems for molecular dynamics simulations, however, only the OPLS _2005 and OPLS4 force fields can be automatically assigned. This tutorial will show you how to use Desmond with third-party force fields like AMBER, using the Viparr utility from D.E. Shaw Research.
You will prepare a protein-ligand complex, generate custom AMBER parameters for the ligand, and use the Viparr utility to convert the generated AMBER parameters into a viparr-formatted template, that can be used for simulations.
You can find the input files for this tutorial here: amber_to_desmond.tgz
Before start
You should have a working installation of the Schrödinger Software suite version 2020-4 or newer on a supported version of a supported Linux distribution. See Supported Platforms for more information.
Set the environment variable SCHRODINGER to the installation directory of the Schrödinger software. For example, for a bash shell, enter the following:
export SCHRODINGER=/path/to/schrodinger2020-4
Steps
Setting up a Schrödinger Python Environment
Install AmberTools + conda
AmberTools is needed for deriving force field parameters for the ligand.
For installation of AmberTools + conda please follow the instructions on https://ambermd.org/GetAmber.php#ambertools .
This tutorial used the installation procedure via conda.
Set up a Python Virtual Environment
In order to avoid compatibility issues with the Python modules, and ensure interoperability with Schrödinger's Python modules, use the Schrödinger software to create a new virtual environment.
Initialize a new Python virtual environment using the Schrödinger software:
%> $SCHRODINGER/run schrodinger_virtualenv.py schrodinger.ve
Activate the virtual environment:
%> source schrodinger.ve/bin/activate
Upgrade pip:
[schrodinger.ve] %> pip install --upgrade pip
Install the Viparr and Msys Utilities
Viparr is a utility developed by D.E. Shaw Research to assign force field parameters to systems, which can then be used to perform MD simulations with Desmond.
Install the packages into the virtual environment
[schrodinger.ve] %> pip install msys-1.7.318-cp38-cp38-manylinux2014_x86_64.whl
[schrodinger.ve] %> pip install viparr-4.7.35-cp38-cp38-manylinux2014_x86_64.whl
Clone the public Viparr parameters from D.E. Shaw Research's GitHub repository:
[schrodinger.ve] %> git clone git://github.com/DEShawResearch/viparr-ffpublic.git
```Alternatively, you can download the repository as ZIP archive: [viparr-ffpublic](https://github.com/DEShawResearch/viparr-ffpublic/archive/master.zip)
Set the VIPARR_FFPATH environment variable
[schrodinger.ve] %> export VIPARR_FFPATH=`pwd`/viparr-ffpublic/ff
Preparing the Protein-Ligand Complex for Simulation
First, we download a structure from the protein data base (PDB) and prepare the protein-ligand complex. This tutorial uses a PDB structure for the human adipocyte lipid-binding protein FABP4 in complex with (S)-ibuprofen (PDB ID: 3p6h).We build the system with Schrödinger's Maestro and Desmond tools. The default force field used by the Schrödinger software is OPLS_2005 (OPLS3e if you have a license). After building the system for MD simulations, we can reassign the forcefield using Viparr.
To prepare the system for MD, open Maestro and follow these steps:
Prepare the Protein-Ligand Complex
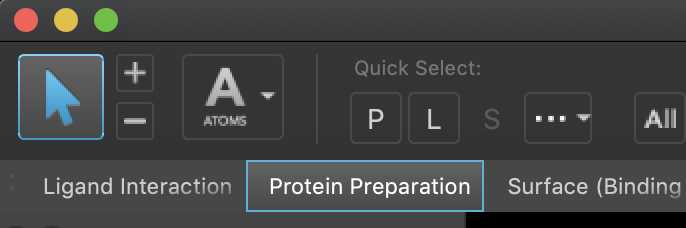
In Maestro, go to Tasks → Protein Preparation and Refinement → Protein Preparation Wizard or click Protein Preparation in the toolbar.
In the Protein Preparation Wizard, enter ‘3p6h’ in the PDB text box, and click Import to download the structure from the PDB database and import it into Maestro.

After the PDB has been imported into the 3D workspace, preprocess the protein and the ligand. In the Protein Preparation Wizard, make sure the following options are selected:
- Assign bond orders
- Add hydrogens
- Create disulfide bonds
- Cap termini
- Fill in missing side chains using Prime (requires a Prime license)
Click Preprocess .
The Protein Preparation Wizard runs structural sanity checks and displays potential issues in a warning. In this tutorial, you can safely ignore these warnings and click OK to close the warning. In real applications, you should pay close attention to these warnings and resolve issues that may lead to problems during the MD simulations.
After the Protein Preparation Wizard finishes, a protein-ligand complex is added to Maestro's Workspace where formal charges, protonation states and bond orders are assigned and hydrogen atoms are added to the protein, ligand and crystallographic water molecules.
Solvate and Neutralize the Protein-Ligand Complex
Now that we have a protein-ligand complex loaded in the Workspace, we can solvate and neutralize the complex to prepare it for MD simulations.
In Maestro, go to Tasks → Desmond → System Builder to open the System Builder.

Click Run to build the system with the default settings. By default, a water buffer of 10 Å and neutralizing counterions are added to the protein-ligand complex. The System Builder also assigns OPLS_2005 force field parameters (or OPLS3e if you have a license) to the protein-ligand atoms using SPC as the model for water.
After the System Builder finishes, a solvated system is added to Maestro's Workspace. The solvated system is also saved to a file desmond_setup_1-out.cms .
Generating Custom AMBER parameters
To simulate a molecule that is not covered by the standard AMBER parameter set, you first need to obtain parameter files for that molecule. You can obtain parameters from one of these sources:
- Deriving parameters via AmberTools antechamber as shown in these tutorials: AM1-bcc or RESP fitting
- Use q4md-forcefieldtools / PyRED server
- Search in parameter databases like this one
- Search the AMBER mailing list to see if anyone else is willing to share their parameters: AMBER mailing list
- Adopt parameters from the literature
- ...
You can use any of the above methods to generate AMBER-compatible parameters.
In this tutorial, we use AmberTools' antechamber to generate parameter files.
Export the Ligand as SDF File
The 3p6h complex contains a ligand: Ibuprofen (IBP). This ligand is not part of the standard AMBER parameter set so you have to derive its parameters via antechamber (or from one of the above mentioned options).

We provide the ligand structure to antechamber as .sdf file.
To prepare a .sdf file with the prepared ligand structure, follow these steps:
- Select the ligand atoms in Maestro's Workspace, right-click the selected atoms and select Create New Entry by → Copying Selected Atoms . This creates a new entry in Maestro only containing the ligand atoms.
- Select the ligand entry in the Entry List on the left side of Maestro, right-click and select Export → Structures
- Enter ibp.sdf as file name.
(optional) If you have installed AmberTools via the conda option (see Step 1.) it is now the right time to activate the AmberTools conda environment via:w
[schrodinger.ve] %> conda activate AmberTools21
Generate Custom AMBER Parameters with antechamber
We now derive partial charges for the IBP ligand by running:
[AmberTools21] [schrodinger.ve] %> antechamber -fi mdl -i ibp.sdf -fo prepi -o IBP.prepi -c bcc -at amber -nc -1 -rn IBP
```with

- the  _-fi_  flag we define the format of the input file (here: MDL SDF format).


- the  _-i_  flag we provide the name of the ligands .sdf file.


- the  _-fo_  flag we define the format of the output file (here: antechambers .prepi parameter format).


- the  _-c_ flag we define the parametrization method which is being used for deriving point charges (here: semi-empirical AM1-bcc).


- the  _-nc_  flag we define the total charge of the molecule.


- the  _-rn_  flag we provide a residue name for our ligand.


Running the above command will roughly take one minute.


After the job has completed successfully the parameter definition file **IBP.prepi**  should have been created and the  **sqm.out** output file should list at the end of the file:
--------- Calculation Completed ----------
Run antechambers parmchk2 program to check which parameters are still missing. The parmchk2 program tries to make educated guesses for them and writes the information to the .frcmod file:
[AmberTools21] [schrodinger.ve] %> parmchk2 -i IBP.prepi -f prepi -o IBP.frcmod
Convert the AMBER Parameters to a Viparr Template
The parameters need to be converted into a format that you can use with Desmond, enter the following command to generate a viparr-formatted template:
[AmberTools21] [schrodinger.ve] %> viparr-convert-amber -m ligand -p IBP.frcmod -t IBP.prepi IBP/
After the program finishes, a new directory IBP is created, which contains the viparr-formatted AMBER template for Ibuprofen.
Assigning AMBER Force Fields to the Molecular System
Now, we can reassign the AMBER force field to the CMS file.
The viparr utility comes with standard sets of protein parameters which we can use for the protein.
For the Ibuprofen ligand, we can use the viparr template in the directory IBP.
Run Viparr
To reassign the force field to AMBER, enter the following command:
[AmberTools21] [schrodinger.ve] %> viparr desmond_setup_1-out.cms amber-start.cms -f aa.amber.ff19SB -f water.tip3p -f ions.amber1jc.tip3p -d IBP

Importing forcefield from ../viparr-ffpublic/ff/aa.amber.ff19SB
Importing forcefield from ../viparr-ffpublic/ff/water.tip3p
Importing forcefield from ../viparr-ffpublic/ff/ions.amber1jc.tip3p
Importing forcefield from IBP
Importing structure from desmond_setup_1-out.cms
WARNING: will NOT fix prochiral atom names because rename_atoms or rename_residues was not enabled
Exporting parametrized system to amber-start.cms
VIPARR exited successfully
With
-f aa.amber.ff19SB the AMBER ff19SB parameters are assigned to the protein part
-f water.tip3p the TIP3P 3-site water model will be used as water model
-f ions.amber1jc.tip3p Ambers monovalent ion parameters will be used
-d IBP we provide the viparr template for the IBP ligand
After viparr finishes, a new file: amber-start.cms is created which contains the structure and AMBER force field information.
Clean Properties and Prepare for MD
To prepare the converted system for MD simulations, certain properties need to be removed from the CMS file and the full-system structure needs to be prepared. Run the Python program:gen_fsys.py
%> $SCHRODINGER/run gen_fsys.py amber-start.cms
```This script will overwrite the file  **amber-start.cms** . The system is now ready for simulation.
Running an MD Simulation with Desmond
Now that the system is prepared with AMBER parameters, Desmond can minimize, equilibrate, and run an MD simulation of the system. For further information check the Desmond User Manual.
Set up an MD Simulation
In Maestro, go to Tasks → Desmond → Molecular Dynamics to open the Molecular Dynamics panel .

In the Model system section, choose Import from a file, and click Browse to locate and load amber-start.cms
- In the Model system section, select Import from file , browse to the file amber-start.cms , and click Load .
- Optional: Adjust simulation parameters, such as simulation time.
- Ensure the Relax model system before simulation checkbox is selected.
- Optional: Enter a job name, click the gear icon to change job settings, or click the ? icon to open the Help for more information.
- Click Run to start the MD simulation.
Analyze the Results
In Maestro, go to Tasks → Desmond → Simulation Interactions Diagram (SID) and 'Load ...' in the .eaf file.

